1. Introducción
This manual provides detailed instructions for the assembly, setup, operation, and maintenance of your Bellemave Twin Over Full Bunk Bed with Trundle and Stairs. Please read all instructions carefully before beginning assembly and retain this manual for future reference. This bunk bed is designed to offer a space-saving sleeping solution with integrated storage and an additional trundle bed.
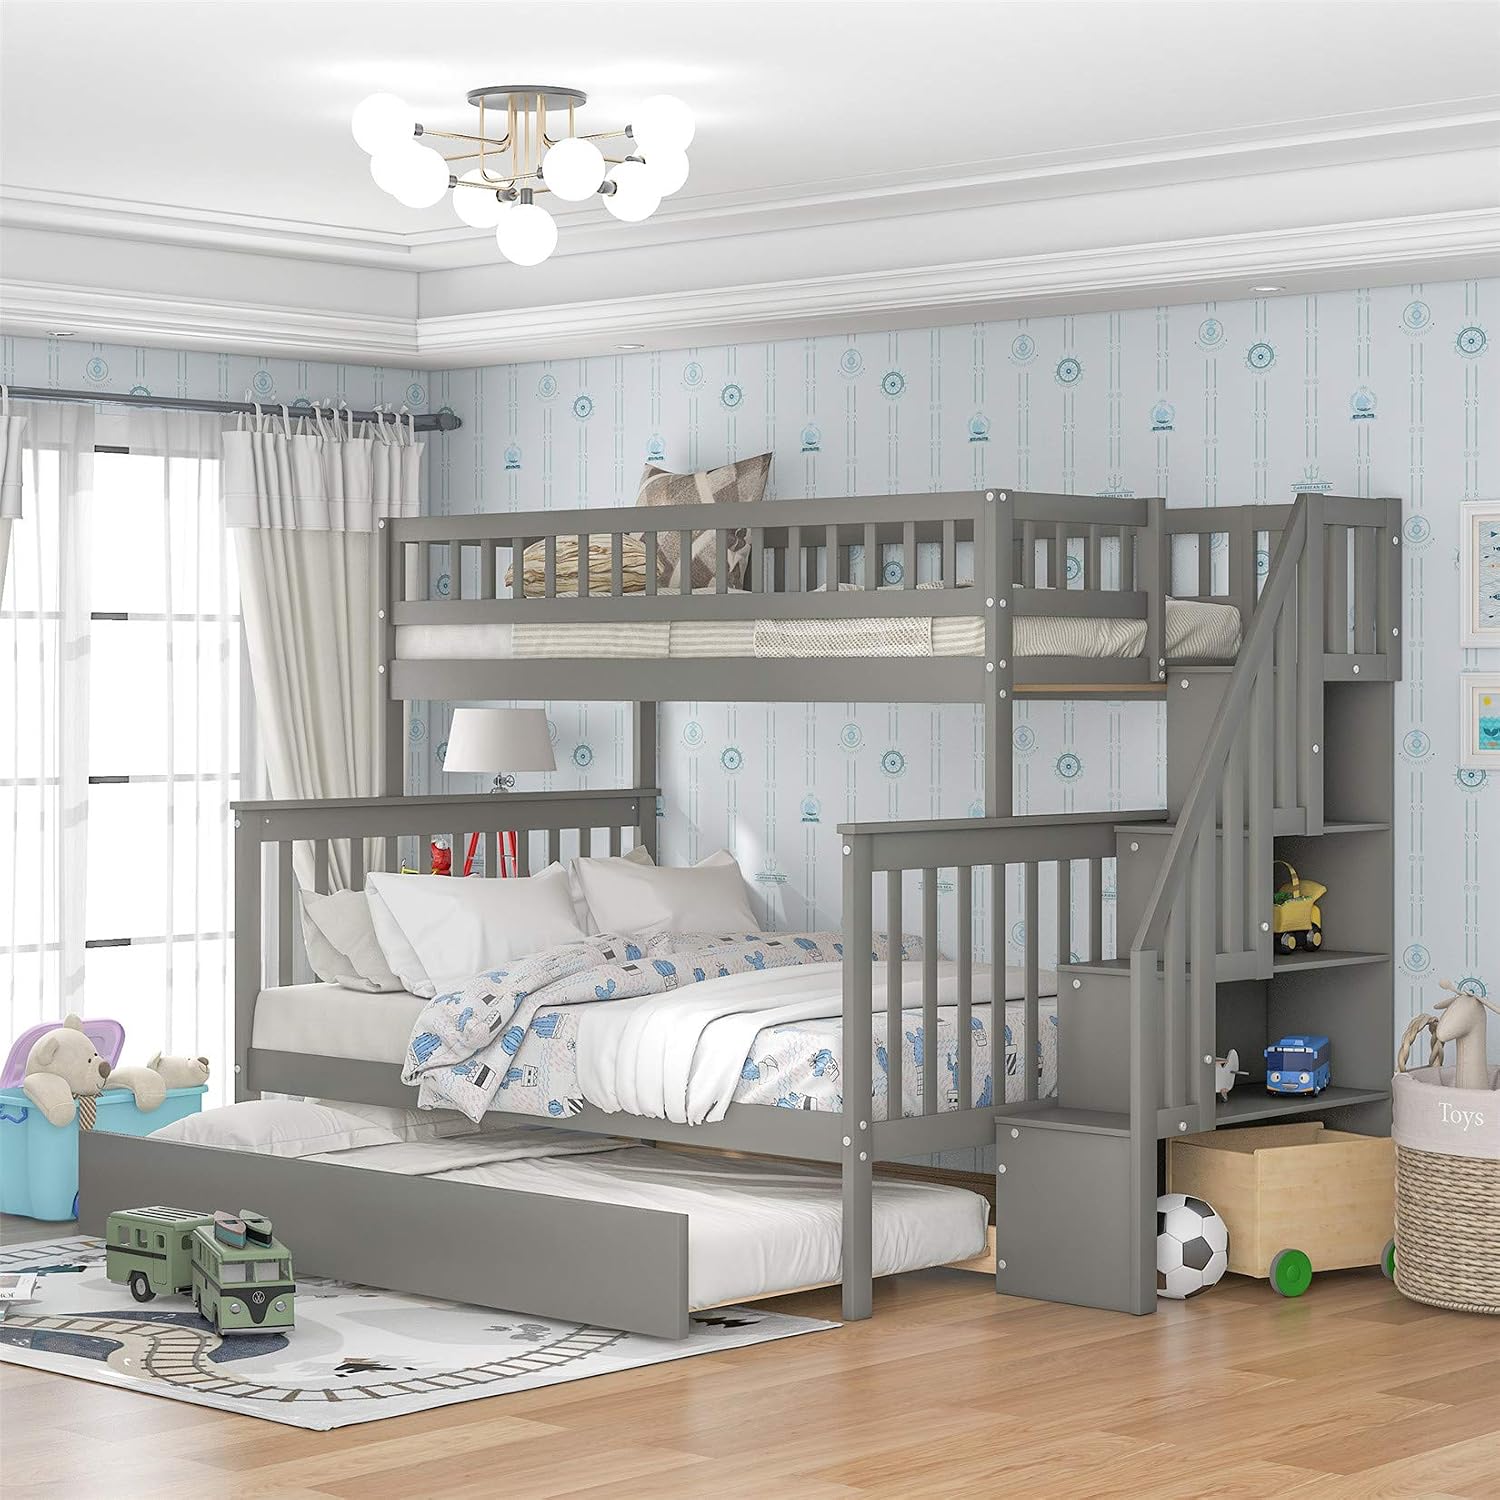
Figure 1.1: Assembled Bellemave Twin Over Full Bunk Bed with Trundle and Stairs.
2. Información de seguridad
- Siga siempre las instrucciones de montaje con precisión. Un montaje incorrecto puede provocar inestabilidad y lesiones.
- Ensure all bolts and connectors are securely tightened before use. Periodically check and re-tighten as necessary.
- La litera superior no es adecuada para niños menores de 6 años.
- Use only mattresses that comply with the recommended thickness and dimensions for each bunk.
- Upper Bunk Bed Weight Capability: 200 lbs.
- Lower Bunk Bed Weight Capability: 250 lbs.
- Trundle Weight Capability: 175 lbs.
- No permita que los niños jueguen encima o debajo de la cama.
- Always use the provided stairs for access to the upper bunk. Do not use alternative climbing methods.
- Ensure the bunk bed is placed on a level surface.
3. Contenido del paquete
Your Bellemave bunk bed will arrive in three separate packages. Please ensure all packages have been received before beginning assembly. Carefully unpack all components and verify against the parts list (not provided in this document, refer to your physical instruction manual for a complete list). In general, the packages contain:
- Pine wood and MDF components for the bed frames, stairs, and trundle.
- Slats for the upper, lower, and trundle beds.
- Hardware kit (bolts, screws, connectors, Allen wrench).
Note: Due to shipping logistics, packages may arrive on different days. Please allow 1-2 additional days for all packages to arrive.
4. Instrucciones de montaje
Assembly is required for this product. It is recommended that two adults assemble the bunk bed. Tools required: Included Allen wrench (and potentially a Phillips head screwdriver, not included).
4.1. Prepare the Area and Identify Parts
Clear a spacious area for assembly. Lay out all components on a soft, clean surface to prevent scratches. Identify all parts and hardware using the provided parts list in your physical manual.
4.2. Assemble the Lower Bed Frame
Begin by assembling the headboard and footboard of the lower full-size bed. Connect the side rails to these components using the specified hardware. Ensure all connections are snug but do not overtighten until the frame is fully assembled.

Figure 4.1: Detail of bed frame construction, showing headboard and slat supports.
4.3. Assemble the Upper Bed Frame
Follow a similar process to assemble the upper twin-size bed frame, including its headboard, footboard, and side rails. Ensure the guardrails are correctly oriented and securely attached to the upper bunk frame.
4.4. Construct the Stair Unit
Assemble the stair unit, paying close attention to the orientation of each step and the integrated storage compartments. The stair unit features four steps, each approximately 14.9 inches wide, and includes four compartments of varying sizes for storage.

Figure 4.2: Detail of the integrated stair unit with storage.
4.5. Attach the Upper Bunk to the Lower Bunk and Stair Unit
Carefully lift the assembled upper bunk and position it onto the lower bunk frame. Secure it using the designated connection points and hardware. Then, attach the stair unit to the side of the bunk bed, ensuring a stable and secure connection to both the upper and lower frames.
4.6. Instalar listones de cama
Place the bed slats onto the support rails for both the upper and lower bunks. Secure them according to the instructions, typically by screwing them into place. The lower bed includes two additional supports to enhance the durability of the slats.

Figure 4.3: Fully assembled bunk bed frame, illustrating slat placement and trundle area.
4.7. Assemble the Trundle Bed
Assemble the trundle bed frame and install its slats. The trundle is designed to slide smoothly under the lower bunk on castor wheels.
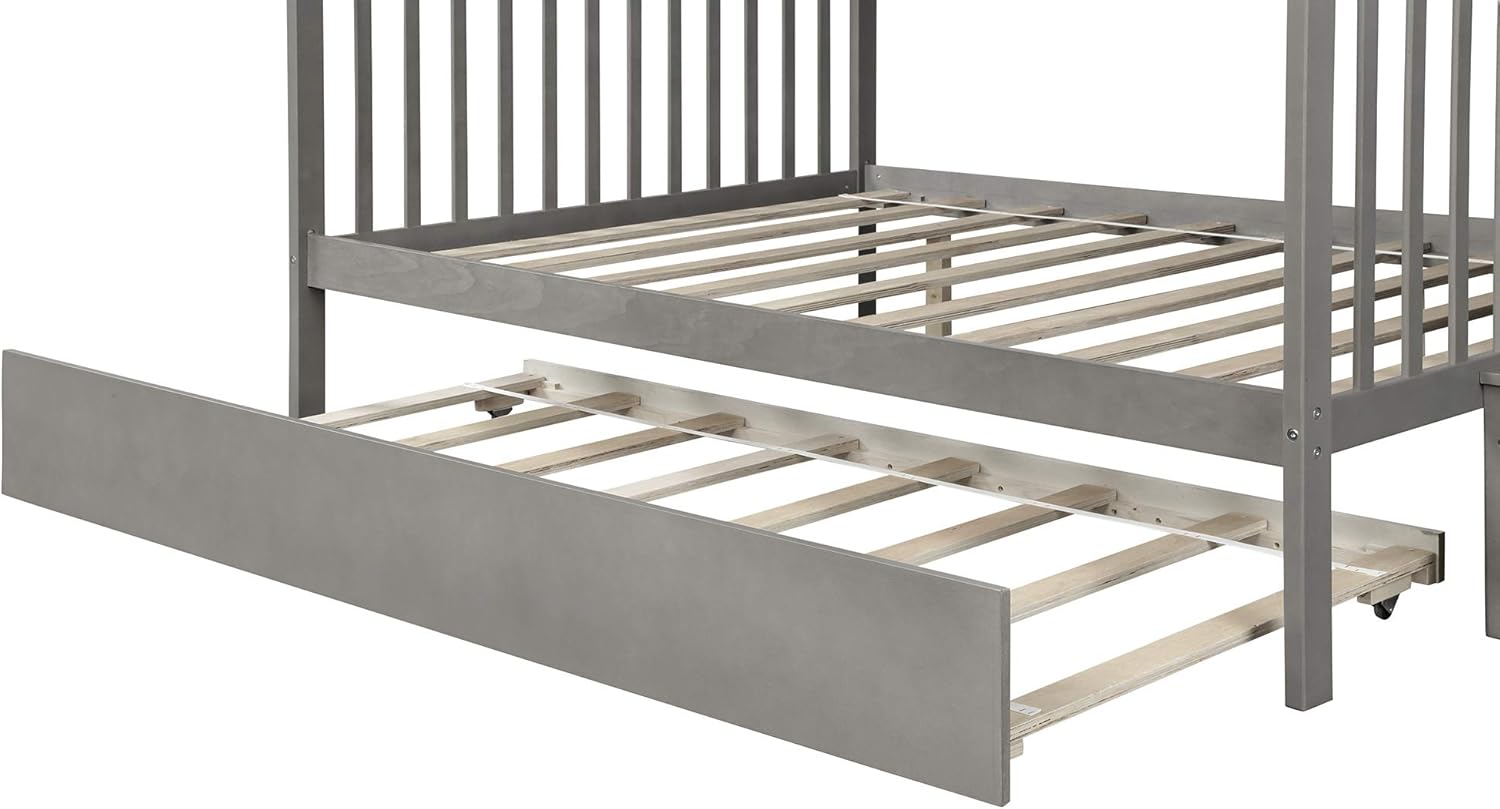
Figure 4.4: Trundle bed in the extended position.
4.8. Inspección final
After assembly, perform a thorough inspection. Ensure all connections are tight, the bed is stable, and there are no loose parts. Confirm that the guardrails are secure on the upper bunk.
5. Instalación y configuración
5.1. Colocación del colchón
- Upper Bed Recommended Mattress Thickness: 6 inches.
- Lower Bed Recommended Mattress Thickness: 8-10 inches.
- Ensure the mattress on the upper bunk is below the top edge of the guardrails for safety.
5.2. Dividing into Two Separate Beds
This bunk bed can be separated into two individual beds (one twin and one full). To do this, carefully disassemble the connections between the upper and lower bunks. The stair unit will remain a separate storage unit. Follow the reverse of the assembly steps for separation, ensuring all components are safely stored or reconfigured.
6. Operating the Trundle and Storage
6.1. Funcionamiento de la cama nido
To use the trundle bed, gently pull it out from under the lower bunk. The castor wheels allow for smooth extension and retraction. To store, push the trundle back under the lower bunk until it is fully concealed.
6.2. Storage Stairs
The stair unit features four integrated compartments. These can be used to store books, toys, or other small items, helping to keep the room tidy.
7. Mantenimiento
- Limpieza: Limpie las superficies de madera con un paño suave.amp paño. Evite productos químicos agresivos o limpiadores abrasivos que puedan dañar el acabado.
- Comprobación del hardware: Periodically check all bolts, screws, and connectors to ensure they remain tight. Re-tighten as needed to maintain structural integrity and safety.
- Cuidado de la madera: The bed is constructed from solid pine and MDF with a durable finish. Protect the wood from excessive moisture and direct sunlight to prevent warping or fading.
8. Solución de problemas
- Partes faltantes: If any parts are missing or damaged upon arrival, do not proceed with assembly. Contact customer service immediately for assistance.
- Dificultad con el montaje: Ensure you are following the instructions step-by-step. If a step seems unclear, re-read the instructions and examine the diagrams carefully. Sometimes, components may appear similar but have subtle differences in orientation.
- Cama tambaleante: A wobbly bed usually indicates loose hardware. Re-check and tighten all bolts and screws. Ensure the bed is on a level surface.
9. Especificaciones

Figura 9.1: Dimensiones detalladas de la litera.
| Característica | Detalle |
|---|---|
| Material | Madera de pino + MDF |
| Tamaño | Twin sobre Full |
| Dimensiones generales del producto | 90.8" de largo x 77.8" de ancho x 65.3" de alto |
| Dimensiones de la cama superior | 42.8" x 76.3" |
| Dimensiones de la cama inferior | 57.8" x 76.3" |
| Altura total | 65.3" |
| Upper Bunk Bed Weight Capability | 200 libras |
| Lower Bunk Bed Weight Capability | 250 libras |
| Trundle Weight Capability | 175 libras |
| Upper Bed Recommended Mattress Thickness | 6 pulgadas |
| Lower Bed Recommended Mattress Thickness | 8-10 pulgadas |
| Número de lamas | 10 (per bed, specific count may vary slightly) |
| Requiere ensamblaje | Sí |
| Característica especial | Durable, Trundle, Storage Stairs |
10. Garantía y soporte
For specific warranty information, please refer to the documentation included with your purchase or contact the manufacturer directly. If you encounter any issues or require assistance with your Bellemave bunk bed, please reach out to the customer service department of your retailer or the manufacturer for support.