Electrolux EEM48321L
Electrolux EEM48321L Fully Integrated Dishwasher User Manual
Model: EEM48321L
1. Información importante de seguridad
Lea todas las instrucciones antes de usar el aparato. Conserve este manual para futuras consultas. Siga siempre las precauciones básicas de seguridad para reducir el riesgo de incendio, descarga eléctrica o lesiones personales.
1.1 Seguridad general
- Este aparato está destinado únicamente para uso doméstico.
- No permita que los niños jueguen con el aparato.
- Asegúrese de que el aparato esté correctamente conectado a tierra.
- Do not operate the dishwasher if it is damaged. Contact authorized service for repairs.
1.2 Seguridad eléctrica
- Connect the appliance to a properly rated, protected, and sized power supply circuit.
- No utilice cables de extensión ni enchufes adaptadores con este aparato.
- Desconecte el aparato de la fuente de alimentación antes de realizar cualquier mantenimiento o limpieza.
1.3 Seguridad en el agua
- Asegúrese de que las conexiones de suministro de agua sean seguras para evitar fugas.
- The AquaStop function provides protection against water leaks.
2. Producto terminadoview
The Electrolux EEM48321L is a fully integrated dishwasher designed for efficient and quiet dishwashing. It features advanced technologies for optimal cleaning and energy efficiency.
2.1 Características principales
- Timer and Delay Start: Permite programar ciclos de lavado para mayor comodidad.
- AquaStop Function: Provides leak protection to prevent water damage.
- AquaSensor Function: Detecta el nivel de suciedad y ajusta el consumo de agua en consecuencia.
- Vidrio protector: Designed to care for delicate glassware.
- Converter Technology: Enhances performance and energy efficiency.
- Indicador de sal: Notifies when to refill dishwasher salt.
2.2 Componentes del aparato

Figura 2.1: Frente View of the Dishwasher. This image shows the fully integrated design of the Electrolux EEM48321L dishwasher, with its control panel visible at the top edge when the door is slightly ajar.

Figura 2.2: Interior View. The interior of the dishwasher, showing the stainless steel tub and the central spray arm. The lower filter area is also visible.
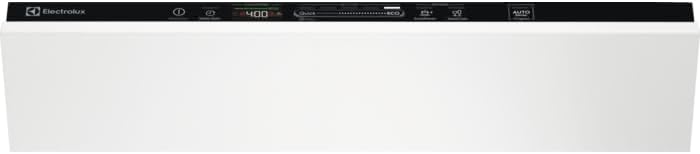
Figura 2.3: Panel de control. This image displays the top-mounted control panel with various program selection buttons, indicators, and a digital display for cycle time.
3. Configuración e instalación
Una instalación correcta es crucial para el funcionamiento seguro y eficiente de su lavavajillas. Se recomienda que la instalación la realice un técnico cualificado.
3.1 Desembalaje
- Retire con cuidado todos los materiales de embalaje.
- Inspeccione el lavavajillas para detectar cualquier daño durante el envío. Informe inmediatamente a su vendedor sobre cualquier daño.
- Conserve los materiales de embalaje para un posible transporte o servicio futuro.
3.2 Posicionamiento y nivelación
- Place the dishwasher in the desired cabinet opening.
- Ajuste las patas niveladoras para garantizar que el aparato esté estable y nivelado.
3.3 Conexiones de agua y electricidad

Figure 3.1: Rear Connections. This image shows the back of the dishwasher with the water inlet hose (typically blue or white with a red connector) and the drain hose, along with the electrical cable.
- Connect the water inlet hose to a cold water supply with a shut-off valve. Ensure the connection is tight.
- Connect the drain hose to a suitable drain pipe or sink trap. Ensure there are no kinks.
- Enchufe el cable de alimentación a una toma eléctrica con conexión a tierra.
3.4 Uso inicial
- Before the first wash, fill the salt dispenser with dishwasher salt (refer to section 5.2).
- Add rinse aid to the dispenser (refer to section 5.3).
- Run a short wash cycle without dishes to flush out any manufacturing residues.
4. Instrucciones de funcionamiento
Siga estos pasos para un lavado de platos eficaz y eficiente.
4.1 Carga del lavavajillas

Figure 4.1: Loaded Racks. This image shows the dishwasher interior with dishes properly arranged in the upper and lower racks, ensuring optimal water circulation.

Figure 4.2: Glassware Placement. Close-up of the upper rack demonstrating how glasses are securely placed, utilizing the protective glass feature for stability during the wash cycle.
- Retire las partículas grandes de comida de los platos antes de cargarlos.
- Place larger items in the lower rack and smaller, more delicate items (like glasses) in the upper rack.
- Asegúrese de que los platos no bloqueen los brazos rociadores.
- Coloque los cubiertos en la cesta para cubiertos con los mangos hacia abajo para los tenedores y cucharas, y hacia arriba para los cuchillos.
4.2 Adición de detergente y abrillantador
- Open the detergent dispenser and add the recommended amount of dishwasher detergent. Close the dispenser cover securely.
- Open the rinse aid dispenser and fill it with rinse aid until the indicator shows full. Adjust the rinse aid dosage if necessary.
4.3 Selección e inicio de un programa
- Cierre la puerta del lavavajillas.
- Pulse el botón de encendido para encender el aparato.
- Use the program selection buttons on the control panel to choose the desired wash program (e.g., Eco, Intensive, Quick).
- If desired, select the Delay Start function and set the delay time.
- Presione el botón Inicio para comenzar el ciclo de lavado.
5. Mantenimiento y cuidado
El mantenimiento regular garantiza un rendimiento óptimo y prolonga la vida útil de su lavavajillas.
5.1 Limpieza de los filtros

Figure 5.1: Filter Location. This image shows the filter assembly located at the bottom of the dishwasher tub, which collects food particles.
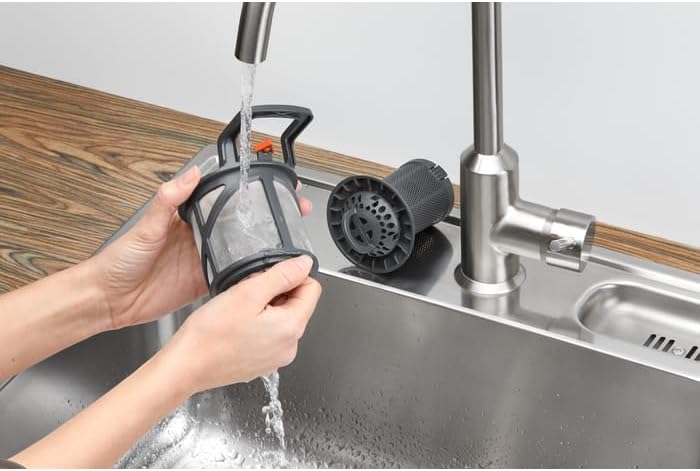
Figure 5.2: Cleaning the Filter. A person is shown cleaning the disassembled dishwasher filter components under running tap water to remove trapped food debris.
- The filter system should be cleaned regularly to prevent blockages and ensure effective washing.
- Gire y retire el filtro cilíndrico de la parte inferior del lavavajillas.
- Separate the coarse and fine filters.
- Enjuague todos los componentes del filtro con agua corriente para eliminar los restos de comida. Utilice un cepillo suave si es necesario.
- Vuelva a montar los filtros y colóquelos nuevamente en el lavavajillas, asegurándose de que estén bien fijados en su lugar.
5.2 Limpieza de los brazos aspersores
- Revise periódicamente las boquillas del brazo rociador para detectar obstrucciones.
- If necessary, remove the spray arms and clear any clogged holes with a thin object like a toothpick.
- Rinse them under running water and reattach them securely.
5.3 Limpieza exterior e interior
- Limpie las superficies exteriores con un paño suave, damp Paño. No utilice limpiadores abrasivos.
- Clean the door seal regularly to remove food residues.
- For interior cleaning, run a dishwasher cleaning cycle with a specialized dishwasher cleaner.
5.4 Recarga de sal
- When the salt indicator light illuminates, refill the salt dispenser with dishwasher salt.
- Use a funnel to add salt to prevent spillage.
- Close the cap tightly after refilling.
6. Solución de problemas
Antes de contactar con el servicio técnico, consulte esta sección para conocer problemas comunes y sus soluciones.
| Problema | Posible causa | Solución |
|---|---|---|
| El lavavajillas no arranca | Power supply issue, door not closed, program not selected | Verifique la conexión eléctrica, asegúrese de que la puerta esté cerrada, seleccione un programa y presione Iniciar. |
| Malos resultados de limpieza | Incorrect loading, clogged spray arms, insufficient detergent, dirty filters | Vuelva a cargar los platos correctamente, limpie los brazos rociadores, agregue más detergente, limpie los filtros. |
| El agua no drena | Manguera de drenaje o filtro obstruidos, problema con la bomba de drenaje | Limpie los filtros, revise la manguera de drenaje para detectar torceduras o bloqueos. |
| Fugas en el lavavajillas | Improperly sealed door, loose hose connections, excessive suds | Check door seal, tighten hose connections, use appropriate detergent. |
| Salt indicator light on | Dishwasher salt level is low | Refill the salt dispenser with dishwasher salt. |
7. Especificaciones
Technical data for the Electrolux EEM48321L dishwasher.
| Especificación | Valor |
|---|---|
| Nombre del modelo | EEM48321L |
| Marca | Electrolux |
| Tipo de instalación | Incorporado |
| Capacidad | 14 Place Settings (implied by 14 cutlery in title, 10.5 litres is water capacity) |
| Clase de eficiencia energética | A+++ |
| Consumo anual de energía | 237 kilovatios hora |
| Nivel de ruido | 44 dB |
| Volumentage | 230 voltios (CA) |
| Quétage | 1950 vatios |
| Dimensiones del producto (W x D x H) | 60 x 55 x 82 cm (standard integrated dishwasher dimensions, 24 x 69 x 2.5 cm from product data seems incorrect for a dishwasher) |
| Material | Acero inoxidable |
| Características especiales | Timer, Delay Start, AquaStop, AquaSensor, Protective Glass, Converter Technology, Salt Indicator |
Note: Product dimensions provided in the source data (24 x 69 x 2.5 cm) appear to be incorrect for a full-size integrated dishwasher. Standard dimensions for such appliances are typically around 60cm width, 55cm depth, and 82cm height. Please refer to the official Electrolux product documentation for precise measurements.
8. Garantía y soporte
Your Electrolux EEM48321L dishwasher comes with a manufacturer's warranty. Please refer to the warranty card included with your appliance for specific terms and conditions.
8.1 Información de garantía
- La garantía cubre defectos de fabricación y materiales defectuosos.
- Se requiere comprobante de compra para todas las reclamaciones de garantía.
- The warranty does not cover damage caused by improper installation, misuse, or normal wear and tear.
8.2 Atención al cliente
For technical assistance, spare parts, or to schedule a service appointment, please contact Electrolux customer service. Contact details can typically be found on the Electrolux official websitio o en la documentación proporcionada con su aparato.
You can also visit the official Electrolux store for more information: Electrolux Store