MIFXIN 505A
MIFXIN Mini Portable Sewing Machine 505A User Manual
Modelo: 505A
1. Introducción
Gracias por la compraasing the MIFXIN Mini Portable Sewing Machine. This compact and versatile sewing machine is designed for both beginners and experienced sewing enthusiasts, offering 12 built-in stitch patterns and a range of convenient features for various DIY sewing projects, from fashion to home decor and crafts. Please read this manual thoroughly before operating the machine to ensure safe and efficient use.
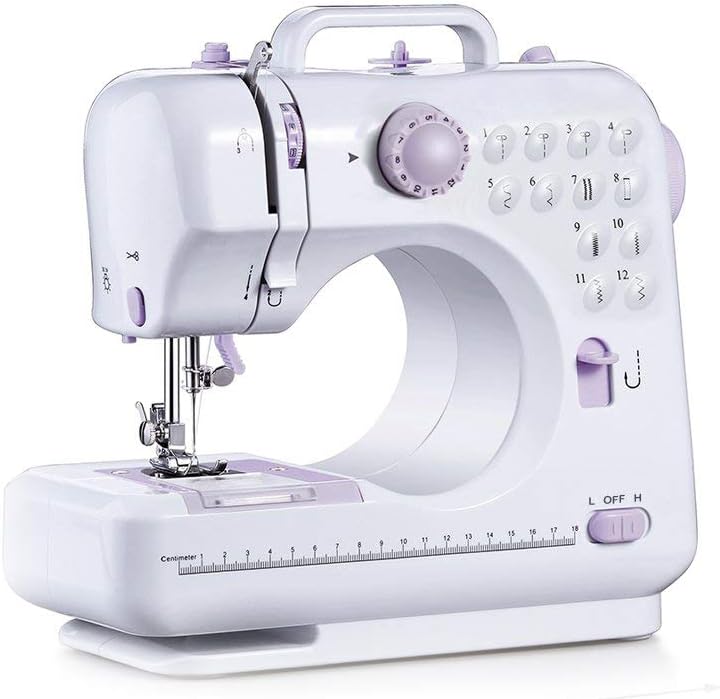
Image: The MIFXIN Mini Portable Sewing Machine, a compact white machine with purple accents, ready for use.
2. Información de seguridad
Observe siempre las siguientes precauciones de seguridad para evitar descargas eléctricas, incendios o lesiones:
- Desenchufe siempre la máquina de la toma de corriente cuando no esté en uso, cuando cambie agujas o cuando la limpie.
- Keep fingers away from the needle, handwheel, and other moving parts while the machine is operating.
- Never operate the machine with damaged cords or plugs.
- No permita que los niños operen la máquina sin la supervisión de un adulto.
- Use only the recommended power adapter (DC 6V 1200mA) or 4 AA batteries (not included).
- Asegúrese de que la máquina esté colocada sobre una superficie estable y plana durante su funcionamiento.
- Do not store or operate the machine in damp o condiciones húmedas.
3. Producto terminadoview
Familiarícese con las distintas partes de su máquina de coser:

Image: Diagram showing the labeled components of the sewing machine, including the take-up lever, upper thread tension dial, pattern selection dial, thread cutter, light, needle clamp screw, bottom bobbin, handwheel, reverse button, power off & speed switch, bobbin winder pin, bobbin winder stop, bobbin winder tension disk, presser foot lifter, presser foot, drawer, AC/DC input, and foot pedal port.
Las características principales incluyen:
- 12 Built-in Stitch Patterns
- Two-thread Lockstitch
- High/Low Speed Selector
- Automatic Thread Rewind
- Forward and Reverse Sewing
- Built-in Sewing Light and Thread Cutter
- Drawer for Accessories
- Foot Pedal or Hand Switch Operation

Image: A diagram highlighting key features of the sewing machine, including 12 stitches, foot pedal, anti-slip bottom pad, mini hidden drawer, LED night light, reverse sewing, adjustable needle spacing, replaceable presser foot, and thread spool.
4. Configuración
4.1 Desempaquetado y conexión eléctrica
Carefully remove the sewing machine and all accessories from the packaging. Place the machine on a stable, flat surface.
You can power the machine using either the included AC adapter or 4 AA batteries (not included).
- Adaptador de CA: Insert the DC plug of the adapter into the AC/DC input port on the back of the machine, then plug the adapter into a wall outlet.
- Baterías: Open the battery compartment on the bottom of the machine and insert 4 AA batteries, ensuring correct polarity.
4.2 Enhebrado de la máquina
Un enhebrado correcto es crucial para un funcionamiento suave y puntadas uniformes. Siga estos pasos cuidadosamente:
- Upper Thread:
- Coloque un carrete de hilo en el portacarrete.
- Guide the thread through the first thread guide (usually a small metal loop).
- Pass the thread through the upper thread tension dial, ensuring it is seated correctly.
- Enhebre la palanca tensora de derecha a izquierda.
- Guíe el hilo hacia abajo a través de la guía del hilo de la barra de la aguja.
- Finally, thread the needle from front to back. Pull about 6 inches of thread through the needle eye.
- Bobbin (Lower Thread):
- Open the bobbin cover plate located on the sewing bed.
- Insert a wound bobbin into the bobbin case, ensuring the thread unwinds counter-clockwise.
- Guide the bobbin thread through the tension spring slot.
- Turn the handwheel towards you to lower the needle. The upper thread will catch the bobbin thread, bringing it up through the needle plate.
- Pull both the upper and lower threads under the presser foot and towards the back of the machine, leaving about 4-6 inches of tail.
Video: A demonstration of setting up and threading the MIFXIN Mini Portable Sewing Machine, including placing the bobbin and guiding the upper thread.
5. Instrucciones de funcionamiento
5.1 Selección de puntadas
The machine features 12 built-in stitch patterns. To select a stitch, turn the Pattern Selection Dial to the desired number (1-12). Refer to the stitch chart printed on the machine for visual reference of each stitch type.
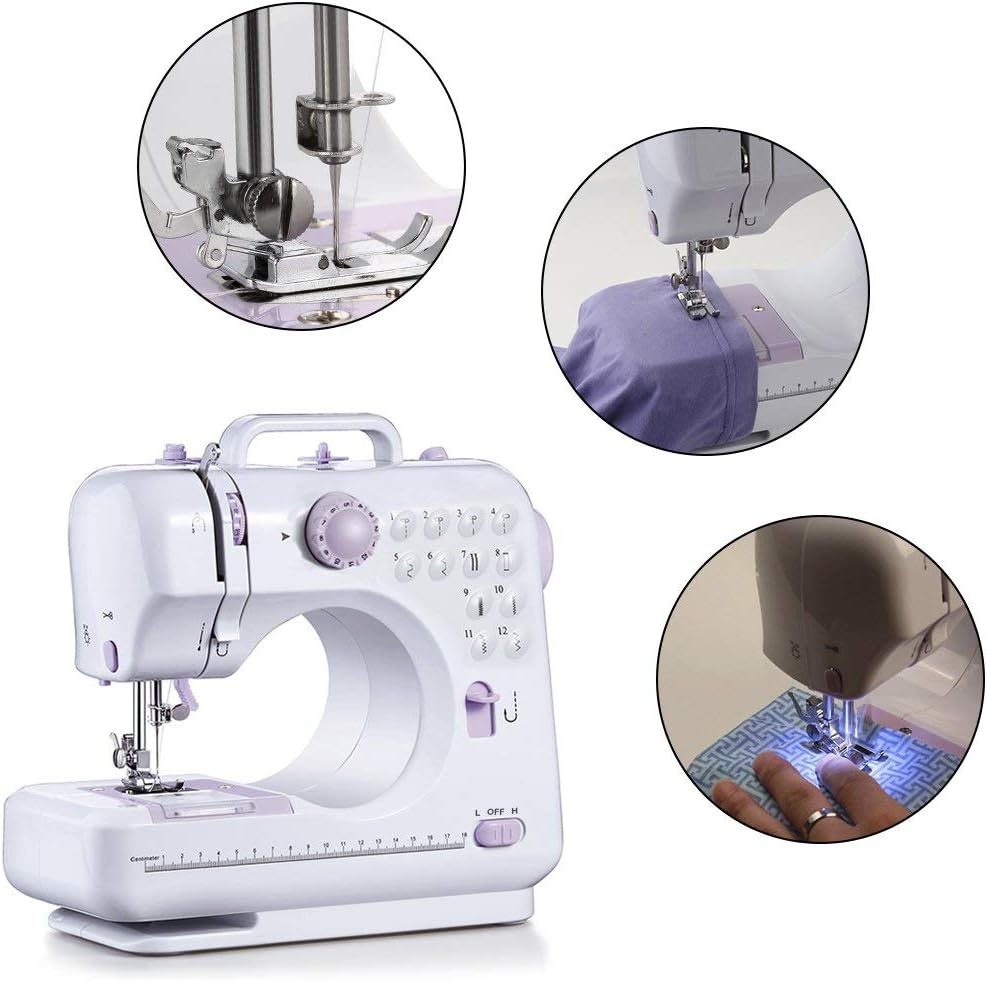
Imagen: Primer plano views of the sewing machine in action, demonstrating the needle and presser foot, and various sewing applications.
5.2 Ajuste de la velocidad
The machine has two speed settings: Low (L) and High (H). Use the Power Off & Speed Switch to select your desired speed. For beginners or intricate work, the Low speed is recommended.
5.3 Inicio y parada de la costura
Puede operar la máquina utilizando el interruptor manual o el pedal.
- Interruptor de mano: Slide the Power Off & Speed Switch to 'L' (Low) or 'H' (High) to start sewing. Slide it to 'OFF' to stop.
- Pedal: Ensure the Power Off & Speed Switch is in the 'OFF' position. Plug the foot pedal into the foot pedal port. Press the foot pedal to start sewing and release to stop.
To sew in reverse, press and hold the Reverse Button while the machine is operating. Release the button to resume forward sewing.

Image: A person using the MIFXIN Mini Portable Sewing Machine to sew fabric, demonstrating its ease of use for various projects.
5.4 Compatibilidad de tejidos
The machine is suitable for a variety of fabrics. Refer to the table below for guidance on fabric types and thickness:

Image: A table detailing fabric compatibility for the sewing machine. It indicates whether sewing is easy (✓), difficult (✗), or not smooth (△) for various fabric types (Cotton/Linen, Silk/Wool, Polyester, Elastic) and thicknesses (Regular, Thick, Thin, Hard, Soft).
Key for Fabric Compatibility Table:
- ✓: means easy to sew
- ✗: means difficult to sew
- △: means not smooth to sew
- Thin (fabric): Two layers of fabric thickness < 0.35mm
- Thick (fabric): Two layers of fabric thickness ≥ 0.8mm
- Regular (fabric): Two layers of fabric thickness ≥ 0.35mm and ≤ 0.8mm
For optimal results, always test on a scrap piece of your fabric before beginning your project.
6. Mantenimiento
6.1 Limpieza
Regular cleaning helps maintain the machine's performance:
- Desenchufe siempre la máquina antes de limpiarla.
- Use a soft brush or lint-free cloth to remove lint and dust from the needle plate area and bobbin case.
- No utilice limpiadores líquidos ni productos químicos agresivos.
6.2 Reemplazo de la aguja
Replace the needle if it becomes bent, dull, or broken. Use only needles designed for household sewing machines.
- Apague y desenchufe la máquina.
- Afloje la aguja clamp tornillo.
- Retire la aguja vieja.
- Inserte la aguja nueva con el lado plano hacia la parte posterior de la máquina, empujándola hacia arriba hasta el fondo.
- Apriete el cierre de la aguja.amp atornillar de forma segura.
7. Solución de problemas
| Problema | Posible causa | Solución |
|---|---|---|
| La maquina no arranca | No power, foot pedal not connected, speed switch off. | Check power adapter/batteries, ensure foot pedal is plugged in, slide speed switch to L or H. |
| Puntadas omitidas | Incorrect threading, bent needle, wrong needle for fabric. | Re-thread the machine, replace needle, use appropriate needle. |
| Rotura de hilo | Too much tension, poor quality thread, needle bent/dull. | Adjust tension dial, use good quality thread, replace needle. |
| La tela no se alimenta | El prensatelas no está bajado, los dientes de arrastre están obstruidos. | Lower the presser foot, clean lint from feed dog area. |
| Operación ruidosa | Lack of lubrication, loose parts. | Consult a professional for lubrication, check for loose screws. |
8. Especificaciones
- Modelo: 505A
- Dimensiones: 10.83 x 4.72 x 10.24 pulgadas (27.5 x 12 x 26 cm)
- Peso: 4.36 libras (1.98 kg)
- Patrones de puntadas: 12 incorporados
- Configuraciones de velocidad: Alto / Bajo
- Fuente de alimentación: DC 6V 1200mA adapter or 4 x AA batteries (not included)
- Color: Blanco
- Fabricante: MIFXIN
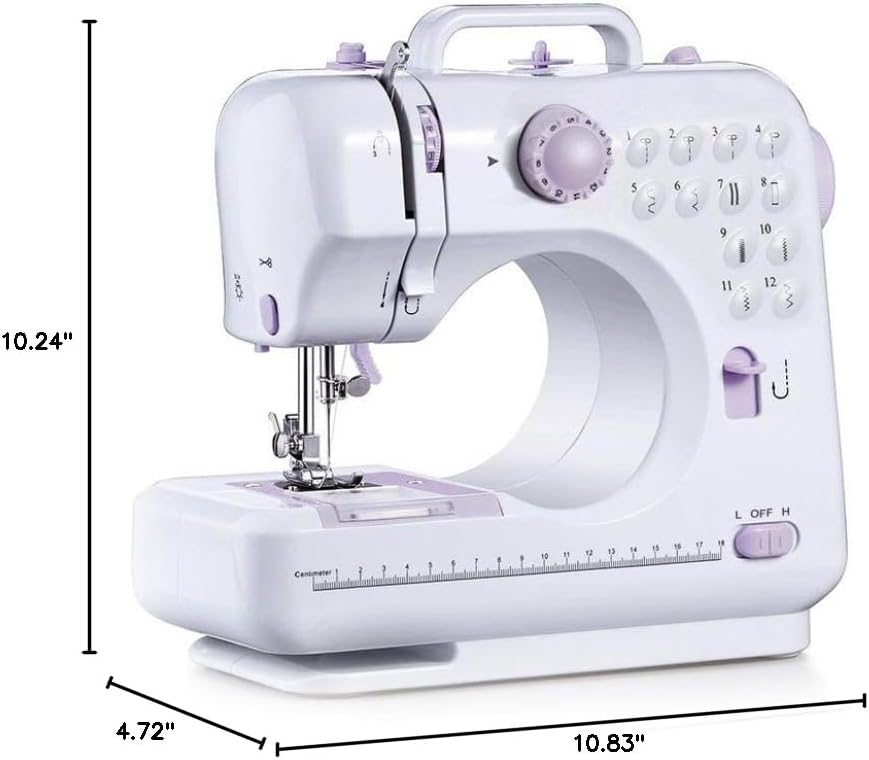
Image: A diagram illustrating the dimensions of the MIFXIN Mini Portable Sewing Machine, showing its height (10.24 inches), depth (4.72 inches), and width (10.83 inches).
9. Garantía y soporte
For warranty information and customer support, please refer to the documentation included with your purchase or contact MIFXIN customer service directly. Keep your purchase receipt as proof of purchase.
Para obtener más ayuda, puede visitar el MIFXIN Store on Amazon.
Ask a question about this manual
Ask about setup, troubleshooting, compatibility, parts, safety, or missing instructions. Manuals+ will review the question and use this page’s manual context to help answer it.