1. Información importante de seguridad
Please read all instructions carefully before using the blender. Failure to follow these instructions may result in electric shock, fire, or serious injury.
Precauciones generales de seguridad
- Always unplug the blender from the electrical outlet when not in use, before assembling or disassembling parts, and before cleaning.
- No sumerja la base del motor en agua u otros líquidos.
- Evite el contacto con piezas móviles.
- No opere ningún electrodoméstico con un cable o enchufe dañado, o después de que el electrodoméstico no funcione correctamente o se haya caído o dañado de alguna manera.
- El uso de accesorios no recomendados o vendidos por el fabricante puede provocar incendios, descargas eléctricas o lesiones.
- No utilizar en exteriores.
- No deje que el cable cuelgue del borde de la mesa o mostrador, ni que toque superficies calientes.
- Mantenga las manos y los utensilios fuera del recipiente mientras licua para reducir el riesgo de lesiones graves o daños a la licuadora. Se puede usar un raspador, pero solo cuando la licuadora no esté en funcionamiento.
- Las cuchillas están afiladas. Tratar con cuidado.
- Utilice siempre la licuadora con la tapa puesta.
- Este aparato no está diseñado para ser utilizado por personas (incluidos niños) con capacidades físicas, sensoriales o mentales reducidas, o con falta de experiencia y conocimientos, a menos que hayan recibido supervisión o instrucciones sobre el uso del aparato por parte de una persona responsable de su seguridad.
Seguridad eléctrica
Este aparato tiene un enchufe polarizado (una clavija es más ancha que la otra). Para reducir el riesgo de descarga eléctrica, este enchufe está diseñado para encajar en un tomacorriente polarizado de una sola manera. Si el enchufe no encaja completamente en el tomacorriente, inviértalo. Si sigue sin encajar, comuníquese con un electricista calificado. No intente modificar el enchufe de ninguna manera.
2. Componentes del producto
Familiarize yourself with the parts of your Oster Classic Series 8-Speed Blender:
- Base del motor: Contiene el motor y el panel de control.
- 6-Cup Glass Jar: El recipiente principal de mezcla.
- Tapa: Seals the jar during operation.
- Tapa: A removable cap in the lid for adding ingredients while blending.
- Conjunto de cuchillas: Consists of the Crush Pro 4® 4-point stainless steel blade, sealing gasket, and bottom cap.

Figure 2.1: Assembled Oster Classic Series 8-Speed Blender with empty glass jar.
This image displays the complete blender unit, including the motor base, the 6-cup glass jar, and the lid with its filler cap. Various fresh fruits are arranged around the base, indicating its use for preparing beverages and food.
3. Instrucciones de configuración
Antes del primer uso
- Desempaque la licuadora y todos sus componentes.
- Wash the glass jar, lid, filler cap, and blade assembly in warm, soapy water. Rinse thoroughly and dry.
- Limpie la base del motor con un anuncioamp paño. No sumerja la base del motor en agua.
Asamblea
- Place the sealing gasket onto the blade assembly.
- Inserte el conjunto de cuchillas en la abertura inferior del frasco de vidrio.
- Screw the bottom cap onto the jar, ensuring it is tightened securely to prevent leaks.
- Coloque el frasco ensamblado sobre la base del motor, asegurándose de que esté asentado correctamente.
- Place the lid onto the glass jar, and insert the filler cap into the lid opening.
4. Instrucciones de funcionamiento
Preparación de ingredientes
- Corte los ingredientes sólidos en trozos pequeños (cubos de aproximadamente 1 pulgada) para una mezcla óptima.
- Always add liquids first, then soft ingredients, then hard ingredients, and finally ice.
- Do not overfill the blender jar. The maximum capacity for liquids is 6 cups.
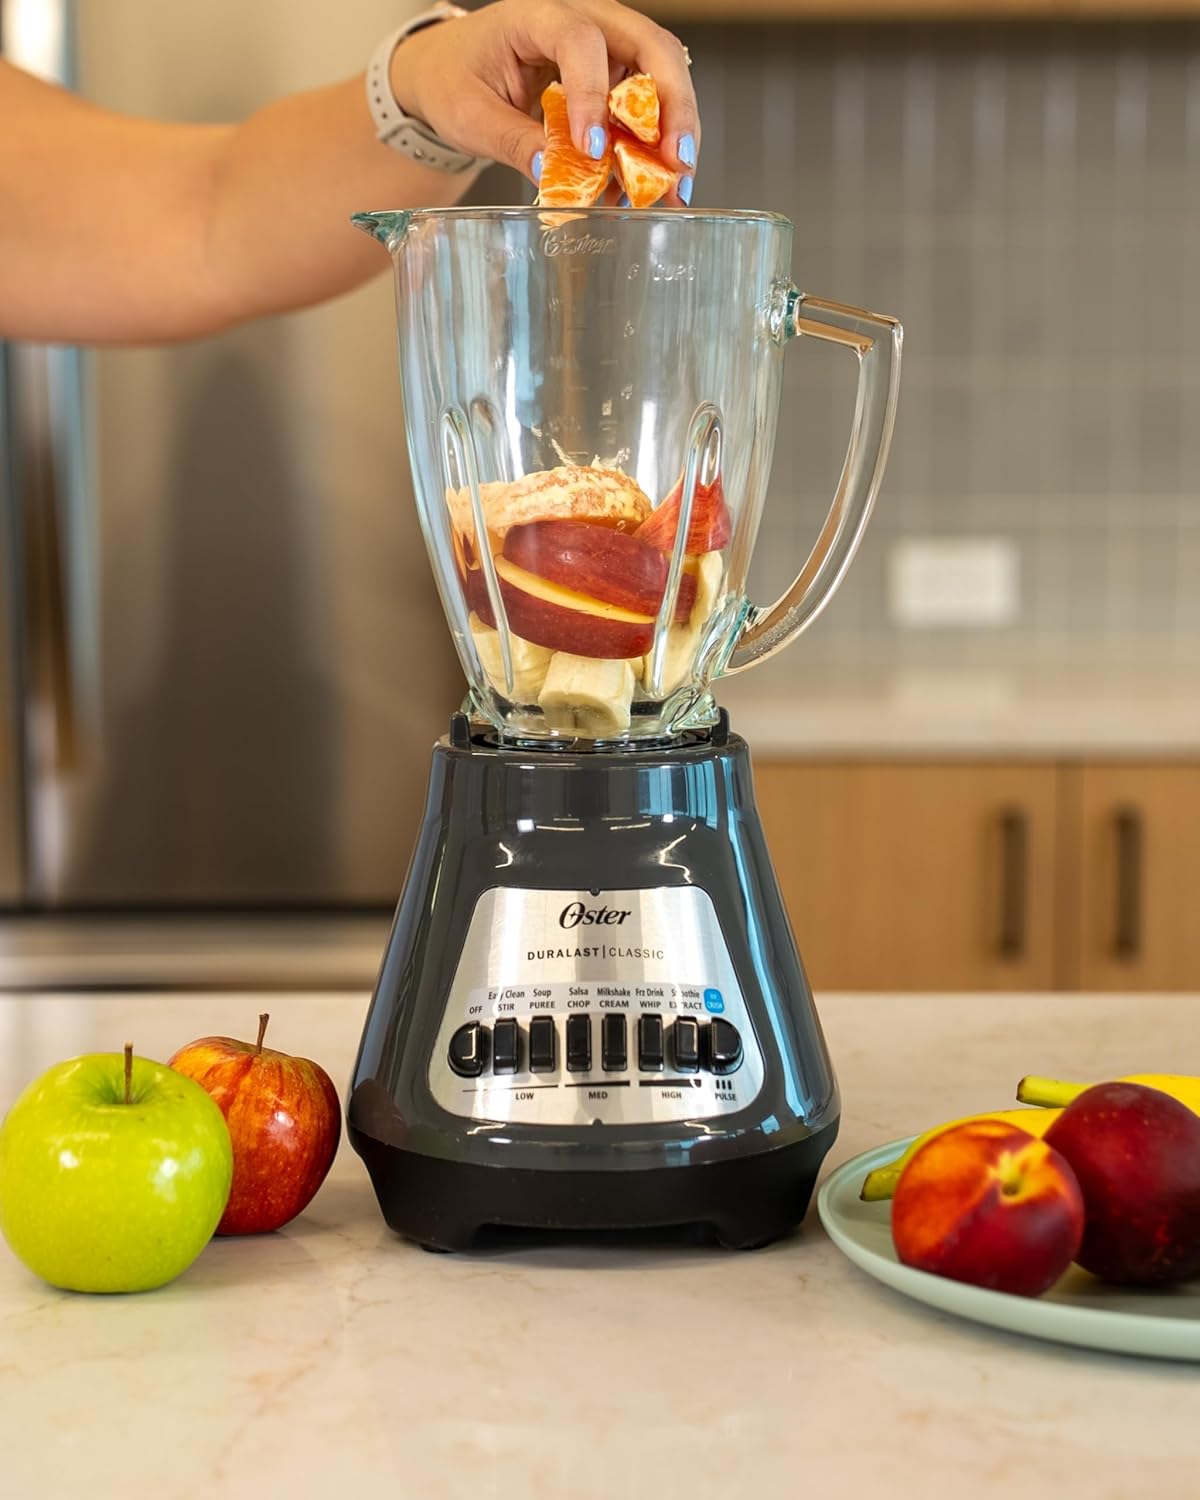
Figure 4.1: Adding ingredients to the blender jar.
This image shows a hand carefully placing orange segments into the blender's glass jar, which already contains other fruits like bananas and apple slices, demonstrating the process of loading ingredients.
Proceso de mezcla
- Ensure the blender is properly assembled and the lid is securely in place.
- Enchufe el cable de alimentación a una toma eléctrica de 220 V.
- Select the desired speed setting using the push-button controls on the motor base. The blender offers 8 speeds, including specific functions like 'Ice Crush' and 'Pulse'.
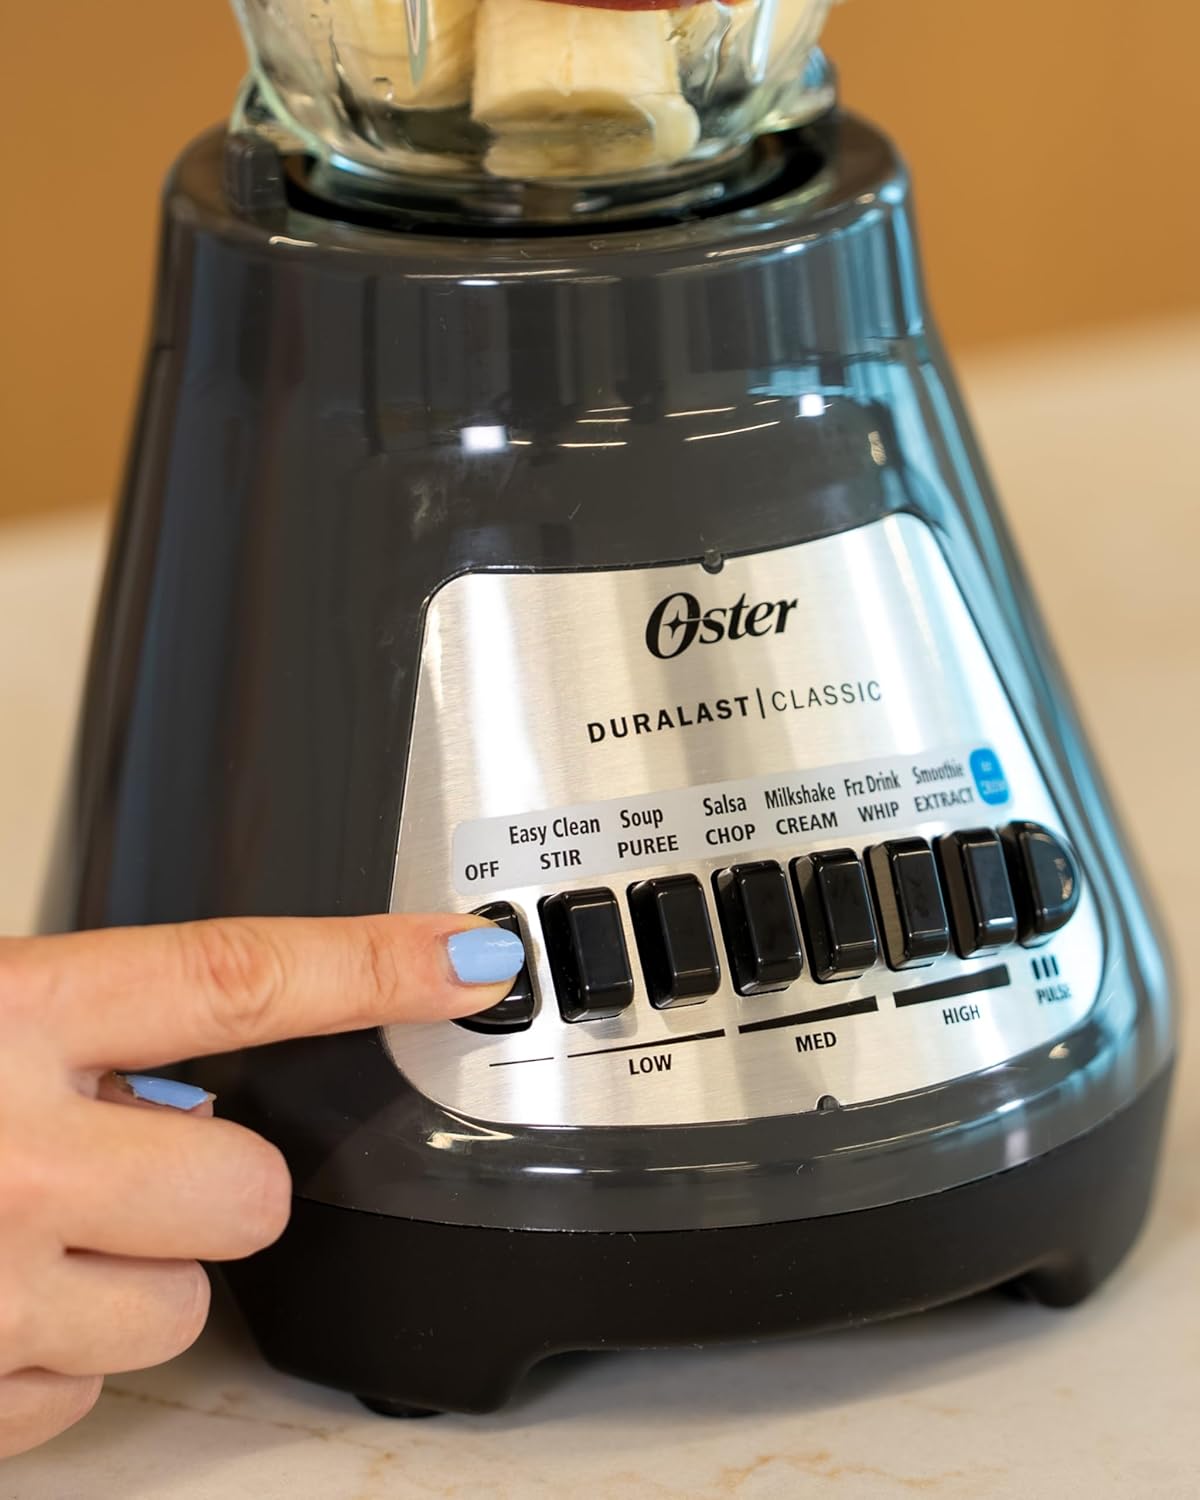
Figure 4.2: Operating the blender controls.
This image illustrates a user's hand pressing one of the control buttons on the blender's base, highlighting the push-button interface for speed selection and function activation.
- For continuous blending, press the desired speed button (Low, Med, High).
- Para ráfagas cortas de potencia, use el botón "Pulse". Suéltelo para detenerlo.
- For crushing ice, use the dedicated 'Ice Crush' setting.

Figure 4.3: Blender in operation with fruits and ice.
This image shows the blender actively processing a mixture of colorful fruits and ice cubes within its glass jar, demonstrating its blending capability.

Figure 4.4: Blender prepared with ice and fruit.
This image displays the blender with its glass jar filled with ice and various fruits, indicating it is ready to begin the blending process.
5. Limpieza y mantenimiento
La limpieza regular garantiza un rendimiento óptimo y prolonga la vida útil de su licuadora.
Limpieza diaria
- Desenchufe la licuadora del tomacorriente.
- Disassemble the glass jar, blade assembly, lid, and filler cap.
- Wash these parts in warm, soapy water. The glass jar, lid, and blade assembly are also dishwasher safe.
- Limpie la base del motor con un anuncioamp paño. Nunca sumerja la base del motor en agua ni en ningún otro líquido.
- Seque todas las piezas minuciosamente antes de volver a montarlas o guardarlas.

Figure 5.1: Blender components in a dishwasher.
This image shows the disassembled components of the Oster blender, specifically the glass jar, blade assembly, and lid, arranged within a dishwasher rack, indicating their dishwasher-safe nature for convenient cleaning.
Almacenamiento
Store the blender in a clean, dry place. Ensure the power cord is neatly wrapped and not kinked.
6. Guía de solución de problemas
Si tiene problemas con su licuadora, consulte los siguientes problemas y soluciones comunes:
| Problema | Posible causa | Solución |
|---|---|---|
| La licuadora no enciende. | Not plugged in; power outlet not working; jar not seated correctly; motor overheated. | Ensure plug is firmly in a working outlet; check circuit breaker; ensure jar is securely placed on base; allow motor to cool for 15-20 minutes. |
| Los ingredientes no se mezclan uniformemente. | Too little liquid; too many ingredients; ingredients too large; blade assembly not tight. | Add more liquid; reduce ingredient quantity; cut ingredients into smaller pieces; ensure blade assembly is securely tightened. |
| La licuadora pierde líquido por el fondo del recipiente. | Blade assembly not tight; gasket missing or improperly placed; gasket damaged. | Tighten blade assembly securely; ensure gasket is correctly seated; replace damaged gasket. |
| Olor a quemado durante el funcionamiento. | Sobrecarga del motor; funcionamiento continuo durante demasiado tiempo. | Reduce ingredient load; do not operate continuously for more than 3 minutes; allow motor to cool. If smell persists, discontinue use and contact customer support. |
7. Especificaciones técnicas
- Marca: Oster
- Número de modelo: BLSTMEGG00000
- Color: Gris
- Número de velocidades: 8
- Capacidad: 6 Cups (Glass Jar)
- Material del contenedor: Vaso
- Material de la hoja: Stainless Steel (Crush Pro 4® 4-point)
- Fuente de energía: Eléctrico con cable
- Volumentage: 220 voltios
- Tipo de controles: Push Button, Manual Speed Control
- Dimensiones del producto: 8.8" de profundidad x 10.2" de ancho x 13.8" de alto
- Peso del artículo: 6.78 libras
- Código postal: 034264492592
8. Garantía y soporte
Información de garantía
This Oster Classic Series 8-Speed Blender comes with a standard manufacturer's warranty. For specific details regarding warranty coverage, duration, and terms, please refer to the warranty card included with your product packaging or visit the official Oster websitio.
Atención al cliente
For technical assistance, replacement parts, or any other inquiries, please contact Oster Customer Service. You can find contact information on the official Oster website or through the documentation provided with your blender.
Oster Oficial Websitio: www.oster.com