1. Introducción
This manual provides essential information for the safe and efficient operation, installation, and maintenance of your Steinbach SPS 100-1 self-priming filter pump. Please read all instructions carefully before installation and use. Keep this manual for future reference.
2. Instrucciones de seguridad
Información de seguridad importante:
- Desconecte siempre la bomba de la fuente de alimentación antes de realizar cualquier mantenimiento o limpieza.
- Ensure the electrical installation complies with local regulations and is protected by a Residual Current Device (RCD) with a tripping current not exceeding 30 mA.
- Do not operate the pump if the power cord or plug is damaged. Contact qualified personnel for repairs.
- The pump must be installed on a solid, level surface, protected from direct sunlight and rain.
- Ensure adequate ventilation around the pump motor to prevent overheating.
- Este aparato no está diseñado para ser utilizado por personas (incluidos niños) con capacidades físicas, sensoriales o mentales reducidas, o con falta de experiencia y conocimientos, a menos que hayan recibido supervisión o instrucciones sobre el uso del aparato por parte de una persona responsable de su seguridad.
- Se debe supervisar a los niños para garantizar que no jueguen con el aparato.
3. Producto terminadoview
The Steinbach SPS 100-1 is a self-priming filter pump designed for efficient water circulation in swimming pool filter systems, such as the Speed Clean Comfort 75. It operates without a built-in timer, offering continuous operation when powered.
Componentes
- Pump body with motor
- Pre-filter basket with transparent lid
- Conexiones de entrada y salida
- Cable de alimentación con enchufe

Figura 1: Sobreview of the Steinbach SPS 100-1 Self-Priming Filter Pump.
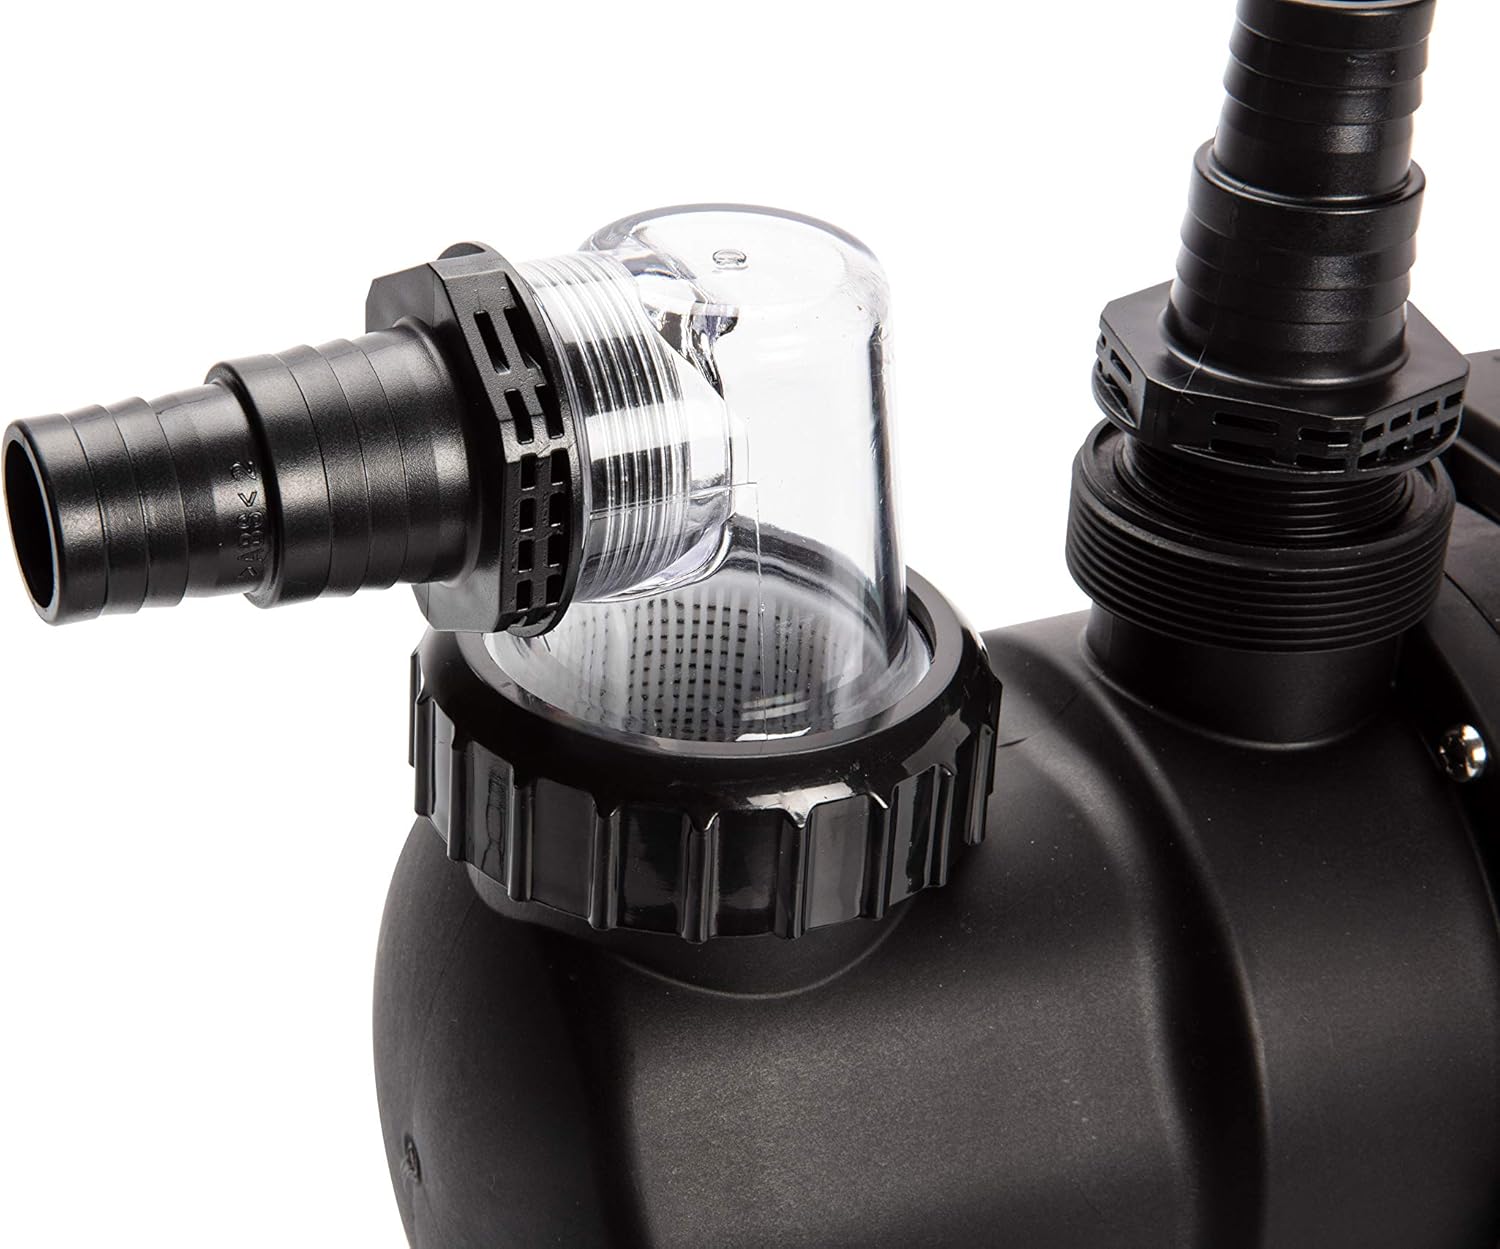
Figura 2: Primer plano view of the pre-filter housing and the inlet connection with a hose attached. The transparent lid allows for easy inspection of the filter basket.

Figura 3: detallada view of the pre-filter and the threaded inlet connection, ready for hose attachment.

Figure 4: Close-up of the pump's outlet connection with a hose securely fastened, directing filtered water.

Figura 5: detallada view of the pump's threaded outlet connection, showing the port where the return hose connects.

Figure 6: Product label displaying technical specifications such as model number, voltage, power, and flow rate.
4. Configuración e instalación
Proper installation is crucial for the pump's performance and longevity. Refer to your specific filter system manual for detailed plumbing instructions.
4.1 Colocación
- Position the pump as close to the pool as possible, below water level if feasible, to aid in self-priming.
- Ensure the pump is on a stable, level, and dry surface.
- Proteja la bomba de la exposición directa a la intemperie (lluvia, nieve, luz solar directa).
- Allow sufficient space around the motor for ventilation and maintenance access.
4.2 Conexiones de fontanería
- Connect the suction line from the pool skimmer/main drain to the pump's inlet (front connection).
- Connect the discharge line from the pump's outlet (top connection) to the filter system's inlet.
- Use appropriate fittings, clamps, and thread sealant (Teflon tape) to ensure watertight connections.
- Avoid kinks or sharp bends in hoses to maintain optimal flow.
4.3 Conexión eléctrica
- Asegúrese de que la fuente de alimentación coincida con el volumen de la bomba.tage (230 V).
- Plug the pump into a grounded electrical outlet protected by an RCD.
- No utilice cables de extensión a menos que sea absolutamente necesario y asegúrese de que estén clasificados para uso en exteriores y para los requisitos de energía de la bomba.
5. Instrucciones de funcionamiento
5.1 Cebado de la bomba
As a self-priming pump, the SPS 100-1 can draw water, but initial priming is recommended for faster startup:
- Asegúrese de que todas las válvulas estén abiertas, permitiendo que el agua fluya desde la piscina hasta la bomba.
- Remove the transparent lid of the pre-filter.
- Fill the pre-filter housing completely with water.
- Vuelva a colocar la tapa de forma segura, asegurándose de que la junta tórica esté colocada correctamente para evitar fugas de aire.
- Turn on the pump. It should begin to draw water and expel air. If it does not prime within a few minutes, turn it off, re-check connections, and repeat the priming process.
5.2 Operación normal
- Once primed, the pump will continuously circulate water through your filter system.
- Monitor the pressure gauge on your filter (if applicable) to determine when backwashing or filter cleaning is needed.
- This model does not include a timer, so you will need to manually switch it on and off or connect it to an external timer (not included).
6. Mantenimiento
6.1 Pre-Filter Basket Cleaning
Regularly inspect and clean the pre-filter basket to prevent debris buildup and maintain pump efficiency.
- Apague la bomba y desconéctela de la fuente de alimentación.
- Cierre todas las válvulas necesarias para evitar el flujo de agua de la piscina.
- Desenrosque la tapa transparente del prefiltro.
- Retire la cesta y vacíe los residuos acumulados.
- Enjuague bien la cesta con agua.
- Inspeccione la junta tórica de la tapa para detectar daños y asegúrese de que esté limpia.
- Vuelva a colocar la cesta y cierre bien la tapa.
6.2 Preparación para el invierno
Before freezing temperatures arrive, properly winterize your pump to prevent damage:
- Desconecte la bomba de la fuente de alimentación.
- Drain all water from the pump by removing the drain plug (usually located at the bottom of the pump housing).
- Disconnect all hoses and pipes.
- Clean the pre-filter basket and housing.
- Guarde la bomba en un lugar seco y libre de heladas.
7. Solución de problemas
| Problema | Posible causa | Solución |
|---|---|---|
| La bomba no arranca | No power; tripped breaker/RCD; motor jammed | Check power connection, reset breaker/RCD; contact service if motor is jammed. |
| Pump runs but does not prime/no water flow | Air leak in suction line; pre-filter basket clogged; insufficient water in pre-filter; low pool water level | Check all connections for air leaks; clean pre-filter basket; fill pre-filter with water; ensure adequate pool water level. |
| Flujo de agua reducido | Clogged pre-filter; clogged main filter; partially closed valves; debris in impeller | Clean pre-filter; backwash/clean main filter; open all valves fully; inspect impeller for debris (disconnect power first). |
| Ruido fuerte/vibración | Air in pump; cavitation; loose mounting; worn bearings | Check for air leaks and prime pump; ensure adequate water supply; tighten mounting bolts; contact service for worn bearings. |
8. Especificaciones
| Característica | Especificación |
|---|---|
| Número de modelo | 040922 |
| Tipo | Self-Priming Filter Pump |
| Volumentage | 230 V |
| Fuerza | 550 W |
| Caudal máximo | 158 Liters Per Minute (9.400 l/h) |
| Altura máxima de la cabeza | 10 metros |
| Material | Stainless Steel (motor components), Durable Plastic (pump housing) |
| Peso | 5.96 kilogramos |
| Color | Negro |
| Características | Self-priming, No integrated timer, Suitable for Speed Clean Comfort 75 sand filter systems |
9. Garantía y soporte
Para obtener información sobre la garantía y asistencia técnica, consulte la documentación incluida con su compra o póngase en contacto directamente con el servicio de atención al cliente de Steinbach. Conserve su comprobante de compra para reclamaciones de garantía.
Información del contacto:
- Manufacturer: Steinbach
- Websitio: www.steinbach.at (Please check for local support details)