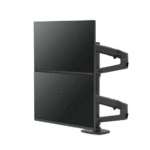
ergotron LX Desk Monitor Arm Instruction Manual
PACKAGE CONTENTS

NOTE: Product movements and spring adjustments may not work until mounted and all equipment has been attached.
Tools Needed


Desk Placement Options
Optional locking feature (customer supplied lock)
ASSEMBLY INSTRUCTION

Rotate – Portrait/Landscape


Tilt

Adjustment Step
Important! You will need to adjust this product after installation is complete. Make sure all your equipment is properly installed on the product before attempting adjustments. This product should move smoothly and easily through the full range of motion and stay where you set i, If movements are too easy or difficult o if product does not stay in desired positions, follow the adjustment instructions to create smooth and easy movements. Depending on your product and the adjustment, it may take many turns to notice a difference. Any time equipment is added or removed from this product, resuting in a change in the weight of the mounted load, you should repeat these adjustment steps to ensure safe and optimum operation.
Adjustment Step
Lift- Up and down
Increase Lift Strength If the mounted weight is too heavy or this product does not stay up when raised, then you’ll need to increase Lift Strength:

Decrease Lift Strength If the mounted weight is too light or this product does not stay down when lowered, then you’l need to decrease Lift Strength:
![]() CAUTION: DO NOT overtighten fasteners. Overtghtening may cause damage to your equipment.
CAUTION: DO NOT overtighten fasteners. Overtghtening may cause damage to your equipment.
Adjustment Step
Tilt – Forward and Backward
Increase Lift Strength If the mounted weight is too heavy or this product does not stay up when raised, then you’l need to increase Lit Strength:

Decrease Lift Strength If the mounted weight is too light or this product does not stay down when lowered, then you’l need to decrease Lift Strength:
![]() CAUTION: DO NOT remove screw. Removing screw may cause damage to equipment.
CAUTION: DO NOT remove screw. Removing screw may cause damage to equipment.
Adjustment Step
Arm Swing – Side-to-side
![]() CAUTION: DO NOT remove screw. Removing screw may cause damage to equipment.
CAUTION: DO NOT remove screw. Removing screw may cause damage to equipment.
Increase Friction If this product moves too easily, then you’l need to increase friction:

Decrease Friction If this product is too difficult to move, then you’ll need fo decrease friction:
Yup, that’s it. Really.
Now your LX Arm is ready for however you work best.
Learn more about ergonomic computer use at: www.ergotron.com/ergonomics
 Important Information.
Safety
![]() Warning: Because mounting surface materials can vary widely, it is imperative that you make sure mounting surface is strong enough to handie mounted product and equipment.
Warning: Because mounting surface materials can vary widely, it is imperative that you make sure mounting surface is strong enough to handie mounted product and equipment.
![]() Caution: Leave enough slack in cable to allow full range of motion. “~ To avoid the potential to pinch cables it is important to follow the cable routing instructions in this manual. Falure to follow these instructions may result in equipment damage or personal injury.
Caution: Leave enough slack in cable to allow full range of motion. “~ To avoid the potential to pinch cables it is important to follow the cable routing instructions in this manual. Falure to follow these instructions may result in equipment damage or personal injury.
SAFETY

WARNING! Stored Energy Hazard: The arm mechanism is under tension and will move up rapidly, on its own, as soon as attached equipment is removed. For this reason, DO NOT remove equipment unless the arm has been moved to the highest postion! Failure to follow this instruction may result in serious personal injury andlor equipment damage!
Weight Capacity:
![]() CAUTION: DO NOT EXCEED MAXIMUM LISTED WEIGHT CAPACITY. SERIOUS INJURY OR PROPERTY DAMAGE MAY OCCUR!
CAUTION: DO NOT EXCEED MAXIMUM LISTED WEIGHT CAPACITY. SERIOUS INJURY OR PROPERTY DAMAGE MAY OCCUR!
The lower most range of motion for vertical liftis decreased up to 4.5 (114 mm) when arm is adjusted —| to hold over 20ibs (9 kgs).
For the latest User Installation Guide please visit: www.ergotron.com
For Warranty visit: www.ergotron.com/warranty
For Senvice visit: www.ergotron.com Forlocal customer care phone numbers visit: hitp://contact.ergotron.com
NOTE: When contacting customer service, reference the serial number.
Costumer Support
www.ergotron.com | USA: 1-800-888-8458 | Europe: +31 (0)3345 45600 | China: 400-120-3051 | Japan: japansupport@ergotron.com
madie in the process of translation from English to another language), or for incidental, special or consequential damages of any nature resulting from furnishing this instruction and performance of equipment in connection with this instruction. rgotron,Inc. reserves the right to make changes in the product design and/or product documentation without notification to its users. For the most current product information, or to know f this document is available in languages other than those herein, please contact Ergotron. No part of this publication may be reproduced; stored in a retrieval syster, or transmitted in any form or by any means, electronic, mechanical, photocopying, ecording or otherwise without the prior written consent of Exgotron, Inc,1181 Trapp Road, Eagan, Minnesota, 55121, USA Patents Pending and Patented US. & Foreign. Ergotron is a egistered trademark of Ergotron, Inc.
Documents / Resources
 | ergotron LX Desk Monitor Arm [pdf] Instruction Manual LX Desk Monitor Arm, LX, Desk Monitor Arm, Monitor Arm, Arm |


