1. Enkonduko
This manual provides detailed instructions for the setup, operation, and maintenance of your BINNIFA Play 6D Sound Bar. Please read this manual thoroughly before using the product to ensure proper function and to maximize your audio experience. Keep this manual for future reference.

Image 1.1: The BINNIFA Play 6D Sound Bar, a sleek, silver-colored audio device designed to enhance television sound.
2. Sekurecaj Informoj
- Ne elmetu la sonbreton al pluvo, humideco aŭ ekstremaj temperaturoj.
- Certigu taŭgan ventoladon ĉirkaŭ la unuo por malhelpi trovarmiĝon.
- Ne malfermu la ĉ.asing; plusendu ĉian riparadon al kvalifikita personaro.
- Uzu nur la provizitan elektran adaptilon.
- Keep the sound bar away from strong magnetic fields.
3. Pako Enhavo
Kontrolu, ke ĉiuj eroj ĉeestas en la pakaĵo:
- BINNIFA Play 6D Sound Bar
- Teleregilo
- AC-Potenca Adaptilo
- Optika Kablo
- Muroj por Muntado
4. Produkto Finitaview
4.1 Fronto kaj Supro View
Bildo 4.1: Fronto view of the sound bar, featuring a silver grille and a subtle BINNIFA logo on the left.
4.2 Malantaŭaj Panelaj Konektoj
The rear panel of the sound bar provides various input ports for connecting to your television and other audio sources.

Image 4.2: Close-up of the rear panel showing input ports: Coaxial (COX), Optical (OPT), HDMI ARC, USB, AUX, and DC IN.
5. Instalado
5.1 Lokigaj Elektoj
The BINNIFA Play 6D Sound Bar offers flexible placement options:
- Tabla Lokigo: Place the sound bar on a flat, stable surface directly in front of your television. Ensure it does not obstruct the TV's remote sensor.
- Mura muntado: Use the included wall mounting kits to attach the sound bar to a wall below your television. Refer to the wall mounting template for precise drilling locations.

Image 5.1: The sound bar positioned on a media console beneath a television, demonstrating tabletop placement.
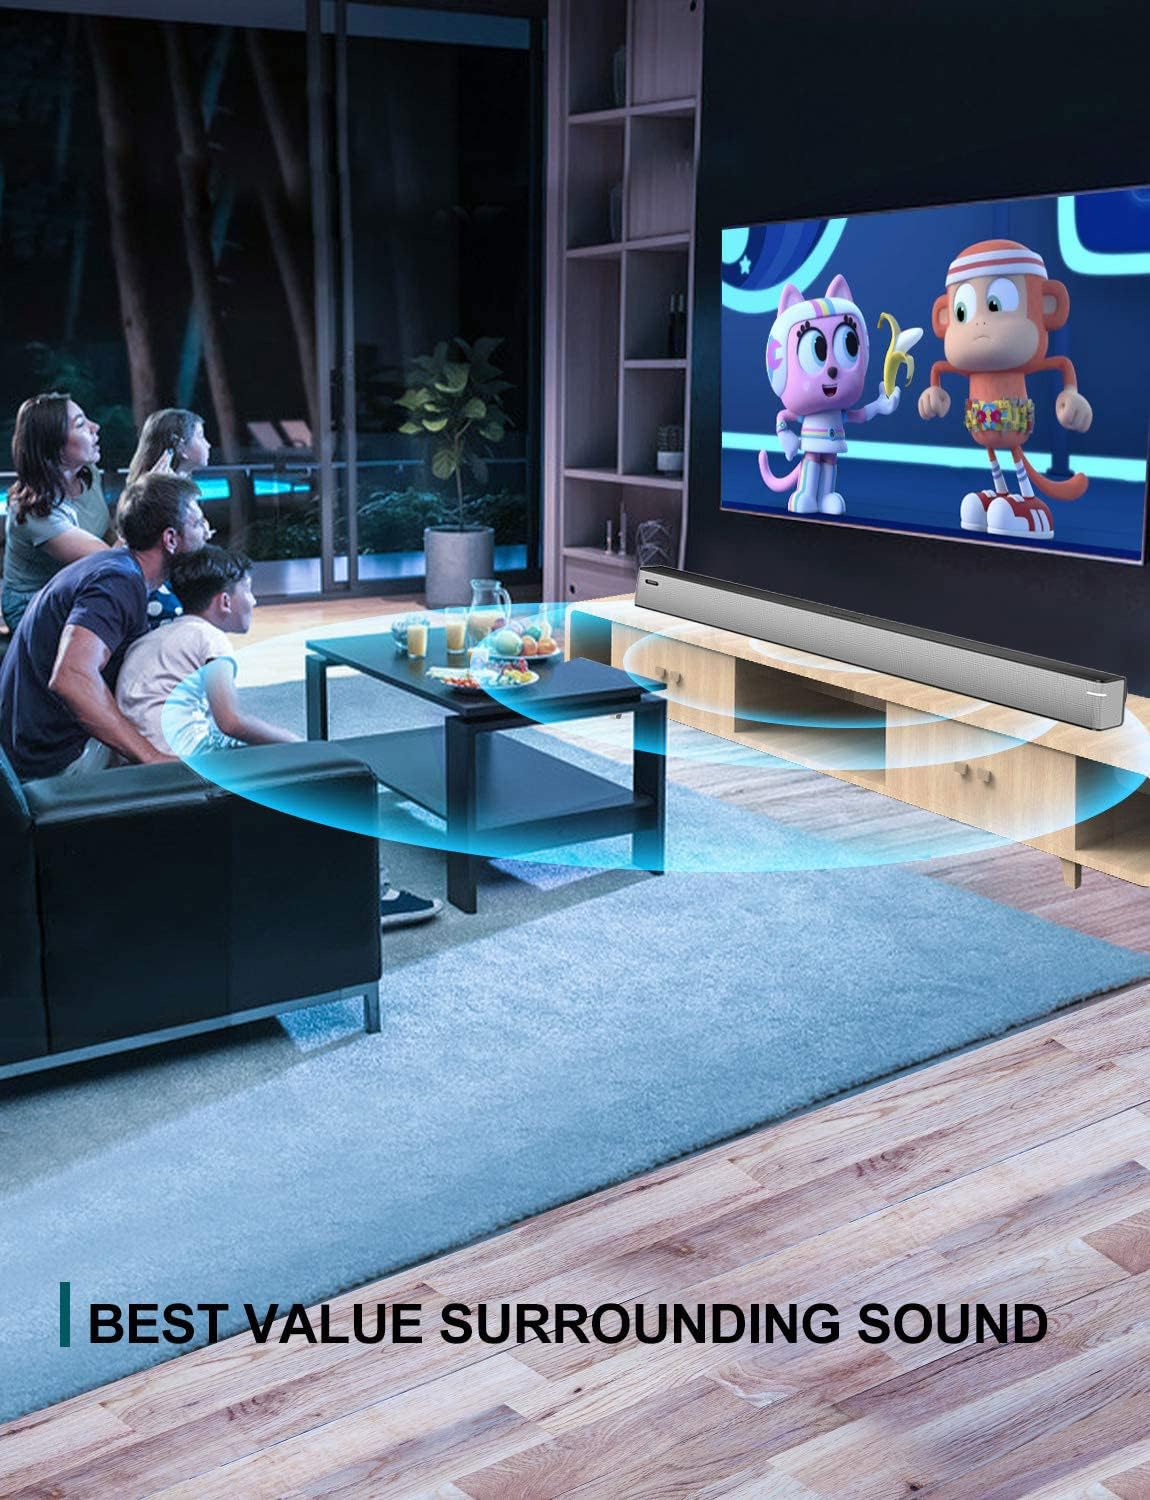
Image 5.2: The sound bar mounted on a wall directly below a television, illustrating wall-mount installation.
5.2 Connecting to Your TV or Audio Source
The sound bar supports multiple connection types. Choose the method that best suits your television or audio device.
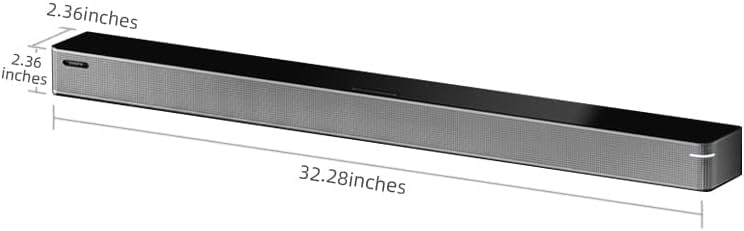
Image 5.3: A diagram illustrating the available connection methods: HDMI ARC, USB Media, and Bluetooth.
- HDMI ARC-Konekto (Rekomendita):
- Connect one end of an HDMI cable (not included) to the HDMI ARC port on your TV.
- Konekti la alian finon al la HDMI ARC haveno sur la sondrinkejo.
- Certigu, ke la funkcio HDMI ARC de via televidilo estas ebligita en ĝiaj agordoj.
- Optika Konekto:
- Connect the included optical cable to the OPT haveno sur la sondrinkejo.
- Connect the other end to the optical digital audio output port on your TV.
- Set your TV's audio output to 'Optical' or 'PCM'.
- AUX-Konekto:
- Connect a 3.5mm audio cable (not included) to the AUX haveno sur la sondrinkejo.
- Connect the other end to the headphone jack or AUX output on your TV or audio device.
- USB-Konekto:
- Enmetu USBan poŝmemoron enhavantan aŭdion files en la USB haveno sur la sondrinkejo.
- The sound bar will automatically switch to USB mode and begin playback.
- Coaxial Connection:
- Connect a coaxial cable (not included) to the COX haveno sur la sondrinkejo.
- Connect the other end to the coaxial digital audio output port on your TV.
5.3 Potenca Konekto
Konekti la AC-adaptilon al la DC IN port on the sound bar, then plug the adapter into a wall outlet.
6. Funkciaj Instrukcioj
6.1 Ŝalti/Malŝalti
Premu la Potenco butonon sur la teleregilo aŭ sur la sonbreto por ŝalti aŭ malŝalti la aparaton.
6.2 Eniga Elekto
Premu la Enigo button on the remote control to cycle through the available input sources: HDMI ARC, Optical, AUX, USB, and Bluetooth.
6.3 Bluetooth-Parigo
Por konekti Bluetooth-aparaton:
- Turn on the sound bar and select Bluetooth mode using the Enigo butonon. La indikilo ekbrilos.
- Ebligu Bluetooth sur via portebla aparato (poŝtelefono, tabulkomputilo, ktp.).
- Serĉu available devices and select "BINNIFA Play 6D" from the list.
- Once paired, the indicator light on the sound bar will stop flashing and remain solid.
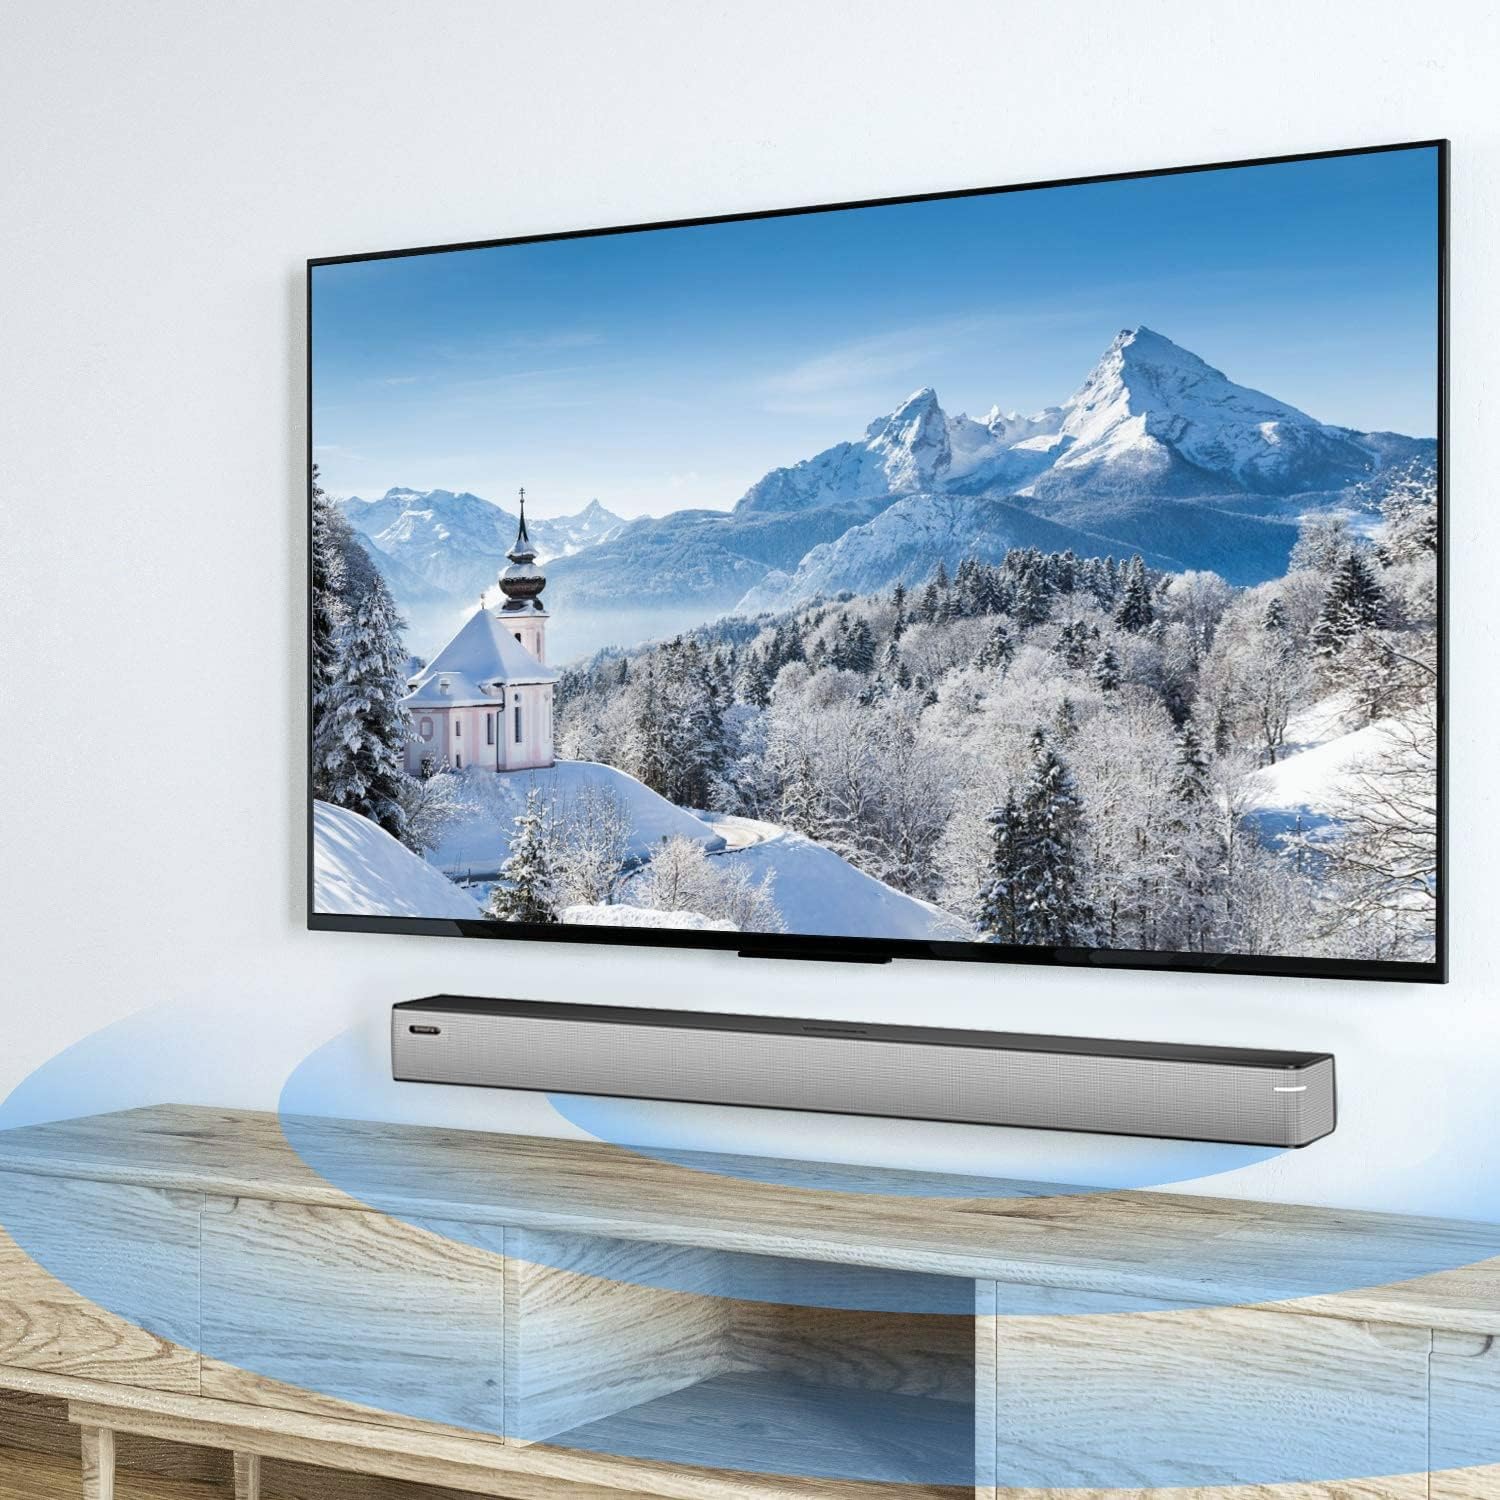
Image 6.1: A smartphone displaying music playback, wirelessly connected to the sound bar via Bluetooth, illustrating simple connectivity.
6.4 Sonreĝimoj
The sound bar features three optimized sound modes:
- Muzika Reĝimo: Ideal for pop music, providing balanced audio.
- Filma reĝimo: Enhances movie and TV show audio with heavy bass for an immersive experience.
- Novaĵreĝimo: Optimizes vocal clarity for news broadcasts and talk shows.
Press the corresponding button on the remote control to switch between modes.
6.5 Volumo-Kontrolo
Uzu la Volumo supren (+) kaj Volumumeto (-) buttons on the remote control or on the sound bar to adjust the volume level.
7. Prizorgado
To ensure the longevity and performance of your sound bar:
- Purigado: Wipe the surface of the sound bar with a soft, dry cloth. Do not use liquid cleaners or abrasive materials.
- Stokado: Se vi stokas la aparaton dum plilongigita periodo, malkonektu ĝin de la elektro kaj konservu ĝin en malvarmeta, seka loko.
- Ventolado: Ensure that the vents are not blocked to prevent overheating.
8. Respondecaj problemoj
If you encounter issues with your BINNIFA Play 6D Sound Bar, refer to the following common problems and solutions:
| Problemo | Ebla Kaŭzo | Solvo |
|---|---|---|
| Neniu sono el la sonbreto. |
|
|
| Bludenta aparato ne povas pariĝi. |
|
|
| Teleregilo ne funkcias. |
|
|
9. Specifoj
Detailed technical specifications for the BINNIFA Play 6D Sound Bar:
- Modelo: Play 6D
- Marko: BINNIFA
- Produktaj Dimensioj: 82cm x 6cm x 6cm (32.3cm P x 2.36cm L x 2.36cm A)
- Item Pezo: 4.19 Funtoj (1.9 kg)
- Tipo de parolanto: Sondrinkejo
- Munta Tipo: Mura Monto, Tabletop
- Konekteca Teknologio: Auxiliary, Bluetooth, Coaxial, HDMI ARC, Optical, USB
- Sendrata Komunika Teknologio: Bluetooth 5.0
- Bluetooth-Gamo: Ĝis 10 metroj (33 futoj)
- Parolanto Maksimuma Eliga Potenco: 30 vatoj
- Frekvenca Respondo: 60 Hz
- Signalo-al-Bruo-Proporcio: 75 dB
- Elektrofonto: Corded Electric (AC adapter)
- Kontrola Metodo: Teleregilo
- Koloro: Arĝento
- UPC: 791200396207

Image 9.1: Diagram illustrating the dimensions of the sound bar: approximately 32.28 inches long, 2.36 inches deep, and 2.36 inches high.
10. Garantio kaj Subteno
BINNIFA products are designed for reliability and performance. For warranty information or technical support, please refer to the warranty card included with your product or visit the official BINNIFA webretejo. Konservu vian aĉetkvitancon kiel pruvon de aĉeto por garantiaj reklamoj.