1. Wichtige Sicherheitshinweise
Bitte lesen und verstehen Sie alle Anweisungen, bevor Sie dieses Etagenbett aufbauen und benutzen. Bewahren Sie diese Anleitung zum späteren Nachschlagen auf.
- Gewichtskapazität: The upper bunk is designed to support a maximum weight of 175 lbs (79 kg). The lower bunk is designed to support a maximum weight of 250 lbs (113 kg).
- Altersempfehlung: Das obere Bett ist nicht für Kinder unter 6 Jahren geeignet.
- Sturzgefahr: Ensure guardrails are properly installed on the upper bunk. Do not allow horseplay on or under the bed. Always use the ladder for access to the upper bunk.
- Anforderungen an die Matratze: Use only mattresses that meet the specified dimensions for twin size beds. Ensure the mattress thickness does not exceed the maximum indicated by the guardrail height.
- Montage: Assembly should be performed by two adults. Ensure all fasteners are securely tightened before use. Periodically check and re-tighten fasteners.
- Belüftung: Do not obstruct the ventilation openings of the light strip.
- Elektrische Sicherheit: Ensure the light strip is connected to a suitable power source and handled according to electrical safety guidelines. Disconnect power before cleaning or maintenance.
2. Packungsinhalt
Prüfen Sie vor Beginn der Montage, ob alle Komponenten vorhanden sind. Sollten Teile fehlen oder beschädigt sein, wenden Sie sich bitte an den Kundendienst.
- Bettgestellkomponenten (Kopfteil, Fußteil, Seitenteile, Lattenrost)
- Wardrobe unit components (panels, hanging rod, shelves)
- Four storage drawers (drawer fronts, sides, bottoms, hardware)
- Leiter
- Light strip and power adapter
- Pegboard panels and mounting hardware
- Assembly hardware (screws, bolts, nuts, cam locks, dowels)
- Montagewerkzeug (Inbusschlüssel, Schraubendreher)
3. Aufbau und Montage
Befolgen Sie diese Schritte sorgfältig für eine korrekte Montage. Es wird empfohlen, das Bett in dem Raum aufzubauen, in dem es später verwendet werden soll.
- Bereiten Sie den Bereich vor: Sorgen Sie für ausreichend Platz zum Zusammenbauen. Legen Sie alle Bauteile auf eine weiche, saubere Unterlage, um Kratzer zu vermeiden.
- Assemble the Wardrobe Unit: Begin by assembling the main panels of the wardrobe unit. Secure the hanging rod and internal shelves as instructed.
- Attach Pegboard Panels: Mount the pegboard panels to the sides of the wardrobe unit using the provided hardware.
- Lichtleiste installieren: Carefully attach the integrated light strip to the designated area within the wardrobe. Ensure the wiring is routed safely and securely.
- Bettgestelle montieren: Construct the upper and lower bed frames by attaching the side rails to the headboards and footboards.
- Connect Wardrobe to Bed Frame: Securely attach the assembled wardrobe unit to the bed frames using the connecting hardware.
- Lattenrost einbauen: Place and secure the wooden slats onto both the upper and lower bed frames. Ensure they are evenly spaced and firmly attached.
- Schubladen zusammenbauen: Construct the four storage drawers. Insert the drawer slides into the bed frame and attach the drawers.
- Leiter anbringen: Securely attach the ladder to the upper bunk frame.
- Endkontrolle: Verify that all bolts, screws, and fasteners are tightly secured. Do not overtighten.

Image: Fully assembled Polibi Twin Size Bunk Bed, showcasing the integrated wardrobe, four storage drawers, and ladder. The bed is shown in a room setting with bedding.

Bild: Nahaufnahme view of the wooden bed slats installed on the bed frame, demonstrating their support structure.
4. Bedienungsanleitung
4.1 Using the Wardrobe and Storage
- Aufhängestange: Utilize the integrated hanging rod for organizing clothes. Ensure items are distributed evenly to prevent excessive strain.
- Ablagefach: The top shelf within the wardrobe is suitable for hats, accessories, or folded garments.
- Aufbewahrungsschubladen: The four deep-set drawers beneath the bed frame are designed for storing blankets, pillows, clothing, or other items. Pull drawers gently to open and push firmly to close.
- Pegboard Panels: Use standard pegboard hooks (not included) to customize storage on the pegboard panels for headphones, bags, keys, or decorative items.
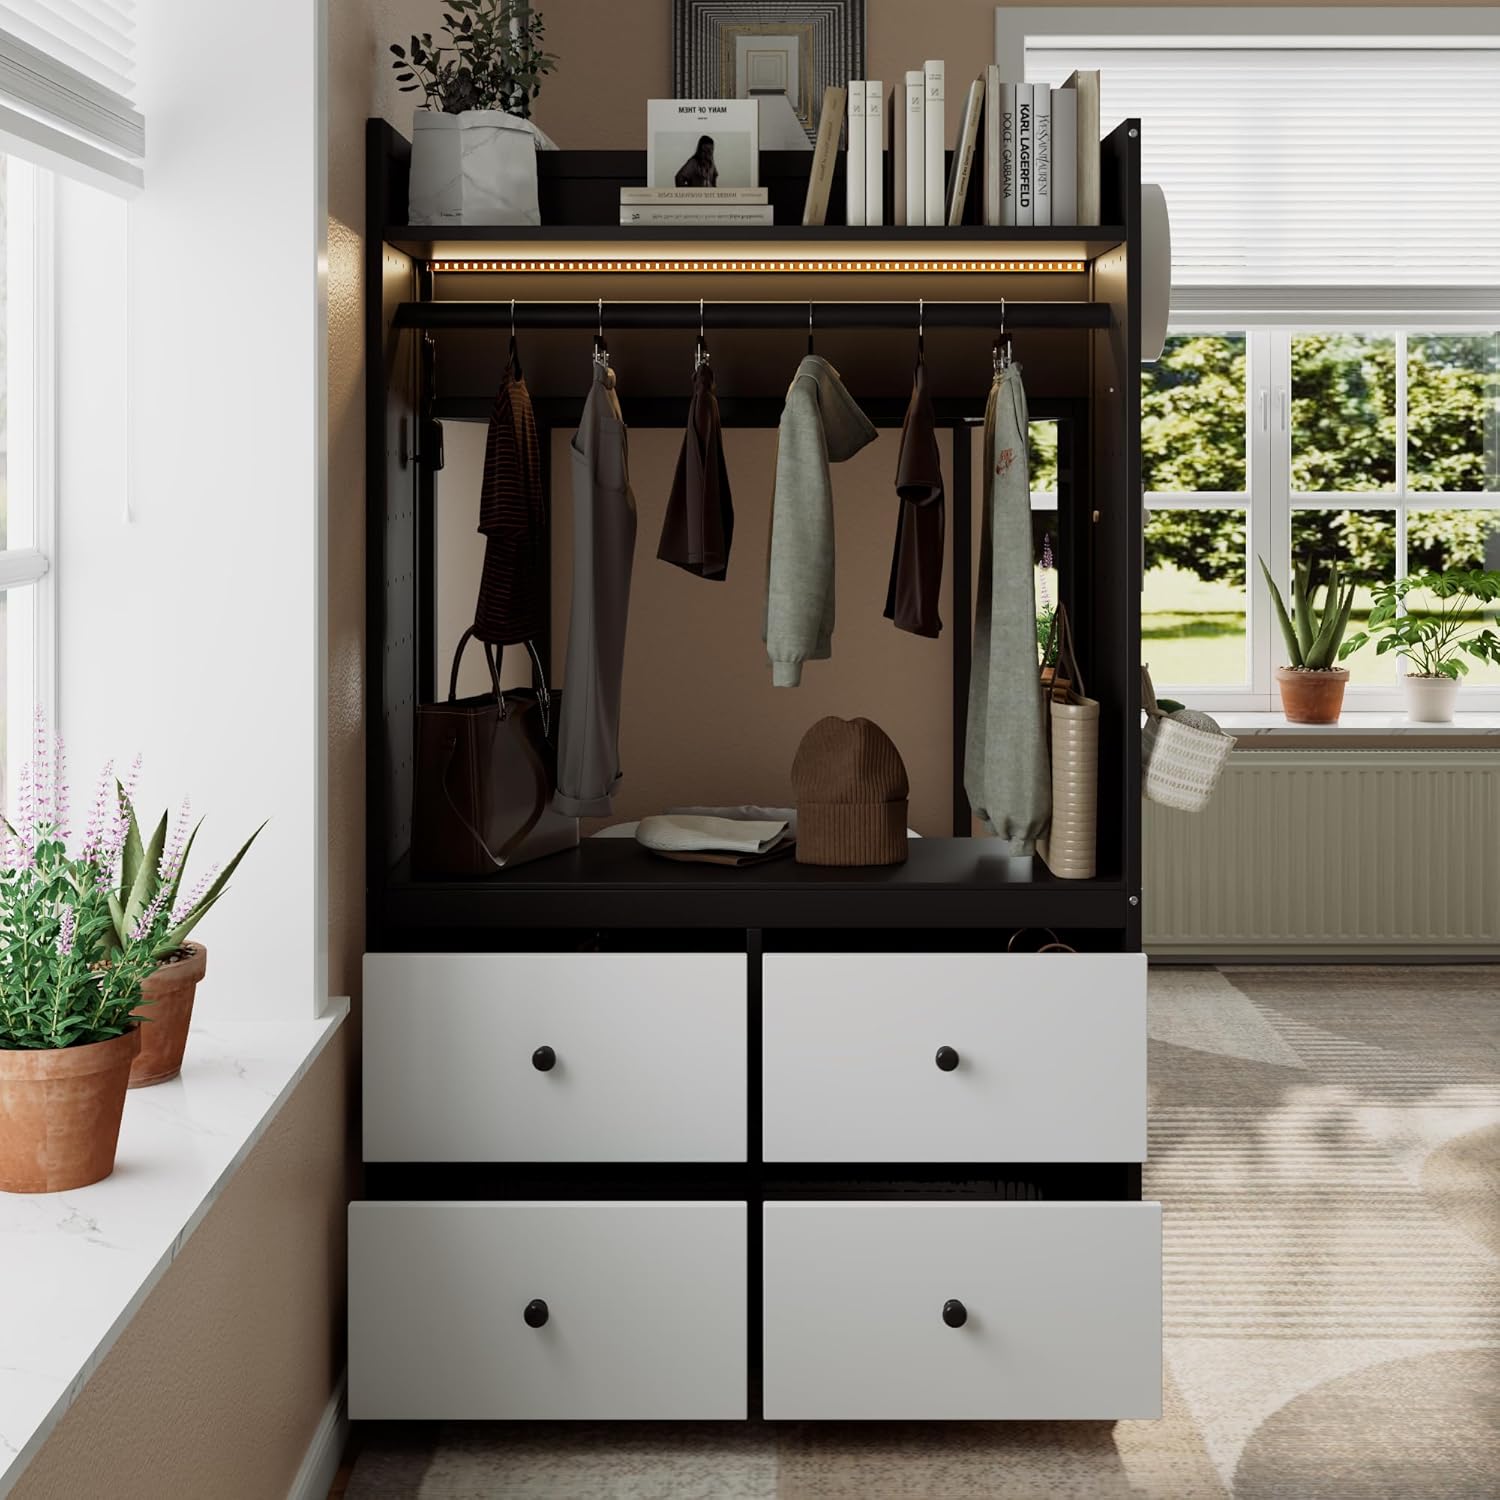
Abbildung: Innenraum view of the built-in wardrobe, showing clothes hanging on the rod, a top shelf, and the integrated light strip illuminating the space.

Bild: Detailliert view of one of the four storage drawers pulled open, revealing its interior and the drawer knob.
4.2 Integrated Light Strip
- Ein-/Ausschalten: The light strip is typically controlled by an inline switch or a remote control (if included). Refer to the light strip's specific instructions for operation.
- Helligkeits-/Farbanpassung: Some light strips offer adjustable brightness or color settings. Consult the light strip's manual for these features.

Image: Close-up of the light strip installed above the hanging rod inside the wardrobe, showing its connection cable.
5. Wartung
- Reinigung: Wischen Sie Oberflächen mit einem weichen, damp Mit einem Tuch abwischen. Vermeiden Sie aggressive Chemikalien oder Scheuermittel, die die Oberfläche beschädigen könnten.
- Überprüfung der Befestigungselemente: Periodically (every 3-6 months) inspect all bolts, screws, and fasteners to ensure they remain tight. Re-tighten as necessary to maintain structural integrity and prevent squeaking.
- Lichtstreifen: Keep the light strip free from dust. If the light strip malfunctions, consult the manufacturer's instructions for troubleshooting or replacement.
- Schubladenführungen: Falls die Schubladen schwergängig werden, tragen Sie eine kleine Menge Silikonschmiermittel auf die Schubladenschienen auf.
6. Fehlerbehebung
- Bettquietschen: Check all fasteners and tighten any loose connections. Ensure the bed is on a level surface.
- Drawers Stick/Don't Close Smoothly: Verify that the drawer slides are properly aligned and free of obstructions. Ensure drawers are not overloaded. Lubricate slides if necessary.
- Light Strip Not Working: Check the power connection and ensure the adapter is plugged into a working outlet. Verify the inline switch (if present) is in the 'on' position. If issues persist, the light strip may require replacement.
- Wackeliger Rahmen: Ensure all structural bolts are fully tightened. Check for uneven flooring and use shims if needed to stabilize the bed.
7. Spezifikationen
| Modellnummer | B0GLP7X6FT |
| Marke | polybi |
| Farbe | Schwarz |
| Größe | Zweibettzimmer |
| Material | Holz |
| Produktabmessungen (L x B x H) | 92.7" x 40" x 65" |
| Besondere Merkmale | Built-in Wardrobe, 4 Storage Drawers, Integrated Light Strip, Pegboard Organizer |

Image: Diagram illustrating the key dimensions of the Polibi Twin Size Bunk Bed, including length (92.7"), width (40"), and height (65").
8. Garantie und Support
Polibi products are manufactured with quality and care. For specific warranty details, please refer to the warranty card included with your purchase or visit the official Polibi webWebsite.
If you encounter any issues or require assistance with assembly, missing parts, or product operation, please contact Polibi customer support:
- WebWebsite: Besuchen Sie den Polibi Store auf Amazon
- E-Mail/Telefon: Refer to your purchase documentation or the Polibi webDie aktuellsten Kontaktinformationen finden Sie auf dieser Webseite.


