Einführung
Thank you for choosing the SHARDOR 64mm Flat Burr Commercial Coffee Grinder and 20 Bar Espresso Machine. This manual provides essential information for the safe and efficient operation, maintenance, and troubleshooting of your appliance. Please read it thoroughly before first use and keep it for future reference.
Wichtige Sicherheitshinweise
- WARNUNG: Lesen Sie vor der Verwendung des Geräts alle Anweisungen.
- Vor der Reinigung oder wenn das Gerät nicht benutzt wird, ziehen Sie immer den Netzstecker.
- Das Gerät, das Netzkabel und der Stecker dürfen nicht in Wasser oder andere Flüssigkeiten getaucht werden.
- Halten Sie Hände und Utensilien während des Betriebs von beweglichen Teilen fern.
- This appliance is for household and light commercial use only.
- Stellen Sie sicher, dass die LautstärketagDer auf dem Gerät angegebene Wert entspricht Ihrer örtlichen Stromversorgung.
- Betreiben Sie kein Gerät, dessen Kabel oder Stecker beschädigt ist, oder wenn das Gerät eine Fehlfunktion aufweist oder auf sonstige Weise beschädigt wurde.
- Bei der Benutzung von Geräten durch oder in der Nähe von Kindern ist eine genaue Aufsicht erforderlich.
Produkt überview
The SHARDOR coffee system combines a high-performance 64mm flat burr grinder with a professional 20-bar espresso machine, designed to deliver optimal coffee extraction and flavor.
Grinder Components:
- Bohnenbehälter
- 64mm Flat Burrs (SUS420 Stainless Steel)
- Grind Adjustment Dial (100 settings)
- Grinding Chamber (All-aluminum)
- Outlet schleifen
- Netzschalter
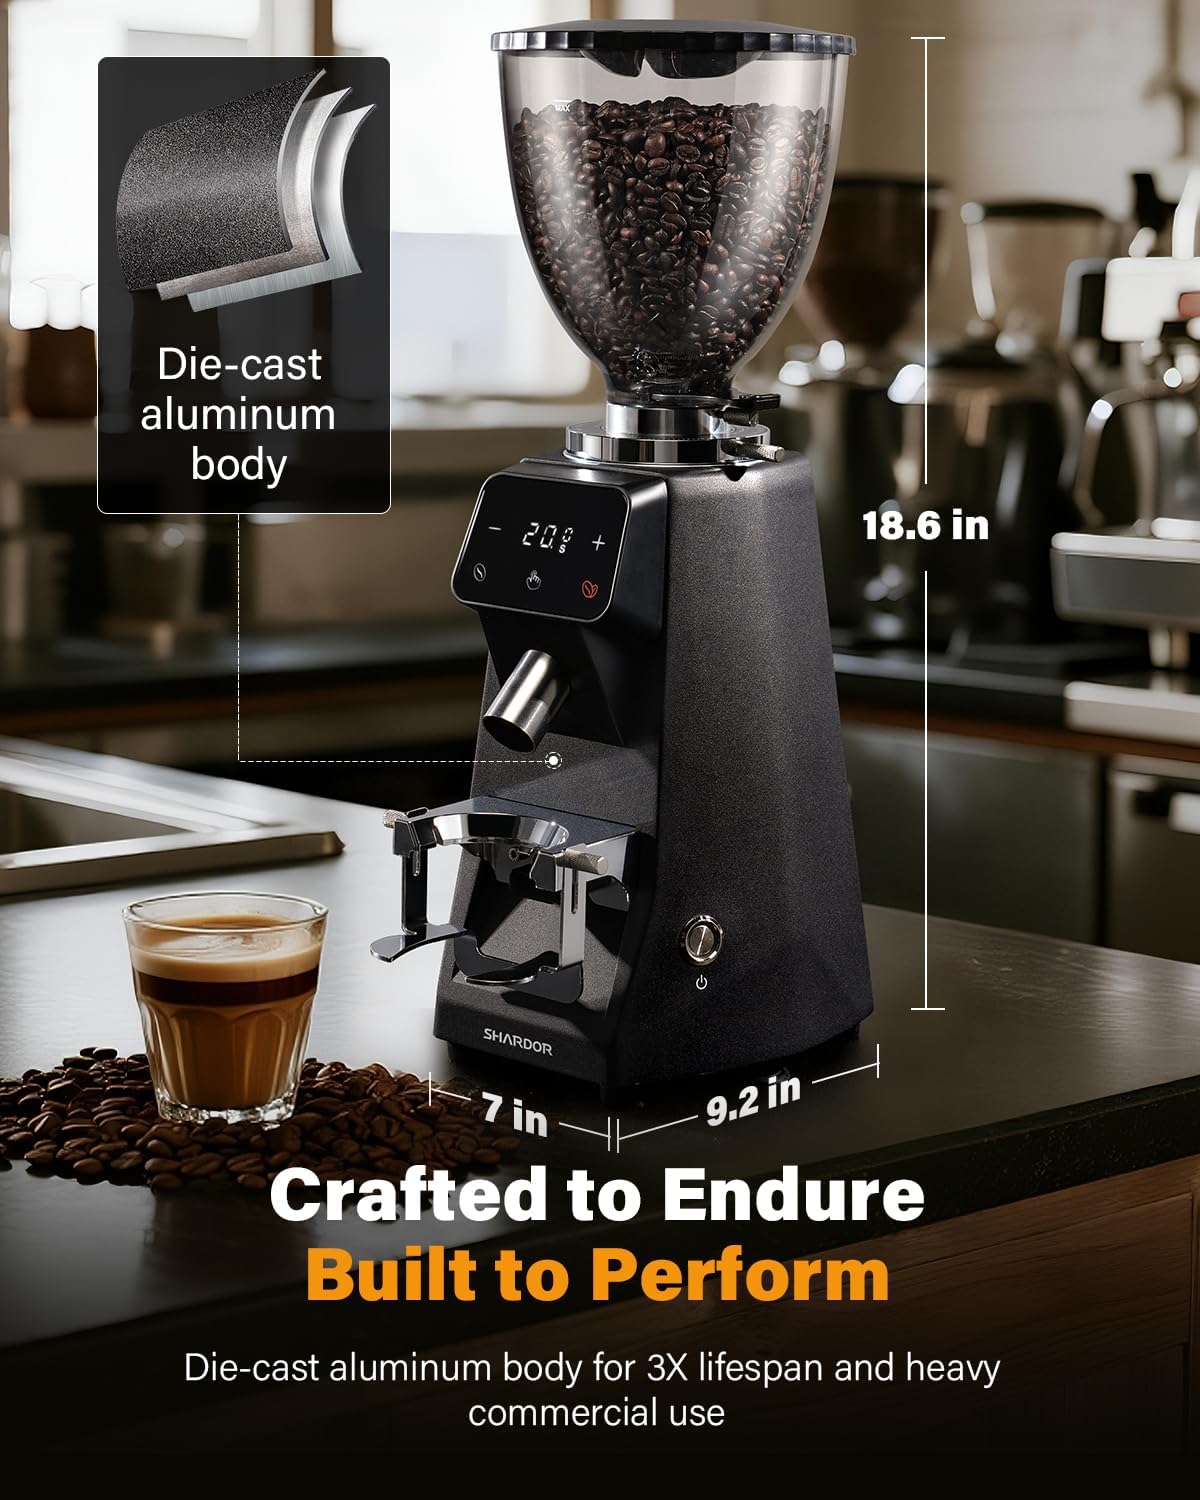
Abbildung 1: SHARDOR 64mm Flat Burr Grinder. This image shows the overall design and dimensions of the grinder, highlighting its die-cast aluminum body and bean hopper.
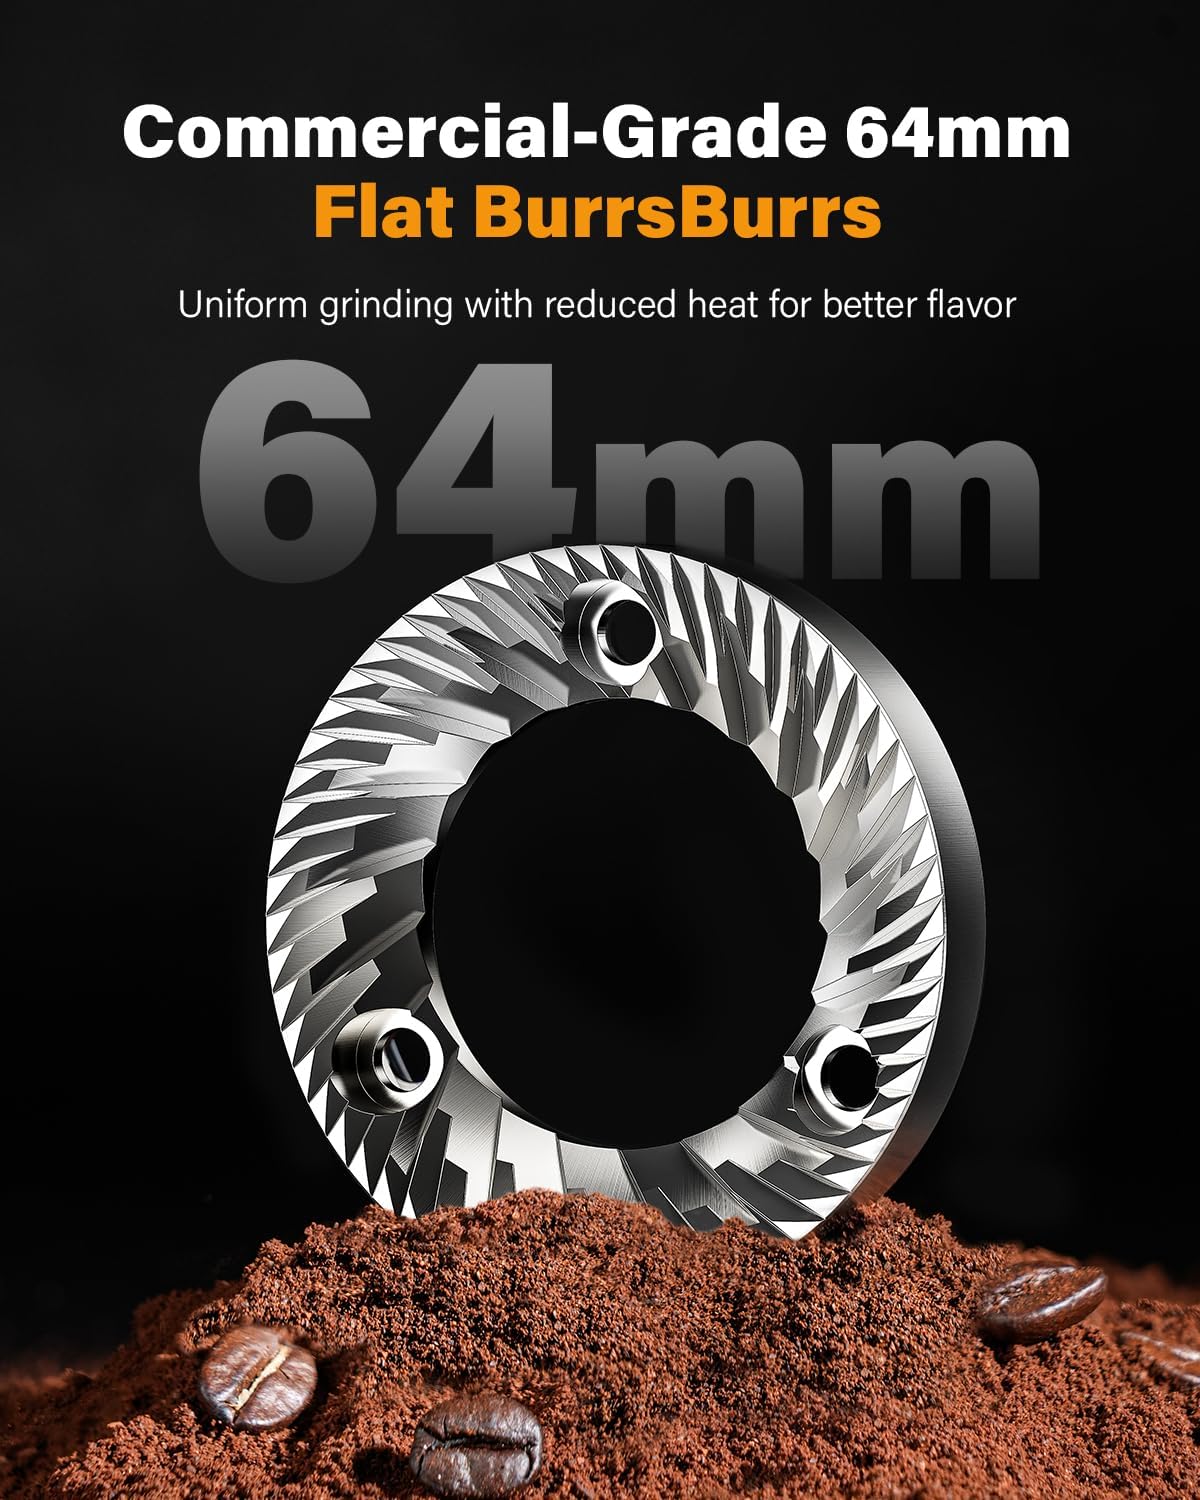
Abbildung 2: 64mm Flat Burr. A detailed view of the 64mm SUS420 stainless steel flat burrs, designed for consistent grinding and minimal heat buildup.
Espresso Machine Components:
- Wassertank
- Control Panel (LED display, One-Touch Touchscreen)
- Siebträgerhalter
- Dampfstab
- Tropfschale
- Netzschalter

Abbildung 3: SHARDOR 20 Bar Espresso Machine. This image displays the front view of the espresso machine, showing the control panel, portafilter, and steam wand.
Aufstellen
- Auspacken: Entnehmen Sie alle Komponenten vorsichtig aus der Verpackung. Bewahren Sie die Verpackung für spätere Transporte oder Lagerung auf.
- Platzierung: Place the grinder and espresso machine on a stable, level, and dry surface. Ensure adequate ventilation around both units.
- Erstreinigung:
- Wischen Sie die Außenseite beider Geräte mit einem Tuch ab.amp Tuch.
- Wash the bean hopper, portafilter, and water tank with warm, soapy water, then rinse thoroughly and dry.
- Run a cycle of plain water through the espresso machine without coffee to flush the internal system.
- Schleifmaschinenbaugruppe:
- Ensure the 64mm flat burrs are correctly seated.
- Attach the bean hopper securely to the top of the grinder.
- Espresso Machine Water Tank: Fill the water tank with fresh, cold filtered water up to the MAX line.
- Stromanschluss: Plug both the grinder and the espresso machine into grounded electrical outlets.
Bedienungsanleitung
A. Coffee Grinder Operation
- Kaffeebohnen hinzufügen: Pour whole roasted coffee beans into the bean hopper.
- Mahlgradeinstellung auswählen: Rotate the grind adjustment dial to select your desired fineness. The grinder offers 100 settings, from 1 (finest for espresso) to 100 (coarsest for French press). Refer to the guide below for common brewing methods.
- Kaffee mahlen: Place your portafilter or grind container under the grind outlet. Press the power button to start grinding. The grinder utilizes STO 2.0 Direct Grind Drop Technology to minimize static and retain freshness.
- Stoppen Sie das Schleifen: Press the power button again to stop grinding once the desired amount is achieved.
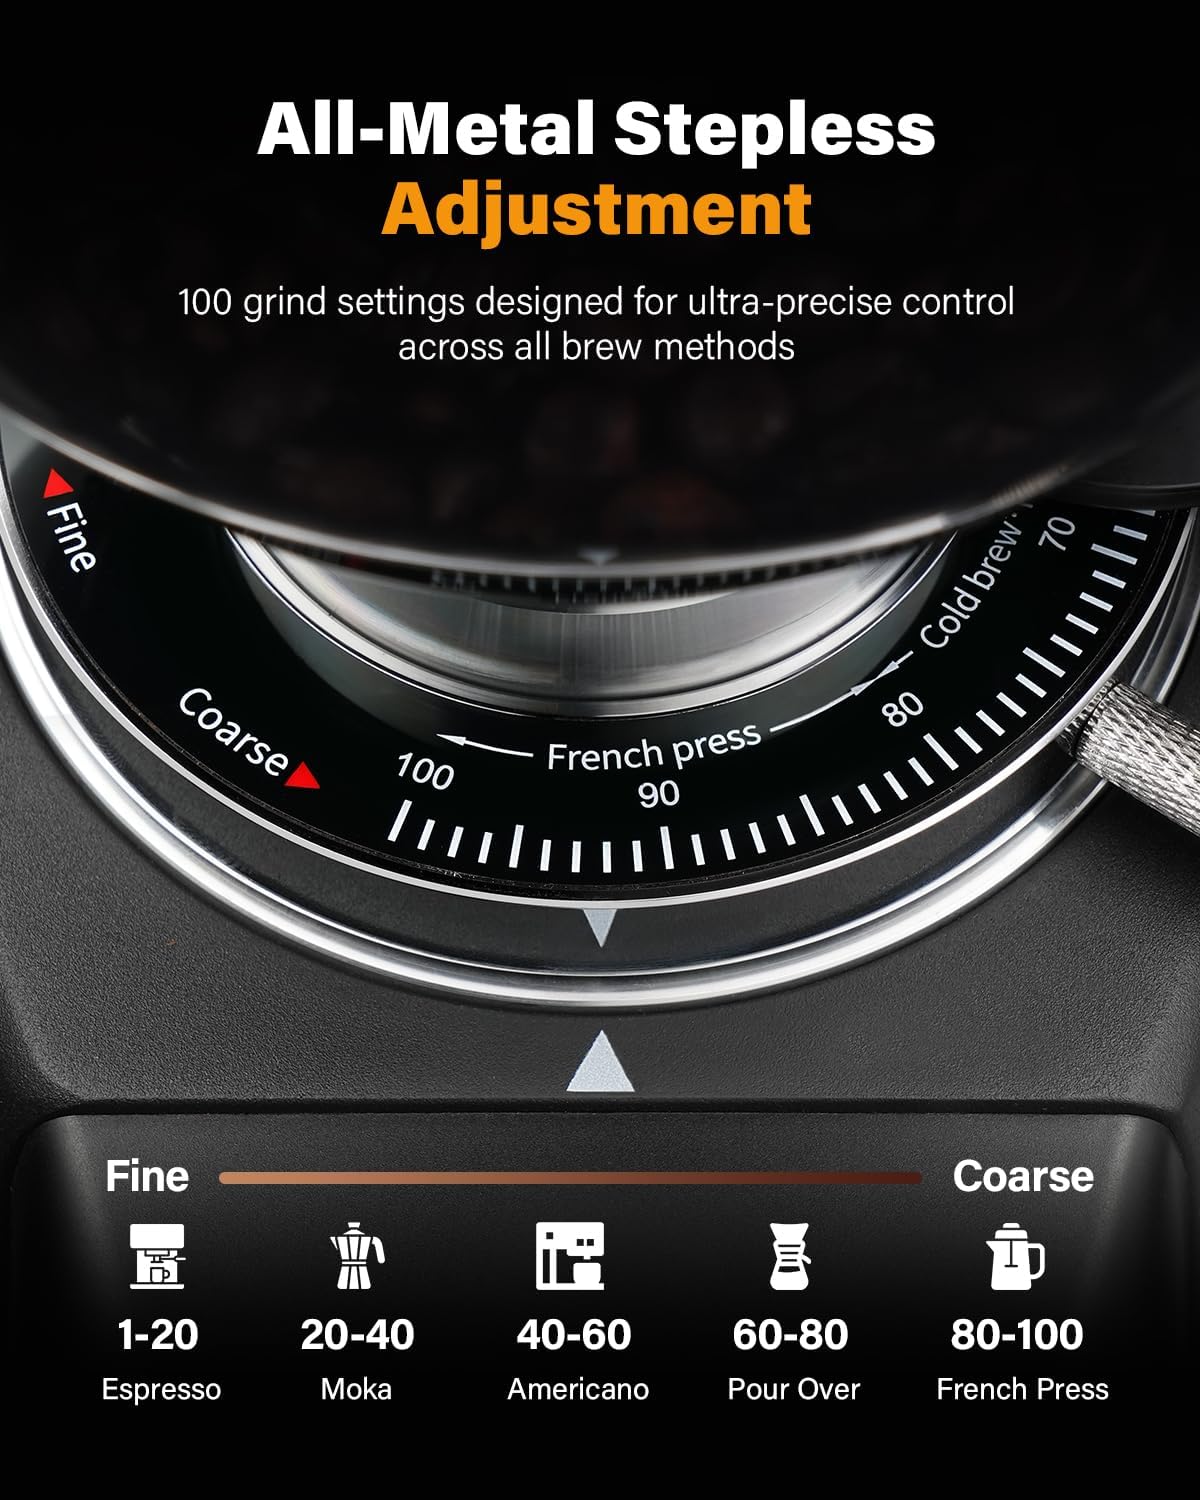
Abbildung 4: All-Metal Stepless Adjustment. This image illustrates the grind adjustment dial with 100 settings, indicating recommended ranges for various brewing methods like Espresso, Moka, Americano, Pour Over, and French Press.
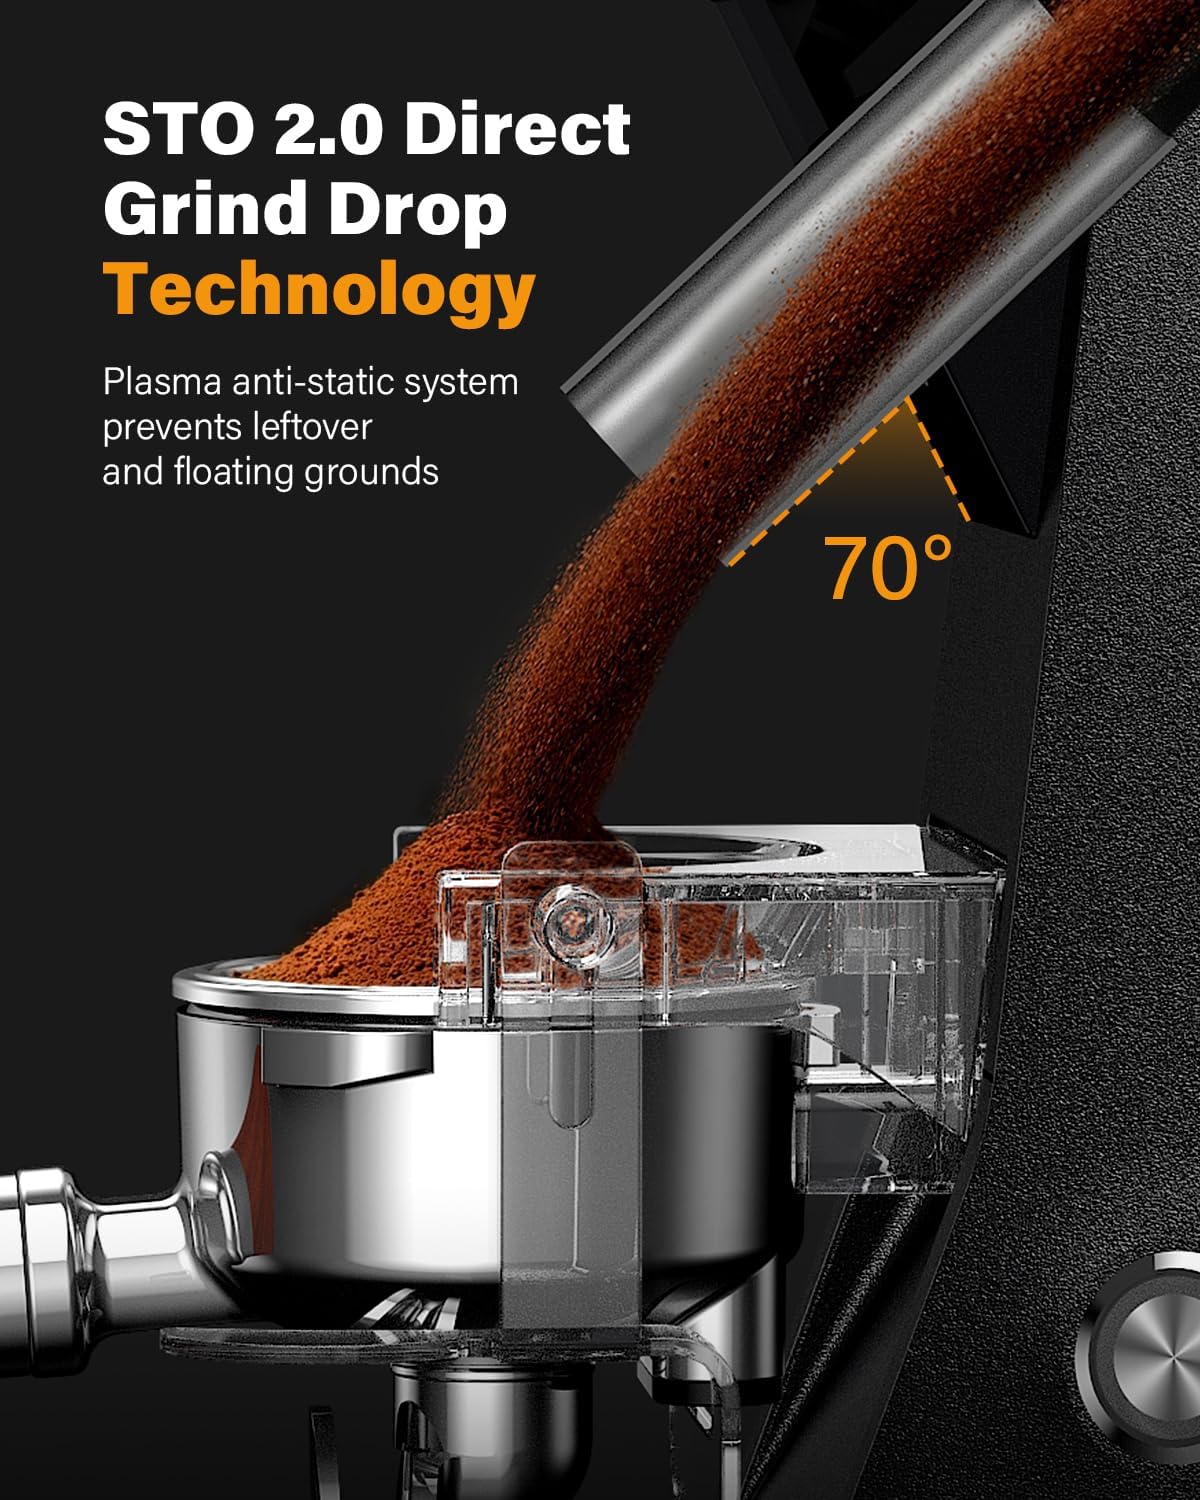
Abbildung 5: STO 2.0 Direct Grind Drop Technology. This image shows coffee grounds being dispensed directly into a portafilter, demonstrating the anti-static system and direct drop design.
B. Bedienung der Espressomaschine
- Einschalten: Press the ON/OFF button on the touchscreen. The machine will begin preheating.
- Vorwärmen: Wait for the machine to reach optimal brewing temperature. The LED display will indicate readiness.
- Siebträger vorbereiten: Fill the portafilter with freshly ground coffee and tamp it evenly. Attach the portafilter securely to the group head.
- Espresso zubereiten:
- Stellen Sie Ihre Tasse(n) auf die Abtropfschale.
- Select "1 CUP" for a single shot or "2 CUP" for a double shot on the touchscreen.
- For customized coffee strength, use the "MANUAL" mode to control the brewing time.
- The 20-bar pump system will extract the espresso.
- Adjust Temperature (NTC Precise Temperature Control): Use the temperature control settings on the touchscreen to select your preferred brewing temperature (198°F, 200°F, or 203°F) for balanced flavors.
- Steam Milk (Powerful Steam Wand):
- Press the "STEAM" button on the touchscreen. Wait for the steam indicator to light up.
- Immerse the steam wand tip just below the surface of cold milk in a frothing pitcher.
- Turn the steam knob to release steam and froth the milk to your desired texture.
- Turn off the steam knob and press the "STEAM" button again to stop.
- Wipe the steam wand immediately after use.
- Automatische Abschaltung: The machine will automatically shut off after 15 minutes of inactivity.

Abbildung 6: 20 Bar Professional Pump. This image illustrates the high-pressure extraction process, showing the rich crema produced by the 20-bar pump system.

Abbildung 7: NTC Precise Temperature Control. This image shows the LED display with temperature options, allowing users to select between low, middle, and high temperature modes for optimal brewing.

Abbildung 8: Powerful Steam Wand. This image demonstrates the steam wand in action, frothing milk in a pitcher for lattes and cappuccinos.
Wartung und Reinigung
Regular cleaning and maintenance ensure the longevity and optimal performance of your SHARDOR coffee system.
A. Grinder Cleaning
- Stecker ziehen: Trennen Sie die Mühle immer vom Netz, bevor Sie sie reinigen.
- Trichter leeren: Entfernen Sie alle restlichen Kaffeebohnen aus dem Trichter.
- Grate reinigen: Remove the upper burr and use a brush to clean both the upper and lower burrs.
- Saubere Mahlkammer: Use a brush or vacuum cleaner to remove coffee grounds from the grinding chamber and outlet.
- Außen abwischen: Wischen Sie die Außenseite mit adamp Tuch. Keine Scheuermittel verwenden.
B. Espresso Machine Cleaning
- Stecker ziehen: Always unplug the espresso machine before cleaning.
- Siebträger und Filterkörbe: Nach jedem Gebrauch mit warmem Seifenwasser waschen.
- Tropfschale: Leeren und reinigen Sie die Tropfschale regelmäßig.
- Dampfdüse: Wischen Sie die Dampfdüse nach jedem Gebrauch sofort mit einem feuchten Tuch ab.amp cloth to prevent milk residue buildup. Periodically, use a pin to clear any blockages in the steam nozzle.
- Wassertank: Spülen Sie den Wassertank regelmäßig aus und füllen Sie ihn mit frischem Wasser auf.
- Entkalkung: The machine features a "ONE-TOUCH DESCALE" function. Follow the instructions on the LED display or refer to the full descaling procedure in the comprehensive manual (if available) for detailed steps. Descale regularly based on water hardness and usage.
- Außen abwischen: Wischen Sie die Außenseite mit adamp Tuch.
Fehlerbehebung
| Problem | Mögliche Ursache | Lösung |
|---|---|---|
| Mahlwerk startet nicht | Not plugged in; Hopper not correctly seated; Power button not pressed. | Check power connection; Ensure hopper is locked in place; Press power button firmly. |
| No coffee grounds dispensed | Beans not in hopper; Grinding chamber blocked; Burrs clogged. | Add beans; Clean grinding chamber and burrs. |
| Espresso machine not turning on | Not plugged in; Power switch off. | Überprüfen Sie den Stromanschluss; Stellen Sie sicher, dass der Netzschalter eingeschaltet ist. |
| Kein Wasserdurchfluss aus der Gruppierung | Water tank empty; Pump airlocked; Machine not preheated. | Fill water tank; Run a hot water cycle to prime pump; Allow machine to preheat fully. |
| Schwacher Espresso / zu schnelle Extraktion | Grind too coarse; Insufficient coffee; Tampzu leicht. | Adjust grind to finer setting; Use more coffee; Tamp fester. |
| Kein Dampf aus der Lanze | Steam function not activated; Wand clogged. | Press "STEAM" button and wait for readiness; Clean steam wand nozzle. |
Technische Daten
- Mühlentyp: 64mm Flat Burr
- Material der Fräser: SUS420 Stainless Steel, Food-Grade
- Mahlgradeinstellungen: 100 levels (Stepless Adjustment)
- Grinder Housing: Aluminiumdruckguss
- Mahlkammer: Fully Aluminum
- Espresso Pump Pressure: 20 Bar Profipumpe
- Espresso Machine Power: 1350 W
- Temperaturkontrolle: NTC Precise Temperature Control (198°F, 200°F, 203°F)
- Steuerschnittstelle: One-Touch Touchscreen LED Display
- Automatische Abschaltung: 15 Minuten Inaktivität
- ASIN: B0FSSWNLDY
- Datum der Erstveröffentlichung: 20. September 2025
Garantie und Support
SHARDOR products are manufactured to high-quality standards. For warranty information, technical support, or customer service inquiries, please refer to the warranty card included with your purchase or visit the official SHARDOR webBitte halten Sie Ihre Modellnummer und das Kaufdatum bereit, wenn Sie sich an den Support wenden.
Official SHARDOR Store: Visit the SHARDOR Store on Amazon