
1. Einleitung
Welcome to the user manual for your new ASUS ROG Strix SCAR 16 G635LX-RW158WS gaming laptop. This document provides essential information for setting up, operating, maintaining, and troubleshooting your device. The ROG Strix SCAR 16 is engineered for high-performance gaming, featuring an Intel Core Ultra 9 processor, NVIDIA GeForce RTX 5090 graphics, and a high-refresh-rate display.

Figure 1.1: The ASUS ROG Strix SCAR 16 Gaming Laptop.
2. Lieferumfang
Upon unboxing your ASUS ROG Strix SCAR 16, please verify that all the following items are included:
- ASUS ROG Strix SCAR 16 Gaming Laptop
- Netzteil
- Benutzerhandbuch (dieses Dokument)
- Garantiedokumente
3. Produktüberschreitungview
The ASUS ROG Strix SCAR 16 is designed for peak gaming performance and productivity. Key features include:
- Prozessor: Intel Core Ultra 9 275HX with Intel AI Boost NPU
- Grafik: NVIDIA GeForce RTX 5090 Laptop GPU with 24GB GDDR7 RAM
- Anzeige: 16-inch, 2.5K (2560 x 1600) WQXGA, 240Hz Refresh Rate, 1200nits Brightness ROG Nebula HDR Display
- Erinnerung: 32 GB DDR5 RAM
- Lagerung: 2TB PCIe 4.0 NVMe M.2 Performance SSD
- Kühlung: ROG Intelligent Cooling with Vapor Chamber, Sandwiched Heatsink, Tri-Fan Technology, and Conductonaut Extreme Liquid Metal
- Tastatur: Backlit Chiclet Keyboard Per-Key RGB with Copilot key and Touchpad-based NumberPad
- Konnektivität: Wi-Fi 7, 2.5G LAN, Thunderbolt 5, HDMI 2.1, USB 3.2 Gen2 Type-A
- Audio: Schlau Amp Technology, 5.1.2 Channel Virtual Surround Sound, Two-Way AI Noise Cancelation
3.1 Kernkomponenten

Abbildung 3.1: Überview of the laptop's core specifications.
3.2-Kühlsystem
The ROG Intelligent Cooling system ensures optimal thermal performance, even during intense gaming sessions. It features an end-to-end Vapor Chamber, a sandwiched heatsink design, Tri-Fan Technology, and Conductonaut Extreme Liquid Metal for efficient heat dissipation.

Figure 3.2: ROG Intelligent Cooling system components.
3.3 Displaytechnologie
Experience stunning visuals with the ROG Nebula HDR display. This 16-inch Mini LED panel offers over 2000 dimming zones, 1200 nits peak brightness, a 240Hz refresh rate with 3ms response time, and 100% DCI-P3 color gamut coverage. It supports Dolby Vision, NVIDIA G-SYNC, and is VESA Certified DisplayHDR 1000.

Figure 3.3: ROG Nebula HDR Display specifications.
3.4 Konnektivität und Anschlüsse
The laptop offers comprehensive connectivity options for all your peripherals and networking needs, including Wi-Fi 7, 2.5G Ethernet, Thunderbolt 5, HDMI 2.1, and multiple USB ports.

Abbildung 3.4: Port-Layout und Anschlussmöglichkeiten.
3.5 Audiosystem
Enjoy immersive audio with Smart Amp Technology, 5.1.2 Channel Virtual Surround Sound, and Two-Way AI Noise Cancelation for clear communication.

Figure 3.5: Studio-quality sound features.
3.6 Tastatur und Touchpad
The full-size Chiclet keyboard features Per-Key RGB backlighting, dedicated gaming hotkeys, and a touchpad with an integrated NumberPad for enhanced functionality.

Figure 3.6: Keyboard and touchpad with NumberPad.
3.7 Aufrüstbarkeit
The laptop features a tool-less access design, allowing for easy upgrades. It supports up to 64GB 5600MHz DDR5 memory and up to 4TB PCIe 4.0 storage in RAID 0 configuration.
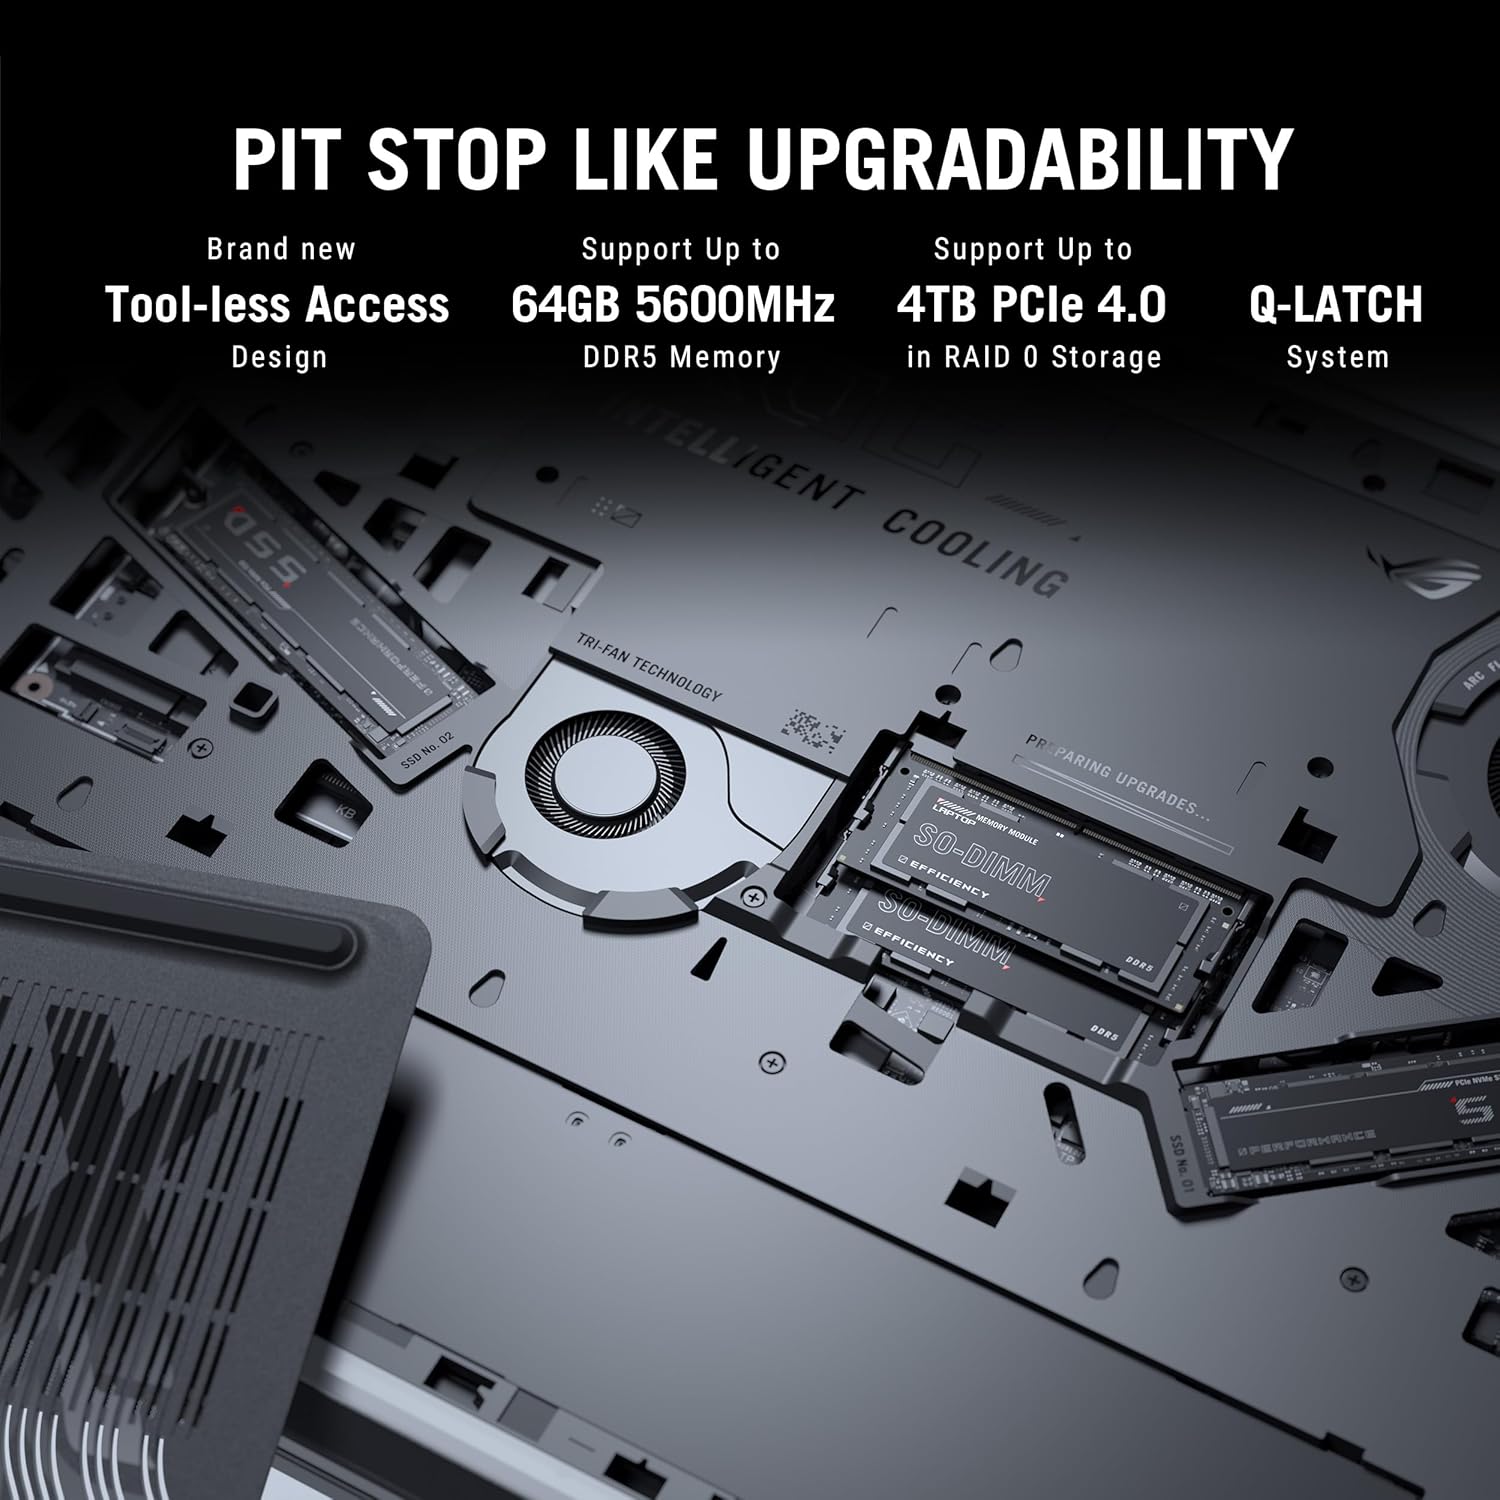
Figure 3.7: Internal components for upgradability.
4. Einrichtung
4.1 Erstes Einschalten
- Strom anschließen: Plug the power adaptor into the laptop's power port and then into a wall outlet. Ensure the power indicator light illuminates.
- Anzeige öffnen: Carefully open the laptop display to a comfortable viewing-Winkel.
- Einschalten: Drücken Sie den Netzschalter, der sich normalerweise oben rechts auf der Tastatur befindet.
- Ersteinrichtung: Folgen Sie den Anweisungen auf dem Bildschirm, um die Einrichtung von Windows 11 Home abzuschließen, einschließlich Sprachauswahl, Netzwerkverbindung und Erstellung des Benutzerkontos.
4.2 Anschließen von Peripheriegeräten
Connect external devices such as a mouse, keyboard, external display, or storage devices to the available USB, HDMI, or Thunderbolt ports as needed.
5. Bedienungsanleitung
5.1 Energieverwaltung
- Schlafmodus: Schließen Sie den Deckel oder drücken Sie kurz den Netzschalter, um in den Schlafmodus zu wechseln.
- Abschalten: Klicken Sie auf die Start-Taste, dann auf Ein/Aus > Ausschalten.
- Neustart: Klicken Sie auf die Schaltfläche „Start“, dann auf „Ein/Aus“ > „Neustart“.
5.2 Tastaturfunktionen
Nutzen Sie die Funktionstasten (F1-F12) in Kombination mit der Fn key for quick access to system controls such as volume, brightness, and wireless settings. The dedicated gaming hotkeys provide quick access to performance modes and other ROG-specific features.
5.3 Anzeigeeinstellungen
Adjust display settings through Windows Settings or the NVIDIA Control Panel for optimal gaming and visual experience. You can configure refresh rate, resolution, and color profiles.
6. Wartung
6.1 Reinigung
- Bildschirm: Benutzen Sie ein weiches, fusselfreies Tuch, dampMit Wasser oder einem Bildschirmreiniger abspülen. Scharfe Chemikalien vermeiden.
- Tastatur und Gehäuse: Verwenden Sie eine weiche Bürste oder Druckluft, um Staub zu entfernen. Wischen Sie Oberflächen mit einem leicht feuchten Tuch ab.amp Tuch.
- Vents: Regularly clean the cooling vents with compressed air to prevent dust buildup and maintain airflow.
6.2 Batteriepflege
- Vermeiden Sie häufiges vollständiges Entladen des Akkus.
- Bewahren Sie den Laptop an einem kühlen, trockenen Ort auf, wenn er längere Zeit nicht benutzt wird.
- For optimal battery longevity, consider using battery health management features available in ASUS software.
6.3 Softwareaktualisierungen
Regularly update your operating system, drivers (especially graphics drivers), and ASUS utilities to ensure optimal performance, security, and compatibility.
7. Fehlerbehebung
Dieser Abschnitt behandelt häufig auftretende Probleme. Bei komplexeren Problemen wenden Sie sich bitte an den ASUS-Support. webWebsite oder wenden Sie sich an den Kundendienst.
7.1 Stromversorgungsprobleme
- Laptop lässt sich nicht einschalten: Ensure the power adaptor is securely connected to both the laptop and a working power outlet. Check if the power adaptor's LED is lit. Try a different outlet.
- Akku wird nicht aufgeladen: Verify the power adaptor connection. Check for any physical damage to the adaptor or charging port.
7.2 Anzeigeprobleme
- Keine Anzeige auf dem Bildschirm: Connect an external monitor to check if the issue is with the laptop's internal display. Ensure the display cable (if external) is properly connected. Try pressing Fn + F8 (oder die entsprechende Anzeigetaste), um die Anzeigeausgabe umzuschalten.
- Flackernde oder verzerrte Anzeige: Aktualisieren Sie Ihre Grafiktreiber. Überprüfen Sie die Kabelverbindungen des Displays, falls Sie einen externen Monitor verwenden.
7.3 Leistungsprobleme
- Langsame Leistung: Close unnecessary applications. Check for background processes consuming high CPU/RAM. Ensure adequate ventilation and clean cooling vents. Update drivers.
- Überhitzung: Ensure the laptop is on a hard, flat surface to allow proper airflow. Clean the cooling vents. Consider using a laptop cooling pad.
8. Spezifikationen
Detailed technical specifications for the ASUS ROG Strix SCAR 16 G635LX-RW158WS.
| Besonderheit | Spezifikation |
|---|---|
| Marke | ASUS |
| Modellname | ROG Strix SCAR 16 |
| Modellnummer | G635LX-RW158WS |
| Prozessor | Intel Core Ultra 9 275HX (2.7 GHz, up to 5.4 GHz, 24 cores, 24 Threads) |
| Grafik | NVIDIA GeForce RTX 5090 Laptop GPU, 24GB GDDR7 RAM |
| Anzeige | 16-inch, 2.5K (2560 x 1600) WQXGA, 16:10, 240Hz, 1200nits, ROG Nebula HDR |
| Erinnerung | 32GB DDR5 RAM (Max 64GB) |
| Lagerung | 2TB PCIe 4.0 NVMe M.2 Performance SSD |
| Betriebssystem | Windows 11 Home |
| Tastatur | Backlit Chiclet Keyboard Per-Key RGB, Copilot key |
| WebNocken | 1080P FHD IR-Kamera für Windows Hello |
| Kabellose Konnektivität | Wi-Fi 7 (802.11.be), Bluetooth |
| Häfen | Thunderbolt 5 (USB Type-C), HDMI 2.1, USB 3.2 Gen2 Type-A, 2.5G Ethernet, Audio Jack |
| Batterie | 90 Wattstunden Lithium-Ionen |
| Abmessungen (Länge x Breite x Dicke) | 35.4L x 26.8W x 2.3Th Centimeters |
| Artikelgewicht | 2.8 Kilogramm |
9. Garantie und Support
9.1 Garantieinformationen
This genuine ASUS laptop comes with a 1-year Global Warranty and Onsite Domestic Warranty from ASUS, covering manufacturing defects. Physical damage is not covered. To activate your warranty, please register on the ASUS brand webWebsite.
9.2 Kundendienst
For product-related queries or immediate assistance, you can contact ASUS customer support:
- Gebührenfreie Nummer: 18002090365 (Monday - Saturday, 09:00 AM - 06:00 PM)
- E-Mail: rc_india@asus.com
- Online-Hilfe: Besuchen Sie den offiziellen ASUS-Support website for service centers and further assistance: www.asus.com/in/support

Figure 9.1: ASUS 4A Guarantee and support contact details.
10. Wichtige Hinweise
In den bereitgestellten Daten waren keine offiziellen Produktvideos zur Einbettung in dieses Handbuch verfügbar.