Einführung
This manual provides detailed instructions for the setup, operation, and maintenance of your Geevon Wireless Digital Refrigerator Thermometer. This device is designed to monitor temperatures in your refrigerator, freezer, or other environments using two wireless sensors, ensuring optimal storage conditions for your items.
Bitte lesen Sie diese Bedienungsanleitung vor der Verwendung des Produkts sorgfältig durch, um eine korrekte Funktion zu gewährleisten und seine Lebensdauer zu maximieren.
Packungsinhalt
Bitte überprüfen Sie nach dem Auspacken, ob alle Komponenten vorhanden und in einwandfreiem Zustand sind:
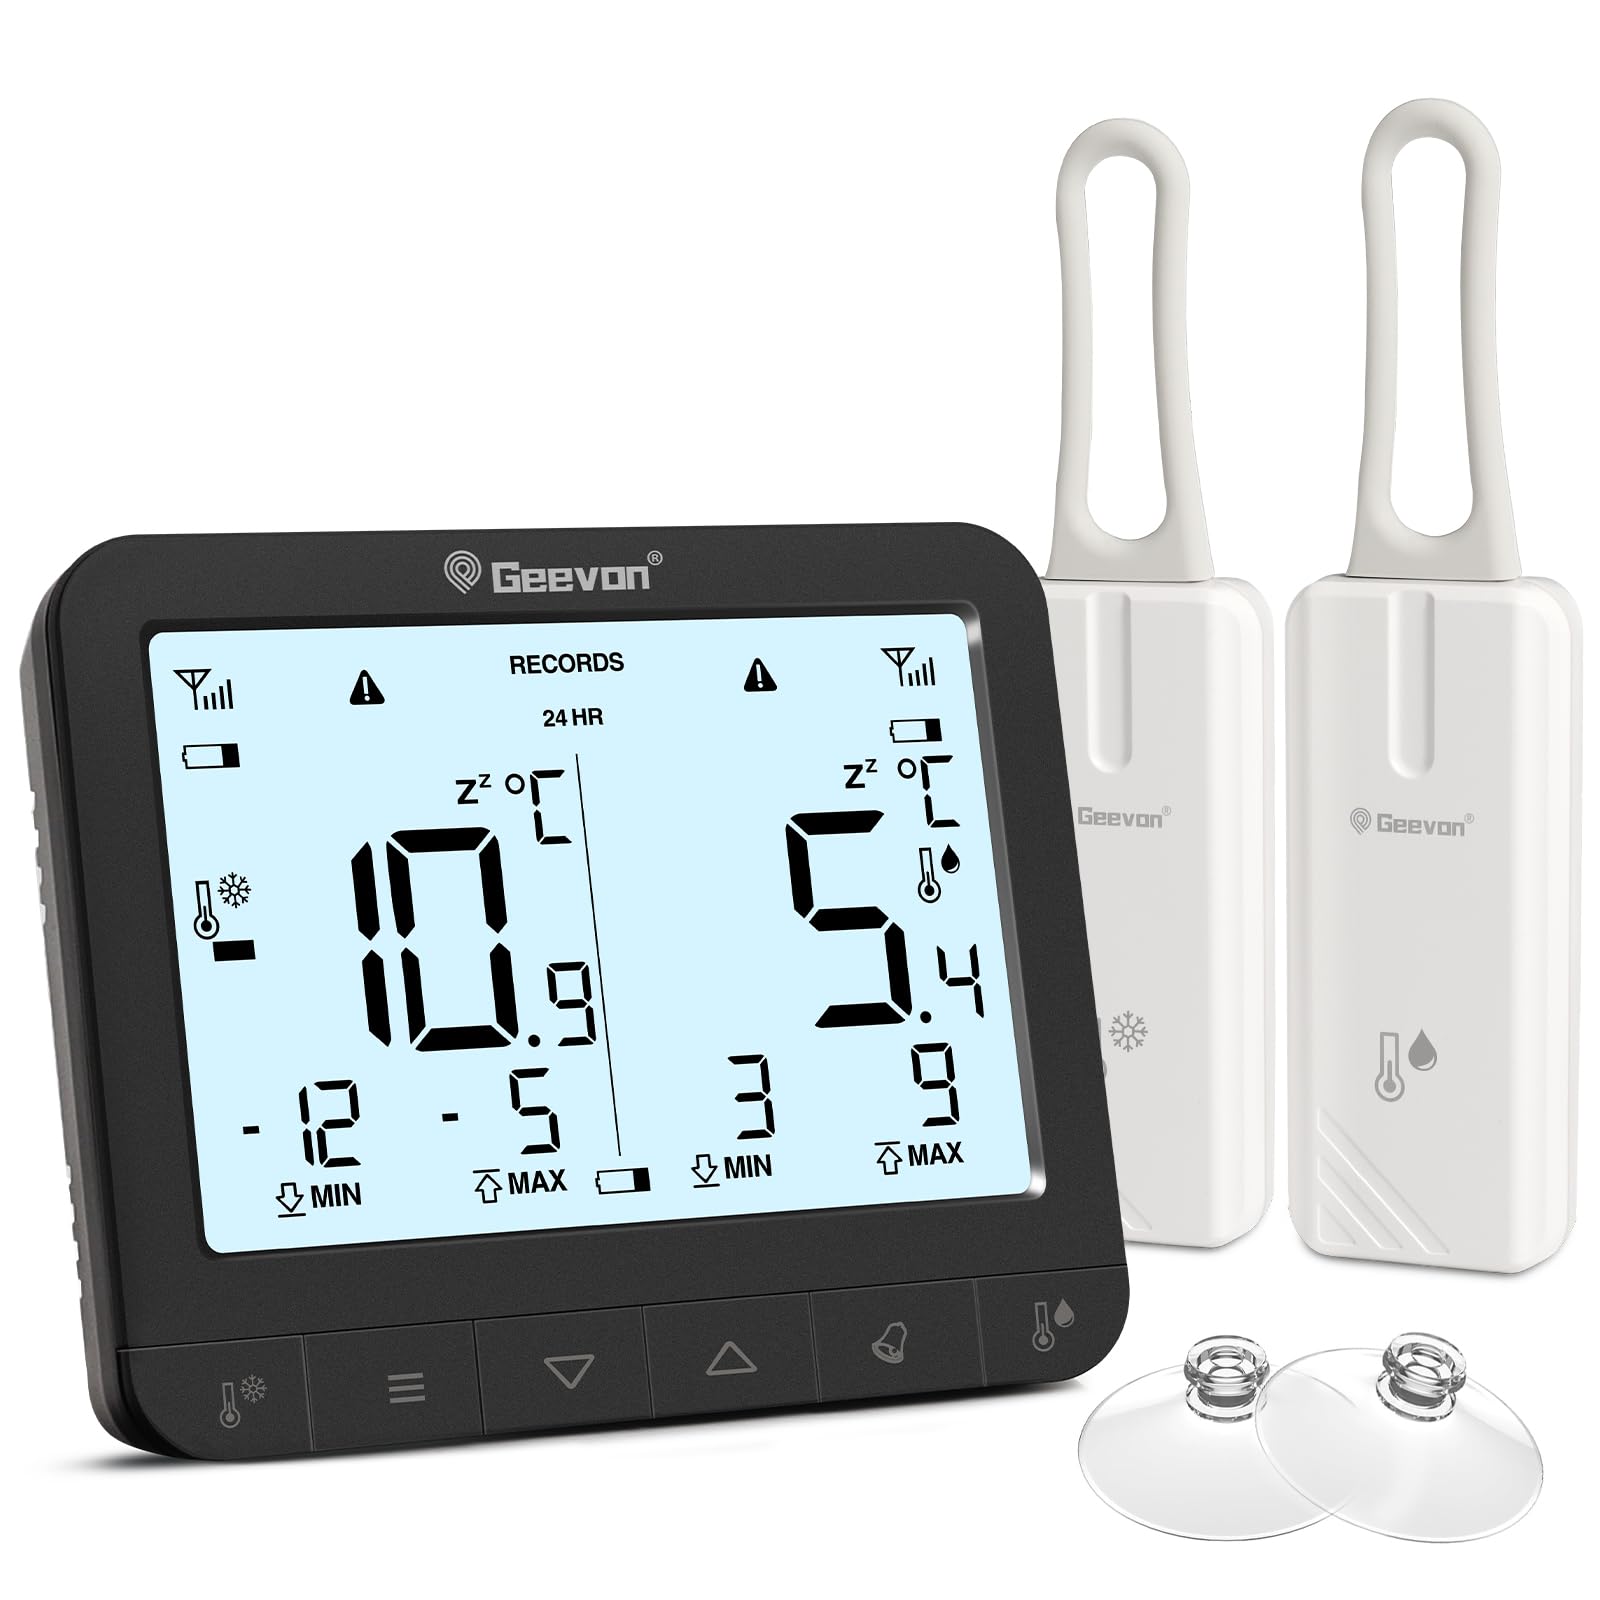
- 1 x Hauptanzeigeeinheit
- 2 x drahtlose Sensoren
- 6 x AAA Batteries (for main unit)
- 2 x CR2032 Batteries (pre-installed in sensors or included separately)
- 1 x Benutzerhandbuch (dieses Dokument)
- 2 x Suction Cups (for sensor mounting)

The image displays the main unit, two sensors, and accessories including suction cups for installation.
Installationsanweisungen
1. Einlegen der Batterie
Für die Hauptanzeigeeinheit:
- Suchen Sie das Batteriefach auf der Rückseite des Hauptgeräts.
- Öffnen Sie die Batterieabdeckung.
- Legen Sie 6 AAA-Batterien unter Beachtung der richtigen Polarität (+/-) ein.
- Schließen Sie die Batterieabdeckung fest.
For the Wireless Sensors:
- Locate the battery compartment on the back of each sensor.
- Öffnen Sie die Batterieabdeckung.
- Insert 1 CR2032 battery into each sensor, observing the correct polarity (+/-).
- Schließen Sie die Batterieabdeckung fest.
The image illustrates the battery compartments for both the main unit and the wireless sensors.
2. Sensorplatzierung
The wireless sensors can be placed inside your refrigerator, freezer, or any other area where temperature monitoring is desired. Ensure the sensors are not submerged in liquid and are placed in a location where they can transmit signals to the main unit.
- Hängend: Use the integrated loop to hang the sensor from a shelf or rack.
- Magnetische Befestigung: The sensors have built-in magnets for attachment to metallic surfaces.
- Saugnäpfe: Attach the provided suction cups to the sensor for mounting on smooth surfaces like glass or plastic.

This image demonstrates different ways to position the wireless sensors within a refrigerator or freezer.
The main display unit can be placed on a countertop using its integrated stand or mounted on a metallic surface using its rear magnets.
Bedienungsanleitung
Anzeige überview

The main display unit shows current temperatures for two channels, along with max/min records and status icons.
The display shows temperatures for two channels (CH1 and CH2), along with their respective maximum (MAX) and minimum (MIN) recorded temperatures. Signal strength indicators for each sensor and battery level indicators are also present.
1. Temperature Unit Selection (℃/℉)
On the back of the main display unit, locate the small "C/F" button. Press this button to toggle between Celsius (℃) and Fahrenheit (℉) temperature units.

This image highlights the C/F switch on the back of the main unit and other key features.
2. Max/Min Temperature Records
The display shows the maximum and minimum temperatures recorded over a 24-hour period. To view historical max/min records (since the last reset or power cycle), briefly press the "UP" or "DOWN" buttons on the main unit. To reset the max/min records, press and hold the "CLEAR" button (usually indicated by a trash can icon or similar) for a few seconds.
3. 2-Channel Alarm Setting
The thermometer allows you to set high and low temperature alarms for each channel.
- Briefly press the channel button (e.g., "CH1" or "CH2" button, or a general "Channel" button) to enter alarm setting mode for that channel.
- Use the "UP" and "DOWN" buttons to adjust the desired high and low temperature thresholds.
- Press and hold the "Alarm" button (often indicated by a bell icon) to toggle the alarm function ON or OFF for the selected channel.
- An audible alarm will sound if the temperature exceeds the set high threshold or falls below the set low threshold.

This image illustrates the alarm function, showing how to set upper and lower temperature limits for alerts.
4. Hintergrundbeleuchtungsfunktion
To illuminate the display for easier reading in low-light conditions, touch the light bulb icon on the top of the main unit. The backlight will activate for approximately 10 seconds.
Hauptmerkmale
- Zwei drahtlose Sensoren: Monitor two separate locations simultaneously.
- Großer Temperaturbereich: Misst Temperaturen von -40 °C bis 37 °C (-40 °F bis 98.6 °F).
- Max/Min-Aufzeichnung: Tracks the highest and lowest temperatures recorded over 24 hours or historically.
- Akustische Alarme: Alerts you when temperatures exceed or fall below preset thresholds.
- Anzeige für niedrigen Batteriestand: Displays icons for low battery on both the main unit and sensors.
- Hintergrundbeleuchtung: Provides temporary illumination for clear reading in dim environments.
- Vielseitige Platzierung: Main unit features a stand and magnets; sensors can be hung, magnetically attached, or secured with suction cups.
The thermometer is suitable for various applications, including refrigerators, freezers, and wine coolers.
Wartung
- Reinigung: Wischen Sie das Hauptgerät und die Sensoren mit einem weichen, fusselfreien Tuch ab.amp Reinigen Sie die Geräte mit einem Tuch. Verwenden Sie keine Scheuermittel und tauchen Sie die Geräte nicht in Wasser.
- Batteriewechsel: Replace batteries promptly when the low battery indicator appears on the display. Refer to the "Battery Installation" section for instructions.
- Lagerung: Bei längerer Lagerung des Geräts sollten alle Batterien entfernt werden, um ein Auslaufen zu verhindern. An einem kühlen, trockenen Ort aufbewahren.
Anzeige für niedrigen Batteriestand
The display unit features separate low battery indicators for the main unit and each sensor. When a battery icon appears, it indicates that the corresponding battery needs replacement.

This image highlights the low battery indicators for the sensors and the main display unit.
Fehlerbehebung
| Problem | Mögliche Ursache | Lösung |
|---|---|---|
| Kein Display am Hauptgerät. | Die Batterien sind leer oder falsch eingelegt. | Prüfen Sie die Batteriepolarität und ersetzen Sie die Batterien durch neue AAA-Batterien. |
| Sensor reading "---" or inaccurate. | Sensor batteries are dead, sensor is out of range, or interference. | Replace sensor CR2032 batteries. Move sensor closer to the main unit. Avoid placing near large metal objects or electronics that may cause interference. |
| Alarm ertönt nicht. | Alarm function is off or thresholds are set too wide. | Ensure the alarm is enabled for the desired channel. Adjust alarm thresholds to appropriate levels. |
| Hintergrundbeleuchtung funktioniert nicht. | Die Batterien der Haupteinheit sind schwach oder leer. | Replace main unit AAA batteries. |
Technische Daten
| Marke | Geevon |
| Modellnummer | 86218 |
| Produktabmessungen (Haupteinheit) | 16 x 4.8 x 17.5 cm (6.3 x 1.9 x 6.9 Zoll) |
| Gewicht | 310 Gramm (0.68 Pfund) |
| Stromversorgung des Hauptgeräts | 6 x AAA-Batterien (im Lieferumfang enthalten) |
| Sensorleistung | 1 x CR2032 Battery per sensor (included) |
| Temperaturbereich | -40 °C bis 37 °C (-40 °F bis 98.6 °F) |
| Messgenauigkeit | ± 0.1 ℉/℃ |
| Anzeigetyp | Digital LCD |
| Besondere Merkmale | Low Battery Indicator, Backlit Display, Max/Min Record, 2-Channel Alarm |
| Material | Acrylnitril-Butadien-Styrol (ABS) |
Garantie und Support
Geevon is committed to providing high-quality products. For any questions, issues, or support needs regarding your Geevon Refrigerator Thermometer, please contact our customer service. We offer lifetime consultation service for our products.
Please refer to your purchase documentation or the official Geevon webDie genauen Garantiebedingungen und Kontaktinformationen finden Sie auf der Webseite.
Online-Hilfe: Contact Seller (GEEVON UK)