1. Einleitung
The S25HH0 303DH US KVM Switch allows you to control up to three computers using a single set of keyboard, mouse, and three monitors. This device supports high-resolution video output and USB 3.0 peripheral sharing, enhancing productivity in multi-computer environments.
Please read this manual thoroughly before installation and operation to ensure proper use and to maximize the performance of your KVM switch.
2. Sicherheitshinweise
- Stellen Sie sicher, dass der KVM-Switch auf einer stabilen, ebenen Fläche steht.
- Das Gerät darf weder Wasser, Feuchtigkeit noch extremen Temperaturen ausgesetzt werden.
- Verwenden Sie ausschließlich das mitgelieferte Netzteil. Die Verwendung eines falschen Netzteils kann das Gerät beschädigen und zum Erlöschen der Garantie führen.
- Vermeiden Sie es, die Lüftungsöffnungen zu blockieren, um eine Überhitzung zu vermeiden.
- Versuchen Sie nicht, das Gerät selbst zu öffnen oder zu reparieren. Überlassen Sie alle Wartungsarbeiten qualifiziertem Fachpersonal.
- Disconnect power before cleaning. Clean the device with a soft, dry cloth.
3. Packungsinhalt
Bitte überprüfen Sie den Paketinhalt nach Erhalt. Sollten Artikel fehlen oder beschädigt sein, kontaktieren Sie bitte Ihren Händler.
- S25HH0 303DH US Triple Monitor KVM Switch
- Netzteil
- Kabelgebundener Fernschalter
- USB 3.0 Cables (Quantity may vary based on package)
- HDMI Cables (Quantity may vary based on package)
- Benutzerhandbuch (dieses Dokument)
4. Produktüberschreitungview
The KVM switch features multiple ports for connecting your computers, monitors, and USB peripherals. Familiarize yourself with the port layout before proceeding with installation.

Bild: Vorne und hinten view of the S25HH0 303DH US KVM Switch. This image illustrates the various input and output ports, including HDMI, USB 3.0, and the power input, along with the physical switch buttons for PC selection.
Vorderseite
- PC Selection Buttons: Dient zum manuellen Umschalten zwischen angeschlossenen Computern.
- USB 3.0 Ports: For connecting keyboard, mouse, and other USB 3.0 peripherals.
- LED-Anzeigen: Show which computer is currently selected.
Rückseite
- HDMI Input Ports (PC1, PC2, PC3): Schließen Sie es an den HDMI-Ausgang Ihres Computers an.
- USB 3.0 Input Ports (PC1, PC2, PC3): Connect to the USB 3.0 ports of your computers.
- HDMI Output Ports (Monitor 1, Monitor 2, Monitor 3): Connect to your monitors.
- DC 12V Stromeingang: Schließen Sie das mitgelieferte Netzteil an.
- Remote Switch Port: Connect the wired remote control for switching.
5. Einrichtungsanweisungen
Befolgen Sie diese Schritte, um Ihren KVM-Switch anzuschließen:
- Geräte ausschalten: Stellen Sie sicher, dass alle Computer und Monitore ausgeschaltet sind, bevor Sie Verbindungen herstellen.
- Monitore anschließen: Connect your three monitors to the HDMI Output ports (Monitor 1, Monitor 2, Monitor 3) on the KVM switch using HDMI cables.
- Computer verbinden (PC1):
- Connect the HDMI output from your first computer to the HDMI Input (PC1) on the KVM switch.
- Connect a USB 3.0 cable from your first computer's USB 3.0 port to the USB 3.0 Input (PC1) on the KVM switch.
- Computer verbinden (PC2 & PC3): Repeat step 3 for your second and third computers, connecting them to the respective HDMI Input (PC2/PC3) and USB 3.0 Input (PC2/PC3) ports.
- Peripheriegeräte anschließen: Connect your keyboard, mouse, and any other USB 3.0 peripherals to the USB 3.0 ports on the front panel of the KVM switch.
- Anschluss einer kabelgebundenen Fernbedienung (optional): If desired, connect the wired remote switch to the dedicated port on the KVM switch.
- Einschalten: Connect the provided 12V power adapter to the DC 12V input on the KVM switch, then plug it into a power outlet.
- Geräte einschalten: Power on your monitors, then power on your computers.

Bild: Connection diagram illustrating how two PCs share four USB 3.0 devices and multiple monitors through the KVM switch. This highlights the USB 3.0 ports for peripherals like keyboards, mice, and printers.
6. Bedienungsanleitung
6.1 Wechseln zwischen Computern
Sie können mit zwei Methoden zwischen den verbundenen Computern wechseln:
- Physischer Tastenschalter: Press the corresponding PC selection button (PC1, PC2, or PC3) on the front panel of the KVM switch. The LED indicator will light up for the selected computer.
- Kabelgebundener Fernschalter: Use the wired remote control to switch between computers. Press the button on the remote to cycle through the connected PCs.
Bild: Two switching methods for the KVM switch: the physical buttons on the device and the external wired remote control. This illustrates the flexibility in controlling which computer is active.
6.2 Display Modes (Extend Mode / Copy Mode)
After connecting correctly, you can choose your desired display mode:
- Drücken "Windows + P" auf Ihrer Tastatur.
- A pop-up window will appear, allowing you to select between display modes such as Verlängern or Duplicate (Copy).

Bild: Comparison of Extend Mode and Copy Mode. In Extend Mode, each monitor displays unique content, expanding the desktop. In Copy Mode, all three monitors display the same content, duplicating the desktop.
6.3 USB 3.0 Gerätefreigabe
The KVM switch allows up to four USB 3.0 devices to be shared between the connected computers. When you switch to a different computer, the connected USB peripherals (keyboard, mouse, USB drives, etc.) will automatically switch to that computer.
USB 3.0 offers a faster transfer rate of 5Gbps compared to USB 2.0's 480Mbps, ensuring efficient data transfer for your peripherals.
7. Display Resolution and Refresh Rate
The KVM switch supports high-resolution video outputs, ensuring a clear and smooth visual experience.
- DisplayPort (DP1.4) Support: Up to 8K@30Hz, 4K@144Hz, 4K@120Hz. Backward compatible with lower resolutions and refresh rates.
- HDMI (HDMI2.1) Support: Up to 8K@60Hz, 4K@120Hz. Backward compatible with lower resolutions and refresh rates.
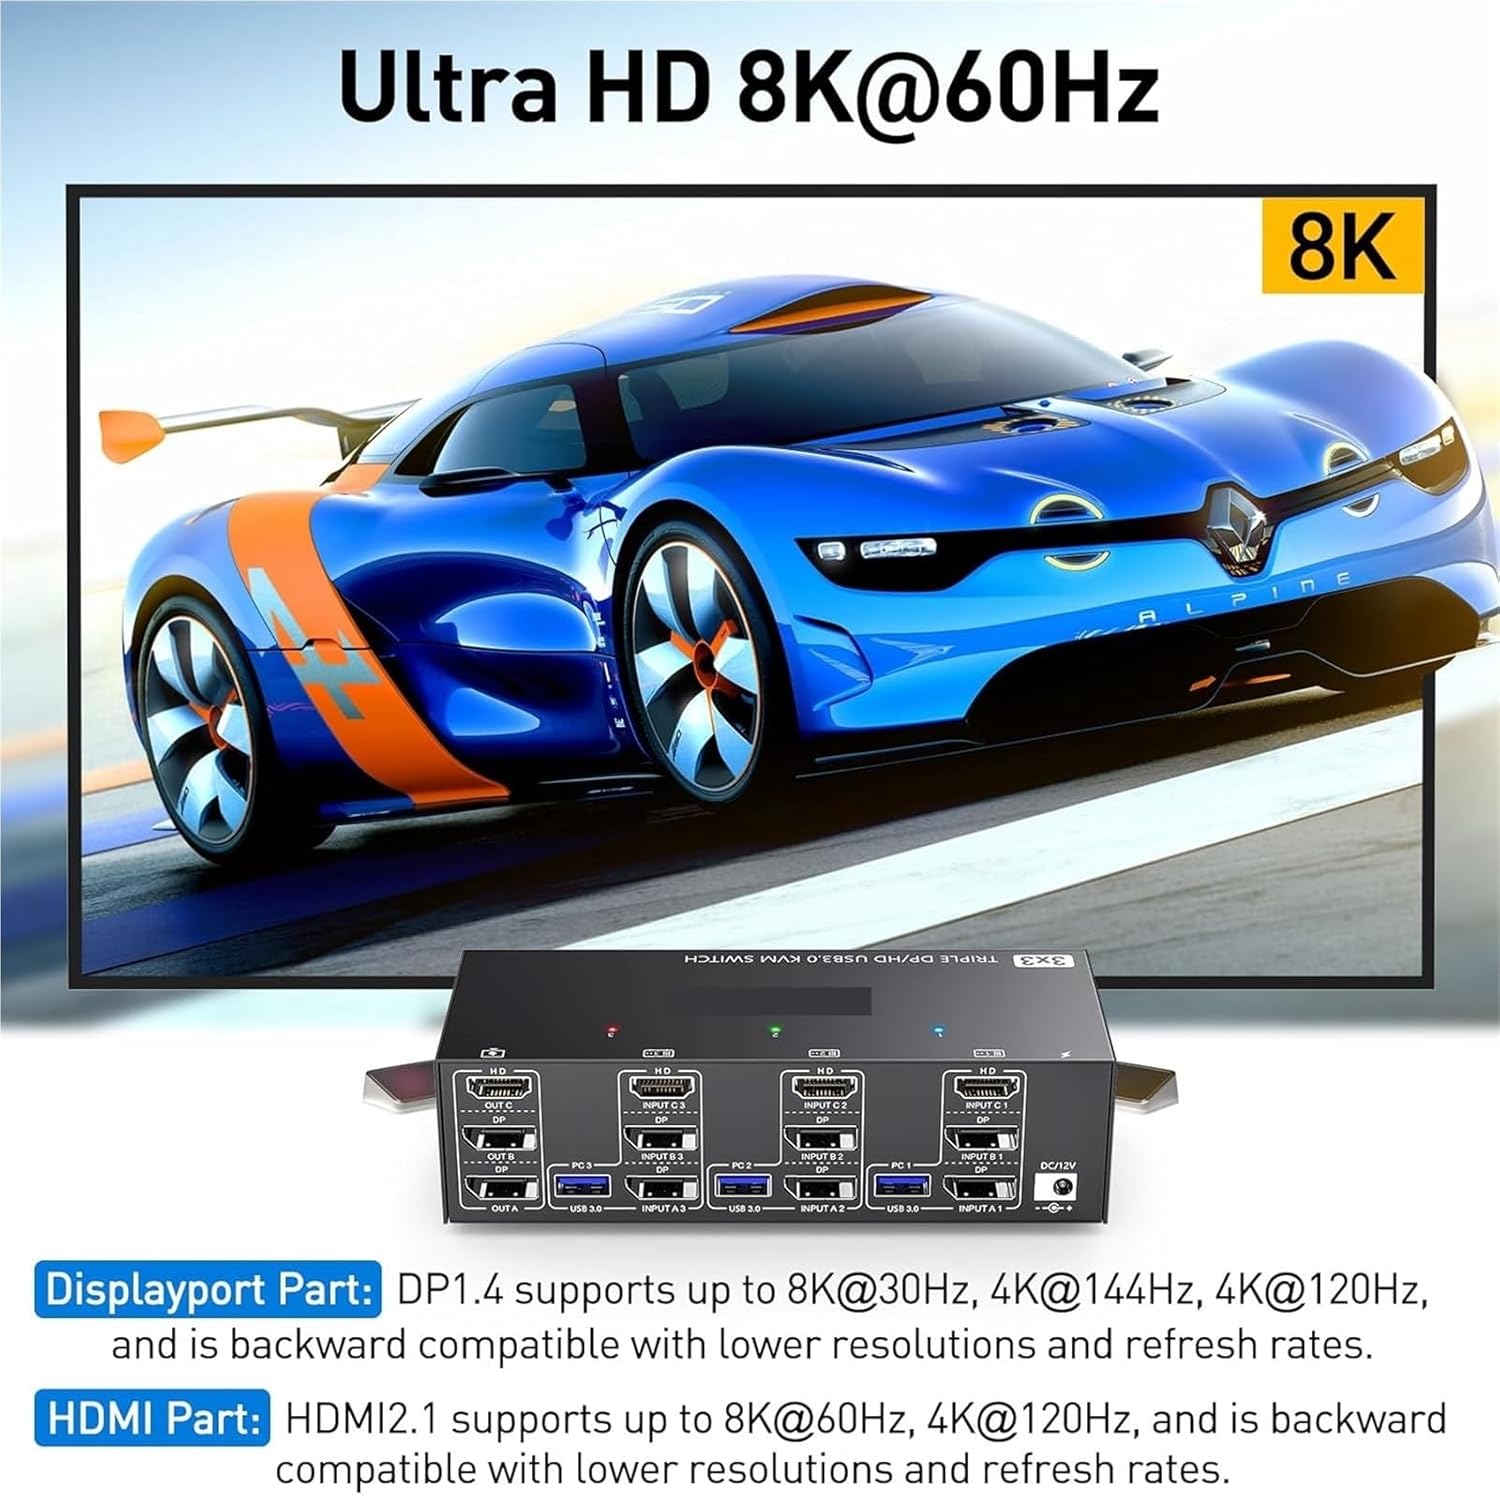
Bild: Visual representation of Ultra HD 8K@60Hz capability. This image details the supported resolutions and refresh rates for both DisplayPort 1.4 and HDMI 2.1 connections, emphasizing high-quality video output.
8. Wartung
- Keep the KVM switch in a cool, dry place away from direct sunlight.
- Regularly clean the exterior of the device with a soft, dry, lint-free cloth.
- Do not use liquid or aerosol cleaners, as they may contain flammable substances or chemicals that can damage the device.
- Stellen Sie sicher, dass alle Kabel fest angeschlossen und frei von Knicken oder Beschädigungen sind.
9. Fehlerbehebung
Sollten Sie Probleme mit Ihrem KVM-Switch haben, beachten Sie bitte die folgenden häufig auftretenden Probleme und Lösungen:
| Problem | Mögliche Ursache/Lösung |
|---|---|
| Keine Anzeige auf den Monitoren. |
|
| Keyboard or mouse not working. |
|
| Cannot switch between computers. |
|
| Schlechte Videoqualität oder Flimmern. |
|
10. Spezifikationen
| Besonderheit | Spezifikation |
|---|---|
| Marke | S25HH0 |
| Modell | 303DH US |
| Eingangsanschlüsse | 3 x HDMI, 3 x USB 3.0 |
| Ausgangsanschlüsse | 3 x HDMI, 4 x USB 3.0 |
| Videonorm | HDMI 2.1, DisplayPort 1.4 (backward compatible) |
| Maximale Auflösung (HDMI) | 8K@60Hz, 4K@120Hz |
| Maximale Auflösung (DisplayPort) | 8K@30Hz, 4K@144Hz, 4K@120Hz |
| USB-Standard | USB 3.0 (5 Gbit/s) |
| Kontrollmethode | Physical Button, Wired Remote |
| Betriebslautstärketage | 12 Volt |
| Artikelgewicht | 50 Gramm |
| Zertifizierungen | CE, RoHS |
11. Garantie und Support
This product comes with a standard manufacturer's warranty. Please refer to the warranty card included in your package or contact your retailer for specific warranty terms and conditions.
For technical support or further assistance, please contact your vendor or the manufacturer's customer service. Contact information can typically be found on the product packaging or the manufacturer's official webWebsite.