1. Sicherheitshinweise
Bitte lesen Sie vor Installation und Inbetriebnahme alle Anweisungen sorgfältig durch. Die Nichtbeachtung dieser Anweisungen kann zu Schäden am Produkt oder Fahrzeug sowie zu Verletzungen führen. Bewahren Sie diese Anleitung zum späteren Nachschlagen auf.
- Ensure the vehicle's ignition is off and the negative battery terminal is disconnected before installation to prevent electrical shorts.
- Wenn Sie sich bei einzelnen Installationsschritten unsicher sind, lassen Sie sich von einem Fachmann beraten.
- Bedienen Sie das Gerät nicht so, dass Sie vom Fahren abgelenkt werden. Die Verkehrssicherheit hat stets oberste Priorität.
- Das Gerät darf keinen extremen Temperaturen, direkter Sonneneinstrahlung oder Feuchtigkeit ausgesetzt werden.
- Verwenden Sie ausschließlich die dafür vorgesehenen Stromkabel und Zubehörteile.
2. Packungsinhalt
Bitte prüfen Sie vor der Installation, ob alle Artikel im Paket enthalten sind.

Image: Components included in the UNITOPSCI A3612A3 package, including the main unit, wiring harnesses, and accessories.
- UNITOPSCI A3612A3 Car Stereo Unit
- Power Cable & Speaker Cable Harnesses
- Lenkradfernbedienung
- Mikrofon
- 12-LED-Rückfahrkamera
- Antenne
- Benutzerhandbuch (dieses Dokument)
- Montagehalterungen
3. Installation
Proper installation is crucial for optimal performance. Refer to the wiring diagram and consult a professional if needed.
3.1 Schaltplan

Image: Detailed wiring connections for the car stereo unit.
Connect the power and speaker cables according to the diagram. Ensure all connections are secure to prevent malfunctions.
- Rot (ACC): Connect to ignition switch +12V.
- Yellow (BATTERY+): Connect to constant +12V.
- Schwarz (GND): Connect to vehicle ground.
- Blue (ANT): Connect to antenna power.
- Orange (ILLUMINATION): Connect to vehicle illumination wire.
- Pink (REVERSE): Connect to reverse light signal for backup camera activation.
- Brown (KEY): Connect to steering wheel control wire.
- Speaker wires (White, Gray, Green, Purple) should be connected to corresponding vehicle speakers (Front Left, Front Right, Rear Left, Rear Right).
3.2 Montage der Einheit
Use the provided mounting brackets to secure the double din unit into your vehicle's dashboard opening. Ensure a snug fit to prevent vibrations.
3.3 Installation der Rückfahrkamera
Mount the backup camera at the rear of your vehicle. Connect its video output to the 'CAM IN' input on the stereo and its power to the reverse light circuit.
4. Einrichtung
4.1 Erstes Einschalten
After installation, reconnect the vehicle battery. Turn on the ignition. The unit should power on and display the main interface.
4.2 Grundeinstellungen
Navigate to the 'Settings' menu to configure basic parameters such as language, time, and date.
4.3 Display Backlight Adjustment
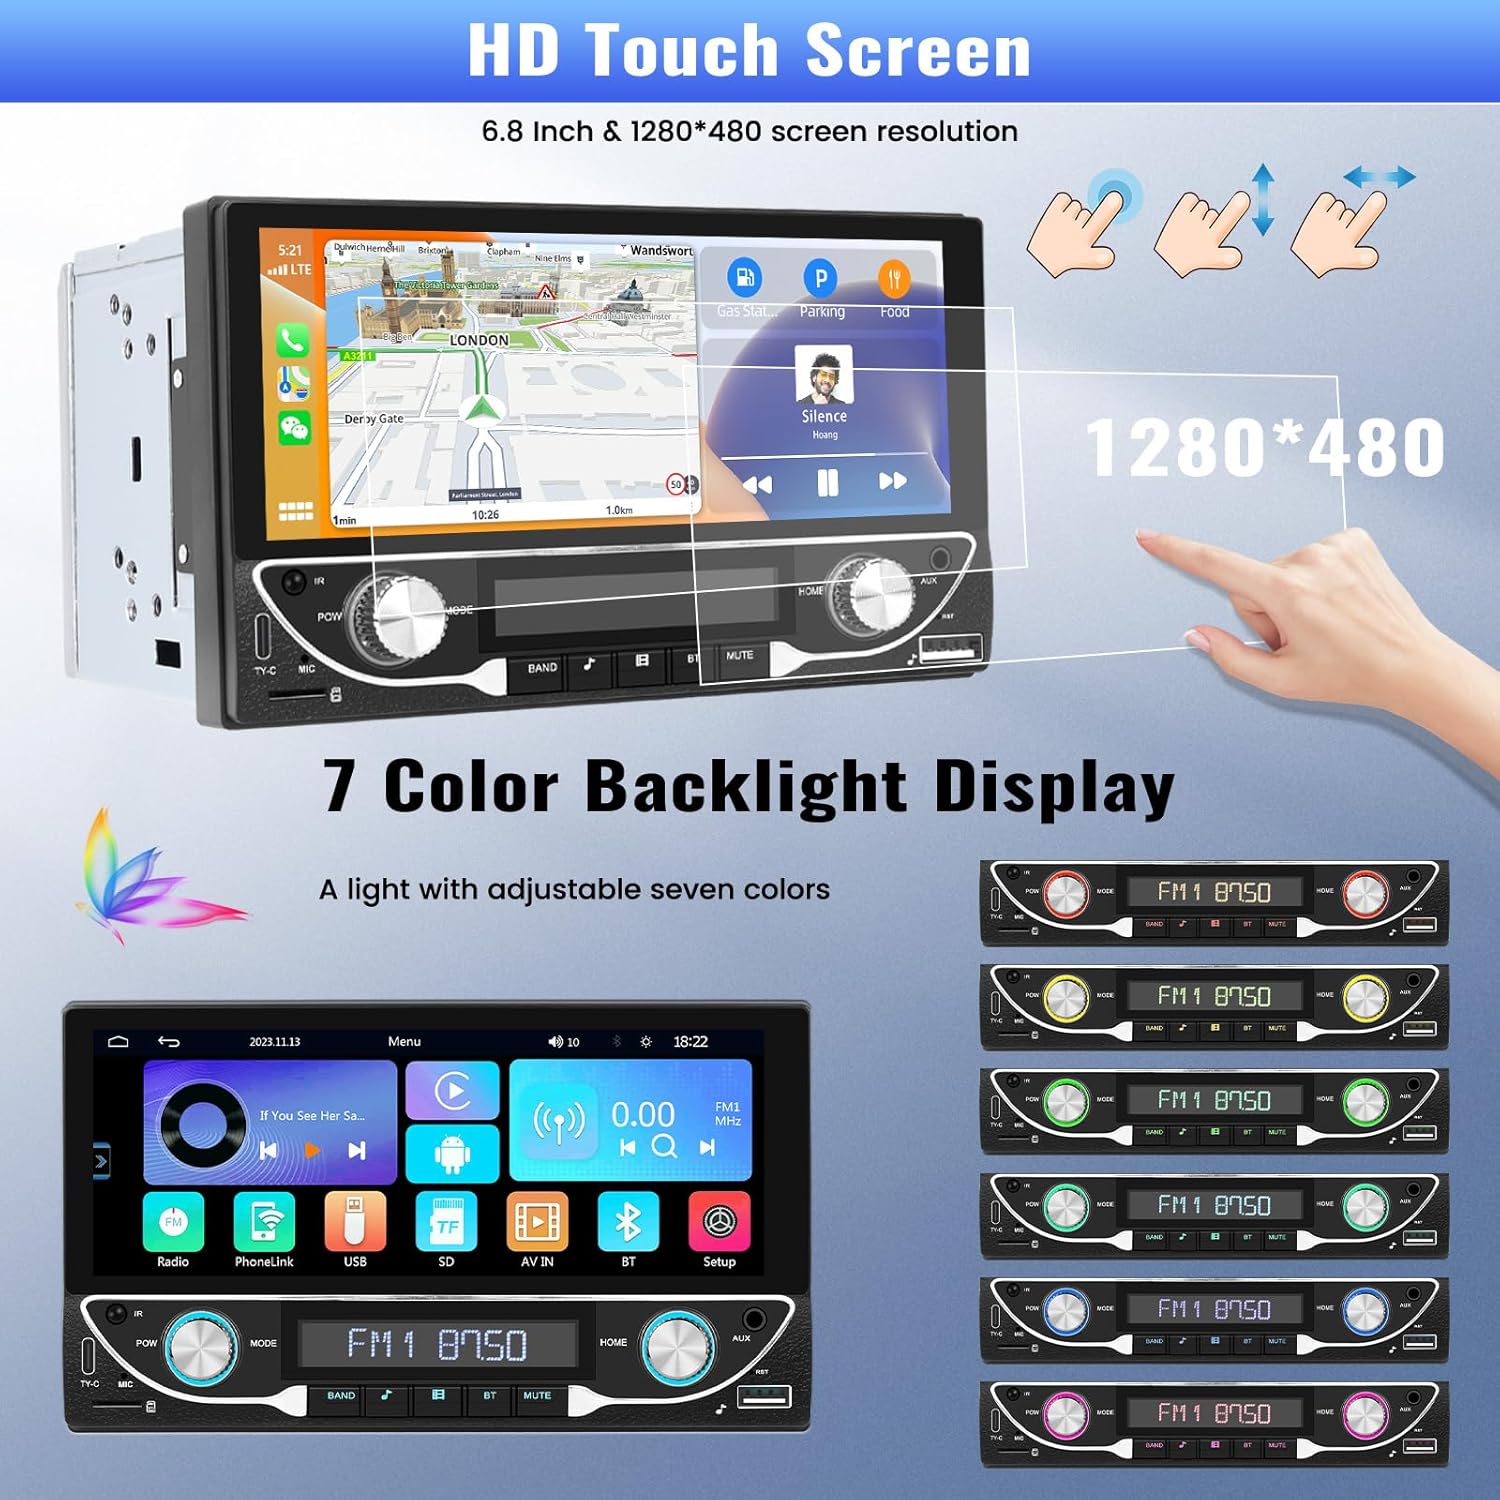
Image: The HD touchscreen and customizable 7-color backlight display options.
Access the display settings to adjust brightness and select from 7 available backlight colors for the physical buttons.
5. Bedienungsanleitung
5.1 Kabellose Apple CarPlay- und Android Auto-Unterstützung
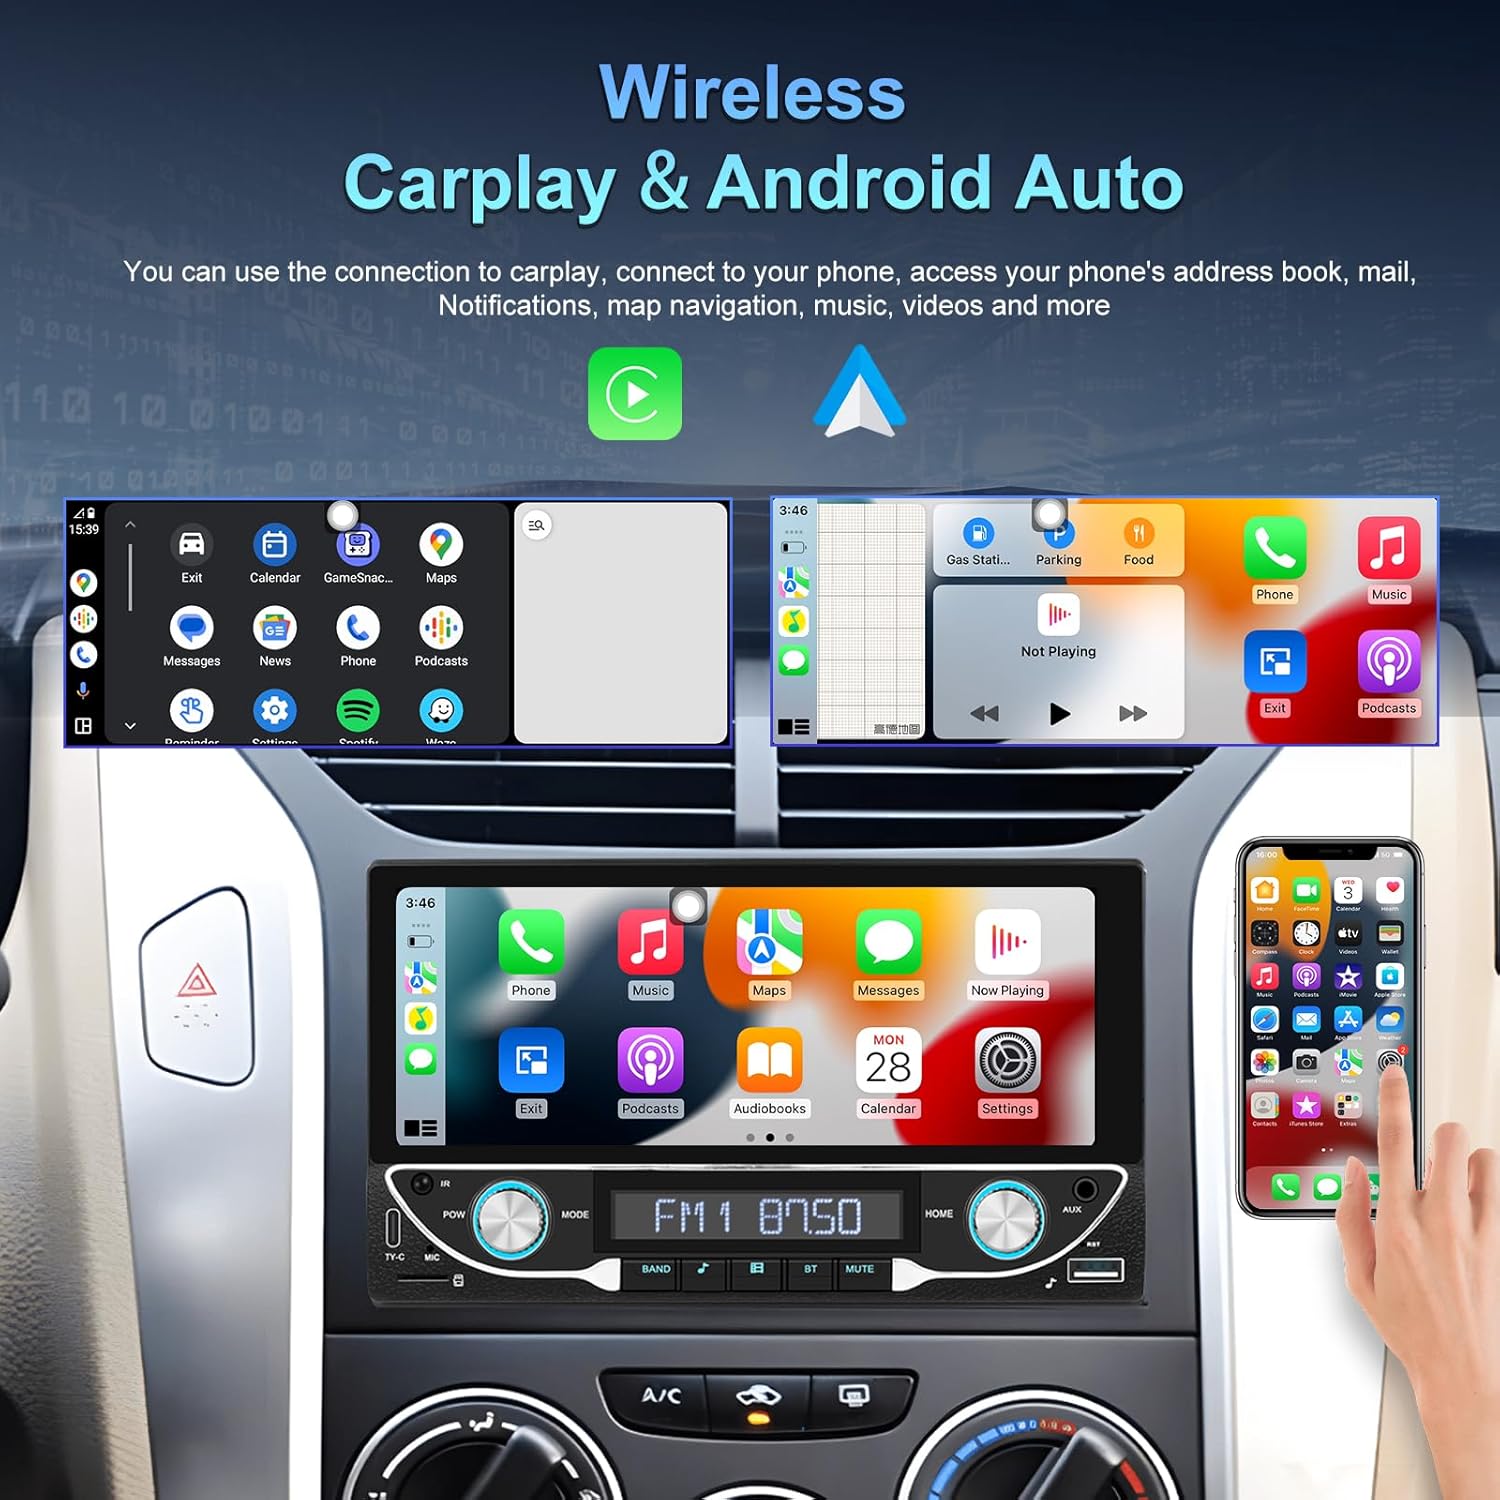
Image: The car stereo displaying both Apple CarPlay and Android Auto interfaces.
Connect your smartphone wirelessly to access Apple CarPlay or Android Auto. This allows for navigation, music, calls, and messages directly from the car stereo display.
- Stellen Sie sicher, dass Bluetooth und WLAN auf Ihrem Smartphone aktiviert sind.
- Wählen Sie im Autoradio das CarPlay- oder Android Auto-Symbol aus.
- Folgen Sie den Anweisungen auf dem Bildschirm, um Ihr Gerät zu koppeln.
5.2 Bluetooth 5.1-Konnektivität
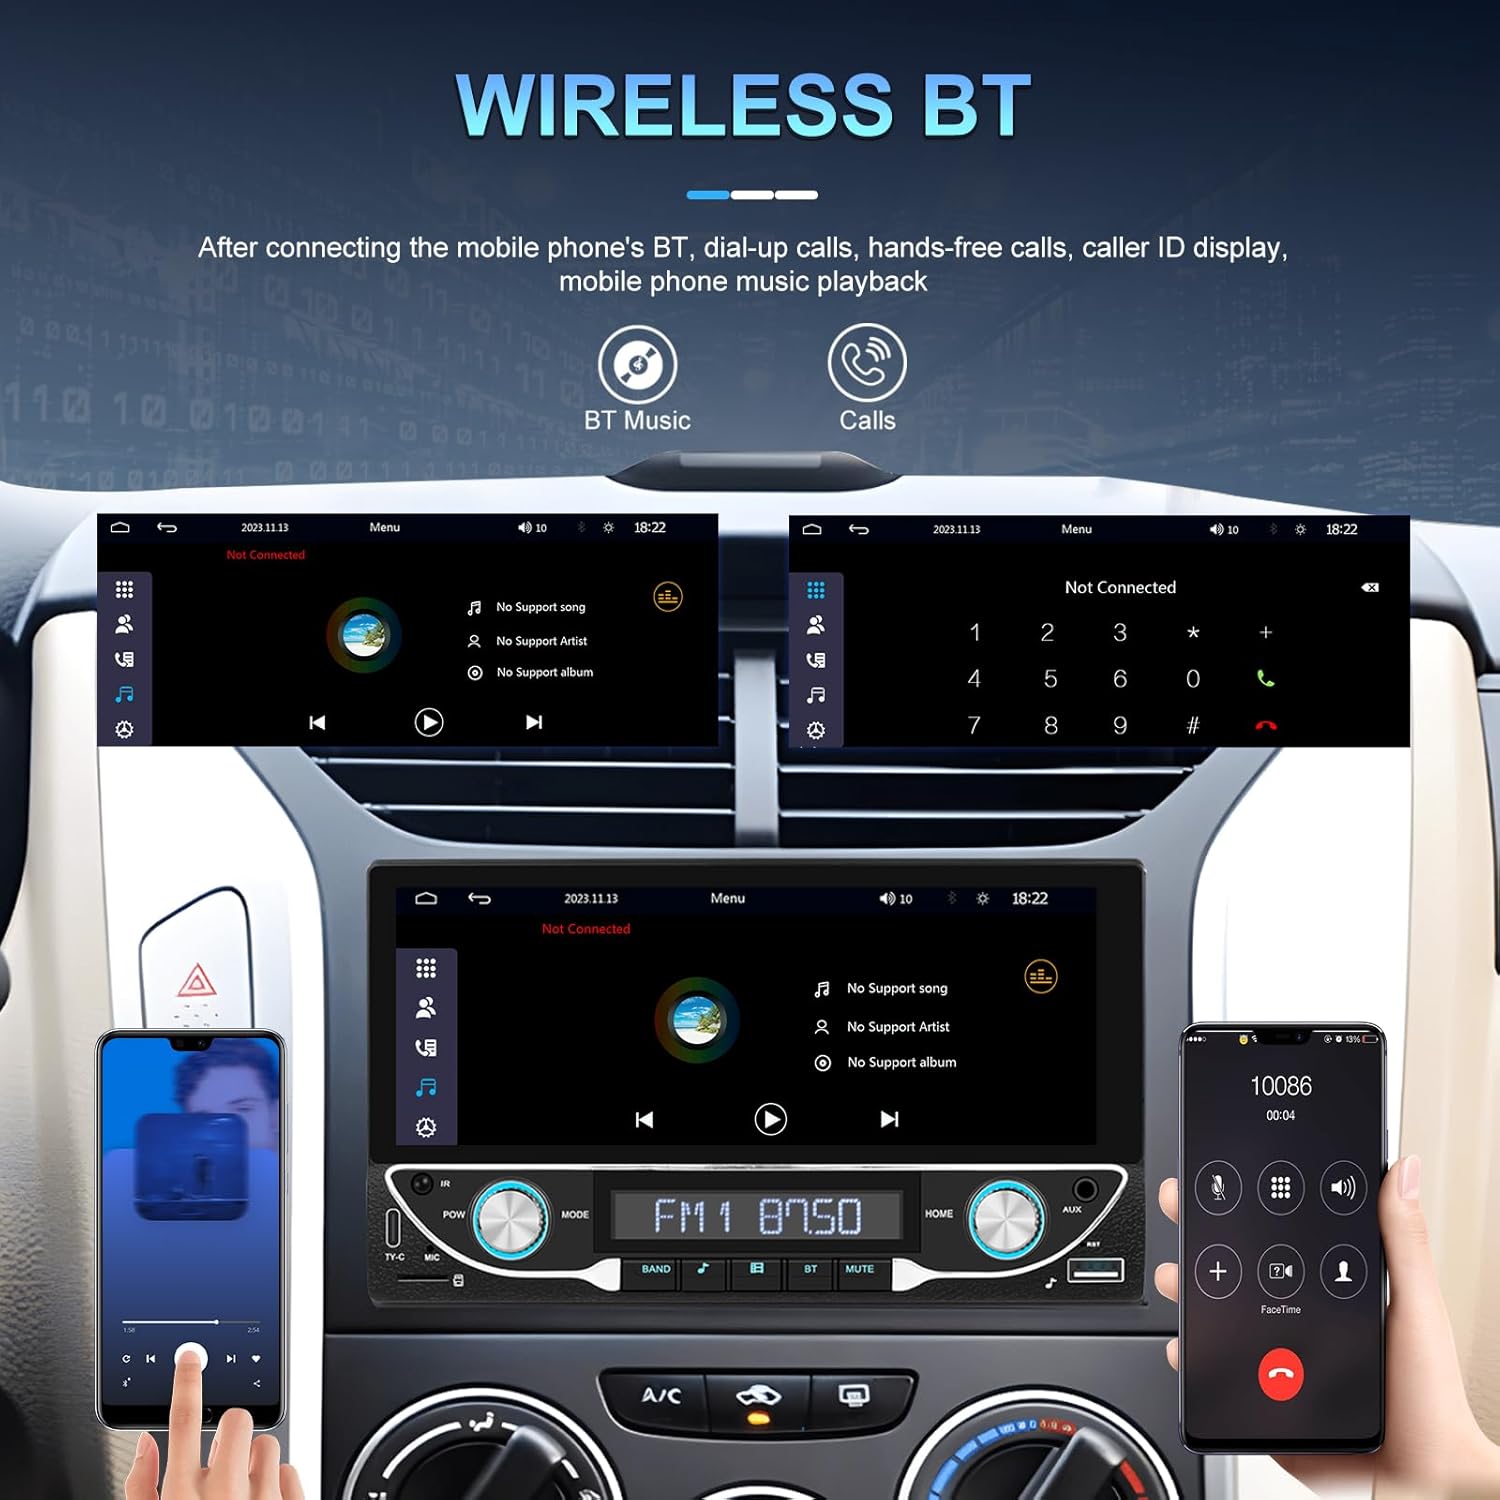
Image: Bluetooth interface for hands-free calling and music streaming.
Verbinden Sie Ihr Telefon via Bluetooth für Freisprechanrufe und drahtloses Audiostreaming.
- Öffnen Sie das Menü „Bluetooth“ am Autoradio.
- Aktivieren Sie Bluetooth auf Ihrem Telefon und suchen Sie nach verfügbaren Geräten.
- Select 'UNITOPSCI A3612A3' (or similar name) from your phone's list and confirm pairing.
- Use the built-in microphone for calls and stream music from your phone.
5.3 FM-Radiobetrieb

Image: FM radio interface with frequency display and sound quality DSP/EQ settings.
Select the 'FM' icon to access the radio tuner. Use the on-screen controls or physical buttons to scan for stations, save presets, and adjust frequency.
5.4 Audio & Video Playback (USB/TF/AUX/Type-C)

Image: Available input options for audio and video playback: USB, TF Card, Type-C, and AUX-in.
The unit supports various media inputs for audio and video playback:
- USB-Eingang: Connect a USB drive with media files.
- TF-Karten-Slot: Insert a TF (MicroSD) card with media files.
- AUX-Eingang: Connect external audio devices using a 3.5mm audio cable.
- Typ-C-Anschluss: For charging compatible devices and potentially data transfer.
Select the corresponding input source from the main menu to access your media.
5.5 Lenkradsteuerung

Image: Steering wheel control setup interface on the car stereo.
If your vehicle supports steering wheel controls, connect the 'KEY' wire during installation. Access the 'Steering Wheel Control' settings to program the buttons for functions like volume, track change, and mode selection.
5.6 Rückseite View Camera / HD Reversing Video
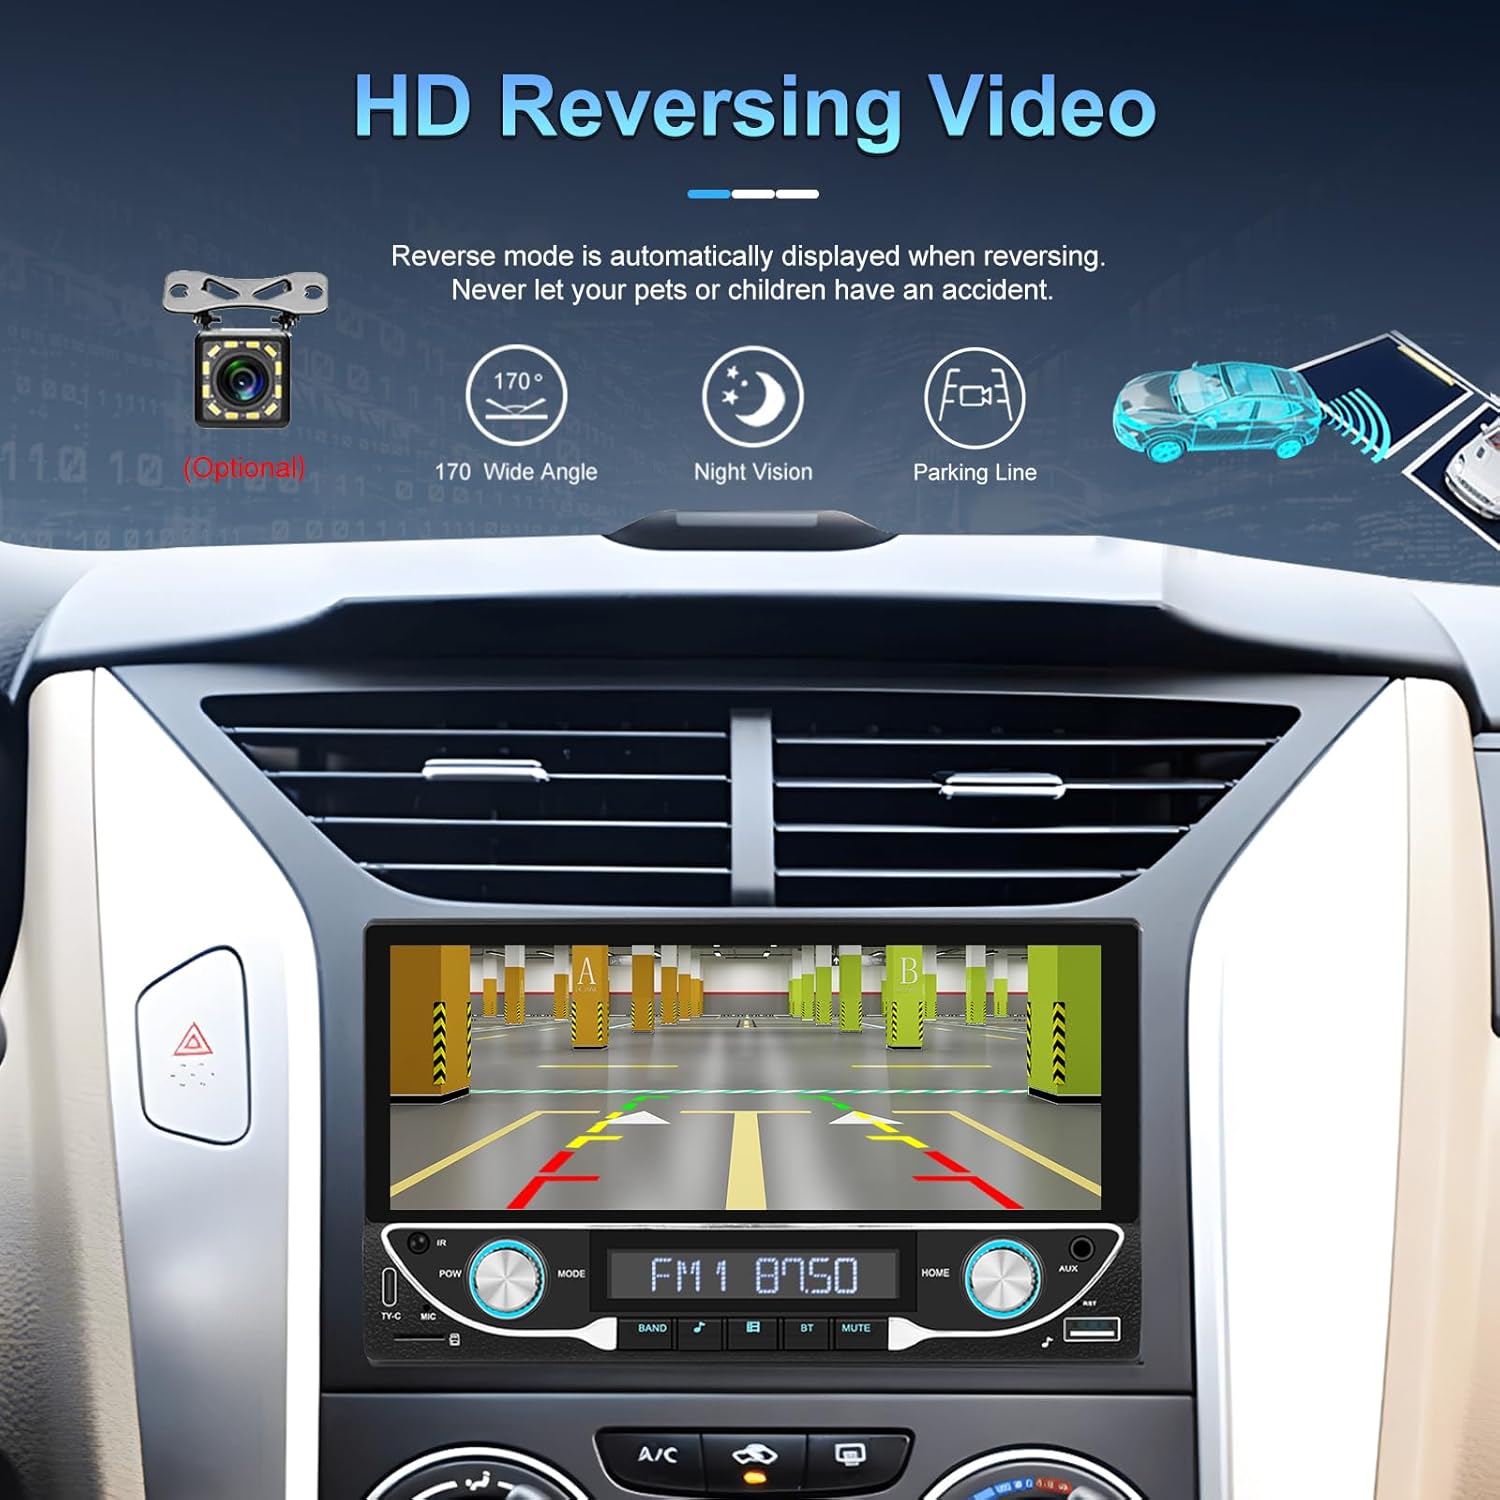
Image: High-definition reversing video display with parking guidelines.
Beim Einlegen des Rückwärtsgangs zeigt das Radio automatisch das Heck an. view camera feed. The included camera offers a 170-degree wide angle and night vision capabilities, along with parking lines for assistance.
5.7 DVR Function Support
The unit supports an optional DVR (Digital Video Recorder) function. Connect a compatible USB DVR camera to the dedicated USB input on the rear of the car radio to record driving footage.
5.8 Mirror-Link-Funktion
Use the Mirror Link function to display your smartphone's screen directly on the car stereo. This feature is compatible with both Android and iOS devices, allowing you to view apps and content from your phone on the larger display.
5.9 Sprachsteuerung & GPS-Navigation
When connected via Apple CarPlay or Android Auto, you can utilize voice commands (e.g., Siri, Google Assistant) for navigation, making calls, sending messages, and controlling music, enhancing driving safety and convenience.
5.10 Sound Quality (DSP & EQ)
The built-in Digital Sound Processor (DSP) and Equalizer (EQ) allow for precise audio customization. Access the 'EQ Setup' menu to adjust bass, treble, and other frequency bands to match your audio preferences. Pre-set EQ modes (e.g., Jazz, Rock, Pop) are also available.
6. Wartung
Um die Langlebigkeit und optimale Leistung Ihres Autoradios zu gewährleisten, beachten Sie bitte folgende Wartungshinweise:
- Reinigen des BildschirmsVerwenden Sie ein weiches, fusselfreies Tuch, um den Touchscreen vorsichtig abzuwischen. Vermeiden Sie scheuernde Reiniger oder Lösungsmittel, die das Display beschädigen könnten.
- Allgemeine Reinigung: Keep the unit free from dust and debris. Use a soft brush or compressed air for hard-to-reach areas.
- Software-Updates: Periodically check the manufacturer's webWebsite für alle verfügbaren Firmware-Updates zur Leistungsverbesserung und zum Hinzufügen neuer Funktionen.
- Vermeiden Sie Flüssigkeiten: Do not spill liquids on the unit. If accidental spillage occurs, power off the unit immediately and allow it to dry completely before use.
7. Fehlerbehebung
If you encounter issues with your UNITOPSCI A3612A3 car stereo, refer to the following common problems and solutions:
| Problem | Mögliche Ursache | Lösung |
|---|---|---|
| Kein Strom | Falsche Verkabelung; durchgebrannte Sicherung; lose Verbindung. | Check power cable connections (ACC, BATTERY+, GND). Verify vehicle fuse and unit's fuse. Ensure all wires are securely connected. |
| Kein Ton | Lautsprecherkabel nicht angeschlossen; Lautstärke zu niedrig; Stummschaltung aktiviert; Falsche Audioquelle. | Check speaker wire connections. Increase volume. Deactivate mute. Select correct audio source (FM, USB, BT, etc.). |
| Bluetooth stellt keine Verbindung her | Bluetooth off on phone/stereo; Device not in pairing mode; Interference. | Ensure Bluetooth is enabled on both devices. Put stereo in pairing mode. Delete previous pairings and try again. Move closer to the unit. |
| CarPlay/Android Auto funktioniert nicht | Wi-Fi/Bluetooth off; Phone not compatible; App issues. | Ensure Wi-Fi and Bluetooth are active on your phone. Restart phone and stereo. Check phone's settings for CarPlay/Android Auto permissions. |
| Rückkamera zeigt kein Bild an | Kamera nicht mit Strom versorgt; Videokabel lose; Rückwärtsauslöserkabel nicht angeschlossen. | Check camera power connection. Ensure video cable is securely connected to 'CAM IN'. Verify Pink (REVERSE) wire connection. |
| Touchscreen reagiert nicht | Systemabsturz; Schmutz auf dem Bildschirm. | Restart the unit (if possible, by briefly disconnecting power). Clean the screen. |
If the problem persists after trying these solutions, please contact UNITOPSCI customer support for further assistance.
8. Spezifikationen
Key technical specifications for the UNITOPSCI A3612A3 car stereo:
- Modellnummer: A3612A3
- Anzeigegröße: 6.86 Zoll
- Bildschirmauflösung: 1280 x 480 Pixel
- Ausgang Wattage: 180 Watts (4 channels)
- Bluetooth-Version: 5.1
- Unterstützte Internetdienste: Maps (via CarPlay/Android Auto)
- Audioausgabetyp: Intern
- Unterstützte Medienformate: AVI, WAV, WMA
- Eingänge: USB, TF Card, AUX, Type-C
- Merkmale: Wireless Apple CarPlay, Wireless Android Auto, FM Radio, Mirror Link, DSP, EQ, Steering Wheel Control, Backup Camera Input, DVR Function Support, 7-Color Backlight.
Image: Front, rear, and side dimensions of the UNITOPSCI A3612A3 car stereo.
Abmessungen (ungefähr):
- Front Panel: 17.8cm (7.0in) width x 10.3cm (4.0in) height
- Chassis: 17.8cm (7.0in) width x 10.0cm (3.9in) height x 11cm (4.3in) depth
9. Garantie und Support
UNITOPSCI products are designed for reliability and performance. For warranty information and technical support, please refer to the warranty card included in your package or visit the official UNITOPSCI webWebsite.
When contacting support, please have your product model number (A3612A3) and purchase details ready.