1. Einleitung
This manual provides detailed instructions for the safe and effective operation of your Dragonhawk Wireless Tattoo Gun Machine, Model YZBTD. Please read this manual thoroughly before using the device to ensure proper setup, operation, and maintenance. This machine is designed for professional tattoo artists and beginners, offering versatility and reliable performance.
2. Sicherheitshinweise
Always prioritize safety when operating tattoo equipment. Failure to follow these guidelines may result in injury or damage to the device.
- Nur zur äußerlichen Anwendung: This device is intended for tattooing on skin.
- Sterilisation: Ensure all needles, cartridges, and contact surfaces are properly sterilized before each use.
- Energiequelle: Verwenden Sie ausschließlich das mitgelieferte Ladekabel und kompatible Netzteile.
- Batteriesicherheit: Do not expose batteries to extreme temperatures or puncture them. Dispose of used batteries responsibly.
- Handhabung: Handle the machine with care. Avoid dropping or subjecting it to strong impacts.
- Feuchtigkeit: Keep the device dry. It is water-resistant, but not waterproof. Avoid submerging it in liquids.
- Kinder: Außerhalb der Reichweite von Kindern aufbewahren.
3. Produktüberschreitungview & Komponenten
The Dragonhawk Wireless Tattoo Gun Machine YZBTD is a cordless pen-style rotary tattoo machine featuring an adjustable stroke length and a powerful coreless motor.

Abbildung 3.1: Überview of the tattoo machine's control panel and battery.
Schlüsselkomponenten:
- Maschinenkörper: Main housing containing the motor and drive system.
- Batteriepack: Detachable power source with OLED display and control buttons.
- Verstellbarer Griff: Rotates to adjust needle depth.
- Hubverstellknopf: Allows selection of 7 stroke lengths (2.4mm - 4.2mm).
- Needle Cartridge Slot: Where tattoo needle cartridges are inserted.
- Typ-C-Ladeanschluss: Zum Aufladen des Akkus.
4. Einrichtung
4.1 Einlegen der Batterie
The machine comes with two replaceable batteries to ensure continuous operation.
- Stellen Sie sicher, dass die Maschine ausgeschaltet ist.
- Gently twist the battery pack counter-clockwise to detach it from the machine body.
- Align a charged battery pack with the machine body and twist clockwise until securely fastened.

Figure 4.1: The machine is equipped with two replaceable batteries for extended use.
4.2 Needle Cartridge Installation
Use only compatible Dragonhawk cartridge needles for optimal performance.
- Wählen Sie die gewünschte Nadelkassette aus.
- Insert the needle cartridge into the machine's slot, pushing firmly until it clicks into place.
- To remove, twist the cartridge slightly and pull it out.

Figure 4.2: Proper insertion of a needle cartridge into the machine.
5. Bedienungsanleitung
Machen Sie sich mit dem Bedienfeld vertraut, um eine effiziente Bedienung zu gewährleisten.
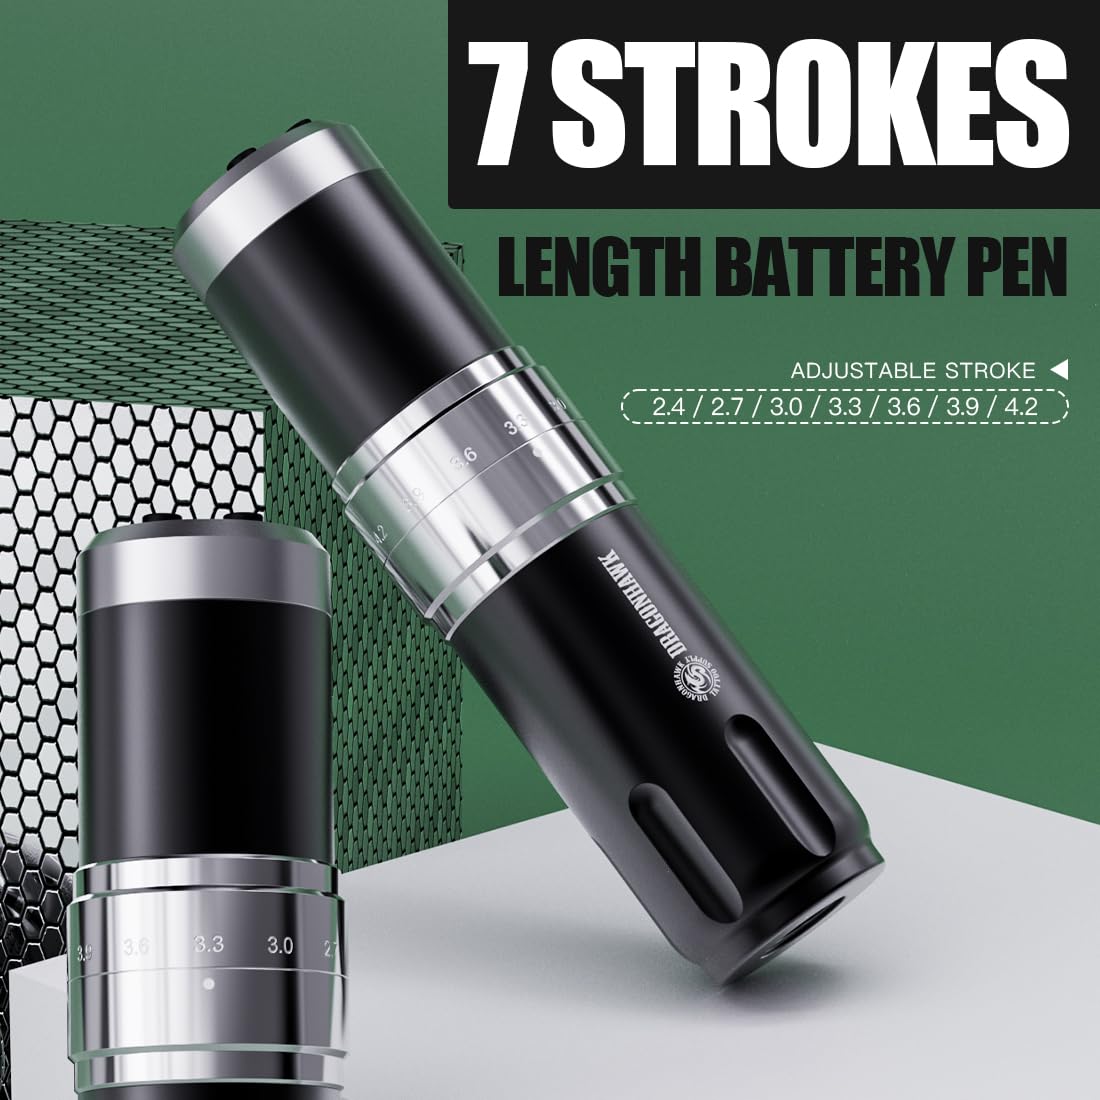
Figure 5.1: Control panel and stroke adjustment.
5.1 Ein-/Ausschalten
- Halten Sie die 'O' (Switch Button) for a few seconds to power the machine on or off.
- The OLED display will show the current voltage und Batteriestand.
5.2 Lautstärke anpassentage
- Verwenden Sie die '+' (Voltage Increase Key) Und '-' (Voltage Reduction Key) buttons to adjust the voltage in 0.1-V-Schritten.
- Die empfohlene LautstärketagDer Bereich liegt zwischen 4 V und 12 V.
5.3 Changing Mode (Liner/Shader)
- Drücken Sie die 'M' (Switch Mode) button to switch between Liner (L) and Shader (S) gears.
- The machine automatically memorizes the voltage settings for each mode.
5.4 Einstellen der Hublänge
The machine offers 7 adjustable stroke lengths from 2.4mm to 4.2mm.
- Rotate the adjustment knob located on the machine body to select the desired stroke length.
- Available lengths: 2.4mm, 2.7mm, 3.0mm, 3.3mm, 3.6mm, 3.9mm, 4.2mm.

Figure 5.2: Adjusting the stroke length by rotating the knob.
5.5 Offizielles Produktvideo
Video 5.1: An official video demonstrating the features and operation of the Dragonhawk Fold3 Wireless Tattoo Gun.
6. Wartung
6.1 Reinigung
- Trennen Sie vor der Reinigung immer die Stromversorgung.
- Wipe the machine body with a soft, damp Ein Tuch und ein mildes Desinfektionsmittel.
- Do not use abrasive cleaners or submerge the machine in liquid.
- Ensure no liquid enters the motor or charging port.
6.2 Laden
The machine is equipped with a Type-C charging port.
- Connect the provided Type-C cable to the charging port on the battery pack.
- Verbinden Sie das andere Ende mit einem kompatiblen USB-Netzteil.
- Das vollständige Aufladen dauert ungefähr 1.5 Stunden.
- The battery indicator on the OLED display will show charging status.
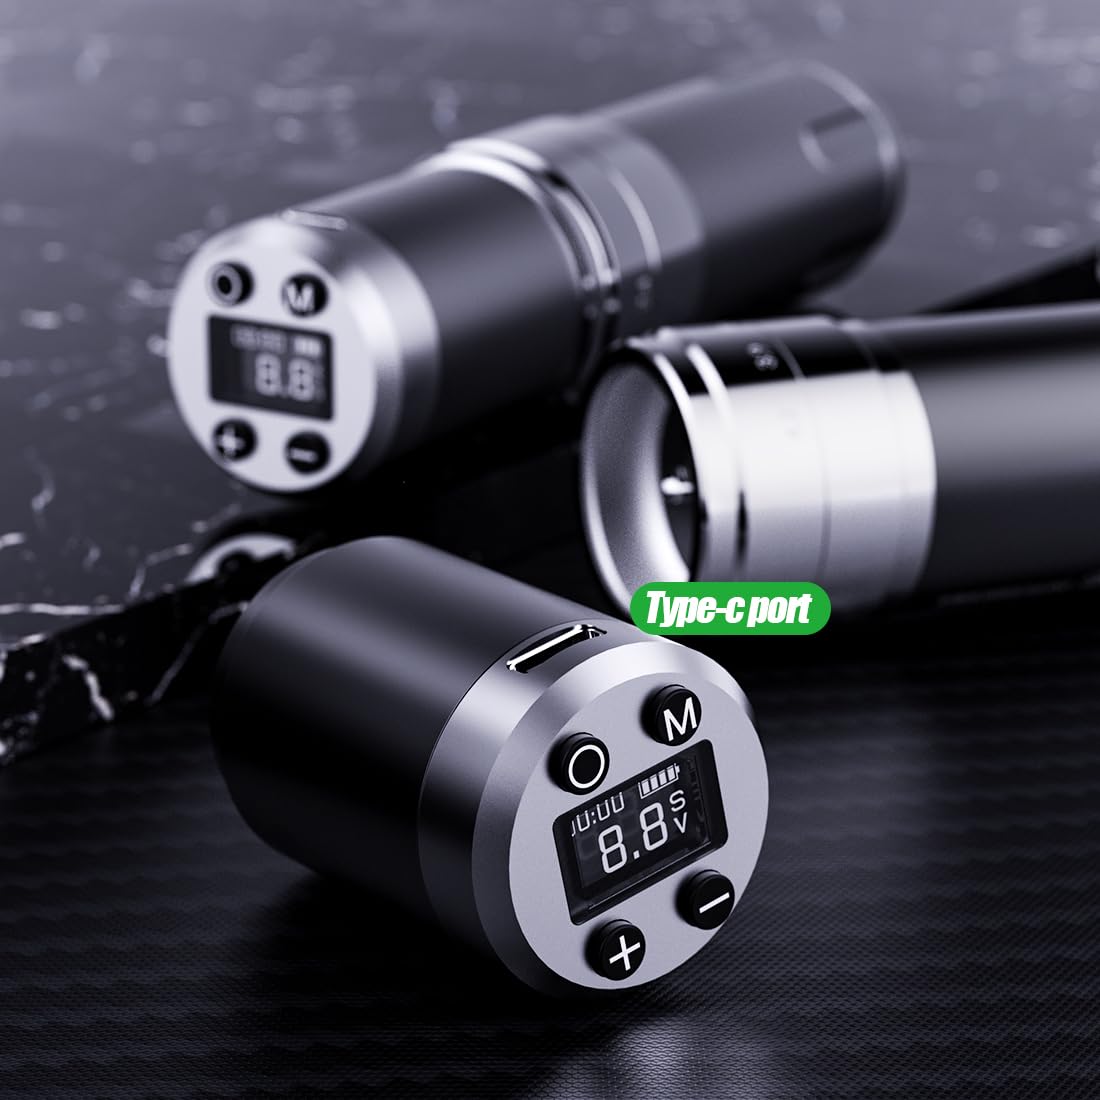
Figure 6.1: Type-C charging port on the battery pack.
6.3 Batteriepflege
- Um die Lebensdauer des Akkus zu verlängern, vermeiden Sie häufiges vollständiges Entladen des Akkus.
- Store the machine and spare batteries in a cool, dry place when not in use.
- If storing for an extended period, charge the batteries to about 50-60% capacity.
7. Fehlerbehebung
In der folgenden Tabelle finden Sie häufig auftretende Probleme und deren Lösungen.
| Problem | Mögliche Ursache | Lösung |
|---|---|---|
| Maschine lässt sich nicht einschalten | Low battery; Battery not properly installed; Power button not pressed correctly. | Charge the battery; Reinstall the battery pack securely; Press and hold the power button firmly. |
| Die Nadel bewegt sich nicht. | Needle cartridge not installed correctly; Stroke length set too low; Motor issue. | Reinstall needle cartridge; Adjust stroke length; Contact support if motor issue persists. |
| Bandtage display flickering | Loose battery connection; Low battery. | Ensure battery is securely attached; Charge the battery. |
| Überhitzung der Maschine | Prolonged continuous use; High voltage Einstellung. | Allow machine to cool down; Reduce voltage falls erforderlich. |
8. Spezifikationen
Technical details of the Dragonhawk Wireless Tattoo Gun Machine YZBTD.
| Besonderheit | Detail |
|---|---|
| Modellnummer | YZBTD |
| Technische Daten | 3.94 x 3.94 x 7.87 Zoll |
| Artikelgewicht | 10.58 Unzen (300 Gramm) |
| Motor | Mcore Coreless Motor |
| Hublängen | 7 adjustable (2.4mm - 4.2mm) |
| Bandtage Reichweite | 4 V - 12 V |
| Batteriekapazität | 1500 mAh (pro Akku) |
| Akkulaufzeit | 6-8 Stunden (pro Akku) |
| Ladezeit | Ca. 1.5 Stunden |
| Ladeanschluss | Typ C |
| Wasserbeständigkeit | Wasserfest |
9. Garantie und Support
Dragonhawk is committed to providing high-quality products and excellent customer service.
- Produktabdeckung: Dragonhawk products typically include coverage for manufacturing defects. Please refer to your purchase documentation for specific warranty terms.
- Technische Unterstützung: For video tutorials, setup guides, and professional tips, visit Youtube.com/@Dragonhawkofficial.
- Kundendienst: For any inquiries or issues with your order, please reach out through Amazon's messaging system.
- Widerrufsfolgen: This product has a 30-day return policy for refund/replacement.