Cecotec 07094
DrumFit Indoor Bike - Benutzerhandbuch
Brand: Cecotec | Model: DrumFit Indoor 6000 Forcis (Model 07094)
Einführung
Welcome to the user manual for your new Cecotec DrumFit Indoor Bike. This manual provides essential information for the safe assembly, operation, maintenance, and troubleshooting of your indoor cycling equipment. Please read this manual thoroughly before using the product to ensure proper function and longevity.
The DrumFit Indoor Bike is designed for effective indoor cardio training, featuring a 6 kg inertia flywheel, variable resistance, and an LCD display to track your progress. Its robust carbon steel construction ensures stability for users up to 120 kg.

Image: The Cecotec DrumFit Indoor Bike, showcasing its sleek black design, flywheel, and adjustable components.
Sicherheitshinweise
- Konsultieren Sie vor Beginn eines neuen Trainingsprogramms immer einen Arzt oder eine andere medizinische Fachkraft.
- Vor jedem Gebrauch sicherstellen, dass alle Schrauben und Muttern fest angezogen sind.
- Place the bike on a flat, stable surface. Use a mat underneath to protect flooring and reduce noise.
- Halten Sie Kinder und Haustiere während des Betriebs vom Fahrrad fern.
- Tragen Sie geeignete Sportschuhe und -kleidung.
- Überschreiten Sie nicht das maximale Benutzergewicht von 120 kg.
- Use the emergency stop button (red knob) to quickly halt the flywheel if needed.
Einrichtung und Montage
The DrumFit Indoor Bike requires some assembly. Follow these steps carefully:
- Auspacken: Carefully remove all components from the packaging. Verify all parts are present against the included parts list.
- Base Stabilizers: Attach the front and rear stabilizer bars to the main frame using the provided bolts and tools. Ensure they are firmly secured for stability.
- Pedalanschlüsse: Identifizieren Sie das linke (L) und das rechte (R) Pedal. Schrauben Sie das linke Pedal gegen den Uhrzeigersinn und das rechte Pedal im Uhrzeigersinn in die Kurbelarme. Ziehen Sie es fest an.
- Sattelmontage: Insert the saddle post into the main frame. Adjust the height and horizontal position of the ergonomic saddle for comfort, then tighten the adjustment knob.
- Lenkermontage: Insert the handlebar post into the main frame. Adjust the height of the handlebars to your preferred position and secure with the adjustment knob.
- LCD Display and Device Holder: Mount the LCD display onto the handlebar assembly. Connect any necessary sensor cables. Attach the device holder to the handlebars, ensuring it is stable for your smartphone or tablet.
- Flaschenhalter: Attach the bottle holder to the frame in the designated location.

Bild: Nahaufnahme view of the adjustable saddle and handlebars, highlighting the comfort-fit design and adjustment points.
Bedienungsanleitung
Adjusting Your Riding Position
- Sattelhöhe: Adjust the saddle so that your leg has a slight bend at the knee when the pedal is at its lowest point.
- Saddle Fore/Aft: Position the saddle so your knee is directly above the pedal spindle when the pedals are horizontal.
- Lenkerhöhe: Adjust handlebars for a comfortable upper body posture, avoiding excessive strain on your back or wrists.
Verwendung des Widerstandssystems
The DrumFit Indoor Bike features variable manual resistance. The resistance is controlled by a knob located on the frame, typically near the handlebars.
- Widerstand erhöhen: Turn the resistance knob clockwise to increase the intensity of your workout.
- Widerstand verringern: Turn the resistance knob counter-clockwise to decrease the intensity.
- Not-Halt: Push down firmly on the resistance knob to engage the emergency brake and quickly stop the flywheel.

Image: A hand demonstrating the use of the red "PUSH TO STOP" emergency brake knob, located on the bike's frame.
Verständnis des LCD-Displays
The LCD display provides real-time feedback on your workout. It typically shows:
- ZEIT: Dauer deines aktuellen Trainings.
- SPD (Geschwindigkeit): Deine aktuelle Fahrradgeschwindigkeit.
- DST (Entfernung): Die während des aktuellen Trainings zurückgelegte Gesamtstrecke.
- CAL (Kalorien): Geschätzter Kalorienverbrauch.
- ODO (Kilometerzähler): Total accumulated distance (resets only when battery is removed).
- SCAN: Automatischer Durchlauf aller Anzeigefunktionen.
Use the button on the display to switch between modes or to reset values (hold the button for a few seconds to reset current workout data).

Image: A close-up of the LCD display panel, showing the digital readouts for workout metrics and the control button.
Using the Device Holder
The integrated device holder allows you to place your smartphone, tablet, or book for entertainment or guided workouts during your session.

Image: A user engaging with a tablet placed on the bike's device holder, demonstrating its hands-free functionality.

Image: A man actively exercising on the DrumFit Indoor Bike in a modern home environment, showcasing the bike in use.
Wartung
Regular maintenance ensures the longevity and safe operation of your DrumFit Indoor Bike.
- Reinigung: Wischen Sie das Fahrrad mit Werbung abamp Reinigen Sie das Tuch nach jedem Gebrauch, um Schweiß und Staub zu entfernen. Verwenden Sie keine Scheuermittel oder Lösungsmittel.
- Prüfung von Schrauben und Muttern: Periodically check all bolts, nuts, and moving parts for tightness. Retighten as necessary.
- Riemenantriebssystem: The BeltRide system is designed for low maintenance. Keep the area around the flywheel and belt clean and free of debris.
- Pedalanschlüsse: Stellen Sie sicher, dass die Pedale fest sitzen und sich frei drehen lassen.
- Lagerung: Store the bike in a dry, cool place away from direct sunlight and extreme temperatures. The integrated wheels allow for easy transport.
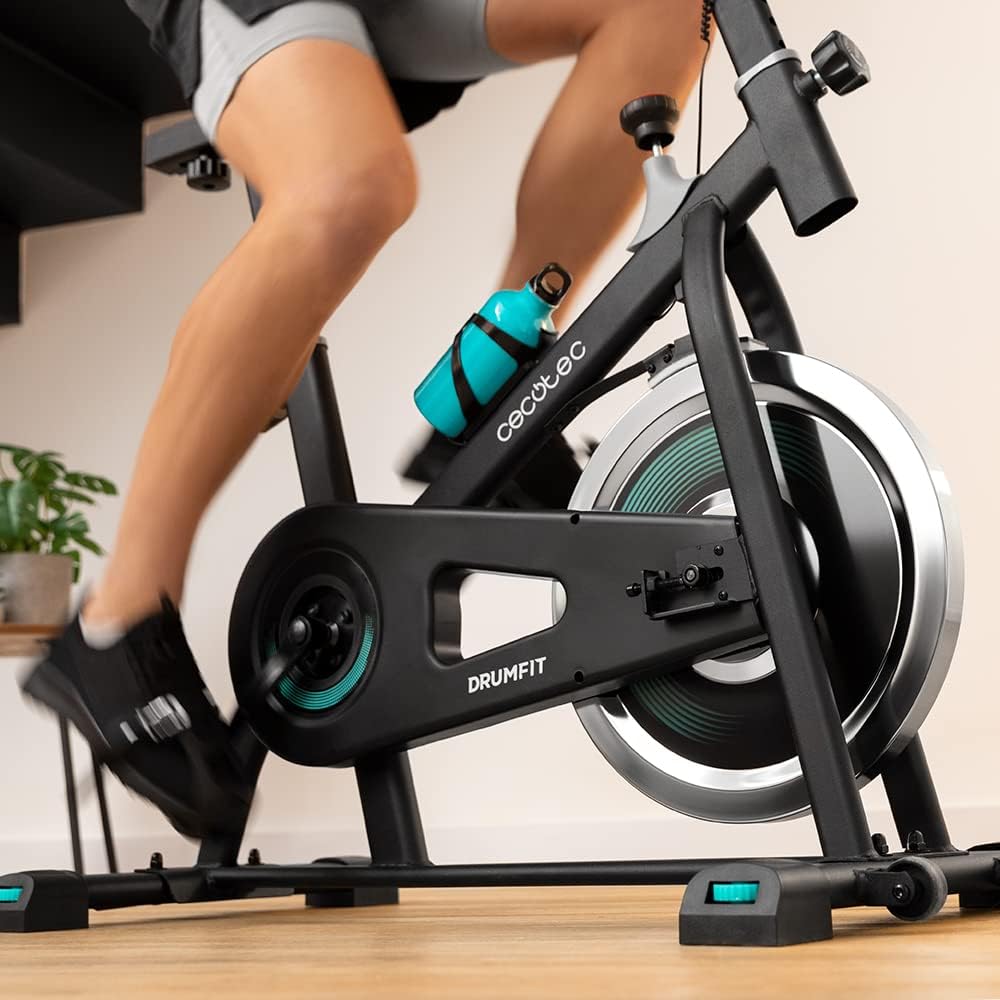
Bild: Detailliert view of the bike's pedals and the 6 kg inertia flywheel, highlighting the belt drive system.
Fehlerbehebung
| Problem | Mögliche Ursache | Lösung |
|---|---|---|
| LCD-Display funktioniert nicht | Low or dead battery; Loose sensor connection. | Replace batteries (if applicable). Check and secure all sensor cables. |
| Ungewöhnliche Geräusche während des Betriebs | Loose bolts; Friction from resistance pads; Debris in flywheel area. | Check and tighten all assembly bolts. Inspect resistance pads for wear. Clean any debris from around the flywheel. |
| Widerstand ändert sich nicht | Resistance knob mechanism issue; Worn resistance pads. | Ensure the resistance knob is properly engaged. Contact customer support if the mechanism feels faulty or pads are worn. |
| Das Fahrrad fühlt sich instabil an | Uneven floor; Loose stabilizer bolts. | Ensure the bike is on a flat, level surface. Check and tighten all bolts on the stabilizer bars. |
Technische Daten
- Marke: Cecotec
- Modellname: DrumFit Indoor 6000 Forcis
- Modellnummer: 07094
- Schwungradgewicht: 6 Kilogramm
- Widerstandsmechanismus: Manueller Flüssigkeitswiderstand
- Antriebssystem: Belt Drive (BeltRide)
- Produktabmessungen (LxBxH): 28.82"T x 8.11"B x 36.22"H (73.2 x 20.6 x 92 cm)
- Artikelgewicht: 6 Kilograms (Package Weight: 23.8 Kilograms)
- Material: Kohlenstoffstahl
- Maximales Benutzergewicht: 120 Kilogramm
- Maximale Benutzergröße: 185 Zentimeter
- Besonderheit: Distance Travelled Monitor, Device Holder, Bottle Holder
- Farbe: Schwarz/Weiß
Garantie und Support
Cecotec-Produkte werden nach hohen Qualitätsstandards gefertigt. Informationen zur Garantie finden Sie auf der Ihrem Produkt beiliegenden Garantiekarte oder auf der offiziellen Cecotec-Website. webWebsite.
For technical support, spare parts, or any inquiries not covered in this manual, please contact Cecotec customer service through their official channels. Have your model number (07094) and purchase details ready when contacting support.
Die Kontaktdaten des Kundendienstes finden Sie in der Regel auf der Website des Herstellers. webWebsite: www.cecotec.com
Ask a question about this manual
Ask about setup, troubleshooting, compatibility, parts, safety, or missing instructions. Manuals+ will review the question and use this page’s manual context to help answer it.