Cecotec 08114
Cecotec Conga Rockstar Wet & Dry Steel Max Vacuum Cleaner User Manual
Modell: 08114 | Marke: Cecotec
Einführung
This manual provides essential information for the safe and efficient operation, maintenance, and troubleshooting of your Cecotec Conga Rockstar Wet & Dry Steel Max vacuum cleaner. Please read this manual thoroughly before using the appliance and keep it for future reference.
The Cecotec Conga Rockstar Wet & Dry Steel Max is a high-power solid and liquid vacuum cleaner designed with a durable metal tank, capable of cleaning various types of dirt, including liquids, from any area of your home or workshop.
Sicherheitshinweise
Beachten Sie beim Gebrauch elektrischer Geräte stets die grundlegenden Sicherheitsvorkehrungen, um das Risiko von Bränden, Stromschlägen und Verletzungen zu verringern.
- Stellen Sie sicher, dass die Stromversorgungslautstärketage entspricht dem Typenschild des Geräts.
- Verwenden Sie den Staubsauger nicht zum Aufsaugen von entflammbaren oder brennbaren Flüssigkeiten, wie z. B. Benzin, oder verwenden Sie ihn nicht in Bereichen, in denen solche vorhanden sein könnten.
- Heben Sie keine brennenden oder rauchenden Gegenstände auf, z. B. Zigaretten, Streichhölzer oder heiße Asche.
- Das Gerät, das Netzkabel und der Stecker dürfen nicht in Wasser oder andere Flüssigkeiten getaucht werden.
- Vor der Reinigung oder Wartung des Staubsaugers muss immer der Netzstecker gezogen werden.
- Halten Sie Haare, lose Kleidung, Finger und alle Körperteile von Öffnungen und beweglichen Teilen fern.
- Verwenden Sie das Produkt nur wie in dieser Anleitung beschrieben. Verwenden Sie ausschließlich die vom Hersteller empfohlenen Anbauteile.
- Bei der Benutzung von Geräten durch oder in der Nähe von Kindern ist eine genaue Aufsicht erforderlich.
Produkt überview
Familiarize yourself with the components of your Cecotec Conga Rockstar Wet & Dry Steel Max vacuum cleaner.

Figure 1: Main unit and included accessories, showing the vacuum's wet and dry capabilities.

Abbildung 2: Ausführlich view of the vacuum cleaner and its various attachments for different cleaning tasks.
Komponenten:
- Main Vacuum Unit with Metal Tank
- Flexibles Rohr
- Extensible Tube (Wand)
- Bodenbürste
- 2-in-1 Accessory (Crevice tool and brush)
- Eckzubehör
- Räder für einfache Mobilität
- Patronenfiltersystem

Figure 3: Close-up of one of the durable wheels, highlighting the vacuum's mobility.

Figure 4: The included accessories: a crevice tool, a brush attachment, and a floor nozzle.
Aufstellen
- Auspacken: Nehmen Sie alle Komponenten vorsichtig aus der Verpackung. Prüfen Sie sie auf Beschädigungen.
- Räder anbringen: Insert the wheels into the designated slots on the base of the vacuum cleaner until they click into place.
- Schlauch anschließen: Attach the flexible tube to the suction inlet on the front of the vacuum unit. Ensure it is securely fastened.
- Zauberstab und Düse zusammenbauen: Connect the extensible tube (wand) to the flexible tube. Then, attach the desired cleaning nozzle (e.g., floor brush, 2-in-1 accessory, or corner accessory) to the end of the wand.
- Filterinstallation: Ensure the cartridge filter is correctly installed inside the tank for dry vacuuming. For wet vacuuming, the filter may need to be removed or replaced with a foam filter (if included and specified by manufacturer). Refer to the maintenance section for filter details.
Bedienungsanleitung
Trockensaugen:
For dry vacuuming, ensure the cartridge filter is properly installed. Plug the vacuum cleaner into a suitable electrical outlet. Turn on the appliance using the power switch. Guide the nozzle over the dry surfaces you wish to clean.

Figure 5: A user demonstrating dry vacuuming on an outdoor patio, effectively cleaning solid debris.

Figure 6: The vacuum cleaner being used to clear leaves and dirt from an outdoor area, showcasing seine Vielseitigkeit.

Figure 7: Using the vacuum with a specialized attachment to clean the interior of a car, reaching tight spaces.
Nasssaugen:
Before wet vacuuming, ensure the dry filter is removed and, if applicable, a wet-specific foam filter is installed. Do not overfill the tank; monitor the liquid level. The vacuum is designed to pick up spilled liquids. When the tank is full, the float mechanism will automatically shut off suction to prevent overflow.

Figure 8: The vacuum effectively cleaning up a liquid spill on a hard floor, demonstrating its wet vacuuming capability.

Figure 9: A close-up showing the vacuum's nozzle collecting water from a surface, indicating its wet function.
Gebläsefunktion:
The vacuum cleaner also features a blower function. To use it, detach the flexible tube from the suction inlet and connect it to the blower outlet, usually located on the rear or side of the unit. This function is useful for clearing debris from hard-to-reach areas or blowing leaves.
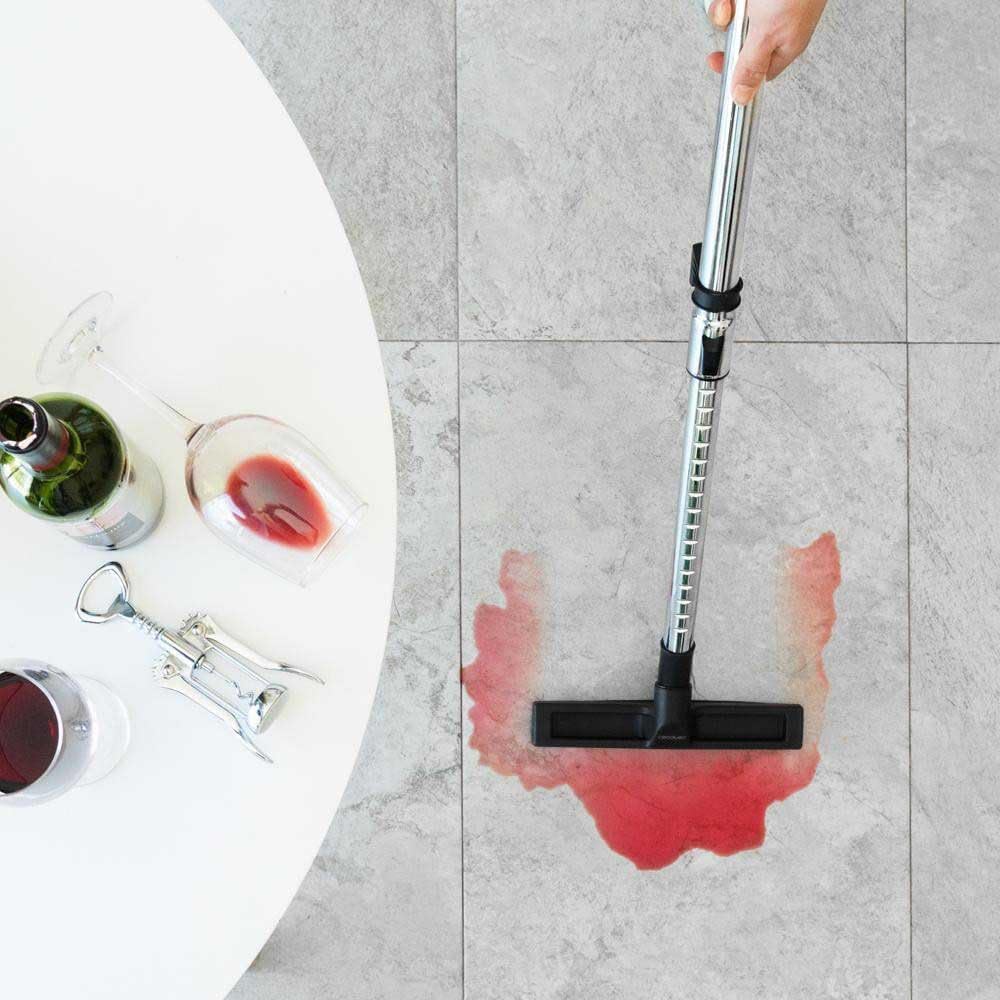
Figure 10: A user utilizing the blower function to clear debris from around a rock wall, demonstrating its utility beyond vacuuming.
Wartung
Regelmäßige Wartung gewährleistet optimale Leistung und verlängert die Lebensdauer Ihres Staubsaugers.
Entleeren des Tanks:
After each use, especially after wet vacuuming, empty the tank. Unlatch the top motor unit from the tank and carefully pour out the contents. Clean the inside of the tank with water and mild detergent if necessary, then dry thoroughly.

Figure 11: The vacuum cleaner being carried, illustrating its portability for emptying or transport.
Filterreinigung und -austausch:
The cartridge filter is crucial for dry vacuuming. Periodically remove and clean it by tapping off dust or rinsing with water. Ensure the filter is completely dry before re-installing for dry use. For wet vacuuming, ensure the appropriate filter (e.g., foam filter) is used and cleaned as per its specific instructions.

Figure 12: A close-up of the vacuum's filter, emphasizing the importance of regular cleaning for optimal performance.

Figure 13: Diagram illustrating the multi-layer filter system, designed for efficient dust and debris capture.
Allgemeine Reinigung:
Wischen Sie die Außenseite des Staubsaugers mitamp cloth. Do not use abrasive cleaners or solvents. Ensure all parts are dry before storage.
Fehlerbehebung
| Problem | Mögliche Ursache | Lösung |
|---|---|---|
| Der Staubsauger lässt sich nicht einschalten. | Nicht eingesteckt; Netzschalter ausgeschaltet; Sicherungsautomat ausgelöst. | Check power cord connection; ensure switch is ON; reset circuit breaker. |
| Saugkraftverlust. | Full tank; clogged hose/nozzle; dirty filter. | Empty tank; clear any blockages; clean or replace filter. |
| Der Motor stoppt während des Nasssaugens. | Tank is full (float mechanism activated). | Leeren Sie den Tank. |
| Ungewöhnliches Geräusch. | Blockage in hose/nozzle; damaged motor. | Prüfen Sie, ob Verstopfungen vorhanden sind, und beseitigen Sie diese gegebenenfalls. Sollten die Geräusche weiterhin bestehen, wenden Sie sich bitte an den Kundendienst. |
Technische Daten
- Marke: Cecotec
- Modellnummer: 08114
- Farbe: Grau
- Abmessungen (L x B x H): 36 x 36 x 45 cm
- Gewicht: 6.8 Kilogramm
- Kapazität: 20 Liter
- Leistung: 1400 Watt
- Bandtage: 1400 Volts (as per product specifications, typically refers to power input)
- Energiequelle: Kabelgebundene Elektrik
- Filtertyp: Patrone
- Empfohlener Untergrund: Hartboden, Teppich

Figure 14: Visual representation of the 1400W power output, indicating strong suction capabilities.

Figure 15: Illustration of the 20-liter tank capacity, allowing for extended cleaning sessions.
Garantie und Support
Cecotec provides support for its products. Spare parts for this model are available for up to 10 years from the date of purchase. For warranty claims, technical assistance, or to inquire about spare parts, please refer to the contact information provided with your purchase or visit the official Cecotec webWebsite.
Ask a question about this manual
Ask about setup, troubleshooting, compatibility, parts, safety, or missing instructions. Manuals+ will review the question and use this page’s manual context to help answer it.