
1. Einleitung
The LAFVIN Basic Starter Kit for Raspberry Pi Pico is designed to introduce users to the fundamentals of electronics and programming. This kit provides a variety of components and comprehensive tutorials to facilitate learning with the Raspberry Pi Pico microcontroller.
2. Lieferumfang
Das Kit enthält die folgenden Komponenten:
- 1 x Raspberry Pi Pico
- 1 x IIC LCD 1602 Display Module
- 1 x 830 Tie-Points Breadboard
- 1 x Obstacle Avoidance Module
- 1 x HC-SR501 PIR Motion Sensor
- 1 x SG90 Servo
- 1 x Potentiometer (10k)
- 1 x Passive Buzzer
- 1 x Active Buzzer
- 30 x Resistors (10x 220R, 10x 1k, 10x 10k)
- 1 x Micro-USB-Kabel
- 8 x Button Switches
- 1 x WS2812 RGB 16-LED Ring Module
- 10 x F-M DuPont Cables
- 65 x Überbrückungsdrähte
- 1 x Thermistor
- 1 x Tilt Switch
- 2 x Photoresistors
- 2 x S8050 Transistors
- 5 x Red LEDs
- 5 x Yellow LEDs
- 5 x Green LEDs
- 1 x RGB-LED

This image displays all the individual components you will find in your LAFVIN Basic Starter Kit, neatly organized and labeled for easy identification.
3. Hauptmerkmale
- The Raspberry Pi Pico series is a range of tiny, fast, and versatile boards built using RP2040.
- Piper Make allows users to learn and absorb the basics of programming in the electronics industry as they learn how to build their own computers.
- The tutorial includes codes and lessons. It will teach every user how to assemble the Basic Starter Kit for Pi Pico.
- Supports 3 languages: MicroPython, C, and Piper Make.

Dieses Bild zeigt eine Nahaufnahme. view of the Raspberry Pi Pico board, detailing its RP2040 microcontroller and Micro-USB B port for power and data.
This diagram illustrates the pinout of the Raspberry Pi Pico, showing the arrangement and function of its General Purpose Input/Output (GPIO) pins, power pins, and communication interfaces.
4. Einrichtung und erste Schritte
To begin using your LAFVIN Basic Starter Kit, follow these general steps:
- Komponenten auspacken: Carefully remove all components from the packaging and verify against the 'What's in the Box' list.
- Review Dokumentation: Familiarize yourself with the provided tutorial and online resources.
- Connect Raspberry Pi Pico: Insert the Raspberry Pi Pico into the breadboard. Ensure all pins are correctly aligned.
- Assemble Circuits: Follow the step-by-step instructions in the tutorial to build your first circuit using the breadboard, jumper wires, and other components.
- Mit Computer verbinden: Use the Micro-USB cable to connect your Raspberry Pi Pico to your computer.
- Software installieren: Install the necessary software (e.g., Thonny IDE) and MicroPython firmware as guided by the tutorial.
- Upload-Code: Laden Sie die bereitgestellte Datei hoch.ample code or write your own to the Raspberry Pi Pico.
Dieses Video bietet einen allgemeinen Überblickview and demonstration of how to use the LAFVIN Basic Starter Kit, including unboxing and initial setup steps.
This video offers another perspective on the basic functionalities and components of the starter kit, guiding users through initial interactions.
5. Programming Languages Supported
The LAFVIN Basic Starter Kit supports multiple programming languages, making it versatile for various learning levels:
- MicroPython: A lean and efficient implementation of the Python 3 programming language, optimized for microcontrollers.
- C/C++: A powerful and widely used programming language for embedded systems, offering high performance and control.
- Piper Make: A visual block-based programming environment, ideal for beginners to learn programming concepts without complex syntax.

This image highlights the three primary programming languages—MicroPython, Piper Make, and C/C++—that can be used with the Raspberry Pi Pico, catering to different skill levels.

This image shows the user-friendly graphical interface of Piper Make, demonstrating its block-based approach to programming, which simplifies coding for beginners.
6. Bspampdie Projekte
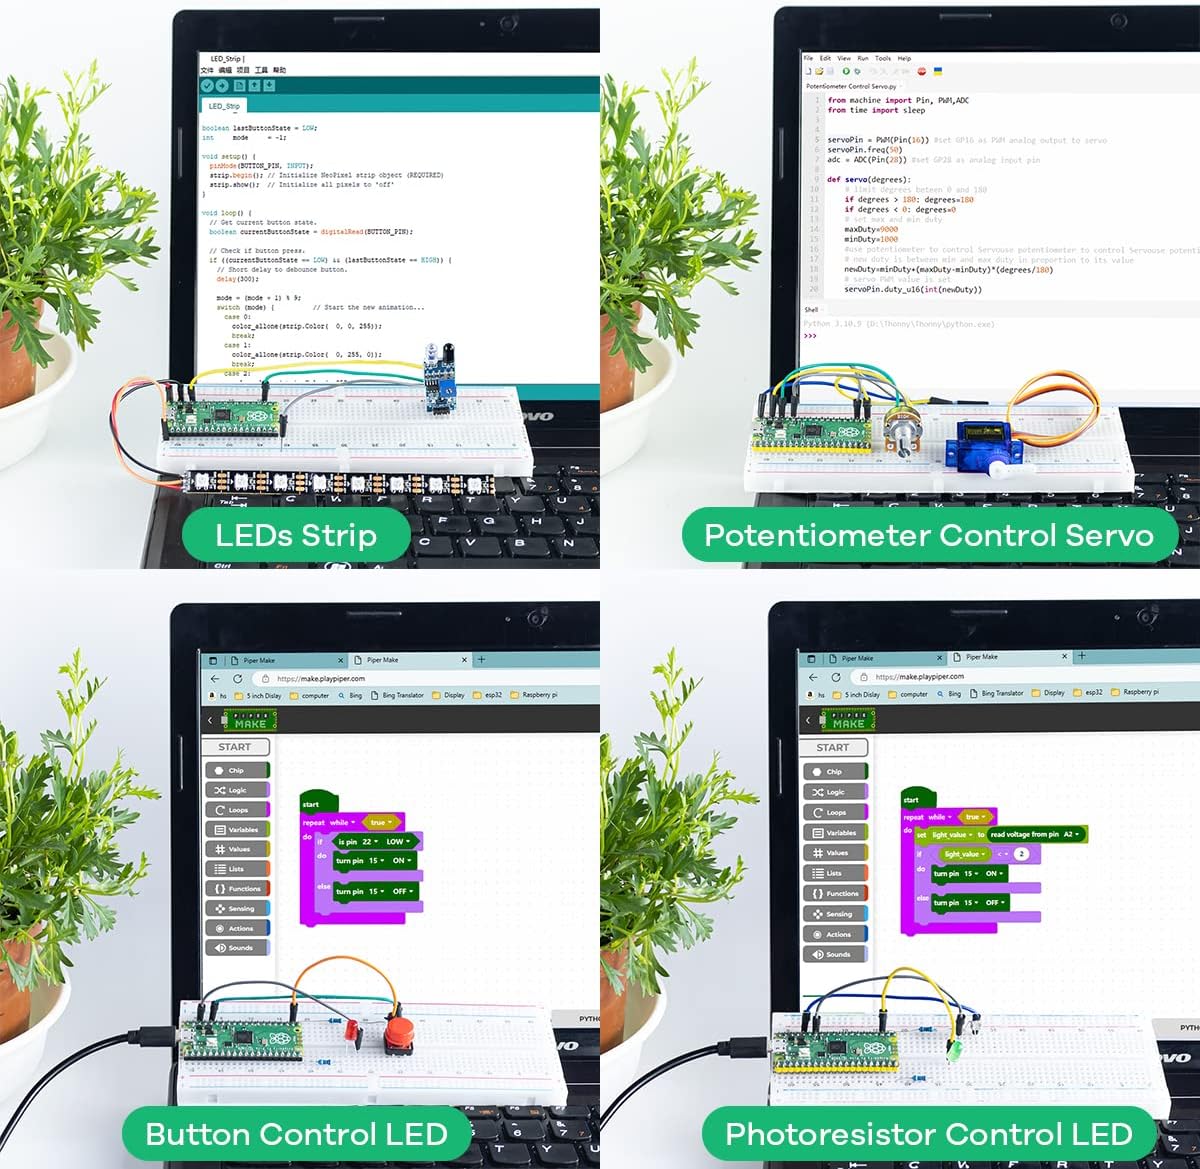
The kit provides resources to build various projects, including:
- LEDs Strip Control
- Potentiometer Control Servo
- Button Controlled LED
- Photoresistor Controlled LED
- Music Buzzer
- Motion Detection using PIR Sensor
- Display CPU Temperature using LCD1602

This image showcases four different projects that can be created with the kit, demonstrating the versatility of the components for various electronic applications.
This extensive tutorial video from GeeekPi demonstrates various projects and detailed setup procedures for a Raspberry Pi Pico basic starter kit, offering valuable insights for users.
7. Spezifikationen
| Besonderheit | Detail |
|---|---|
| Prozessor | Cortex (RP2040) |
| RAM | LPDDR2 |
| Betriebssystem | MicroPython |
| Artikelgewicht | 11.3 Unzen |
| Technische Daten | 5.51 x 3.35 x 1.42 Zoll |
| Anzahl der Prozessoren | 1 |
8. Fehlerbehebung
If you encounter issues while using the kit, consider the following common troubleshooting steps:
- Verdrahtungsprüfung: Double-check all connections on the breadboard against the schematic in the tutorial. Loose or incorrect wires are a common cause of problems.
- Codeverifizierung: Ensure your code is correctly written and uploaded. Pay attention to syntax, indentation, and pin assignments.
- Stromversorgung: Confirm the Raspberry Pi Pico is receiving adequate power via the Micro-USB cable.
- Komponentenfunktionalität: Test individual components if possible to rule out faulty parts.
- Softwareumgebung: Verify that your IDE (e.g., Thonny) and MicroPython firmware are correctly installed and configured.
- Online-Ressourcen: Refer to the official Raspberry Pi Pico documentation and online forums for further assistance.
9. Garantie und Support
For warranty information, technical support, or further inquiries, please refer to the contact information provided by LAFVIN at the time of purchase or visit the official LAFVIN webWebsite. Bewahren Sie Ihren Kaufbeleg für Garantieansprüche auf.