1. Einleitung
This manual provides detailed instructions for the assembly, operation, and maintenance of your OUKANING Retractable Stainless Steel Arch Backdrop Stand, Model 1. This stand is designed to provide a stable and versatile framework for various decorative purposes at events.

Image 1.1: The OUKANING Arch Backdrop Stand in an outdoor event setting.
2. Sicherheitshinweise
- Vergewissern Sie sich vor der Verwendung, dass alle Komponenten sicher befestigt sind.
- Do not overload the arch with excessive weight. The stand has a strong load-bearing capacity, but exceeding reasonable limits can compromise stability.
- Stellen Sie den Ständer auf eine ebene, stabile Oberfläche, um ein Umkippen zu verhindern.
- Keep children and pets away from the stand during assembly and while in use.
- Regularly inspect the stand for any signs of damage or wear. Do not use if damaged.
3. Packungsinhalt
Vergewissern Sie sich, dass alle folgenden Komponenten in Ihrem Paket enthalten sind:
- 5 x Poles (main vertical and horizontal sections)
- 3 x Base plates (for stability)
- 1 x T-shaped fitting (for central horizontal connection)
- 2 x L-shaped fittings (for corner connections)
4. Montageanleitung
Follow these steps to assemble your OUKANING Arch Backdrop Stand. It is recommended to have two people for easier assembly.
4.1. Visuelle Montageanleitung
Video 4.1: Step-by-step assembly demonstration of the arch stand.
4.2. Schritt-für-Schritt-Anleitung
- Attach Poles to Bases: Insert the bottom end of three vertical poles into the designated holes on the three base plates. Ensure they are firmly seated.
- Extend Vertical Poles: Extend the vertical poles to your desired height. The stand features a retractable design allowing adjustment from 1.5m to 3m (4.9ft to 9.8ft). Secure the poles at the chosen height.
- Connect Corner Fittings: Attach the two L-shaped fittings to the top of the two outer vertical poles.
- Install T-shaped Fitting: Attach the T-shaped fitting to the top of the central vertical pole.
- Assemble Horizontal Bars: Connect the horizontal poles between the L-shaped and T-shaped fittings. The stand's width is also adjustable, from 1.5m to 6m (4.9ft to 19.7ft). Ensure all connections are secure using the insertion interfaces.

Image 4.2: Detail of the easy and fast connection mechanism for poles.

Image 4.3: Adjustable dimensions of the arch stand.
5. Operation and Decoration
Once assembled, the OUKANING Arch Backdrop Stand can be customized for various events. Its robust stainless steel construction allows for diverse decorative elements.
- Dekoration: Adorn the arch with flowers, balloons, fabric drapes, LED lights, or other decorative items to create a personalized backdrop.
- Verstellbarkeit: The retractable design allows for flexible adjustment of both height and width to suit different venue requirements and event themes.
- Pflanzenunterstützung: The sturdy frame can also serve as a support structure for climbing plants in a garden or patio setting.

Abbildung 5.1: Beispielamples of decoration options for the arch stand.

Image 5.2: The arch stand providing support for various climbing plants.
6. Wartung und Pflege
- Reinigung: Wipe down the stainless steel frame with a soft, damp Mit einem Tuch abwischen. Vermeiden Sie scheuernde Reinigungsmittel, die die Oberfläche zerkratzen könnten.
- Lagerung: For long-term storage, disassemble the stand into its individual components. Store in a dry place away from extreme temperatures to prevent potential damage.
- Inspektion: Periodically check all connections and components for tightness and wear, especially after disassembly and reassembly.
7. Fehlerbehebung
- Der Ständer ist instabil: Ensure all poles are fully inserted into their bases and fittings. Verify that the stand is placed on a level surface. Check that all adjustable sections are securely locked.
- Difficulty assembling poles: Ensure the insertion interfaces are clean and free of debris. Apply gentle, even pressure when connecting poles.
- Poles not extending/retracting smoothly: Check for any obstructions or bends in the poles. Ensure the locking mechanisms are functioning correctly.
8. Spezifikationen
| Besonderheit | Detail |
|---|---|
| Material | Edelstahl |
| Farbe | Silber |
| Grundfläche (L x B) | 40 cm x 25 cm (15.75 Zoll x 9.84 Zoll) |
| Adjustable Size (L x W) | 1.5m x 1.5m to 3m x 6m (4.9ft x 4.9ft to 9.8ft x 19.7ft) |
| Gewicht | 14 kg |
| Produktabmessungen (montiert) | 118.11 x 9.84 x 118.11 inches (approx. 3m x 0.25m x 3m for 3x3m configuration) |
| Modellnummer | 1 |
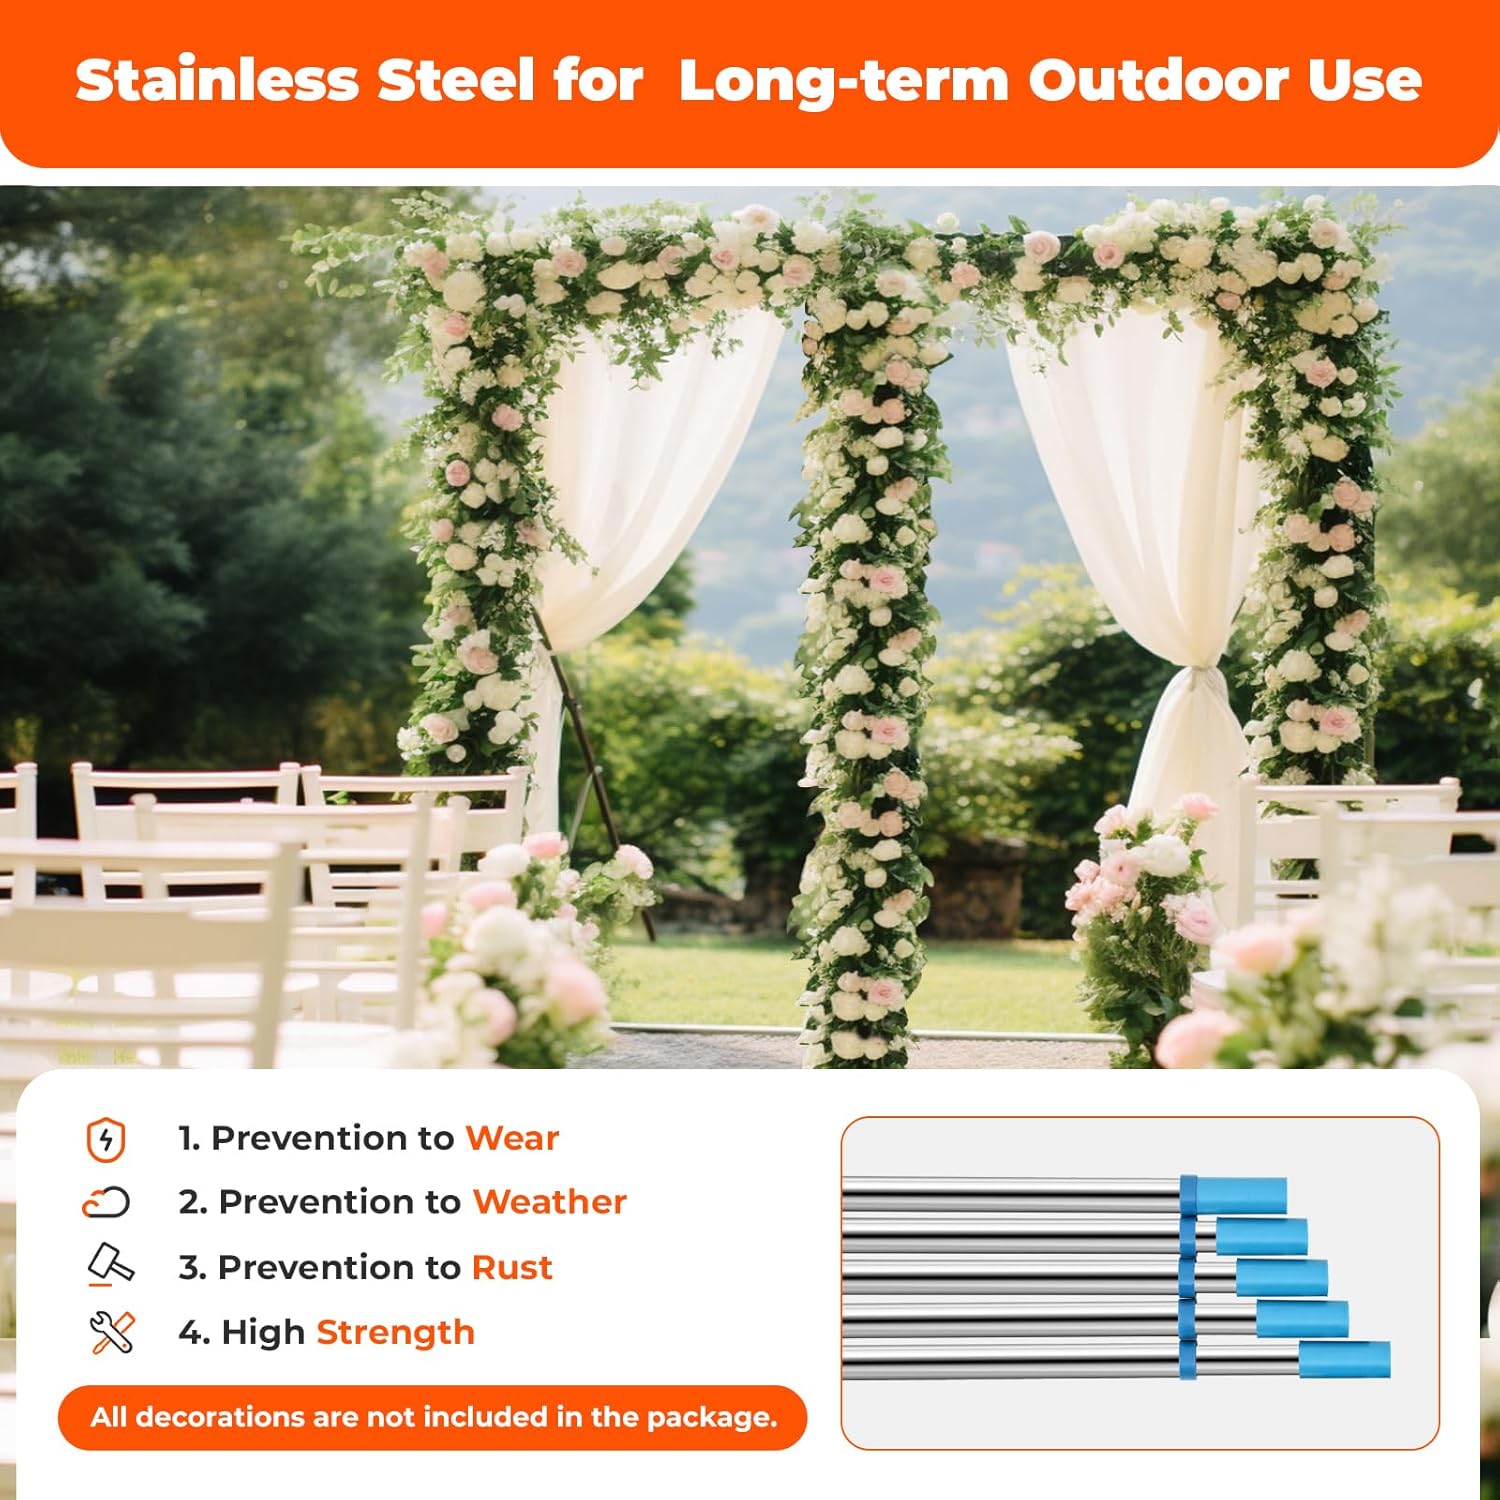
Image 8.1: Stainless steel construction for long-term outdoor use.
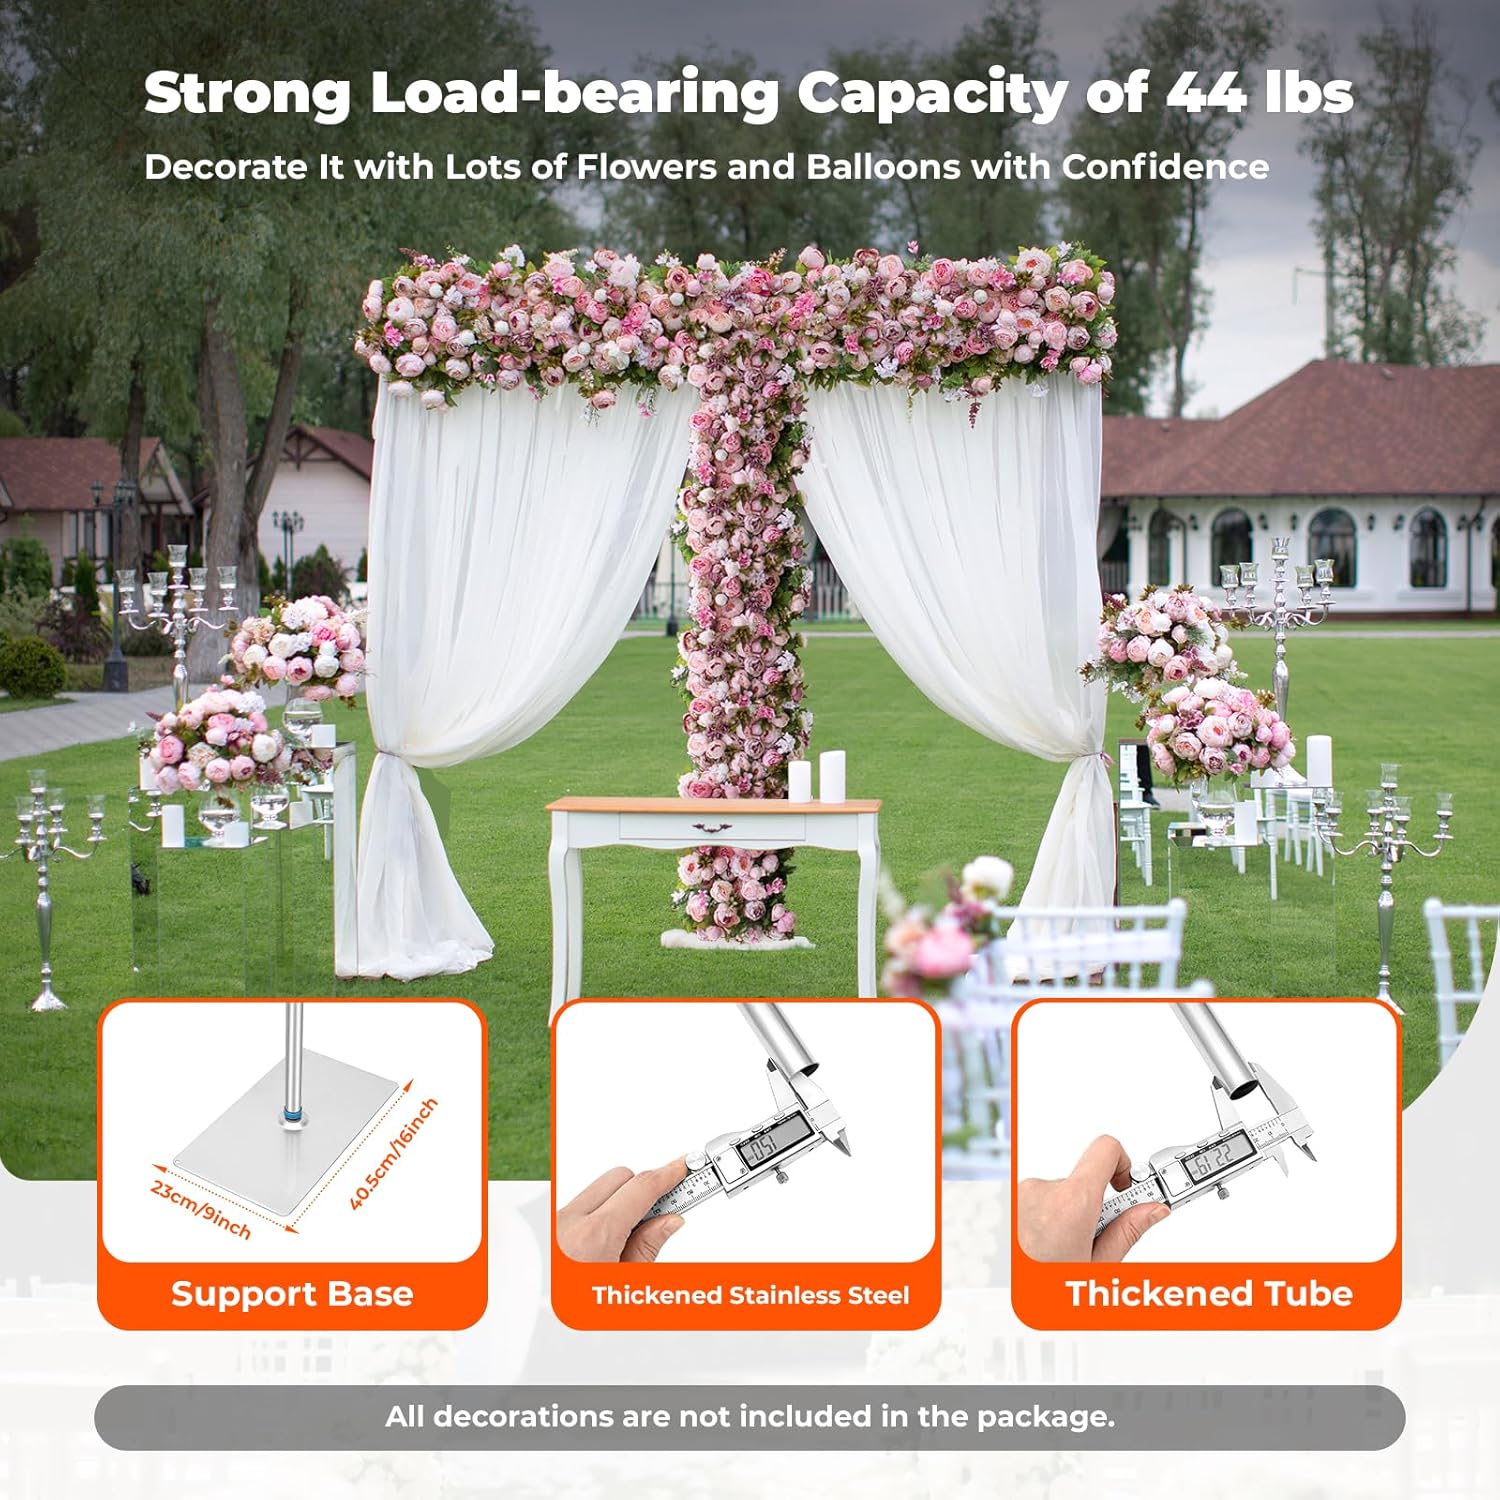
Image 8.2: Features contributing to the stand's strong load-bearing capacity.
9. Garantie und Support
For warranty information or technical support, please refer to the product packaging or contact the seller directly through the platform where the product was purchased. Ensure you have your purchase details and model number (Model 1) available when contacting support.