PROVISION ISR B08P4QLQNM
VORSCHRIFT ISR WebKamera mit Licht – Benutzerhandbuch
Model: B08P4QLQNM
1. Einleitung
This manual provides comprehensive instructions for the setup, operation, and maintenance of your PROVISION ISR Webcam with Light. Please read this manual thoroughly before using the device to ensure optimal performance and longevity.
The PROVISION ISR Webcam with Light is designed to offer a superior video streaming experience with its Full HD 1080p resolution, adjustable integrated lighting, and a built-in noise-reduction microphone. It is ideal for various applications including live streaming, video conferencing, online classes, and content creation.
2. Hauptmerkmale
- Professional Webcam with Adjustable Light: Features an innovative design with an integrated LED light offering 3 adjustable brightness levels for optimal illumination in any environment.
- Full HD 1080p-Auflösung: Delivers crystal-clear images and high color reproduction with a 1080p resolution and a 100-degree wide viewing angle for a natural, undistorted picture.
- Eingebautes Mikrofon mit Geräuschunterdrückung: Equipped with a microphone that reduces background noise and echoes, ensuring clear audio during calls and recordings.
- Vielseitige Anwendung: Suitable for live streaming, video conferences, online courses, vlogging, and gaming.
- Plug-and-Play-Installation: Requires no driver installation; simply connect the USB cable to your device. Compatible with most popular operating systems.
3. Packungsinhalt
Bitte überprüfen Sie beim Öffnen des Pakets, ob alle Artikel vorhanden und in einwandfreiem Zustand sind.
- VORSCHRIFT ISR WebKamera mit Licht
- Integriertes USB-Kabel
- Benutzerhandbuch (dieses Dokument)
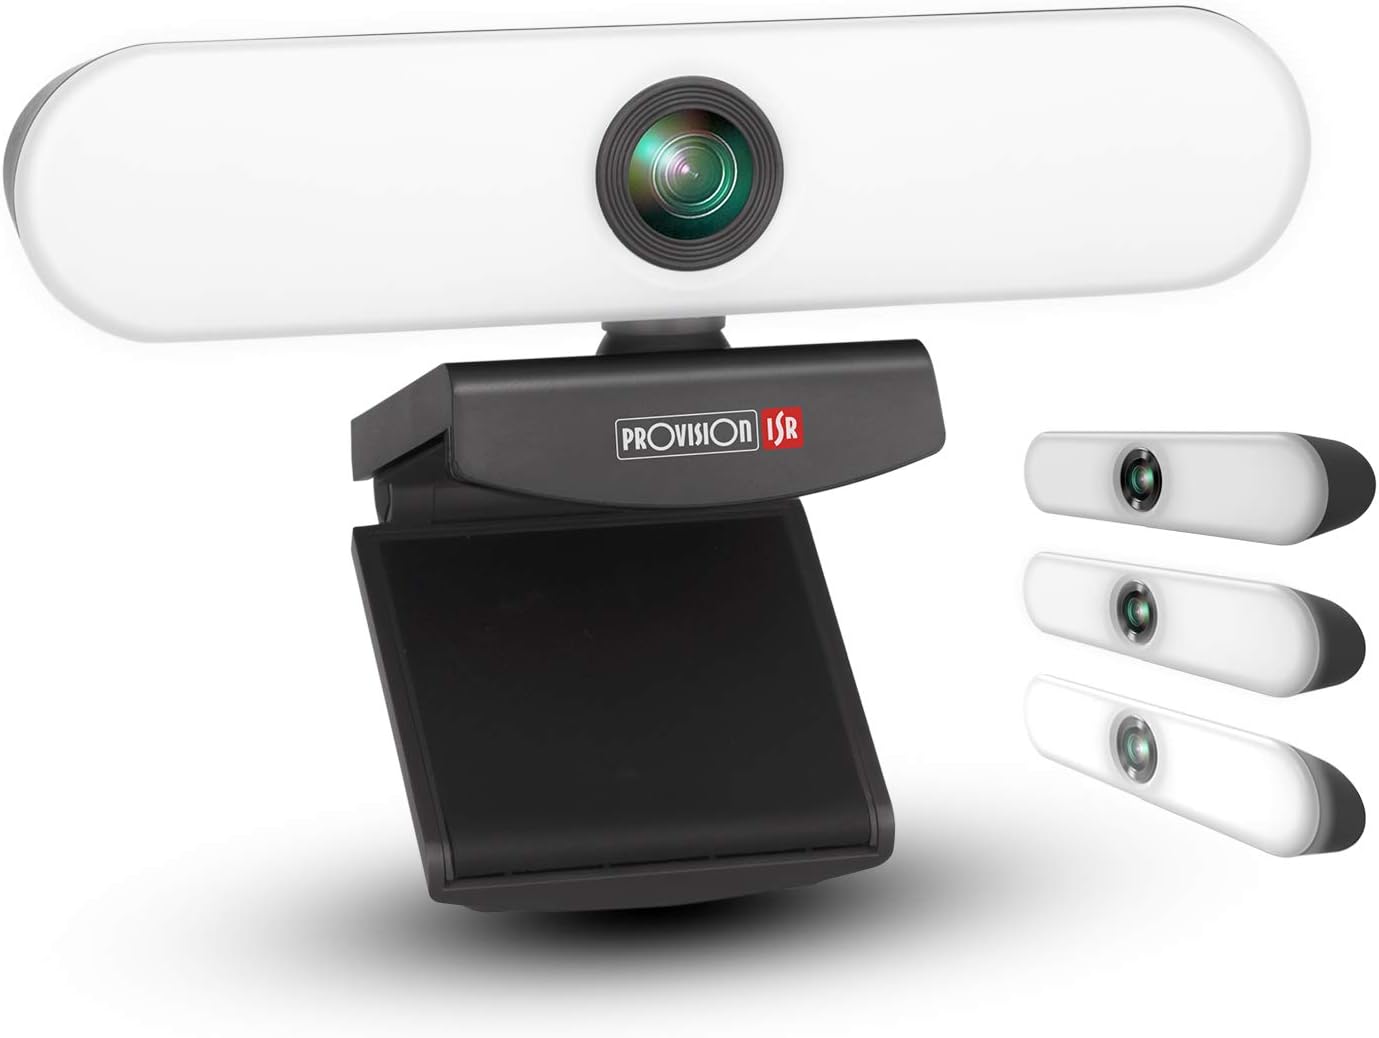
Image: The PROVISION ISR Webcam with Light, showing its integrated light bar and adjustable clip.
4. Installationsanleitung
4.1 Anschließen der WebNocken
- Auspacken: Entfernen Sie vorsichtig die webDie Kamera kam aus ihrer Verpackung.
- Montieren: Open the adjustable clip base and securely place the webcam on top of your computer monitor, laptop screen, or a flat surface. Ensure the webDie Nockenwelle ist stabil und in die gewünschte Richtung ausgerichtet.
- Verbinden: Schließen Sie das integrierte USB-Kabel an das Gerät an. webcam in einen freien USB-Port Ihres Computers.

Bild: Das webcam shown with its USB cable, illustrating its plug-and-play compatibility with Windows, Mac OS, and Android devices.
4.2 Driver Installation (Plug & Play)
The PROVISION ISR Webcam is designed for plug-and-play operation. Your operating system (Windows, macOS, Linux, Android) should automatically detect and install the necessary drivers upon connection. No manual driver installation is typically required.
- Wait a few moments after connecting the USB cable for your system to recognize the device.
- You may see a notification indicating that a new device has been detected and is ready for use.
4.3 Initial Setup in Applications
Once connected, you can select the webcam and its microphone within your preferred video conferencing or streaming application (e.g., Zoom, Skype, Microsoft Teams, OBS Studio).
- Open your desired application.
- Navigate to the application's settings or preferences, usually under "Audio" or "Video" settings.
- Select "PROVISION ISR Web"cam" als Ihr Videoeingabegerät.
- Select "PROVISION ISR Webcam Microphone" (or similar) as your audio input device.
- Adjust video and audio settings as needed within the application.

Image: A woman on a video call, demonstrating the webcam's clear image and sound quality when used with a laptop.
5. Bedienungsanleitung
5.1 Adjusting the Integrated Light
Der webcam features an integrated LED light with three brightness levels. To adjust the light:
- Locate the touch button on the top of the webNocken.
- Tap the button once to cycle through the brightness levels: Low, Medium, High, and Off.
- Select the level that provides optimal illumination for your environment.

Image: Illustration showing the webcam and three examples of lighting levels (Low, Medium, High) on a person's face.
5.2 Einstellen Viewing-Winkel
Der webcam's clip base allows for flexible positioning and angle adjustment.
- Gently tilt the webcam up or down to adjust the vertical viewing-Winkel.
- Drehen Sie den webcam left or right on its base to adjust the horizontal viewing-Winkel.
- Stellen Sie sicher, dass webcam is securely positioned after adjustment.

Abbildung: Diagramm zur Veranschaulichung des 90-Grad-Weitwinkels view der webcam, showing it capturing a group meeting.
6. Wartung
Durch sachgemäße Wartung wird die Langlebigkeit und optimale Leistung Ihres Geräts sichergestellt. webNocken.
- Reinigung der Linse: Verwenden Sie ein weiches, fusselfreies Tuch, das speziell für optische Linsen entwickelt wurde, um die Linsen vorsichtig abzuwischen. webKameraobjektiv. Vermeiden Sie scheuernde Materialien oder aggressive Chemikalien.
- Reinigung des Körpers: Wischen Sie den Körper des webcam with a soft, dry cloth. If necessary, a slightly damp Ein Tuch kann verwendet werden, achten Sie aber darauf, dass keine Feuchtigkeit in das Gerät eindringt.
- Lagerung: Bei längerer Nichtbenutzung lagern Sie die webDie Kamera sollte an einem sauberen, trockenen Ort ohne direkte Sonneneinstrahlung und extreme Temperaturen aufbewahrt werden.
- Kabelpflege: Avoid bending or kinking the USB cable excessively. Do not pull the cable to disconnect the webcam; always grasp the plug.
7. Fehlerbehebung
| Problem | Mögliche Ursache | Lösung |
|---|---|---|
| WebKamera nicht erkannt | Loose USB connection, faulty USB port, driver issue, application not recognizing device. | Ensure USB cable is fully inserted. Try a different USB port. Restart your computer. Check device manager for driver status. Select the webcam in your application settings. |
| Kein Videoausgang | Webcam not selected in application, privacy settings blocking camera, lens cap (if applicable). | Verifizieren webcam selection in application settings. Check operating system privacy settings (e.g., Windows Camera Privacy). Ensure nothing is obstructing the lens. |
| Schlechte Videoqualität | Insufficient lighting, dirty lens, low bandwidth, application settings. | Adjust the integrated light to a higher brightness level. Clean the webcam lens. Ensure stable internet connection. Check application video resolution settings. |
| Microphone not working or poor audio | Microphone not selected, privacy settings, background noise. | Wählen Sie die webcam's microphone in your application's audio settings. Check operating system microphone privacy settings. Reduce ambient noise. |
| Integrated light not working | Not turned on, faulty unit. | Tap the touch button on top of the webcam to cycle through brightness levels. If still not working, contact customer support. |
8. Spezifikationen
| Besonderheit | Detail |
|---|---|
| Modellnummer | B08P4QLQNM |
| Auflösung der Videoaufnahme | 1080p Full HD |
| Fotosensor-Technologie | CMOS |
| Konnektivitätstechnologie | USB |
| Besonderheit | Integrated Adjustable Light (3 Levels), Low Light Performance |
| Mikrofon | Built-in Noise-Reduction Microphone |
| Viewing-Winkel | 100-degree (approx.) |
| Abmessungen (ca.) | 15.9 x 7.1 x 6.3 cm |
| Gewicht ca.) | 237 g |
| Kompatibilität | Windows, macOS, Android (Plug & Play) |
9. Garantie und Support
PROVISION ISR products are manufactured to high quality standards. For specific warranty information, please refer to the warranty card included with your purchase or visit the official PROVISION ISR webBewahren Sie Ihren Kaufbeleg als Kaufnachweis auf.
For technical support, troubleshooting assistance beyond this manual, or warranty claims, please contact PROVISION ISR customer service through their official channels. Contact information can typically be found on the product packaging or the brand's official webWebsite.
Hinweis: Garantiebedingungen und Supportverfügbarkeit können je nach Region variieren.