KitchenAid KFP0918CU
KitchenAid 9-Cup Food Processor Instruction Manual
Model: KFP0918CU
Einführung
Thank you for choosing the KitchenAid 9-Cup Food Processor. This manual provides essential information for the safe and efficient operation, maintenance, and care of your appliance. Please read all instructions carefully before first use and retain this manual for future reference.

Image: The KitchenAid 9-Cup Food Processor in Contour Silver, fully assembled with the work bowl and lid in place.
Wichtige Sicherheitshinweise
WARNUNG:
- Lesen Sie vor der Inbetriebnahme der Küchenmaschine alle Anweisungen sorgfältig durch.
- Tauchen Sie die Motorbasis nicht in Wasser oder andere Flüssigkeiten.
- Vor dem Zusammenbau, der Demontage oder der Reinigung muss das Gerät immer vom Stromnetz getrennt werden.
- Avoid contact with moving parts. Keep hands and utensils away from cutting blades and discs during operation to prevent injury.
- Vor dem Betrieb sicherstellen, dass der Deckel fest verriegelt ist.
- Do not process hot liquids in the food processor.
- Dieses Gerät ist nicht für die Verwendung durch Personen mit eingeschränkten physischen, sensorischen oder geistigen Fähigkeiten oder mangelnder Erfahrung und Kenntnis bestimmt, es sei denn, sie werden von einer für ihre Sicherheit verantwortlichen Person beaufsichtigt oder in die Verwendung des Geräts eingewiesen.
- Bei der Benutzung von Geräten durch oder in der Nähe von Kindern ist eine genaue Aufsicht erforderlich.
Im Lieferumfang enthaltene Komponenten
Your KitchenAid 9-Cup Food Processor comes with the following parts:
- (1) 9-cup work bowl
- (1) Lid with feed tube
- (1) Multi-purpose blade
- (1) Reversible medium slicing/shredding disc
- (1) Thick slicing disc
- (1) Food pusher
- (1) Motor base
Einrichtung und Montage
Before first use, wash all parts except the motor base in warm, soapy water, rinse, and dry thoroughly. Ensure the appliance is unplugged before assembly.
- Stellen Sie den Motorsockel auf eine saubere, trockene und ebene Fläche.
- Align the work bowl with the motor base and twist clockwise until it locks into place. The handle should be positioned to the right.
- Carefully place the desired blade or disc onto the drive adapter inside the work bowl.
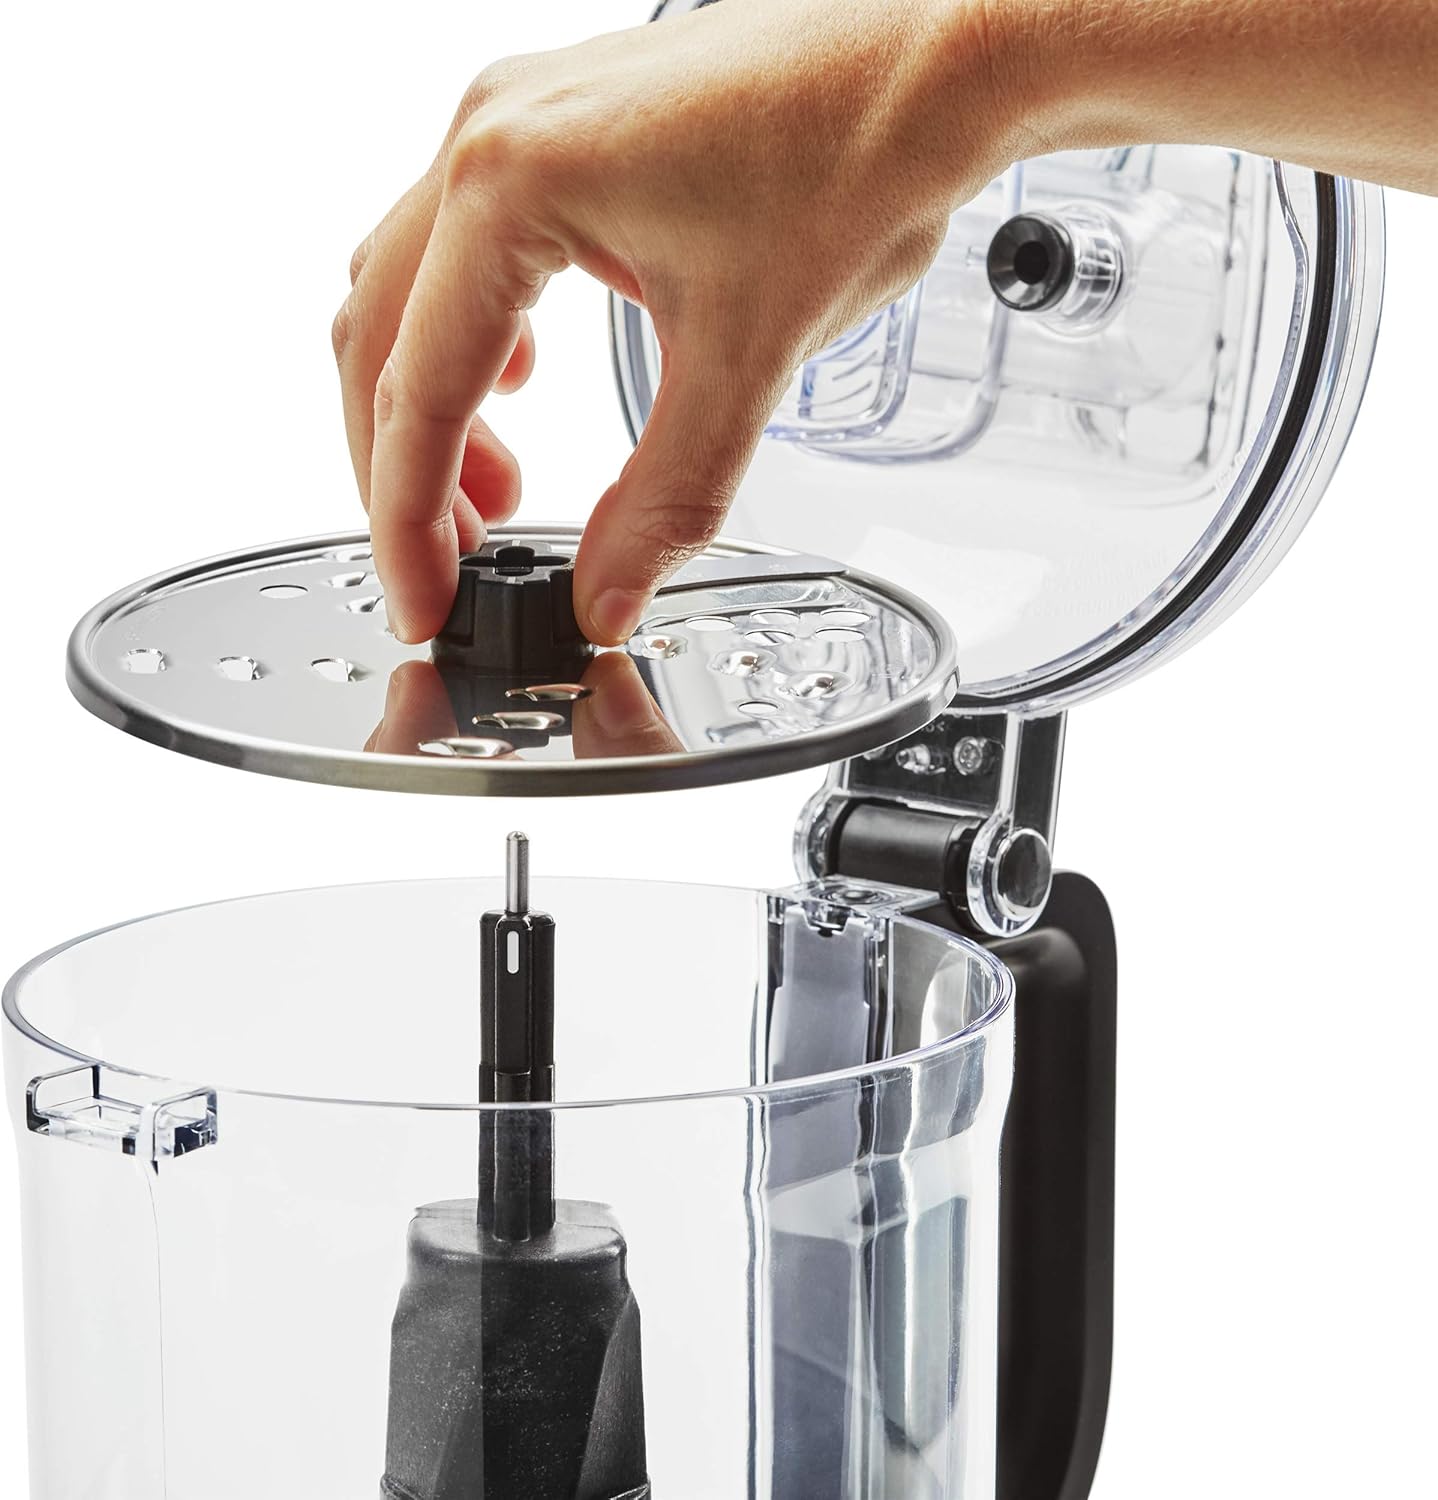
Image: A hand carefully places the slicing disc onto the central shaft within the food processor's work bowl.
- Place the lid onto the work bowl, aligning the lid tab with the handle. Twist the lid clockwise until it locks securely. The food processor will not operate unless the lid is properly locked.
- Den Futterstopfer in das Einfüllrohr des Deckels einführen.
Bedienungsanleitung
The KitchenAid 9-Cup Food Processor features three speed options: Low, High, and Pulse, controlled by easy-press paddles with illuminated LED controls.

Image: Close-up of the KitchenAid Food Processor's base, showing the 'Low', 'High', and 'Off/Pulse' illuminated control buttons.
- Ensure the food processor is properly assembled and the lid is locked.
- Stecken Sie das Netzkabel in eine geerdete Steckdose.
- Add ingredients to the work bowl. For slicing or shredding, place ingredients into the feed tube.
- Wählen Sie Ihre gewünschte Geschwindigkeit:
- Niedrig: For softer ingredients or when more control is desired.
- Hoch: For harder ingredients or faster processing.
- Impuls: Press and hold for short bursts of power. Release to stop. Ideal for chopping, mincing, or when precise control over consistency is needed.
- When processing is complete, press the "Off/Pulse" button to turn off the appliance.
- Unplug the food processor before disassembling and removing ingredients.

Image: The KitchenAid Food Processor on a kitchen counter, actively processing zucchini, with other fresh vegetables nearby.

Image: The KitchenAid Food Processor on a wooden counter, filled with sliced yellow squash and zucchini, surrounded by fresh tomatoes and other ingredients.
Pflege und Reinigung
Proper cleaning ensures the longevity and hygiene of your food processor. All parts, except the motor base, are dishwasher-safe.
- Vor der Reinigung immer den Netzstecker der Küchenmaschine ziehen.
- Disassemble all parts: remove the lid, food pusher, blade/disc, and work bowl from the motor base.
- Wash the work bowl, lid, food pusher, and all blades/discs in the dishwasher (top rack recommended) or by hand with warm, soapy water.
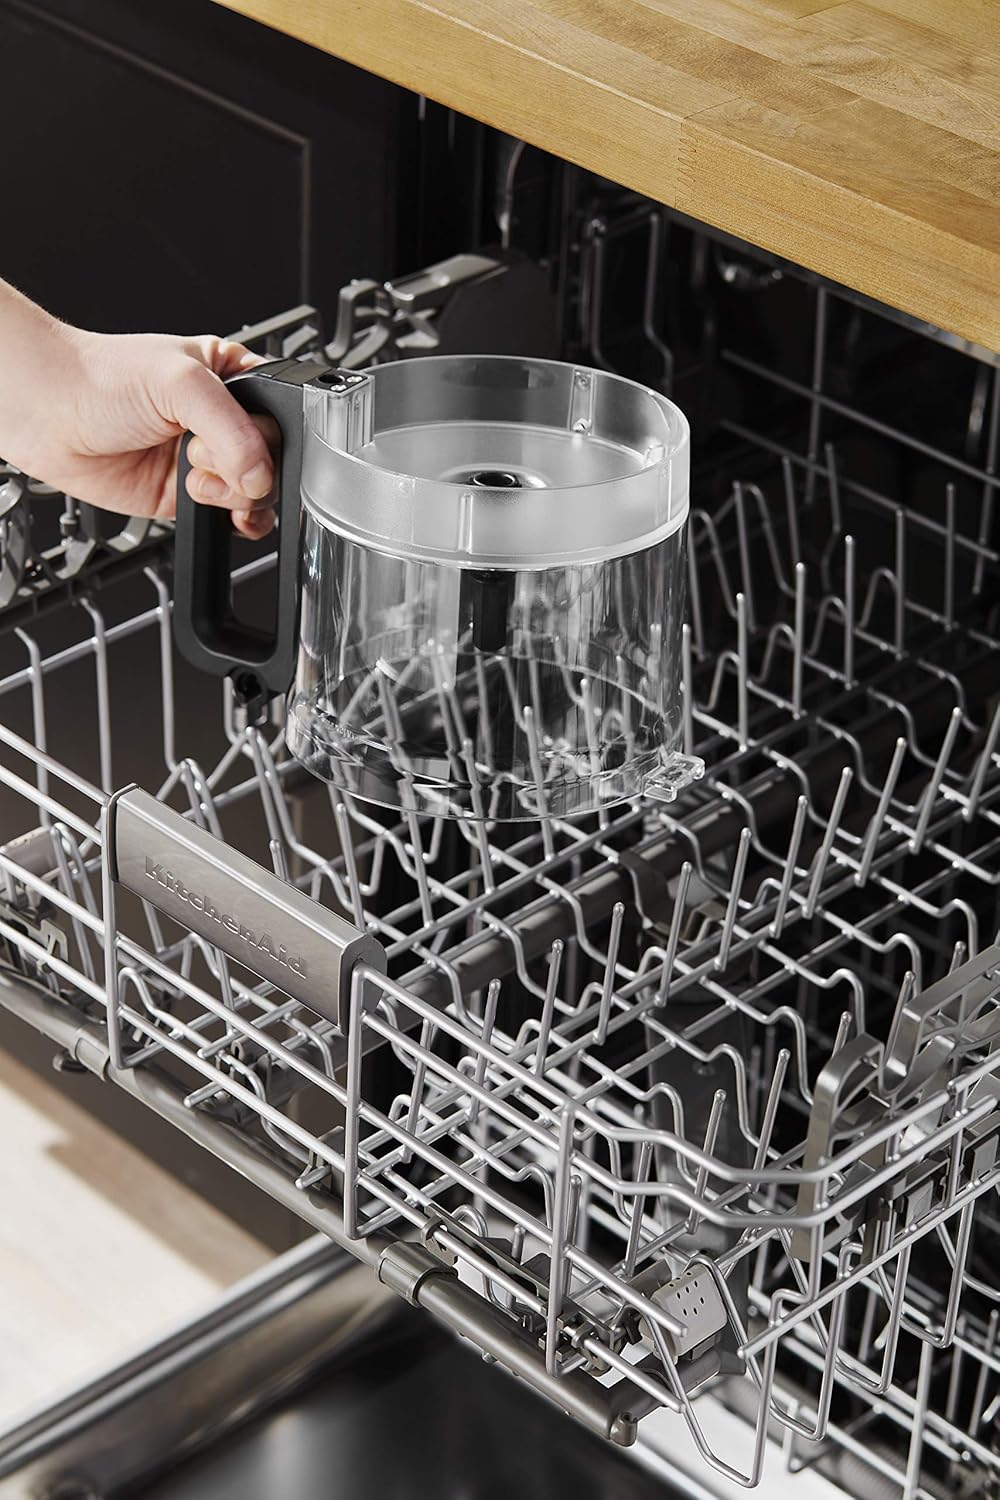
Image: A hand placing the clear work bowl of the food processor into the top rack of a dishwasher for cleaning.
- Use caution when handling blades and discs as they are sharp.
- Wischen Sie den Motorsockel mit einemamp Tuch. Tauchen Sie den Motorsockel nicht in Wasser.
- Trocknen Sie alle Teile gründlich ab, bevor Sie sie wieder zusammenbauen oder lagern.
Fehlerbehebung
| Problem | Mögliche Ursache | Lösung |
|---|---|---|
| Die Küchenmaschine lässt sich nicht einschalten. |
|
|
| Motor stoppt während des Betriebs. |
|
|
| Ingredients are not evenly processed. |
|
|
Technische Daten
- Marke: KitchenAid
- Modell: KFP0918CU
- Kapazität: 9 Tassen
- Wastage: 270 Watt
- Anzahl der Geschwindigkeiten: 3 (Niedrig, Hoch, Puls)
- Bandtage: 120 Volt
- Klingenmaterial: Edelstahl
- Produktpflege: Dishwasher Safe (work bowl, lid, accessories)
Garantieinformationen
This KitchenAid 9-Cup Food Processor (Model KFP0918CU) comes with a 90 Tage eingeschränkte Garantie from the date of purchase. This warranty covers defects in material and workmanship under normal household use. For full terms and conditions, please refer to the warranty card included with your product or visit the official KitchenAid webWebsite.
Kundenservice
For further assistance, product registration, or to purchase additional accessories, please contact KitchenAid Customer Service:
- WebWebsite: www.kitchenaid.com
- Telefon: Refer to your product packaging or the KitchenAid webWebsite für regionale Kontaktnummern.
When contacting support, please have your model number (KFP0918CU) and serial number (if applicable) ready.
Ask a question about this manual
Ask about setup, troubleshooting, compatibility, parts, safety, or missing instructions. Manuals+ will review the question and use this page’s manual context to help answer it.