1. Einleitung
The ScopeAround MS450 Digital Otoscope Ear Camera is designed to provide a clear and detailed view of the ear canal and eardrum. This device features a 4.5-inch IPS screen, a high-definition camera with adjustable LED lights, and an intelligent gyroscope for image stabilization. It is intended for personal ear inspection and can assist in monitoring ear health. This manual provides essential information for the safe and effective use of your otoscope.
2. Sicherheitshinweise
- Do not insert the otoscope too deeply into the ear canal. Excessive insertion can cause injury to the eardrum or inner ear structures.
- Always use the provided ear specula to prevent over-insertion and protect the ear canal.
- Clean the camera lens and ear specula thoroughly before and after each use with alcohol wipes to prevent infection.
- This device is for observation and minor earwax removal only. For significant earwax impaction or ear infections, consult a medical professional.
- Bewahren Sie das Gerät außerhalb der Reichweite von Kindern auf. Bei der Verwendung an Kindern ist die Aufsicht durch Erwachsene erforderlich.
- Avoid using the device if you experience pain, discomfort, or bleeding during examination. Seek medical attention immediately.
- Versuchen Sie nicht, das Gerät zu zerlegen oder zu verändern. Dies kann zum Erlöschen der Garantie führen und Sicherheitsrisiken bergen.
3. Packungsinhalt
Überprüfen Sie, ob alle Artikel im Paket vorhanden sind:
- MS450 Otoscope Camera Unit
- Ladekabel (USB Typ-C)
- Bedienungsanleitung
- 4 x Silicone Ear Spoons (various types)
- 3 x Ear Specula (protective cones)
- 1 Pack of Alcohol Prep Pads
- 32GB MicroSD Memory Card (pre-installed or included separately)

4. Produktüberschreitungview
The MS450 otoscope consists of a main display unit and a connected camera probe. Familiarize yourself with the components and controls:

- Anzeigeeinheit: Features a 4.5-inch IPS screen for real-time viewing.
- Kamerasonde: Equipped with an HD camera, 6 adjustable LED lights, and a gyroscope.
- Bedientasten: Power, Photo/Video, Light Control, Mode Switch, Navigation (Up/Down), OK, and Settings.
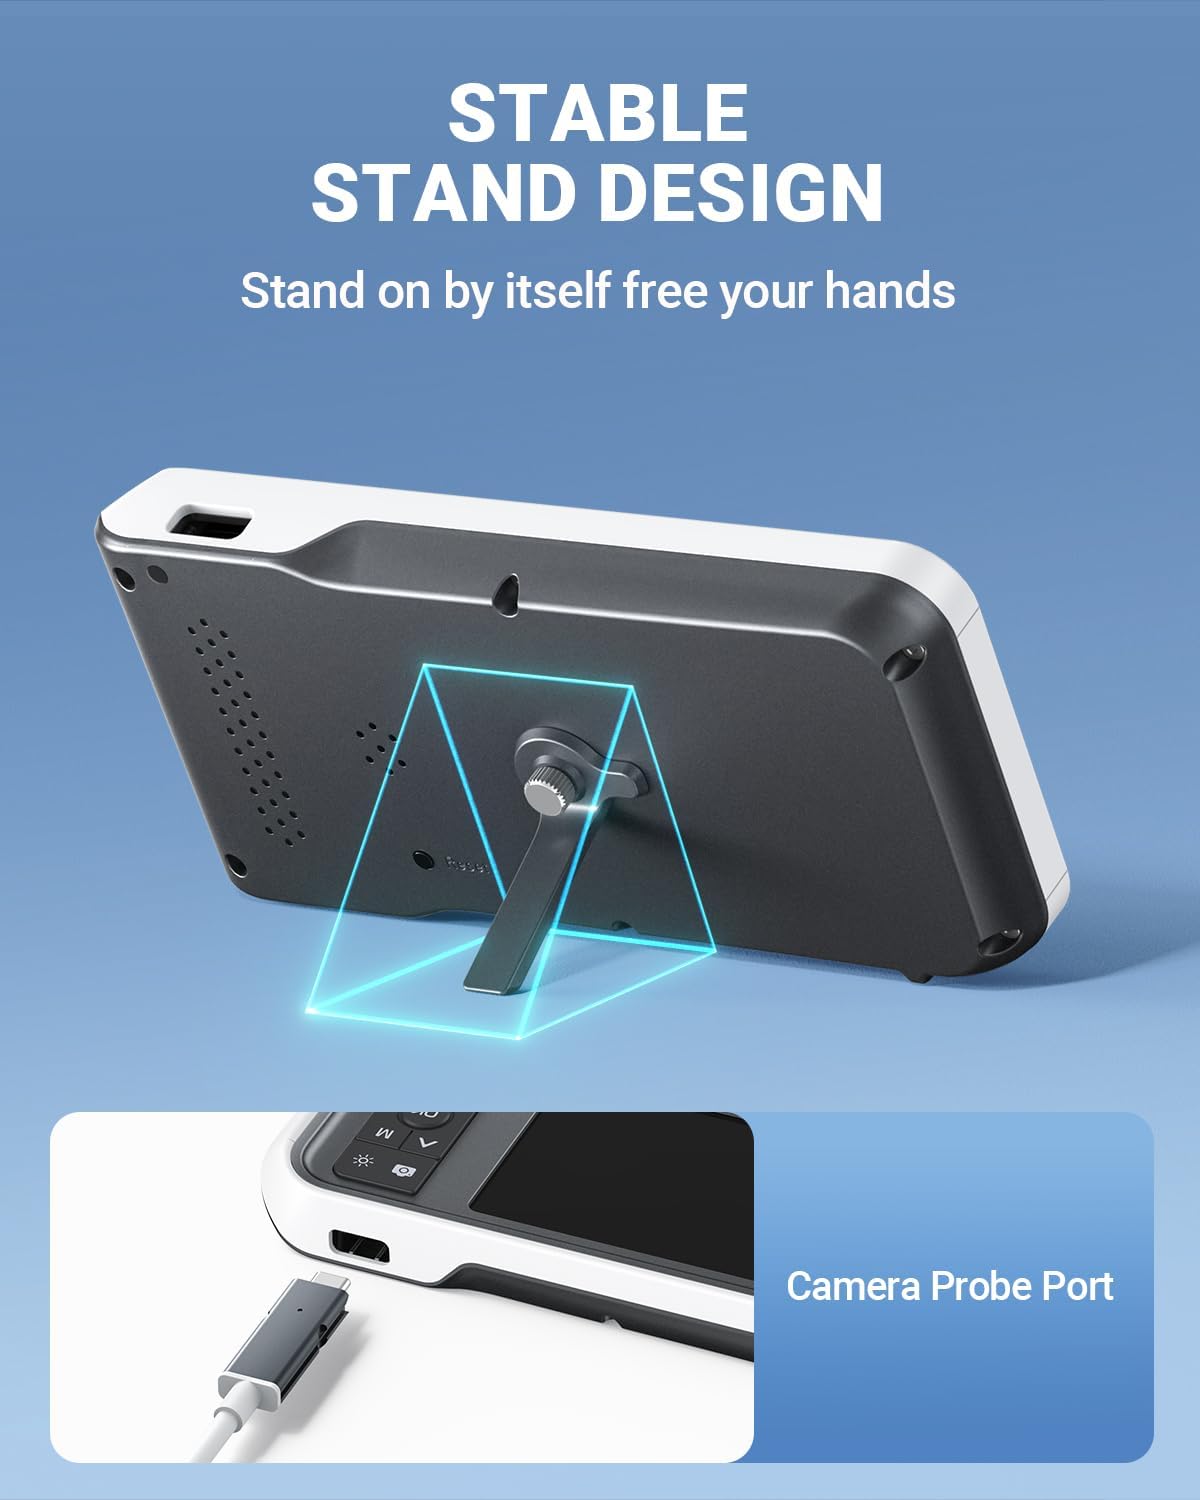
- Häfen: USB Type-C Charging Port, TF Card Slot, Camera Probe Connector.
- Integrierter Ständer: Ermöglicht die freihändige Bedienung.
5. Einrichtung
- Laden Sie das Gerät auf: Before first use, fully charge the otoscope using the provided USB Type-C cable and a compatible power adapter (not included). The charging port is located on the side of the display unit. A full charge provides over 4 hours of continuous use.
- MicroSD-Karte einlegen: Ensure the 32GB MicroSD card is properly inserted into the TF Card Slot. This card is used to store photos and videos.
- Kamerasonde anbringen: Connect the camera probe cable securely to the Camera Probe Connector on the display unit.
- Select and Attach Specula/Ear Spoon: Choose an appropriate ear speculum (protective cone) or silicone ear spoon. Gently push it onto the tip of the camera probe until it is secure. Always use a speculum to protect the ear canal.


6. Bedienungsanleitung
- Einschalten: Press and hold the Power Button (blue button) for a few seconds until the screen turns on.
- LED-Helligkeit anpassen: Use the Light Control Button (sun icon) to cycle through 3 levels of LED brightness to achieve optimal illumination for your ear canal.
- Positionierung: Gently insert the camera probe into the ear canal. The 4.5-inch IPS screen will display a real-time view. The intelligent directional gyroscope helps stabilize the image, preventing disorientation.
- Freisprechbetrieb: Utilize the integrated stand on the back of the display unit to position the device on a flat surface, allowing for hands-free viewing and easier manipulation of the probe.
- Fotos/Videos aufnehmen:
- Press the Mode Switch Button (M) to switch between photo and video modes.
- In photo mode, press the Photo/Video Button (camera icon) once to take a picture.
- In video mode, press the Photo/Video Button once to start recording, and press again to stop.
- Review Medien: Use the navigation buttons (Up/Down) to browse captured photos and videos. Press the OK button to view ein ausgewähltes Element.
- Übertragen von Daten: Connect the device to a computer using the USB Type-C cable to transfer photos and videos from the MicroSD card. Alternatively, remove the MicroSD card and insert it into a card reader.
- Ausschalten: Halten Sie den Ein-/Ausschalter gedrückt, bis sich der Bildschirm ausschaltet.

7. Wartung
- Reinigung der Kameralinse: After each use, gently wipe the camera lens with an alcohol prep pad or a soft, dry cloth. Ensure no residue remains.
- Cleaning Ear Spoons/Specula: Wash reusable ear spoons and specula with soap and water, then sterilize with alcohol prep pads. Replace disposable specula after each use.
- Gerätereinigung: Wipe the main unit with a soft, dry cloth. Do not immerse the main unit in water. The camera probe is waterproof and can be cleaned with water and alcohol.
- Lagerung: Store the otoscope in a clean, dry place at room temperature, away from direct sunlight and extreme temperatures.
- Batteriepflege: Um die Akkulaufzeit zu verlängern, vermeiden Sie häufiges vollständiges Entladen des Geräts. Laden Sie es regelmäßig auf, auch wenn es längere Zeit nicht benutzt wird.

8. Fehlerbehebung
| Problem | Mögliche Ursache | Lösung |
|---|---|---|
| Gerät lässt sich nicht einschalten. | Niedriger Batteriestand; Gerät eingefroren. | Charge the device fully. If unresponsive, press the Reset button with a pin. |
| Kein Bild auf dem Bildschirm. | Camera probe not connected; faulty probe. | Ensure camera probe is securely connected. If problem persists, contact support. |
| Das Bild ist unscharf. | Verschmutzte Linse; falsche Brennweite. | Clean the camera lens. Ensure the probe is within the optimal focal distance (approx. 1 inch / 2.5 cm). |
| Es dürfen keine Fotos/Videos aufgenommen werden. | MicroSD card full or not inserted; incorrect mode. | Check MicroSD card status and ensure it is inserted. Verify device is in photo or video mode. |
| Die LED-Leuchten funktionieren nicht. | Licht ausgeschaltet oder auf niedrigste Helligkeit eingestellt. | Press the Light Control Button to adjust brightness levels. |
9. Spezifikationen
- Modell: MS450
- Anzeige: 4.5-Zoll-IPS-Bildschirm
- Kameraauflösung: Full HD (1080P for images, 720P for video)
- Lichtquelle: 6 adjustable LED lights (3 brightness levels)
- Batterie: 2500 mAh Lithium-Polymer (wiederaufladbar)
- Akkulaufzeit: Ungefähr 4 Stunden Dauerbetrieb
- Lagerung: 32 GB MicroSD-Karte (im Lieferumfang enthalten)
- Brennweite: Approximately 1 inch (2.5 cm)
- Gyroskop: Intelligent directional gyroscope for image stabilization
- Konnektivität: USB Typ-C zum Laden und zur Datenübertragung
- Produktabmessungen: 5.9 x 2.9 x 0.79 Zoll
- Artikelgewicht: 12 Unzen
- Material: Glass (lens), other components as specified by manufacturer
10. Gewährleistung
ScopeAround products are covered by a limited manufacturer's warranty against defects in materials and workmanship. Please refer to the warranty card included in your package or visit the official ScopeAround webDie detaillierten Garantiebedingungen finden Sie auf der Website. Bewahren Sie Ihren Kaufbeleg für Garantieansprüche auf.
11. Unterstützung
For technical assistance, troubleshooting, or product inquiries, please contact ScopeAround customer support:
- WebWebsite: Visit the official ScopeAround webWebsite mit häufig gestellten Fragen und Support-Ressourcen.
- E-Mail: Beachten Sie die Angaben auf Ihrer Produktverpackung oder die offizielle Kennzeichnung. webWebsite für Kundenservice-E-Mail.
- Telefon: Beachten Sie die Angaben auf Ihrer Produktverpackung oder die offizielle Kennzeichnung. webWebseite mit der Kundendienst-Telefonnummer.
Our US-based after-sales support team is available to assist you.