1. Einleitung
This manual provides detailed instructions for the installation, operation, and maintenance of your ASHATA 120dB Touch Sensor Security Alarm Door Knob. This device is designed to provide an audible alert upon detecting unauthorized contact with a door or window, enhancing security for your home, office, or shop. Please read this manual thoroughly before using the product to ensure proper function and safety.
2. Sicherheitshinweise
- Ensure the device is used with the specified 9V battery. Incorrect battery types may cause damage or malfunction.
- Setzen Sie das Gerät keinen extremen Temperaturen, direkter Sonneneinstrahlung oder Feuchtigkeit aus.
- Keep the device out of reach of children to prevent accidental activation or misuse.
- The alarm produces a loud sound (120dB). Avoid prolonged exposure to the sound at close range to prevent hearing discomfort.
- Versuchen Sie nicht, das Gerät selbst zu zerlegen oder zu reparieren. Wenden Sie sich zur Reparatur an qualifiziertes Fachpersonal.
3. Packungsinhalt
Überprüfen Sie, ob alle Artikel in Ihrem Paket vorhanden sind:
- 1 x ASHATA Touch Sensor Security Alarm
- 1 x Benutzerhandbuch (dieses Dokument)
Hinweis: Für den Betrieb wird eine 9V-Batterie benötigt, die nicht im Lieferumfang enthalten ist.
4. Produktüberschreitungview
The ASHATA Touch Sensor Security Alarm is a compact and portable device designed for easy deployment. It features a sensitive touch sensor and a loud siren to deter intruders.
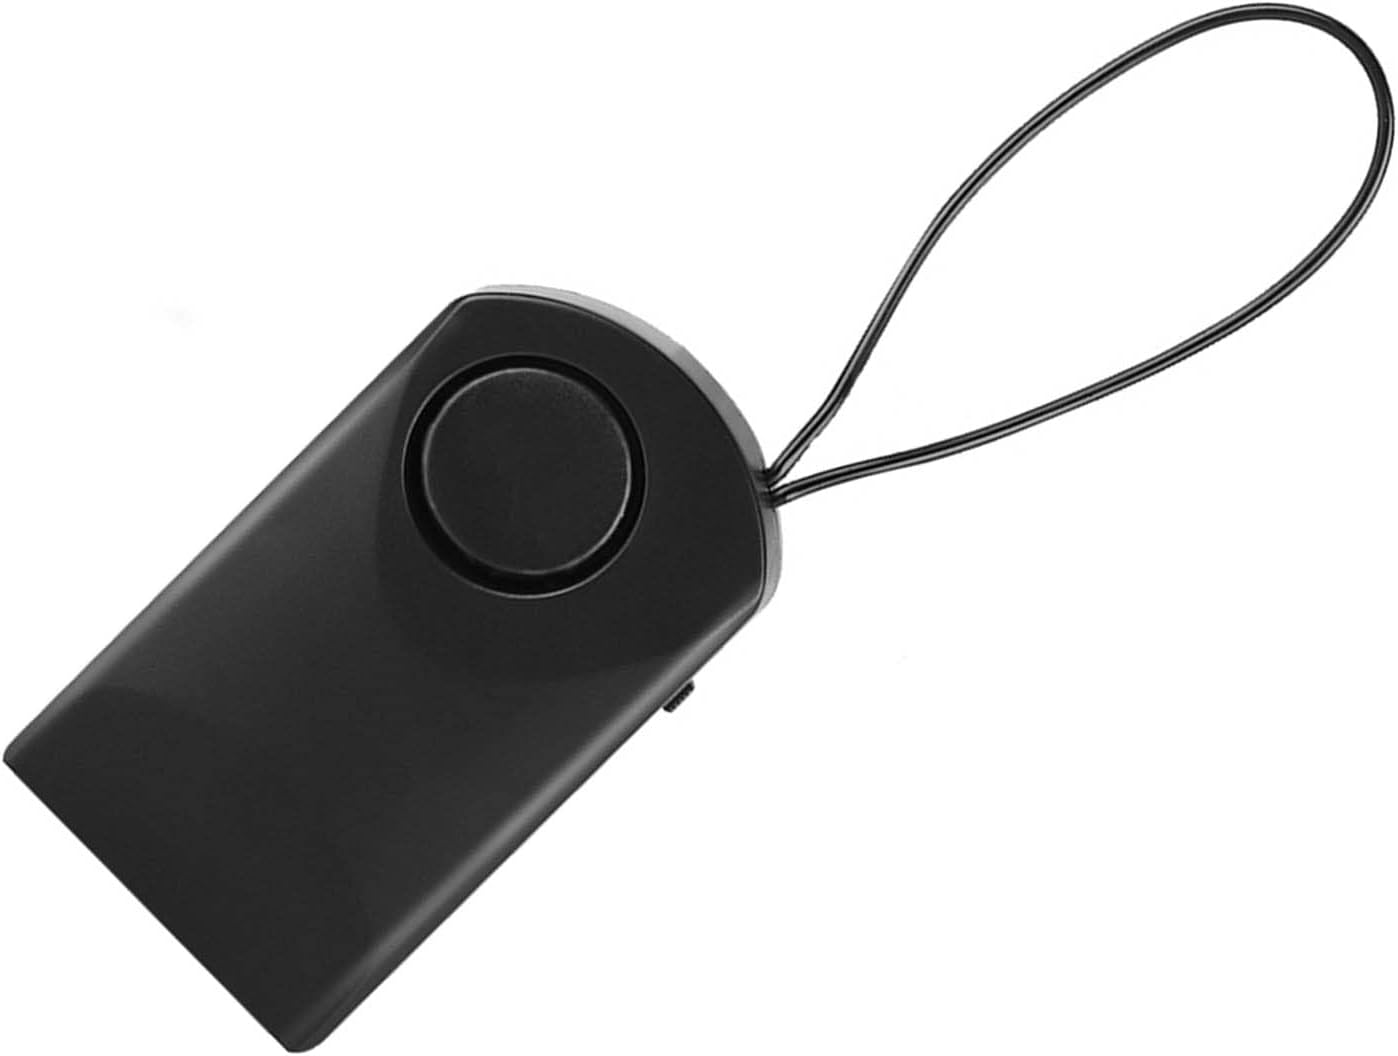
Abbildung 4.1: Front view of the ASHATA Touch Sensor Security Alarm. This image shows the main body of the alarm with the siren speaker visible on the front surface.

Abbildung 4.2: Seite view of the ASHATA Touch Sensor Security Alarm, highlighting the ON/OFF switch. The switch allows for easy activation and deactivation of the alarm function.
Schlüsselkomponenten:
- Siren Speaker: Emits a 120dB alarm sound.
- Berührungssensor: Detects contact or vibration.
- Ein / Aus Schalter: Aktiviert oder deaktiviert den Alarm.
- Batteriefach: Located on the back (requires 9V battery).
- Aufhängeöse: For easy attachment to door handles or knobs.
5. Einrichtung
5.1 Einlegen der Batterie
- Locate the battery compartment cover on the back of the alarm unit.
- Schieben oder hebeln Sie den Deckel vorsichtig auf.
- Legen Sie eine neue 9V-Alkalibatterie ein und achten Sie dabei auf die richtige Polarität (+/-).
- Bringen Sie den Batteriefachdeckel wieder fest an.
5.2 Montage des Melders
The alarm is designed for easy, temporary mounting on door handles or knobs.
- Identify the door or window you wish to secure.
- Use the integrated hanging loop to place the alarm over the inside door handle or knob. Ensure the alarm hangs freely and can detect movement.

Abbildung 5.1: The alarm unit attached to a door handle. The hanging loop allows for quick and easy placement on various door types.

Abbildung 5.2: The alarm positioned on a door knob, illustrating its use in a bedroom setting for personal security. The alarm is designed to activate if the door knob is touched.
6. Bedienungsanleitung
6.1 Aktivierung des Alarms
- Once the alarm is securely mounted and the battery is installed, locate the ON/OFF switch on the side of the unit.
- Schieben Sie den Schalter auf die ON Position.
- The alarm is now armed. Any significant touch or vibration detected on the door handle/knob will trigger the 120dB siren.
6.2 Deactivating the Alarm
- To deactivate the alarm, slide the ON/OFF switch to the AUS Position.
- The alarm will cease to function until reactivated.
Note: The alarm is highly sensitive. Test its sensitivity by gently touching the door handle after activation to ensure it functions as expected.
7. Wartung
- Reinigung: Reinigen Sie das Gerät mit einem weichen, trockenen Tuch. Verwenden Sie keine Scheuermittel oder Lösungsmittel.
- Batteriewechsel: Replace the 9V battery when the alarm sound becomes weak or the unit fails to activate. Always use a fresh alkaline battery.
- Lagerung: Bei längerer Lagerung des Geräts sollte der Akku entfernt werden, um Auslaufen und Beschädigungen zu vermeiden. An einem kühlen, trockenen Ort aufbewahren.
8. Fehlerbehebung
| Problem | Mögliche Ursache | Lösung |
|---|---|---|
| Der Alarm ertönt nicht. |
|
|
| Alarm sounds too easily (false alarms). |
|
|
| Alarm sound is weak. | Schwache Batterie. | Ersetzen Sie die 9V-Batterie durch eine neue. |
9. Spezifikationen
| Besonderheit | Detail |
|---|---|
| Modell | ASHATAurz2poca7s |
| Alarmlautstärke | 120 dB |
| Stromquelle | 1 x 9V Batterie (nicht im Lieferumfang enthalten) |
| Material | ABS-Kunststoff |
| Kontrollmethode | Touch Sensor, ON/OFF Switch |
| Montagetyp | Door Handle/Knob Mount |
| Abmessungen (ca.) | 9.9 x 5.4 x 2.5 cm (3.9 x 2.1 x 1.0 Zoll) |
| Gewicht (ca.) | 69 g (2.4 Unzen) ohne Batterie |
10. Garantie und Support
ASHATA products are designed for reliability and performance. For specific warranty details, please refer to the warranty card included with your purchase or visit the official ASHATA webWebsite.
If you encounter any issues or have questions regarding your ASHATA Touch Sensor Security Alarm, please contact ASHATA customer support through the retailer where the product was purchased or via the contact information provided on the official ASHATA webWebsite.
Please have your model number (ASHATAurz2poca7s) and purchase information ready when contacting support.