1. Einleitung
Thank you for choosing the Yantop Wireless Mouse. This device offers reliable 2.4G wireless connectivity, an ergonomic design for comfortable use, and adjustable DPI settings to enhance your productivity and gaming experience. This manual provides detailed instructions for setup, operation, maintenance, and troubleshooting.

Figure 1: Yantop Wireless Mouse and USB Nano Receiver. A top-down view of the black Yantop wireless mouse, showcasing its ergonomic design, scroll wheel, and DPI button. The compact USB nano receiver is shown next to it.
2. Packungsinhalt
- 1 x Yantop Wireless Mouse
- 1 x USB Nano Receiver (stored in the battery compartment)
- 1 x Benutzerhandbuch
Notiz: Es werden 2 AAA-Batterien benötigt, die nicht im Lieferumfang enthalten sind.
3. Produktüberschreitungview

Figure 2: Six-Button Design. A detailed diagram labeling the six buttons of the Yantop wireless mouse: Left Button, Right Button, Non-slip Rubber Scroll Wheel, DPI Button, Forward Button, and Backward Button.
- Linke Taste: Standardmäßige Linksklick-Funktion.
- Rechter Knopf: Standardmäßige Rechtsklick-Funktion.
- Scrollrad: For scrolling up and down, and can also function as a middle-click button.
- DPI-Taste: Passt die Cursorempfindlichkeit (DPI) an.
- Vorwärts-Taste: Navigiert vorwärts in web Browser bzw file Entdecker.
- Rückwärts-Taste: Navigiert rückwärts in web Browser bzw file Entdecker.
4. Einrichtung
4.1 Batterien einlegen
- Suchen Sie das Batteriefach auf der Unterseite der Maus.
- Öffnen Sie die Abdeckung des Batteriefachs.
- Legen Sie zwei AAA-Batterien ein und achten Sie dabei auf die richtige Polarität (+/-).
- Schließen Sie den Batteriefachdeckel.
4.2 Anschließen des Empfängers
- The USB Nano Receiver is stored inside the battery compartment of the mouse. Carefully remove it.
- Plug the USB Nano Receiver into an available USB port on your computer (desktop, laptop, MacBook, etc.).
- Your computer should automatically detect and install the necessary drivers. No additional software installation is required.
4.3 Ein-/Ausschalten
Locate the ON/OFF switch on the bottom of the mouse. Slide the switch to the "ON" position to power on the mouse. Slide it to the "OFF" position when not in use to conserve battery life.

Figure 3: Battery and Receiver Location. An image of the mouse's underside, illustrating the battery compartment where two AAA batteries are inserted, the storage slot for the USB nano receiver, and the ON/OFF power switch.
5. Bedienung
5.1 Adjusting DPI (Cursor Sensitivity)
The Yantop Wireless Mouse features three adjustable DPI settings: 800, 1200 (default), and 1600. To change the DPI, press the DPI button located below the scroll wheel. Each press will cycle through the available settings, allowing you to select the cursor speed that best suits your needs.
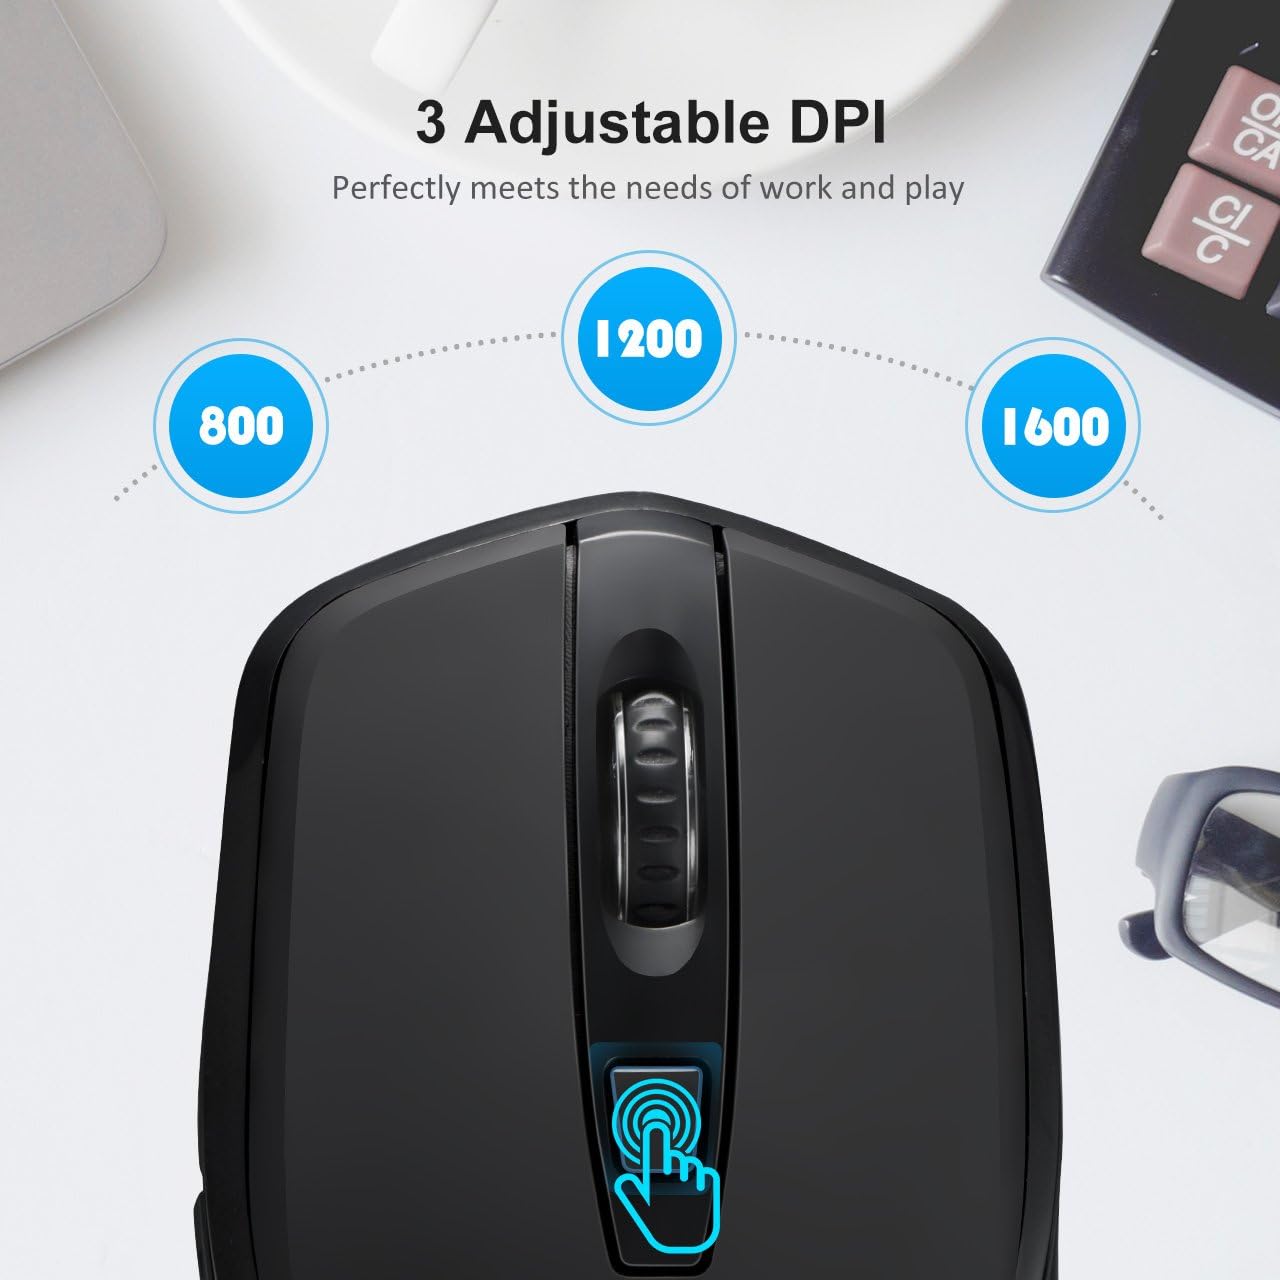
Figure 4: Adjustable DPI Settings. A close-up of the mouse's top, showing the DPI button and visual indicators for the three adjustable DPI settings: 800, 1200 (default), and 1600.
5.2 Energiesparfunktionen
To conserve battery life, the mouse is equipped with a smart power-saving mode. If the mouse is inactive for 10 minutes, it will automatically enter sleep mode. To wake it up, simply click any button on the mouse.

Figure 5: Smart Power Saving Mode. An image depicting the mouse's smart power-saving feature, showing it automatically entering sleep mode after 10 minutes of inactivity.
6. Kompatibilität
The Yantop Wireless Mouse is compatible with a wide range of operating systems, including:
- Windows XP / 7 / 8 / 10
- Mac OS (Note: Side buttons are not supported on Mac OS)
- Linux
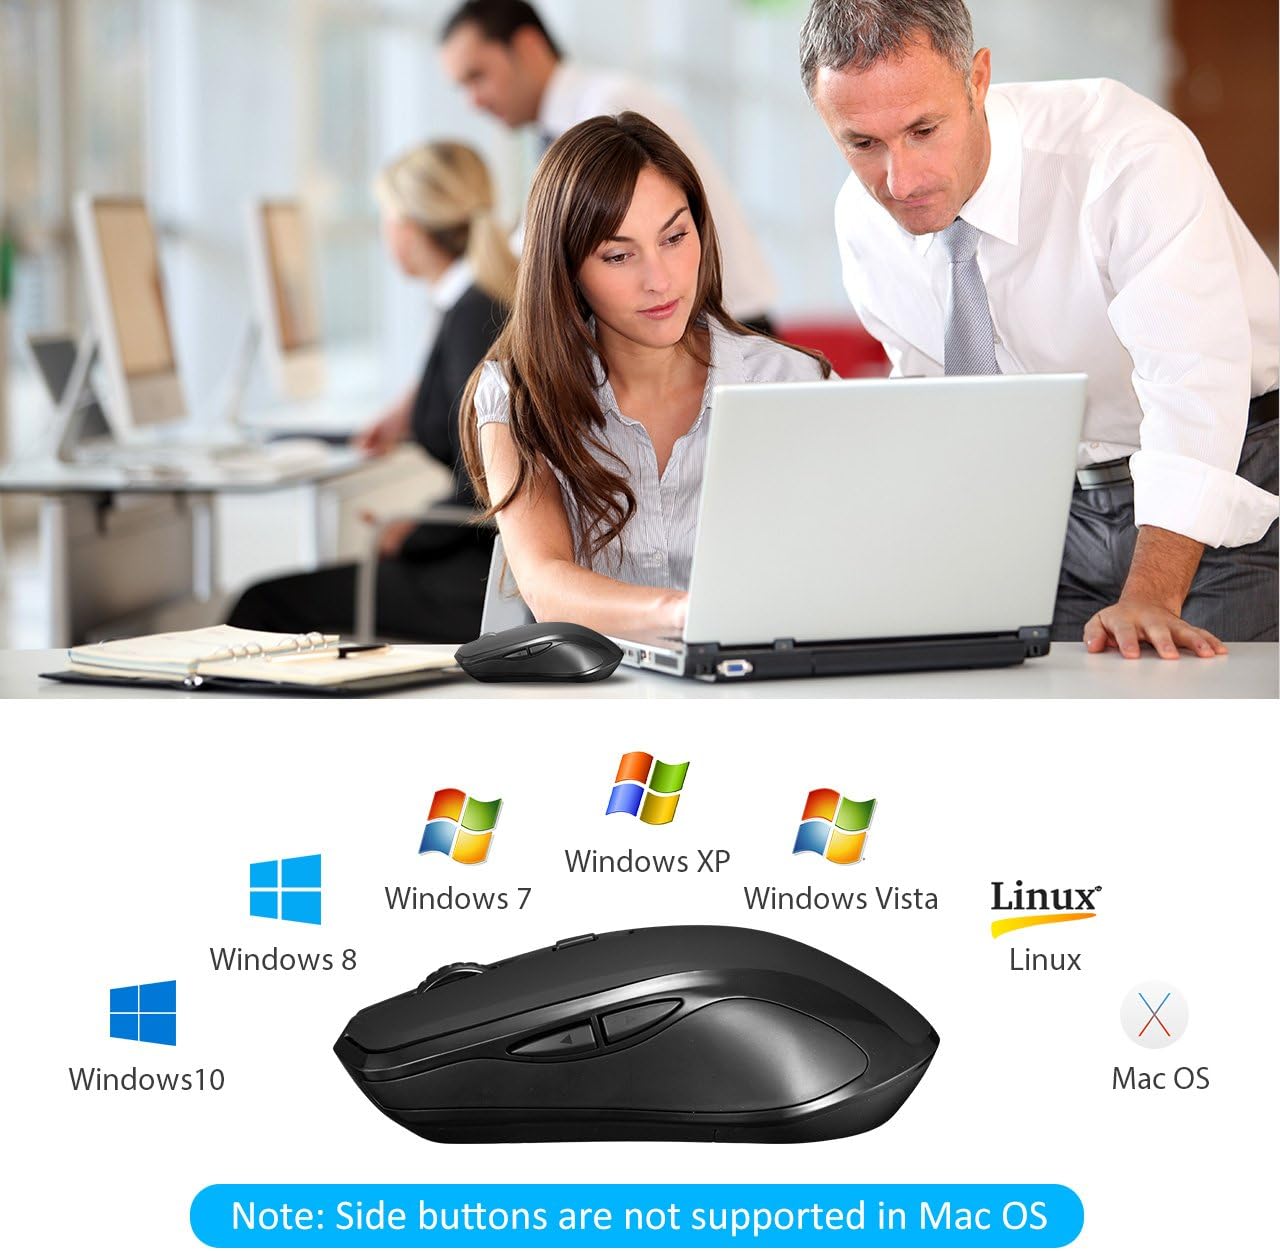
Figure 6: Operating System Compatibility. The Yantop wireless mouse displayed alongside logos of compatible operating systems.
7. Wartung
7.1 Reinigung
Um Ihre Maus zu reinigen, wischen Sie die Oberfläche vorsichtig mit einem weichen, feuchten Tuch ab.amp cloth. Avoid using harsh chemicals or abrasive materials, as these may damage the finish. Ensure no liquid enters the mouse's internal components.
7.2 Batteriewechsel
When the mouse performance degrades or it stops responding, it's likely time to replace the batteries. Follow the steps in Section 4.1 to replace the two AAA batteries. Dispose of old batteries responsibly according to local regulations.
8. Fehlerbehebung
- Maus reagiert nicht:
- Ensure the mouse is powered on (ON/OFF switch on the bottom).
- Prüfen Sie, ob die Batterien richtig eingelegt sind und ausreichend geladen sind. Tauschen Sie sie gegebenenfalls aus.
- Stellen Sie sicher, dass der USB-Nano-Empfänger fest an einen funktionierenden USB-Anschluss Ihres Computers angeschlossen ist. Versuchen Sie es mit einem anderen USB-Anschluss.
- Move the mouse closer to the receiver to rule out range issues (maximum 15m/32ft).
- Die Cursorbewegung ist unregelmäßig oder langsam:
- Reinigen Sie den optischen Sensor an der Unterseite der Maus.
- Versuchen Sie, die Maus auf einer anderen Oberfläche zu verwenden.
- Adjust the DPI setting using the DPI button (see Section 5.1).
- Seitliche Tasten funktionieren nicht:
- If you are using a Mac OS system, the side buttons are not supported. This is a known compatibility limitation.
- For Windows/Linux, ensure no software conflicts are present.
9. Spezifikationen
| Besonderheit | Detail |
|---|---|
| Modellnummer | USAA1-YPGEPC157AB |
| Verbindungstyp | 2.4-GHz-Funk (USB-Nano-Empfänger) |
| DPI-Einstellungen | 800 / 1200 (Standard) / 1600 |
| Anzahl der Tasten | 6 (Links, Rechts, Mausrad, DPI, Vorwärts, Rückwärts) |
| Arbeitsabstand | Bis zu 15 Meter (32 Fuß) |
| Stromquelle | 2 x AAA-Batterien (nicht enthalten) |
| Akkulaufzeit | Up to 12 months (with power-saving mode) |
| Automatischer Schlafmodus | Nach 10 Minuten Inaktivität |
| Haltbarkeit der Tastenanschläge | Über 5,000,000 Klicks |
| Technische Daten | 12.5 x 7.01 x 3.99 cm (4.92 x 2.76 x 1.57 Zoll) |
| Produktgewicht | 90.72 g (0.2 Pfund) |
| Kompatibilität | Windows XP/7/8/10, Mac OS (side buttons not supported), Linux |
10. Garantie und Support
For warranty information and technical support, please refer to the documentation included with your purchase or contact Yantop customer service through the retailer where the product was purchased. Keep your proof of purchase for warranty claims.