1. Einleitung
Thank you for choosing the DEWALT DCE571N-XJ 18V Cordless Caulking Gun. This tool is designed for professional applications requiring precise and controlled material dispensing. Please read this manual carefully before operating the tool to ensure safe and efficient use. Keep this manual for future reference.
Allgemeine Sicherheitshinweise
- Tragen Sie stets geeignete persönliche Schutzausrüstung (PSA), wie z. B. eine Schutzbrille.
- Stellen Sie sicher, dass der Arbeitsbereich gut beleuchtet und frei von Hindernissen ist.
- Betreiben Sie das Werkzeug nicht in explosionsgefährdeten Bereichen, wie zum Beispiel in der Nähe von brennbaren Flüssigkeiten, Gasen oder Stäuben.
- Halten Sie Kinder und Unbeteiligte fern, während Sie das Werkzeug bedienen.
- Trennen Sie den Akku, bevor Sie Einstellungen vornehmen, Zubehörteile wechseln oder das Werkzeug verstauen.
- Use only DEWALT recommended accessories and battery packs.
2. Produktüberschreitungview
The DEWALT DCE571N-XJ is an 18V cordless caulking gun designed for efficient and precise application of sealants and adhesives. Key features include:
- Variable Kurzwahl: Allows for precise control over material flow rate.
- Ergonomischer Griff: Contoured handle with rubber overmold for enhanced comfort and maneuverability.
- Anti-Tropf-Funktion: Durable piston rod with an automatic retraction mechanism to prevent dripping.
- Integriertes LED-Licht: Illuminates the work area for improved visibility during application.
- Patronenhalter: Compatible with 300-400ml cartridges.
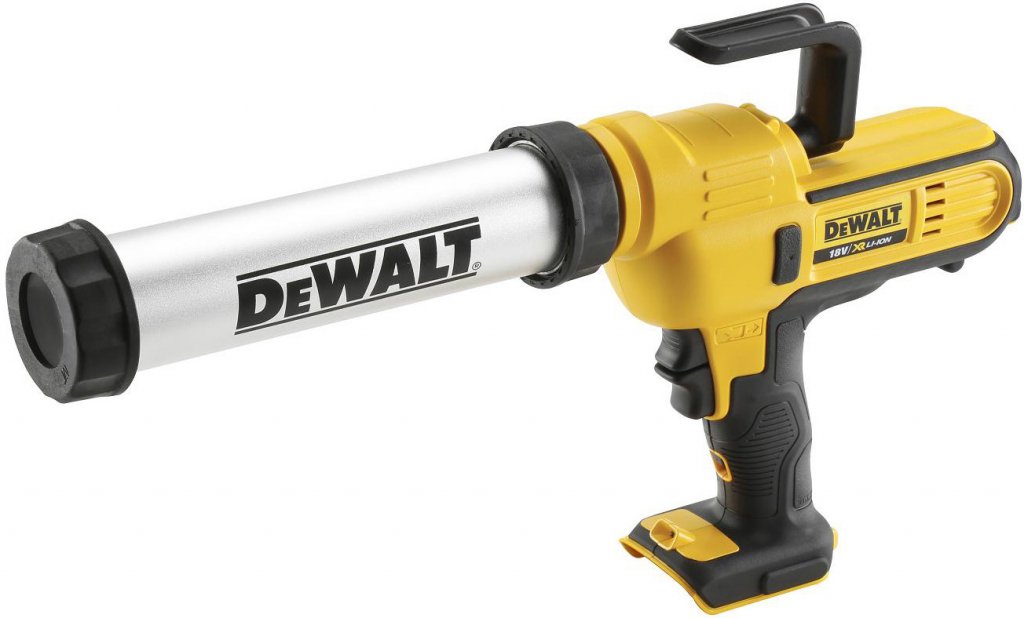
Figure 1: DEWALT DCE571N-XJ 18V Cordless Caulking Gun. This image shows the tool's main body, handle, trigger, and cartridge holder.
3. Einrichtung
3.1 Batterieeinbau (Batterie und Ladegerät separat erhältlich)
- Stellen Sie sicher, dass das Werkzeug ausgeschaltet ist.
- Richten Sie den Akku an der Akkuöffnung an der Unterseite des Werkzeugs aus.
- Schieben Sie den Akku in den Anschluss, bis er hörbar einrastet.
- Zum Entnehmen den Batterieentriegelungsknopf drücken und den Akku herausschieben.
3.2 Loading a Cartridge (300-400ml)
- Aus Sicherheitsgründen muss die Batterie entfernt werden.
- Press the plunger release lever (if applicable) to retract the plunger rod fully.
- Remove the front cap of the cartridge holder.
- Insert the sealant or adhesive cartridge into the holder, nozzle end first.
- Replace the front cap, ensuring it is securely fastened.
- Cut the tip of the cartridge nozzle to the desired bead size at a 45-degree angle.
- Puncture the inner seal of the cartridge using a long nail or wire, if necessary.
4. Bedienungsanleitung
4.1 Ein-/Ausschalten
- To turn on the tool, depress the trigger switch. The LED light will activate.
- Zum Ausschalten den Auslöseschalter loslassen.
4.2 Adjusting Material Flow (Variable Speed Dial)
- Locate the variable speed dial, typically near the trigger.
- Rotate the dial to select the desired speed setting. Lower numbers indicate slower flow, higher numbers indicate faster flow.
- Start with a lower setting and gradually increase as needed for optimal control and bead consistency.
4.3 Applying Sealant/Adhesive
- Positionieren Sie die Düse am Startpunkt Ihrer Anwendung.
- Depress the trigger to begin dispensing material.
- Maintain a consistent speed and angle as you move the tool along the desired path.
- Release the trigger to stop the flow. The anti-drip feature will retract the plunger slightly to prevent excess material from oozing out.
- Use the integrated LED light for enhanced visibility in dimly lit areas.
5. Wartung
5.1 Reinigung
- After each use, remove the cartridge and clean any excess material from the plunger rod and cartridge holder.
- Anzeige verwendenamp cloth to wipe down the exterior of the tool. Do not use harsh solvents or abrasive cleaners.
- Ensure no material dries inside the cartridge holder or on the plunger rod, as this can impede future operation.
5.2 Speicherung
- Bewahren Sie das Werkzeug an einem sauberen, trockenen Ort außerhalb der Reichweite von Kindern auf.
- Entfernen Sie den Akku, bevor Sie den Akku über längere Zeiträume lagern.
- Vermeiden Sie die Lagerung in direktem Sonnenlicht oder extremen Temperaturen.
6. Fehlerbehebung
| Problem | Mögliche Ursache | Lösung |
|---|---|---|
| Werkzeug funktioniert nicht. | Batterie nicht richtig eingesetzt oder entladen. | Stellen Sie sicher, dass der Akku vollständig geladen und richtig eingesetzt ist. |
| Material flow is inconsistent or stops. | Cartridge empty, nozzle clogged, or inner seal not punctured. | Replace cartridge, clear nozzle, or puncture inner seal. |
| Excessive dripping after releasing-Trigger. | Anti-drip mechanism obstructed or material too thin. | Clean plunger rod and mechanism. Allow more time for retraction. |
| Plunger rod does not retract fully. | Material buildup on rod or mechanism. | Clean the plunger rod and surrounding area thoroughly. |
7. Spezifikationen
| Besonderheit | Spezifikation |
|---|---|
| Modellnummer | DCE571N-XJ |
| Bandtage | 18 Volt |
| Produktabmessungen (L x B x H) | 53 x 29.2 x 8.5 cm |
| Gewicht | 2.76 kg |
| Kartuschenkapazität | 300-400ml (holder included) |
| Batterie im Lieferumfang enthalten | Nein (separat erhältlich) |
| Ladegerät enthalten | Nein (separat erhältlich) |
8. Garantie und Support
DEWALT products are engineered to the highest standards. For detailed warranty information, please refer to the warranty card included with your product or visit the official DEWALT website. For technical support, spare parts, or service inquiries, please contact your local DEWALT service center or authorized dealer.
Hinweis: Informationen zur Verfügbarkeit von Ersatzteilen sind in den Produktdaten nicht enthalten.