1. Einleitung
This manual provides detailed instructions for the proper use and maintenance of your Easyfone Prime-A1 Unlocked Flip Cell Phone. Please read this manual thoroughly before using your device to ensure optimal performance and longevity.
2. Packungsinhalt
Upon opening your Easyfone Prime-A1 package, please verify that all the following items are included:
- Easyfone Prime-A1 Cell Phone
- Charging Set (Adapter and Cable)
- Batterie
- Benutzerhandbuch (dieses Dokument)
- SpeedTalk SIM CARD (may be included depending on package)

Image: The Easyfone Prime-A1 product box, detailing the model, item number, FCC ID, and package contents. It also lists radio equipment type, frequency bands, manufacturer, and address.
3. Produktüberschreitungview
The Easyfone Prime-A1 is a classic bar-type flip cell phone designed for ease of use, featuring large buttons, a backlit keypad, and clear sound. It focuses on essential communication functions like calling and texting, without internet access or a camera for simplicity.
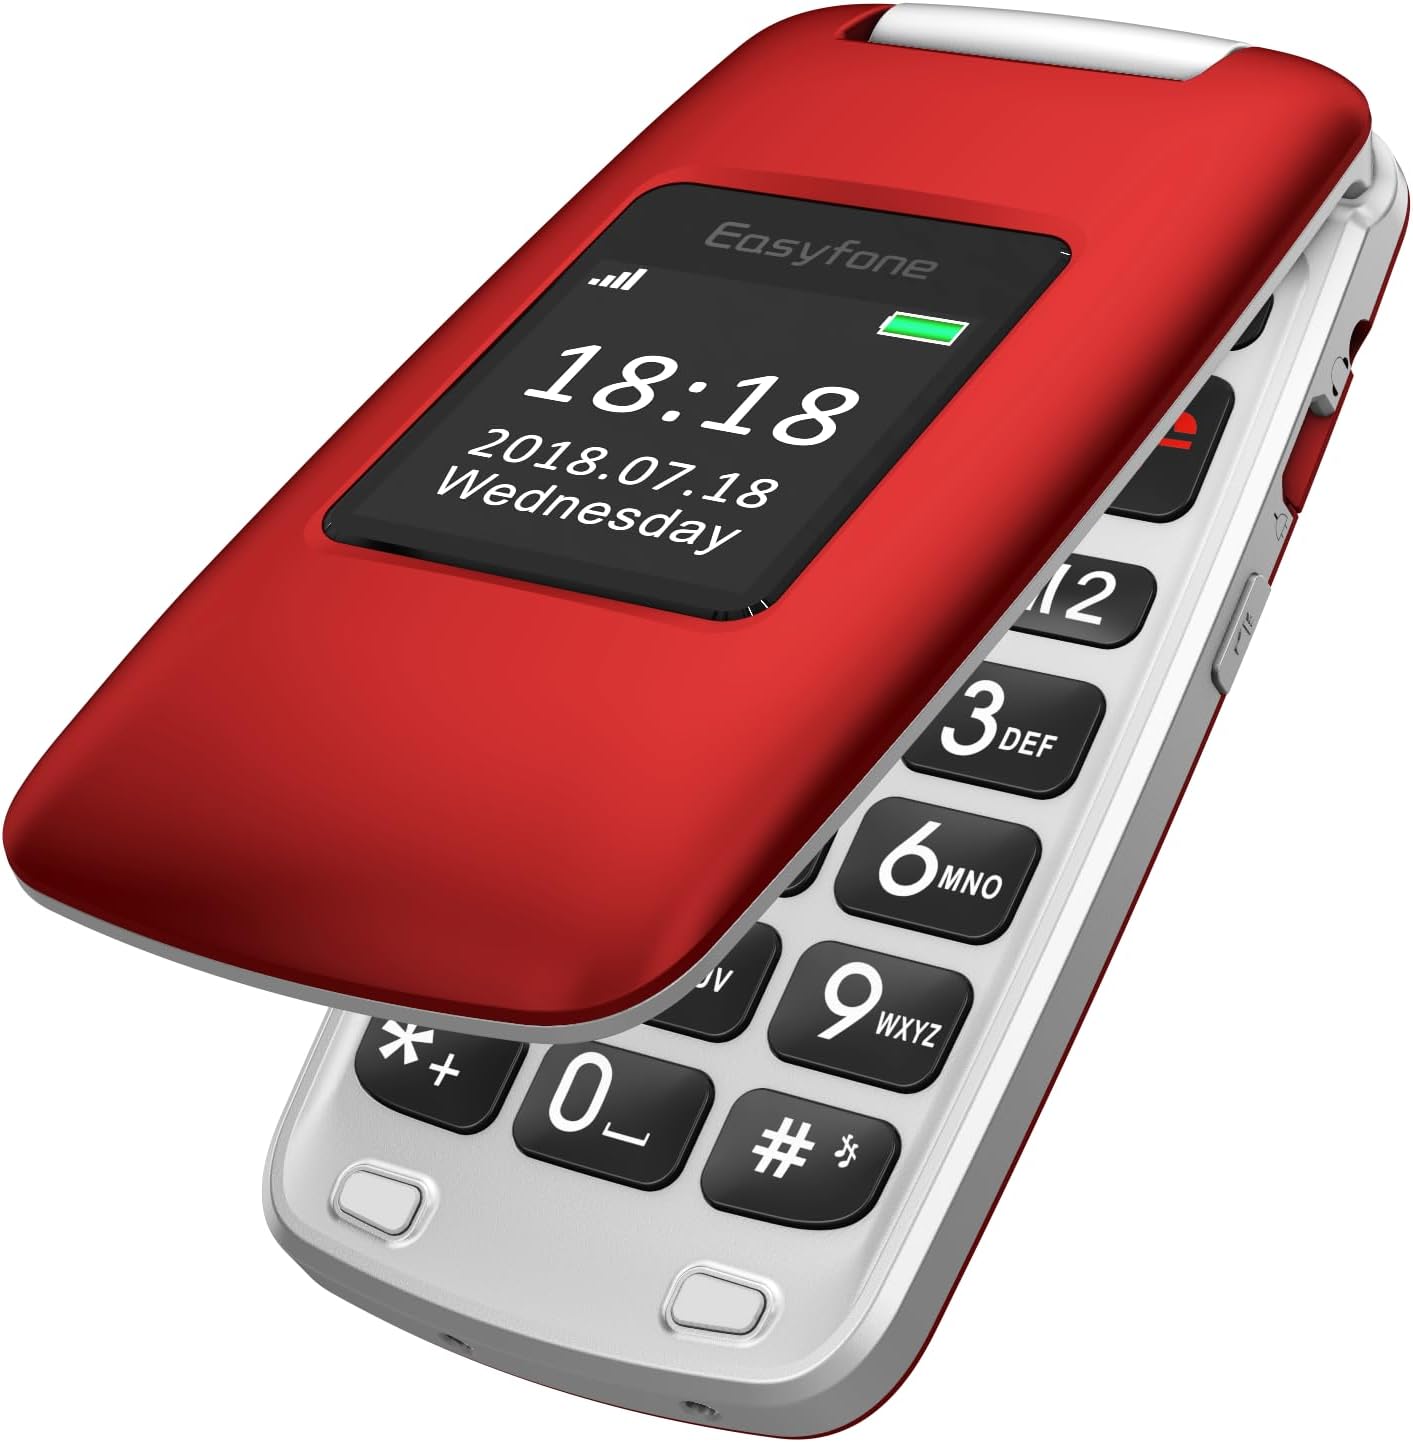
Image: The Easyfone Prime-A1 flip phone in its closed position, showcasing the external display with the current time and date. The phone is red with a silver hinge.

Image: The Easyfone Prime-A1 flip phone in its open position, revealing the large, easy-to-read keypad and the internal screen. The phone is red and silver.
4. Einrichtung
4.1. Einlegen der SIM-Karte und der Speicherkarte
- Öffnen Sie vorsichtig die Rückseite des Telefons.
- Wenn der Akku installiert ist, entfernen Sie ihn.
- Locate the SIM card slot(s). The phone supports standard SIM cards.
- Slide the metal cover of the SIM slot to the left to unlock it, then lift it.
- Insert your SIM card with the gold contacts facing down, ensuring it is correctly oriented according to the diagram on the phone.
- Close the metal cover and slide it to the right to lock it into place.
- If using a memory card (MicroSD), locate the memory card slot and insert the card with the gold contacts facing down until it clicks into place.
Note: A video titled "How to insert the SIM card and Memory card? See Video!!!" is available online. However, as per our guidelines, only videos created by the seller are embedded in this manual. This particular video is user-generated content and therefore not included here. Please refer to the written instructions above.
4.2. Einbau und Aufladen der Batterie
- After inserting the SIM/memory card, place the battery into the battery compartment, aligning the gold contacts on the battery with the contacts in the phone.
- Bringen Sie die Rückseite wieder an und drücken Sie sie fest, bis sie sicher einrastet.
- To charge the phone, connect the charging cable to the phone's charging port or place the phone in the provided charging dock. Connect the other end of the cable to the power adapter and plug it into a wall outlet.
- The battery indicator on the screen will show charging status. Allow the phone to charge completely before first use.

Image: The Easyfone Prime-A1 flip phone resting in its dedicated charging dock, indicating it is ready for charging or currently charging. The phone is red.
4.3. Ein-/Ausschalten
- So schalten Sie das Gerät ein: Press and hold the red 'End Call' button (usually marked with a power icon) until the screen lights up and the Easyfone logo appears.
- So schalten Sie das Gerät aus: Press and hold the red 'End Call' button until a power-off confirmation appears on the screen. Select 'Power Off' to shut down the device.
5. Grundlegende Bedienung
5.1. Anrufe tätigen
- Klappe das Klapphandy auf.
- Enter the phone number using the keypad. The large, backlit buttons ensure easy dialing.
- Drücken Sie die grüne Taste „Anrufen“, um den Anruf zu starten.
- To end the call, press the red 'End Call' button.
5.2. Anrufe entgegennehmen
- When an incoming call is received, the phone will ring and display the caller's information.
- Press the green 'Call' button to answer the call.
- To reject the call, press the red 'End Call' button.
5.3. Sending and Receiving Text Messages
- Navigieren Sie vom Hauptbildschirm aus zum Menü „Nachrichten“.
- Wählen Sie „Nachricht schreiben“, um einen neuen Text zu verfassen.
- Enter the recipient's number and your message using the keypad.
- Select 'Send' to transmit the message.
- Eingegangene Nachrichten werden in Ihrem Posteingang angezeigt.
5.4. Kurzwahl
The Easyfone Prime-A1 features eight dedicated speed dial buttons (number keys 2-9) and two M1/M2 buttons for quick access to important contacts.
- Kurzwahl einstellen: Go to 'Settings' > 'Speed Dial' and assign contact numbers to the desired keys (M1, M2, 2-9).
- Kurzwahl verwenden: On the main screen, press and hold the assigned speed dial key (M1, M2, or 2-9) to automatically dial the stored contact.
5.5. SOS-Funktion
The SOS button is a critical safety feature. When activated, it will automatically dial pre-set emergency contacts and send an emergency message.
- SOS-Kontakte einrichten: Navigate to 'SOS Settings' in the menu. Add up to five emergency contact numbers.
- SOS aktivieren: In an emergency, press and hold the dedicated SOS button on the back of the phone for a few seconds. The phone will then sequentially call the emergency contacts until one answers, and send a pre-set emergency text message to all contacts.
6. Merkmale und Funktionen
Das Easyfone Prime-A1 bietet zahlreiche nützliche Funktionen:
- FM Radio: Listen to your favorite radio stations. Access via the 'Multimedia' or 'Tools' menu.
- Wecker: Stellen Sie mehrere Alarme mit individuell anpassbaren Tönen ein.
- Musikplayer: Audio wiedergeben files auf Ihrer Speicherkarte gespeichert.
- Hinweise: Erstellen und speichern Sie einfache Textnotizen.
- Taschenrechner: Führe einfache Rechenoperationen durch.
- Kalender: View Termine festlegen und Erinnerungen hinzufügen.
- Bluetooth: Connect to compatible Bluetooth devices like headsets for hands-free communication. Activate and manage Bluetooth from the 'Settings' menu.
- Taschenlampe: A built-in flashlight for convenience. Usually activated by a dedicated side button or through the 'Tools' menu.
- HAC-kompatibel: Für Hörgeräteträger geeignet.
- Externe Anzeige: Shows time, date, and caller ID without opening the phone.
- 3.5-mm-Audiobuchse: Zum Anschließen von kabelgebundenen Kopfhörern.
7. Wartung
7.1. Batteriepflege
- Setzen Sie den Akku keinen extremen Temperaturen aus.
- Die Batterie nicht durchstechen, auseinandernehmen oder kurzschließen.
- Use only the original Easyfone charger and battery.
- Wenn das Telefon längere Zeit nicht benutzt wird, laden Sie den Akku auf etwa 50 % auf und lagern Sie es an einem kühlen, trockenen Ort.
7.2. Reinigung
- Verwenden Sie ein weiches, trockenes Tuch, um die Außenseite des Telefons zu reinigen.
- Vermeiden Sie die Verwendung von flüssigen Reinigungsmitteln oder Aerosolen, da diese das Gerät beschädigen können.
7.3. Speicherung
- Store the phone in a cool, dry environment, away from direct sunlight and excessive moisture.
- Keep the phone out of reach of children and pets.
8. Fehlerbehebung
Sollten Sie Probleme mit Ihrem Easyfone Prime-A1 haben, beachten Sie bitte die folgenden häufig auftretenden Probleme und Lösungen:
- Das Telefon lässt sich nicht einschalten: Stellen Sie sicher, dass der Akku korrekt eingesetzt und vollständig geladen ist. Laden Sie das Telefon mindestens 30 Minuten lang auf, bevor Sie versuchen, es wieder einzuschalten.
- Kann keine Anrufe tätigen oder empfangen: Check if the SIM card is properly inserted and activated. Verify that you have network signal. Ensure the phone is not in airplane mode (if applicable).
- Schlechte Anrufqualität: Begeben Sie sich in einen Bereich mit besserer Netzabdeckung. Stellen Sie sicher, dass Lautsprecher und Mikrofon nicht verdeckt sind.
- Der Akku entlädt sich schnell: Reduce screen brightness. Close unused applications. If the issue persists, the battery may need replacement.
- Das Telefon reagiert nicht: Remove the battery, wait a few seconds, and then reinsert it and power on the phone. This performs a soft reset.
- Kompatibilitätsprobleme: Please note that this phone is Nicht kompatibel with AT&T, Cricket, or with CDMA Networks like Verizon, Sprint, and Boost Mobile. It is unlocked for use with T-Mobile, MetroPCS, SpeedTalk, and Tello Mobile.
9. Spezifikationen
| Besonderheit | Spezifikation |
|---|---|
| Modellname | Prime-A1 |
| Betriebssystem | Nucleus OS |
| Bildschirmgröße | 2.4 Zoll |
| Batteriekapazität | 1050 Milliamp Stunden (Lithium-Ionen) |
| Größe des installierten RAM-Speichers | 64 MB |
| Speicherkapazität | 1 GB (expandable via MicroSD, not included) |
| Technische Daten | 3.94 x 1.97 x 0.79 Zoll |
| Artikelgewicht | 3.32 Unzen (94 Gramm) |
| Konnektivitätstechnologien | Bluetooth |
| Zellulartechnologie | 4G (MVNO compatible) |
| Audio-Buchse | 3.5 mm |
| Besondere Merkmale | HAC Compatible, External Display, Charging Dock, FM Radio, Flashlight, SOS Feature, Speed Dial |
| Eingabe der menschlichen Schnittstelle | Schaltflächen |
| Farbe | Rot |
10. Garantie und Support
Your Easyfone Prime-A1 is covered by a manufacturer's warranty. Please refer to the warranty card included in your package for specific terms and conditions. For further assistance, technical support, or to explore other Easyfone products, please visit the official Easyfone store.
Official Easyfone Store: Easyfone Store bei Amazon