Einführung
This manual provides comprehensive instructions for the setup, operation, maintenance, and troubleshooting of your Humminbird HELIX 5 CHIRP GPS G2 Fish Finder. Designed for ease of use, this device offers advanced sonar capabilities and precise GPS navigation to enhance your fishing experience.

Abbildung 1: Vorderseite view of the Humminbird HELIX 5 CHIRP GPS G2 Fish Finder, showing the 5-inch color WVGA display with sonar and chartplotting data.
Key features include a 5-inch color WVGA display, CHIRP Dual Beam PLUS Sonar, precision internal GPS chartplotting with built-in Anima cartography, and a Micro SD card slot for optional maps or saving waypoints. It also boasts a target separation of 2.5 inches, providing clear distinction between fish and structure.
Setup und Installation
Proper installation is crucial for optimal performance of your HELIX 5 unit. The device is designed for gimbal mounting and includes all necessary components for a standard setup.
1. Montage der Einheit
The HELIX 5 unit comes with a gimbal mounting bracket. Choose a location on your boat that provides a clear view of the screen and easy access to controls, while also protecting the unit from excessive spray or direct sunlight. Ensure sufficient space for cable routing behind the unit.

Abbildung 2: Seite view illustrating the gimbal mounting bracket for the HELIX 5 unit.
2. Installation des Wandlers
The transducer is a critical component for sonar functionality. It should be mounted in a location that provides an unobstructed view of the water beneath your boat, free from turbulence or air bubbles. Common mounting locations include the transom or inside the hull (in-hull mounting may require a specific transducer type not included with all models).

Abbildung 3: Bspample of a Humminbird transducer, responsible for sending and receiving sonar signals.
3. Stromanschluss
Connect the power cable to a 12V DC power source. Ensure the connection is secure and protected from water ingress. It is recommended to connect directly to the boat's battery or a dedicated fused circuit to prevent interference and ensure stable power delivery.

Abbildung 4: Rückseite view of the HELIX 5 unit, showing the power and transducer connection ports.
Bedienungsanleitung
The HELIX 5 CHIRP GPS G2 is designed for intuitive operation. Familiarize yourself with the control buttons and menu structure.

Figure 5: Close-up of the control panel, including the directional pad, MENU, EXIT, MARK, GOTO MOB, VIEW, and power buttons.
1. Ein-/Ausschalten
Halten Sie die LEISTUNG button to turn the unit on or off. A short press will bring up the system menu for quick adjustments.
2. Menünavigation
Verwenden Sie die Steuerkreuz to navigate through menu options. Press the SPEISEKARTE button to access the main menu. Press EXIT zum vorherigen Bildschirm zurückkehren oder ein Menü verlassen.
3. Sonar Views
The HELIX 5 offers various sonar views, including traditional 2D sonar and CHIRP Dual Beam PLUS. You can switch between views or display multiple views simultaneously using the VIEW button or through the main menu settings.
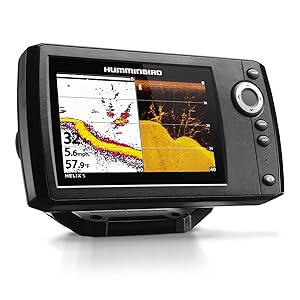
Abbildung 6: Bspample Bildschirm view showing split-screen 2D sonar and Down Imaging for detailed underwater interpretation.
4. GPS and Chartplotting
Utilize the precision internal GPS for accurate navigation and chartplotting. The built-in Anima cartography provides detailed maps. Use the MARKIEREN button to save waypoints and the GOTO MOB button to quickly navigate to a saved location or a Man Overboard (MOB) point.
Wartung
Regular maintenance ensures the longevity and optimal performance of your HELIX 5 unit.
- Reinigung des Displays: Verwenden Sie ein weiches,amp Reinigen Sie den Bildschirm mit einem Tuch. Vermeiden Sie scheuernde Reiniger oder Lösungsmittel, die die Displaybeschichtung beschädigen könnten.
- Unit Housing: Wipe down the unit housing with a mild soap and water solution. Rinse thoroughly with fresh water and dry completely.
- Wandler: Periodically inspect the transducer for marine growth or damage. Clean with a soft brush and fresh water.
- Verbindungen: Ensure all cable connections are clean, dry, and securely fastened.
- Lagerung: When not in use for extended periods, store the unit in a dry, cool place, away from direct sunlight.
Fehlerbehebung
In diesem Abschnitt werden häufig auftretende Probleme behandelt, die bei Ihrem HELIX 5-Gerät auftreten können.
| Problem | Mögliche Ursache | Lösung |
|---|---|---|
| Gerät lässt sich nicht einschalten. | Kein Strom, Wackelkontakt, Sicherung durchgebrannt. | Check power cable connection, inspect fuse in the power cable, verify battery voltage. |
| No sonar readings or erratic readings. | Transducer not submerged, dirty transducer, air bubbles under transducer, incorrect sonar settings. | Ensure transducer is in water, clean transducer face, check for obstructions, adjust sensitivity/range settings. |
| GPS empfängt keine Satelliten. | Unit obstructed, poor satellite signal, unit not in open area. | Begeben Sie sich in einen offenen Bereich mit klarem Himmel view, ensure no metal obstructions above the unit. |
| Screen freezes or unit shuts down intermittently. | Power fluctuations, overheating, software issue. | Verify stable power supply, ensure adequate ventilation, perform a factory reset (consult full manual), update software if available. |
For more detailed troubleshooting, refer to the full user manual available online or contact Humminbird customer support.
Technische Daten
| Marke | Kolibri |
| Modellname | HELIX 5 CHIRP GPS G2 |
| Teilenummer | 410210-1 |
| Bildschirmgröße | 5 Zoll |
| Anzeigetyp | Color WVGA TFT |
| Sonartyp | CHIRP Dual Beam PLUS |
| Ausgangsleistung RMS | 500 Watt |
| Stromquelle | Batteriebetrieben (12 V DC) |
| Artikelgewicht | 2.5 Pfund |
| Produktabmessungen (L x B x H) | 7.55" x 1.13" x 4.28" |
| Montagetyp | Kardangelenk |
| GPS | Precision Internal GPS Chartplotting with built-in Anima cartography |
| Micro SD-Kartensteckplatz | Yes (for optional maps or saving waypoints) |
| Zieltrennung | 2.5 Zoll |
Garantieinformationen
The Humminbird HELIX 5 CHIRP GPS G2 Fish Finder comes with a 1 Jahr eingeschränkte Garantie from the date of purchase. This warranty covers defects in materials and workmanship under normal use. For full warranty terms and conditions, please refer to the official Humminbird website or the detailed warranty document included with your product.
Kundenservice
Should you require assistance with your Humminbird HELIX 5 unit, please contact Humminbird customer support. You can find contact information and additional resources, including the full user manual, on the official Humminbird website. For a downloadable PDF version of the user manual, please visit: Humminbird HELIX 5 User Manual (PDF).
For installation-specific details, an installation manual is also available: Humminbird HELIX 5 Installation Manual (PDF).