
EACHINE TX526
EACHINE TX526 5.8G 40CH AV Wireless FPV Transmitter User Manual
Modell: TX526
Einführung
This manual provides comprehensive instructions for the proper setup, operation, and maintenance of your EACHINE TX526 5.8G 40CH AV Wireless FPV Transmitter. Please read this manual thoroughly before using the device to ensure safe and optimal performance.
Produkt überview
Packungsinhalt
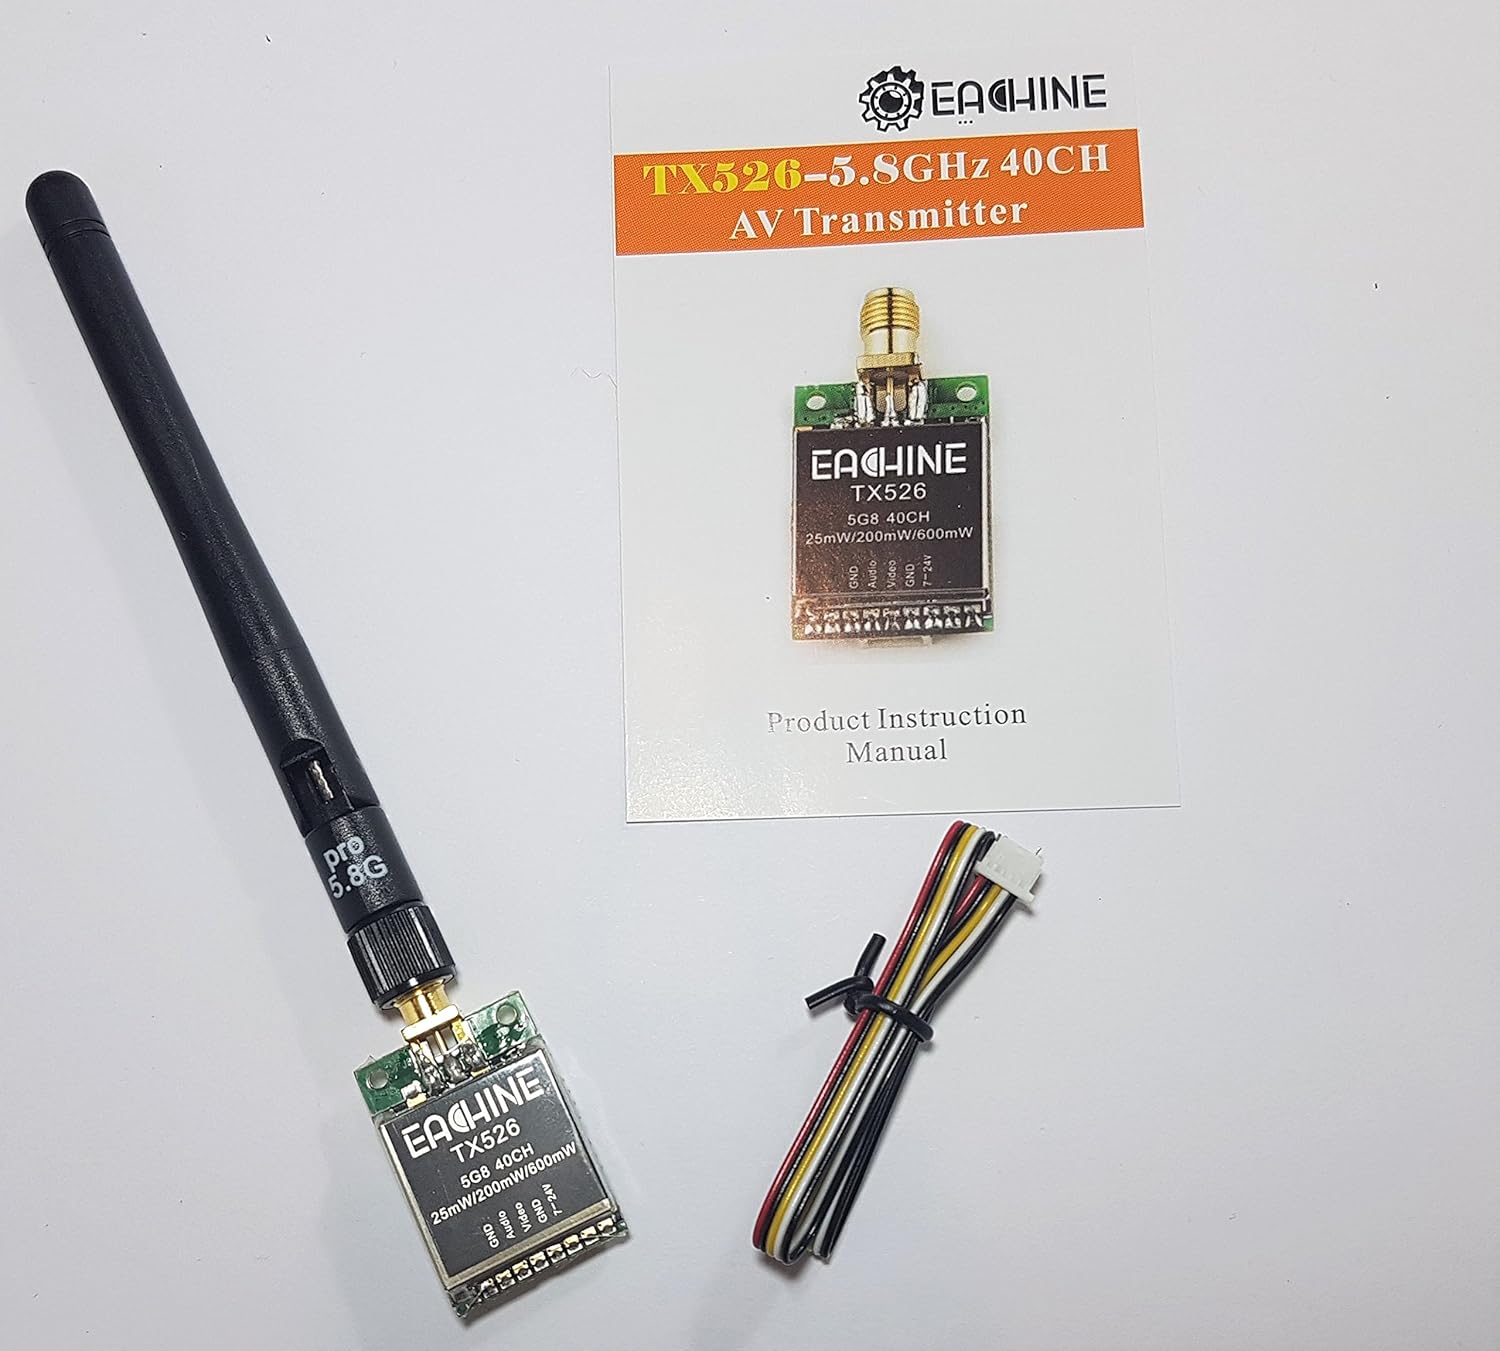
Image: The EACHINE TX526 FPV Transmitter, a detachable antenna, a multi-wire connection cable, and the product instruction manual are included in the package.
- EACHINE TX526 FPV Transmitter
- RP-SMA Female Antenna
- Multi-wire Connection Cable
- Produktanleitung
Hauptmerkmale

Image: The product packaging lists key features of the TX526 transmitter.
- 40CH Raceband support
- Super mini size for compact installations
- Button control for easy channel and power adjustment
- One screen display for clear status indication
- High stability for reliable video transmission
- Switchable power output: 25mW / 200mW / 600mW
Aufstellen
Komponentenidentifikation

Bild: Eine detaillierte view of the TX526 transmitter's connection pads, labeled GND, Audio, Video, GND, and 7-24V.

Image: The reverse side of the TX526 transmitter, showing the digital LED display and the control button.
Schaltplan
Connect the supplied multi-wire cable to the transmitter's pin header according to the following pinout:
| Stift | Funktion | Beschreibung |
|---|---|---|
| 1 | Masse | Erdungsanschluss |
| 2 | Audio | Audio input from camera/microphone (if applicable) |
| 3 | Video | Videoeingang von der FPV-Kamera |
| 4 | Masse | Erdungsanschluss |
| 5 | 7 bis 24 V | Power input (DC 7V to 24V) |
Ensure correct polarity when connecting power. Incorrect wiring can damage the transmitter.
Antennenanschluss

Image: The TX526 transmitter with its antenna securely attached and the power/signal cable connected.
Carefully screw the supplied RP-SMA antenna onto the transmitter's antenna connector. Ensure it is finger-tight to prevent signal loss. Never power on the transmitter without an antenna connected, as this can permanently damage the device.
Bedienungsanleitung
Einschalten
Once all connections are secure, apply power (7-24V DC) to the transmitter. The LED display will illuminate, indicating the current channel and band.
Changing Channels and Bands
The TX526 features a single button for controlling channel and band selection.
- Kurzes Drücken: A short press of the button will cycle through the channels (1-8) within the current band. The LED display will update to show the new channel number.
- Langes Drücken (2-3 Sekunden): A long press of the button will cycle through the available frequency bands (A, B, E, F, R). The LED display will show the band letter (e.g., 'A', 'b', 'E', 'F', 'r') for a moment before returning to the channel number.
Refer to the frequency table below for specific frequencies per channel and band.
Changing Power Output
The TX526 allows switching between 25mW, 200mW, and 600mW output power. The method for changing power output is typically a very long press or a specific button combination. (Note: Specific button sequence for power output change is not detailed in provided images. Refer to the physical manual for precise instructions.)
Higher power output provides greater range but consumes more battery and generates more heat. Always ensure adequate airflow around the transmitter, especially at higher power settings.
Wartung
- Halten Sie den Sender sauber und frei von Staub und Schmutz. Verwenden Sie zum Reinigen ein weiches, trockenes Tuch.
- Avoid exposing the transmitter to extreme temperatures, humidity, or direct sunlight.
- Ensure all connections (antenna, power, video) are secure before each use.
- Regularly inspect the antenna for damage. A damaged antenna can significantly reduce performance.
- Do not attempt to open the transmitter casing, da dies zum Verlust der Garantie und zu Schäden führen kann.
Fehlerbehebung
Kein Videosignal
- Check all wiring connections, especially power and video input.
- Ensure the antenna is securely connected to the transmitter.
- Verify that your FPV receiver is on the same frequency and band as the transmitter.
- Confirm that the FPV camera is powered and functioning correctly.
- Check the power output setting; a very low setting might result in poor range.
Poor Video Quality / Static
- Stellen Sie sicher, dass sich keine Hindernisse zwischen Sender und Empfänger befinden.
- Check for interference from other 5.8GHz devices or strong Wi-Fi signals.
- Verify that both transmitter and receiver antennas are correctly oriented (e.g., vertical polarization).
- Erwägen Sie eine Erhöhungasing the power output of the transmitter if range is an issue.
- Inspect antennas for damage or bends.
Transmitter Overheating
- Ensure adequate airflow around the transmitter, especially when operating at 600mW.
- Avoid enclosing the transmitter in tight spaces without ventilation.
- Bestätigen Sie die Eingabelautstärketage liegt innerhalb des angegebenen Bereichs von 7-24 V.
Technische Daten
| Besonderheit | Detail |
|---|---|
| Modell | EACHINE TX526 |
| Frequenz | 5.8 GHz |
| Kanäle | 40CH (Raceband compatible) |
| Leistungsabgabe | 25 mW / 200 mW / 600 mW (umschaltbar) |
| Eingangslautstärketage | Gleichstrom 7 V - 24 V |
| Antennenanschluss | RP-SMA weiblich |
| Maße | Ungefähr 11.7 x 7.4 x 2.5 cm (Verpackungsabmessungen) |
| Gewicht | Approximately 45 g (Item Weight) |
Hinweis: Spezifikationen können ohne vorherige Ankündigung geändert werden.
Garantie und Support
For warranty information, technical support, or further inquiries, please visit the official EACHINE webWebsite oder wenden Sie sich an Ihren Händler.
Offiziell WebWebsite: http://www.eachine.com
Ask a question about this manual
Ask about setup, troubleshooting, compatibility, parts, safety, or missing instructions. Manuals+ will review the question and use this page’s manual context to help answer it.