
1. Introduktion
This manual provides detailed instructions for the installation, operation, and maintenance of your WinZo Smart Toilet with Bidet Built-in, Model SM8013-1H. Please read this manual thoroughly before installation and use to ensure proper function and safety. Keep this manual for future reference.
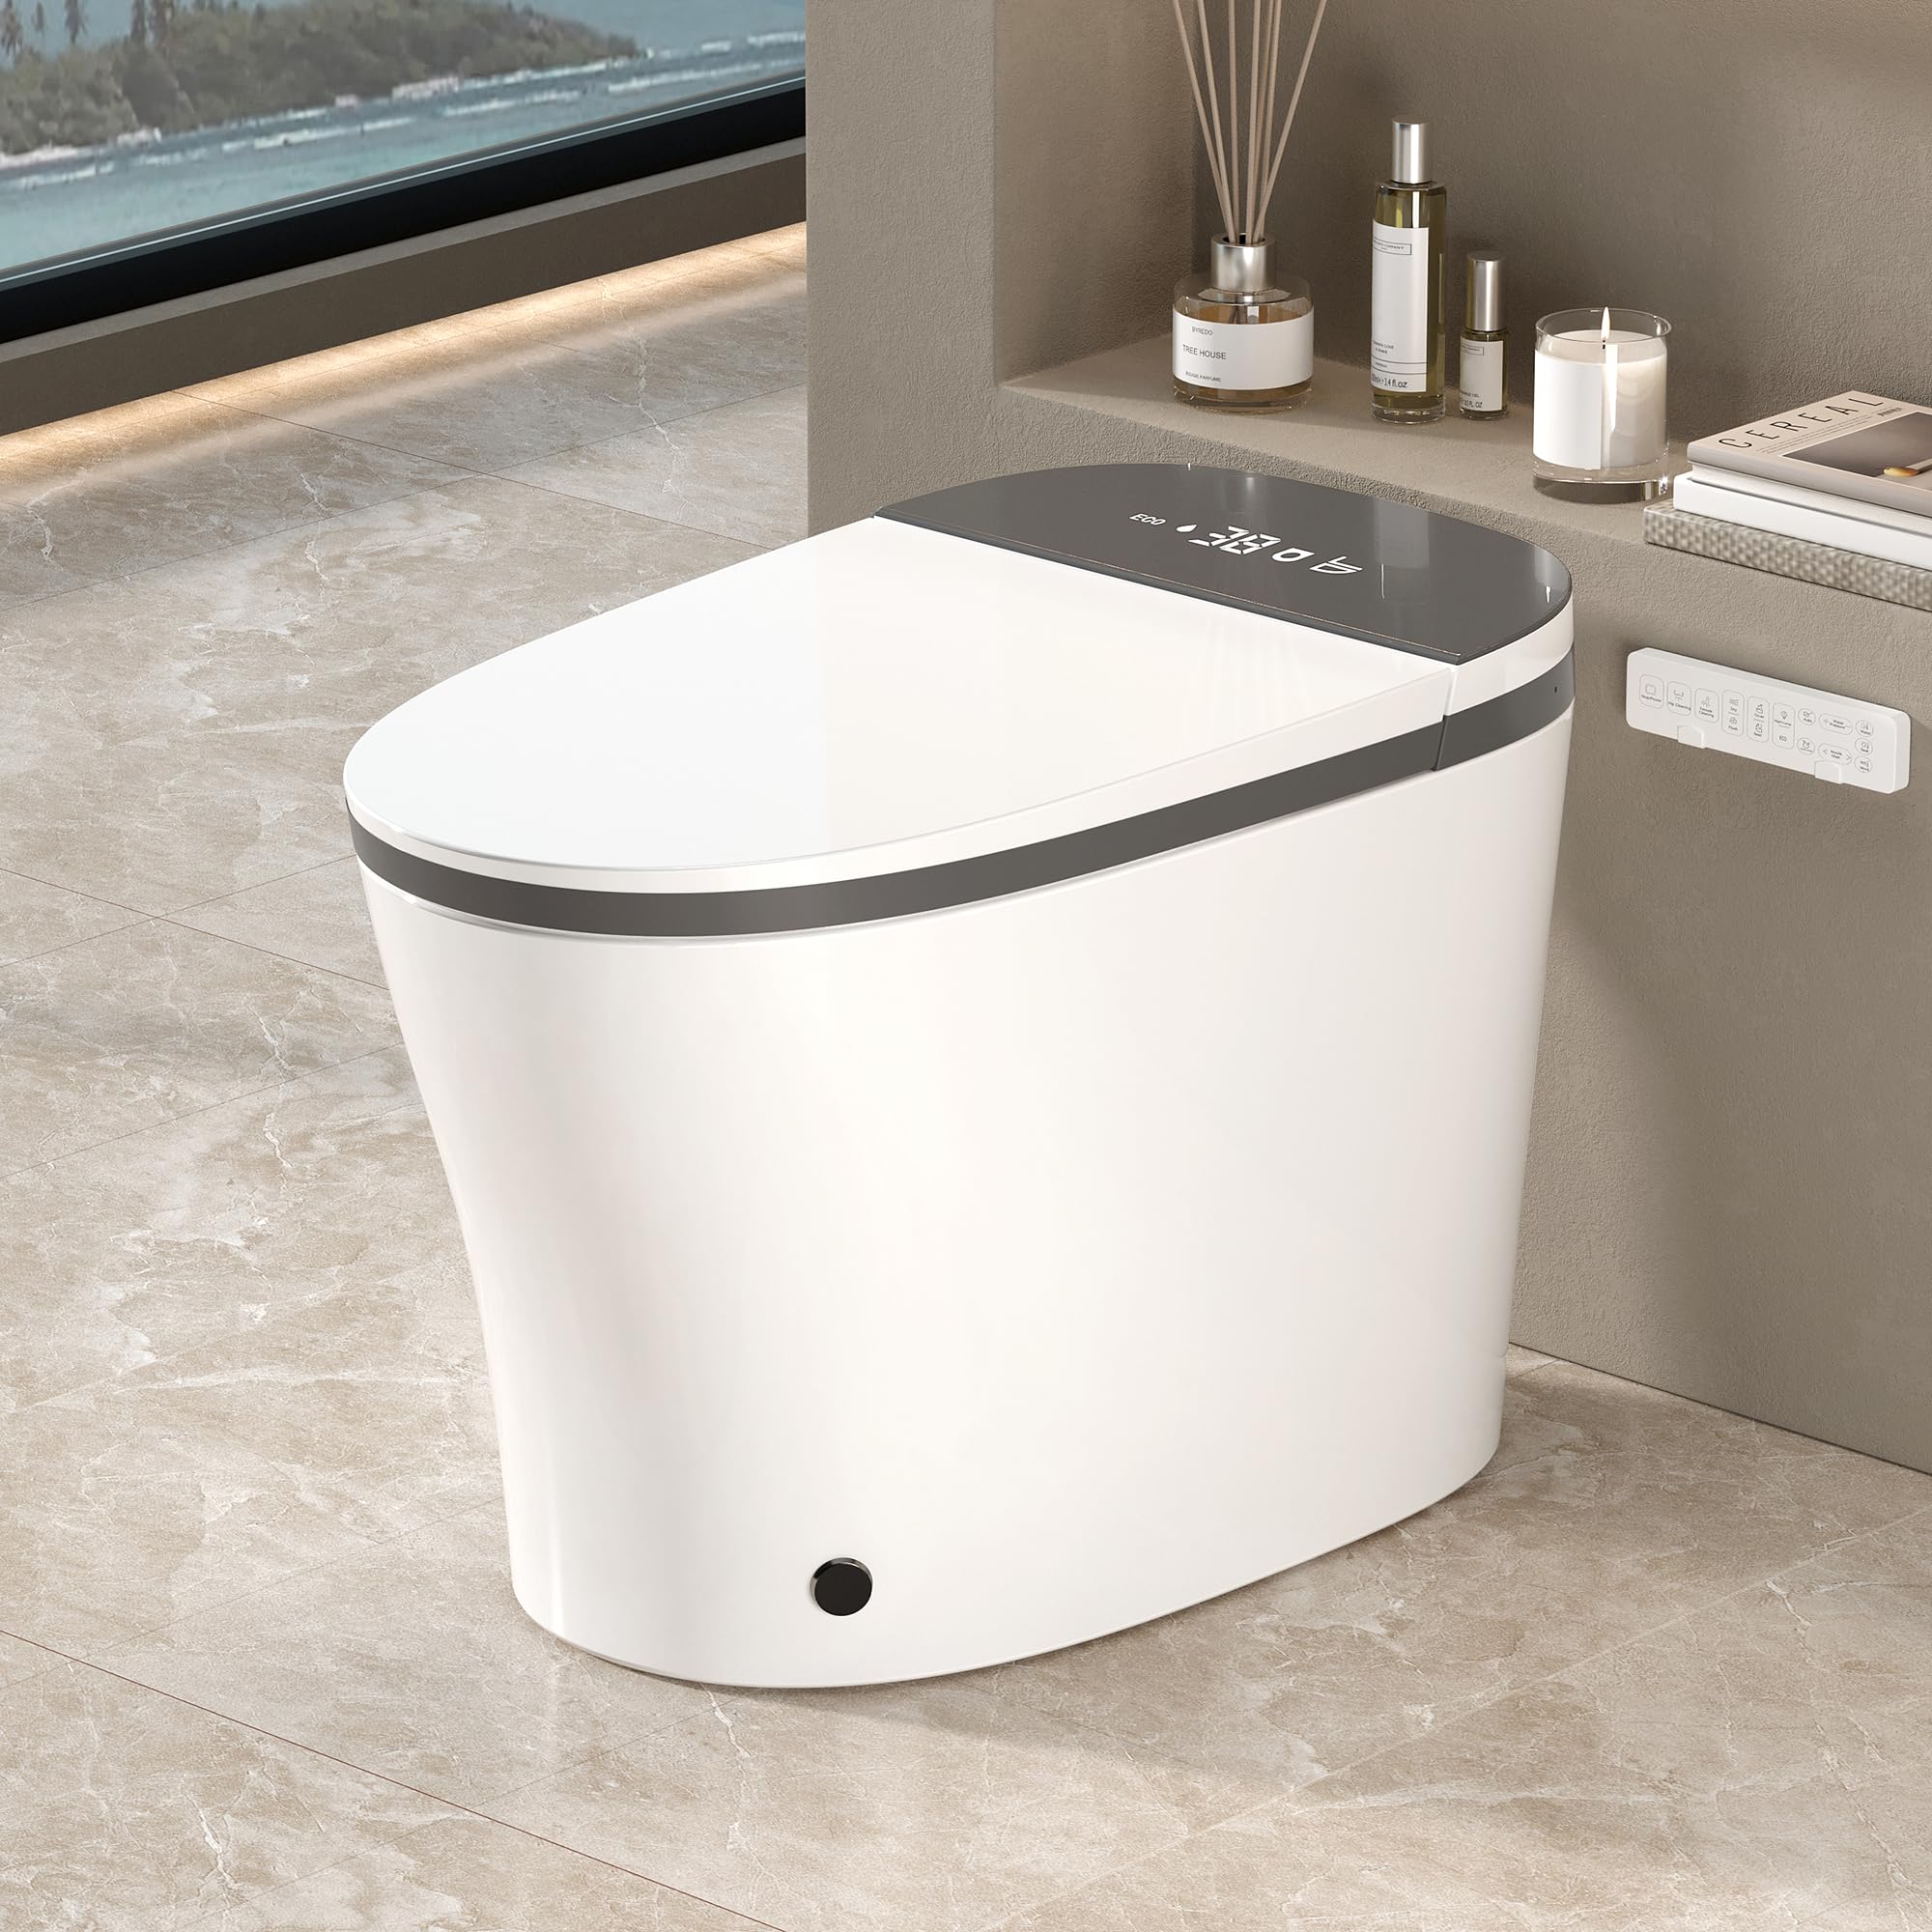
Figure 1.1: WinZo Smart Toilet, Model SM8013-1H
2. Sikkerhedsoplysninger
Observe all safety warnings and precautions to prevent injury or damage. This appliance is for household use only. Do not attempt to repair or modify the unit yourself. Contact qualified service personnel for assistance.
Vigtige sikkerhedsforanstaltninger:
- Ensure the power supply is 110V and properly grounded.
- Enheden må ikke nedsænkes i vand, og der må ikke sprøjtes vand direkte på elektriske komponenter.
- Hold børn og personer med nedsatte fysiske, sensoriske eller mentale evner væk fra enheden, medmindre de er under opsyn.
- Afbryd strømmen før rengøring eller udførelse af vedligeholdelse.
- Do not use abrasive cleaners or harsh chemicals on the toilet surface.
- The tankless design requires a minimum water pressure of 0.15 Mpa.

Figure 2.1: Multiple Security Protection Features
3. Produktkomponenter
The WinZo Smart Toilet includes the following main components:
- Smart Toilet Unit (one-piece ceramic body)
- Integrated Bidet System
- Opvarmet sæde
- LED Display
- Natlys
- Remote Control (All-in-One)
- Installation Hardware (e.g., mounting bolts, wax ring)
- Vandforsyningsslange

Figure 3.1: Product Dimensions and Installation Requirements
4. Opsætning og installation
Professional installation is recommended. Ensure all local plumbing and electrical codes are met. The toilet is designed for a standard 12-inch rough-in.
Installationstrin:
- Forbered området: Turn off the water supply to the existing toilet and flush to empty the tank. Remove the old toilet. Clean the flange area thoroughly.
- Installer monteringsbolte: Secure the mounting bolts to the floor flange.
- Place Wax Ring: Position a new wax ring around the drain opening on the floor flange.
- Sæt toilettet op: Carefully lower the WinZo Smart Toilet onto the mounting bolts, ensuring the wax ring creates a seal. Press down firmly and evenly.
- Sikr toilettet: Install washers and nuts onto the mounting bolts. Tighten gradually and evenly to prevent cracking the ceramic. Do not overtighten.
- Tilslut vandforsyning: Connect the water supply hose from the angle stop valve to the toilet's water inlet. Ensure a tight, leak-free connection. The toilet requires a minimum water pressure of 0.15 Mpa.
- Tilslut strøm: Plug the toilet's power cord into a grounded 110V electrical outlet.
- Test funktionalitet: Tænd for vandforsyningen og kontroller for lækager. Test alle toilettets funktioner som beskrevet i brugsanvisningen.
5. Betjeningsvejledning
Your WinZo Smart Toilet offers a range of automated and customizable features for enhanced comfort and hygiene.
5.1 Auto Open/Close & Flush
- Åbning af låg: The lid automatically opens as you approach the toilet.
- Seat Opening (Foot Kick): For standing use, a gentle foot kick near the sensor will open the seat.
- Automatisk skylning: Toilettet skyller automatisk ud efter brug.
- Lid Closing: The lid closes automatically after a set period (e.g., 90 seconds) or after flushing.

Figure 5.1: Auto Open/Close and Flush Operation
5.2 Bidet Functions (Washing & Drying)
The bidet features instant warm water and adjustable settings.
- Feminin vask: Rotate the side knob counter-clockwise or select on the remote.
- Rear Wash (Hip Wash): Rotate the side knob clockwise or select on the remote.
- Oscillating Wash (Mobile Wash): Select on the remote to move the nozzle forward and back for a wider cleaning area.
- Justering af vandtryk: Use the remote to adjust water pressure.
- Varmlufttørring: After washing, select the drying function on the remote. Adjust from four temperature settings.

Figure 5.2: Arc-Shaped Spray Nozzle and Wash Modes
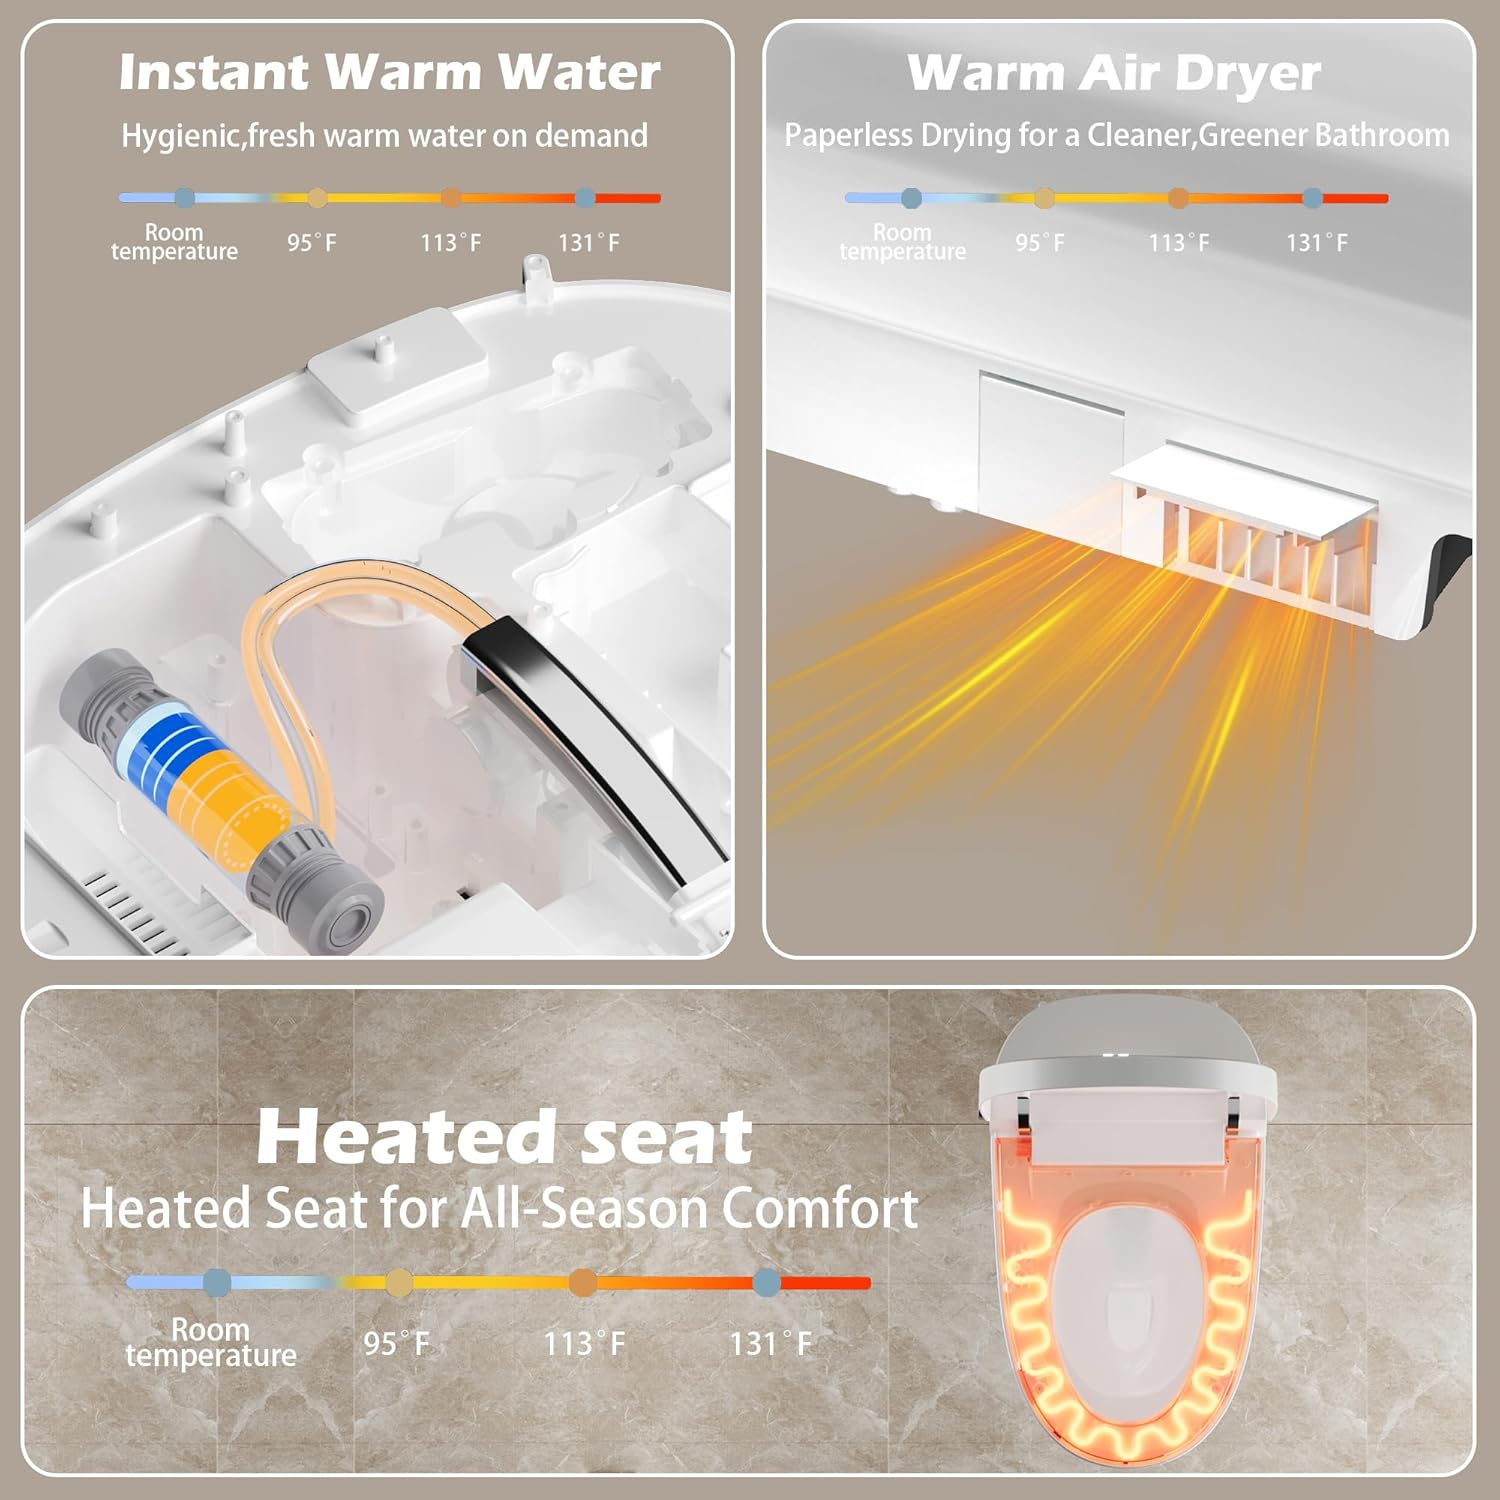
Figure 5.3: Instant Warm Water, Warm Air Dryer, and Heated Seat
5.3 Heated Seat & Night Light
- Opvarmet sæde: The seat offers four adjustable temperature settings for comfort. Control via remote.
- Natlys: A gentle LED night light illuminates the bowl, providing visibility in the dark. This feature activates automatically in low light conditions.

Figure 5.4: Instant Heated Seat

Figure 5.5: LED Display
5.4 Styringer
- Side Knob Control: A multi-functional knob on the side of the toilet allows for easy control of essential bidet functions (feminine wash, hip wash, stop).
- Fjernbetjening: The included remote provides full control over all features, including wash modes, water pressure, water temperature, seat temperature, dryer temperature, and flush options.

Figure 5.6: Side Knob and Remote Control
6. Vedligeholdelse
Regelmæssig rengøring og vedligeholdelse vil sikre dit smarte toilets levetid og optimale ydeevne.
6.1 Rengøring af toilettet
- Ydre: Tør de udvendige overflader af med en blød, damp klud og et mildt, ikke-slibende rengøringsmiddel. Undgå skrappe kemikalier eller slibende svampe.
- Skål: Use a standard toilet brush and toilet bowl cleaner for the interior of the bowl.
- Dyse: The bidet nozzle features a self-cleaning function. Activate this function periodically via the remote control. For manual cleaning, gently pull out the nozzle and wipe with a soft cloth. Do not use excessive force.

Figure 6.1: Nozzle Self-Cleaning Feature
6.2 Filtervedligeholdelse
Periodically check the water inlet filter for debris. If clogged, turn off the water supply, disconnect the hose, and clean the filter screen. Reassemble and check for leaks.
6.3 Power Outage
The toilet includes a built-in battery compartment (batteries not included) to ensure flushing capability during power outages. Install appropriate batteries as per the compartment markings.
7. Fejlfinding
Se tabellen nedenfor for almindelige problemer og løsninger. Kontakt kundesupport, hvis problemet fortsætter.
| Problem | Mulig årsag | Løsning |
|---|---|---|
| Ingen strøm/LED-display slukket | Power cord unplugged, circuit breaker tripped, no power to outlet. | Kontroller strømforbindelsen, nulstil afbryderen, test stikkontakten med en anden enhed. |
| No water for bidet/flush | Water supply valve closed, water pressure too low, inlet filter clogged. | Open water supply valve, ensure minimum 0.15 Mpa pressure, clean inlet filter. |
| Heated seat not working | Seat heating function off, temperature setting too low, seat sensor not detecting user. | Activate heating via remote, increase temperature setting, ensure proper seating. |
| Auto open/close not working | Sensor obstructed or dirty, auto function disabled. | Clean sensor area, ensure no obstructions, check remote settings for auto function. |
| Lækage | Loose connections, damaged wax ring, cracked ceramic. | Check all water connections and tighten. If wax ring or ceramic is damaged, professional repair or replacement may be needed. |
8. Specifikationer
| Feature | Detalje |
|---|---|
| Modelnummer | SM8013-1H |
| Farve | Grå |
| Produktmål (D x B x H) | 27.75 cm x 17 cm x 20 cm |
| Materiale | Keramisk |
| Varens vægt | 95 pund |
| Groft ind | 12 tommer |
| Strømbehov | 110V |
| Minimum vandtryk | 0.15 Mpa |
| Sæde materiale | Plast |
| Installationsmetode | Gulvmonteret |
| Inkluderede komponenter | Smart Toilet, Remote Control |
9. Garanti og support
For warranty information and customer support, please refer to the documentation included with your purchase or visit the official WinZo webwebsted. Behold din købskvittering som købsbevis i tilfælde af garantikrav.
If you encounter any issues not covered in the troubleshooting section, or require further assistance, please contact WinZo customer service.