MAXLANDER ML8G601
MAXLANDER ML8G601 40V Cordless Tiller Cultivator Instruction Manual
Model: ML8G601 | Brand: MAXLANDER
1. Sikkerhedsoplysninger
ADVARSEL: Læs og forstå alle instruktioner, før du bruger dette produkt. Undladelse af at følge alle instruktionerne nedenfor kan resultere i elektrisk stød, brand og/eller alvorlig personskade.
- Always wear appropriate safety gear, including gloves and eye protection, when operating the tiller.
- Keep hands and other body parts away from moving parts.
- Do not operate the tiller in wet or damp forhold.
- Always turn off and unplug the tiller before performing any maintenance or cleaning.
- Always follow the double start button safety feature to prevent accidental start-up.
- Ensure the work area is clear of debris, rocks, and other obstacles that could be thrown by the tines.
- Hold børn og tilskuere på sikker afstand af driftsområdet.
2. Produktet er slutview
The MAXLANDER ML8G601 is a 40V cordless tiller cultivator designed for efficient garden preparation. It features a powerful brushless motor and durable steel tines for effective soil cultivation.
Nøglefunktioner:
- Trådløst design: Freedom of movement without the limitations of power cords. Includes 2x4.0Ah batteries and a fast charger.
- Brushless Powerful Motor: Provides robust power to break up hard soil with 280 RPM.
- Working Size & 4 Steel Tines: Cultivates an area 12-inches wide and up to 8-inches deep.
- Foldehåndtag: Designed for convenient storage and transport.
- Dobbelt sikkerhedsbeskyttelse: Requires both the safety button and trigger to be pressed for operation, preventing accidental starts.
Komponenter:

Figure 2.1: Key Components of the MAXLANDER Tiller
3. Opsætning
3.1 Montering
Follow these steps to assemble your MAXLANDER Tiller Cultivator:
- Unboxing: Fjern forsigtigt alle komponenter fra emballagen.
- Fastgør hjul: Secure the wheels to the main unit using the provided pins and caps.
- Install Lower Handle: Connect the lower handle section to the main body.
- Install Upper Handle: Attach the upper handle section to the lower handle.
- Sikre kabler: Use the provided clips to secure the power cable along the handle.
- Juster håndtagshøjde: The handle height can be adjusted to your preference for comfortable operation.

Figure 3.1: Unboxing the Tiller

Figure 3.2: Attaching the Wheels

Figure 3.3: Installing the Lower Handle

Figure 3.4: Installing the Upper Handle

Figure 3.5: Securing the Power Cable

Figure 3.6: Handle Height Adjustment
3.2 Batteriinstallation og opladning
The tiller operates on two 40V batteries. Ensure batteries are fully charged before use.
- Opladning: Use the provided fast charger to charge both 4.0Ah batteries.
- Installation: Insert the charged batteries into the designated battery compartments on the tiller. Ensure they click securely into place.

Figure 3.7: Batteries and Fast Charger

Figure 3.8: Installing Batteries
3.3 Videovejledning til montering
Video 3.1: MAXLANDER Cordless Tiller Assembly Guide. This video demonstrates the step-by-step assembly process for the tiller, including attaching wheels, handles, and installing batteries.
4. Betjeningsvejledning
4.1 Start og stop
- At begynde: Ensure batteries are installed. Press and hold the safety button, then squeeze the trigger switch. The tines will begin to rotate.
- At stoppe: Release the trigger switch. The tines will stop rotating.
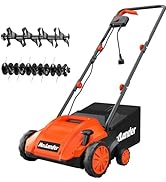
Figure 4.1: Easy Push Button Start
4.2 Tilling Techniques
For de bedste resultater skal du følge disse retningslinjer:
- Begin tilling in an area with softer soil, gradually moving to harder sections.
- Allow the tiller to work at its own pace. Do not force it into the soil.
- For dybere bearbejdning, lav flere overkørsler over det samme område, og øg gradvistasing dybden.
- Overlap each pass slightly to ensure even tilling.

Figure 4.2: Tiller in Operation

Figure 4.3: Tilling Depth and Effectiveness
5. Vedligeholdelse
Regular maintenance ensures optimal performance and extends the life of your tiller.
- Rensning: After each use, remove any soil, debris, or tangled weeds from the tines and housing. Use a stiff brush or cloth. Do not use water directly on electrical components.
- Inspektion af tænder: Periodically inspect the steel tines for wear, damage, or bending. Replace worn or damaged tines immediately to maintain performance and safety.
- Batteripleje: Opbevar batterier et køligt, tørt sted væk fra direkte sollys. Opbevar ikke helt afladede batterier i længere perioder.
- Opbevaring: Clean the tiller thoroughly before storing. The folding handle allows for compact storage. Store in a dry, secure location out of reach of children.

Figure 5.1: Folding Handle for Easy Storage
6. Fejlfinding
| Problem | Mulig årsag | Løsning |
|---|---|---|
| Jordbearbejdningsmaskinen starter ikke | 1. Batteries not charged 2. Safety button/trigger not engaged correctly 3. Batteries not properly inserted | 1. Charge batteries fully 2. Ensure both safety button and trigger are pressed simultaneously 3. Reinsert batteries firmly until they click |
| Tines stop during operation | 1. Overload due to hard soil/obstruction 2. Lavt batteriniveau | 1. Release trigger, clear obstruction, restart. Reduce tilling depth. 2. Recharge or replace batteries |
| Dårlig jordbearbejdningsydelse | 1. Worn or damaged tines 2. Incorrect tilling depth | 1. Inspect and replace tines if necessary 2. Adjust tilling depth for optimal results |
7. Specifikationer
| Feature | Specifikation |
|---|---|
| Mærke | MAXLANDER |
| Modelnummer | ML8G601 |
| Strømkilde | Battery Powered (2x40V) |
| Motortype | Børsteløs |
| Tine Speed | 280 RPM |
| Arbejdsbredde | 12 tommer |
| Arbejdsdybde | Op til 8 tommer |
| Antal tænder | 4 Steel Tines |
| Produktdimensioner | 14" D x 54" B x 11" H |
| Materiale | Stål |
| Farve | Koral |
8. Garanti og support
For warranty information, technical support, or to order replacement parts, please refer to the contact information provided in your product packaging or visit the official MAXLANDER webwebsted. Behold din købskvittering som købsbevis i tilfælde af garantikrav.
Ask a question about this manual
Ask about setup, troubleshooting, compatibility, parts, safety, or missing instructions. Manuals+ will review the question and use this page’s manual context to help answer it.