Rocollos RM0002
Rocollos Wall Mounted Lighted Makeup Mirror
Model: RM0002
Indledning
This manual provides comprehensive instructions for the installation, operation, maintenance, and troubleshooting of your Rocollos Two-Fingers-Width Narrow Base Rechargeable Wall Mounted Lighted Makeup Mirror. Please read this manual thoroughly before use to ensure proper function and safety.

Figure 1: Rocollos Wall Mounted Lighted Makeup Mirror (Brushed Nickel)
Sikkerhedsoplysninger
- Do not immerse the mirror or charging cable in water or other liquids.
- Hold spejlet væk fra varmekilder og direkte sollys.
- Ensure the mirror is securely mounted to the wall before use to prevent falling.
- When using the 10X magnification, maintain a distance of approximately 4 inches (10 cm) from the mirror to avoid dizziness or distorted images.
- This product contains a rechargeable Lithium battery. Do not attempt to replace the battery yourself.
- Brug kun det medfølgende Type-C-kabel til opladning.
Pakkens indhold
Kontroller venligst, at alle varer er til stede i pakken:
- Rocollos Wall Mounted Lighted Makeup Mirror (1 unit)
- Type-C opladningskabel (1 enhed)
- Mounting Hardware (screws, anchors) (1 set)
- Brugervejledning (dette dokument)
Opsætning
1. Første opladning
Before first use, fully charge the mirror. The mirror has a built-in 2000 mAh rechargeable Lithium battery.
- Locate the Type-C charging port on the side of the mirror.
- Connect the provided Type-C cable to the mirror and a compatible USB power adapter (not included).
- The charging indicator light will show red when charging and turn green when fully charged.
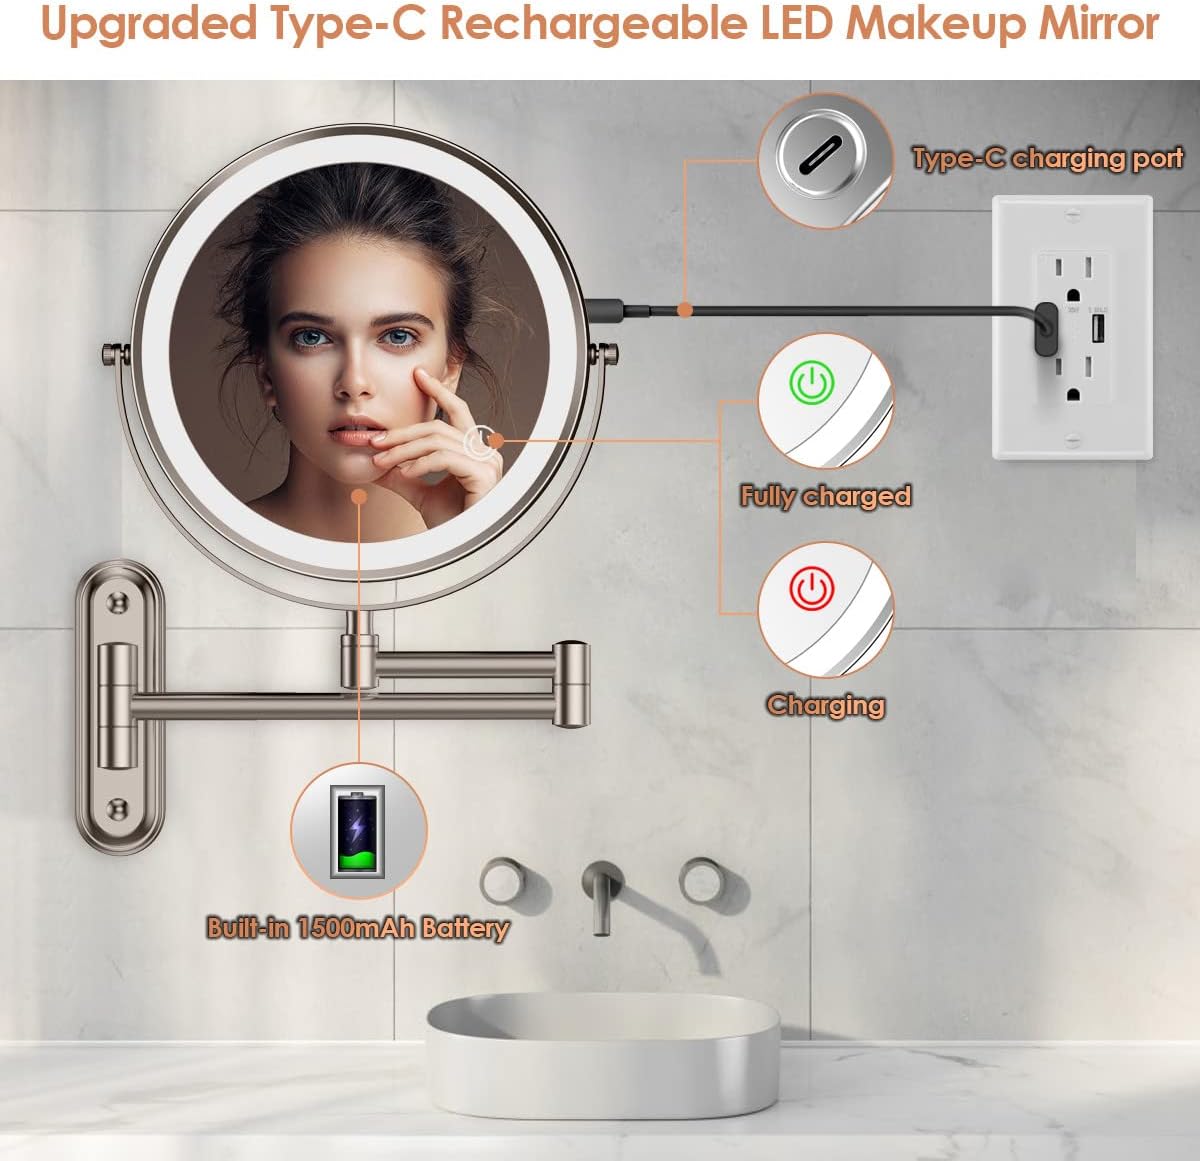
Figure 2: Charging the Mirror
2. Installation af vægmontering
The mirror features a narrow base (5.1in x 1.6in) designed for convenient installation in various locations.
- Choose a suitable location on a wall, ensuring it is a sturdy surface.
- Hold the mirror's wall mount base against the wall at the desired height and use a pencil to mark the positions for the mounting holes.
- Drill pilot holes at the marked positions. Insert wall anchors if necessary for drywall or plaster.
- Align the base with the drilled holes and secure it to the wall using the provided screws. Ensure it is firmly attached.
- Attach the mirror arm assembly to the mounted base.

Figure 3: Narrow Base Design for Easy Installation
Betjeningsvejledning
1. Power On/Off and Light Control
The mirror features a smart touch control for lighting functions.
- Tænd/sluk: Locate the touch sensor (often indicated by a power icon) on the mirror surface. A single short tap will turn the light on or off.
- Change Color Light: With the light on, single tap the touch sensor to cycle through the three color light modes: White Light, Natural Light, and Warm Light.
- Juster lysstyrke: With the light on, press and hold the touch sensor to continuously adjust the brightness level. Release when the desired brightness is reached.
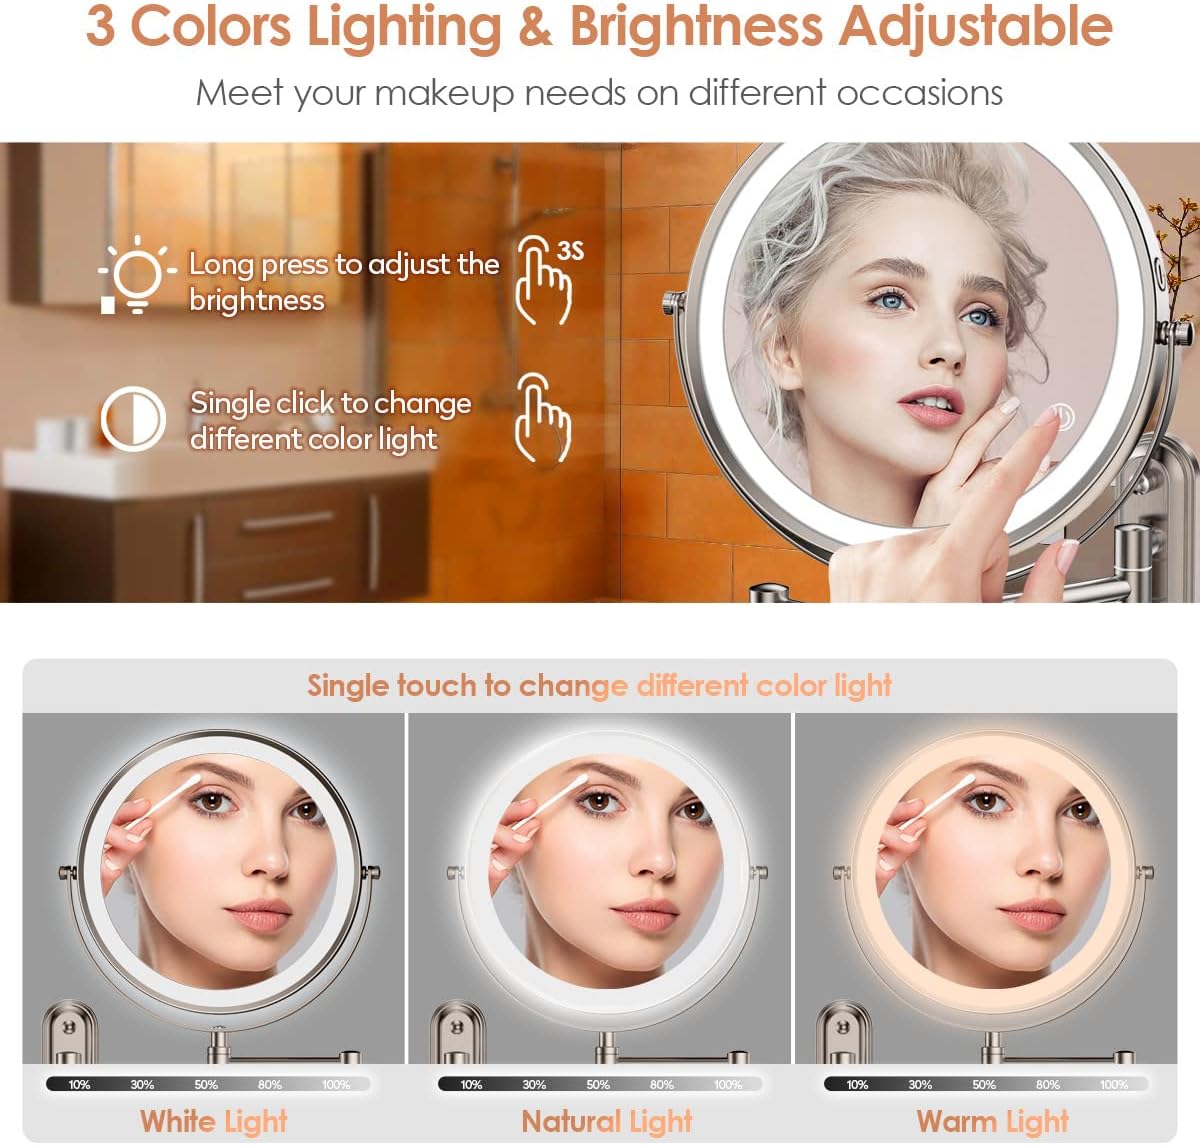
Figure 4: Dimmable 3 Color Lighting
2. Using Magnification (1X/10X)
The mirror is double-sided, offering both 1X and 10X magnification.
- 1X forstørrelse: Use this side for general facial makeup and overall viewing.
- 10X forstørrelse: Flip the mirror to this side for detailed tasks such as applying eyeliner, tweezing eyebrows, or precise lipstick application.
- Important Tip for 10X: To ensure a clear and non-distorted image, keep your face within approximately 4 inches (10 cm) of the 10X magnifying mirror. Moving further away may result in a blurry or inverted image.
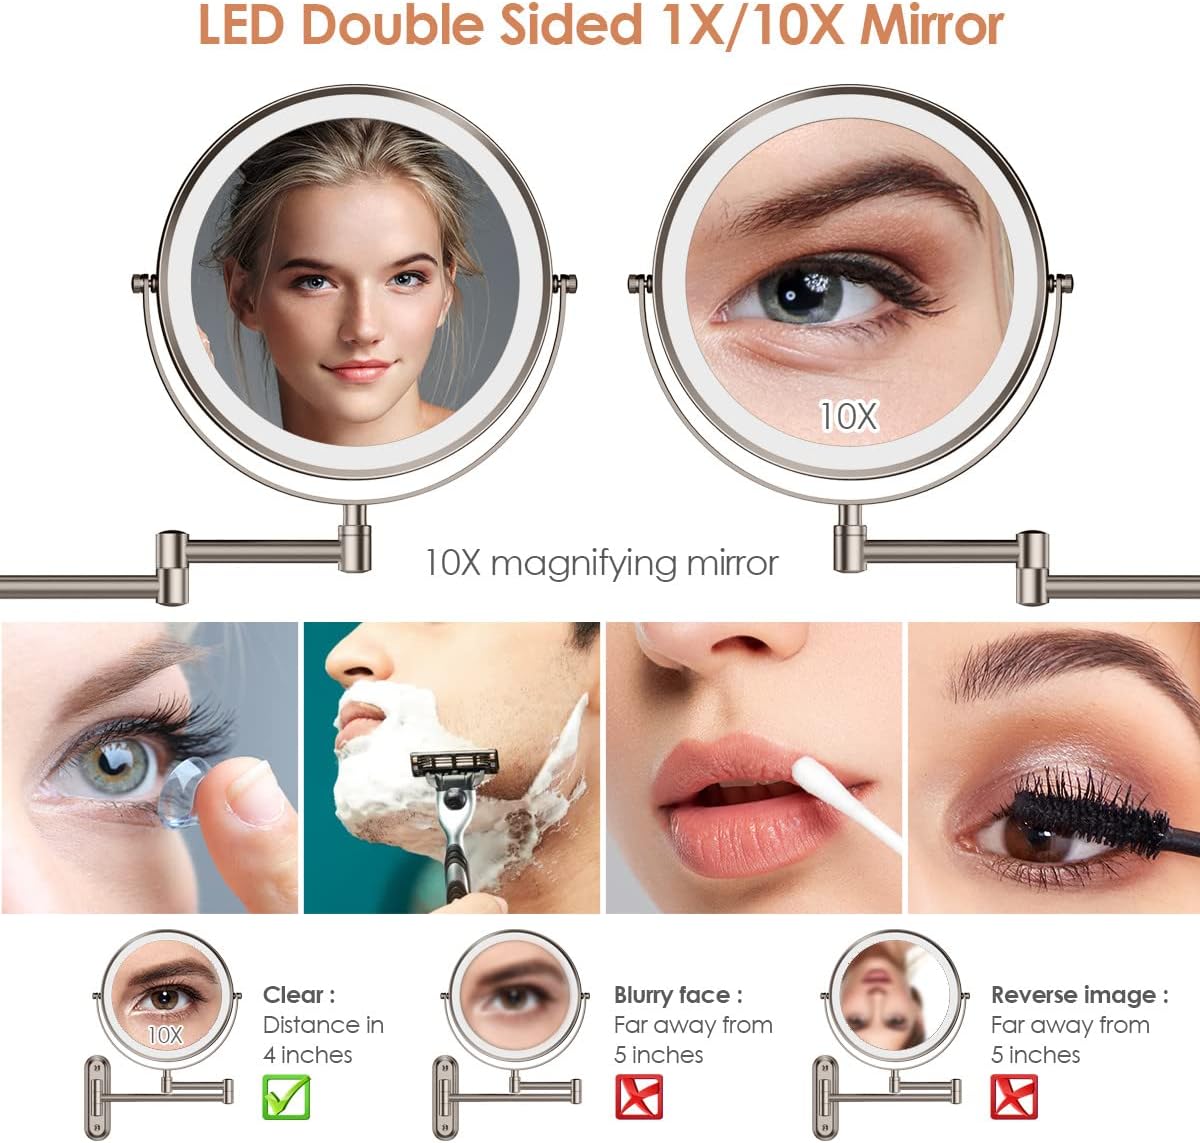
Figure 5: 1X/10X Magnification Usage
3. Adjusting the Mirror Position
The mirror features a 360° flexible swivel and an extendable arm for optimal positioning.
- Gently adjust the mirror head to rotate it 360° to switch between 1X and 10X magnification or to find your preferred viewvinkel.
- Extend or retract the arm to bring the mirror closer or push it away from the wall. The arm also allows for 360° rotation at its joints and 180° movement from the wall mount.
- When not in use, you can fold the mirror flat against the wall to save space.

Figure 6: Flexible Swivel and Extendable Arm
Opretholdelse
- Rensning: To clean the mirror surface, gently wipe with a soft, damp cloth. Do not use abrasive cleaners, solvents, or harsh chemicals, as these may damage the finish or the mirror coating.
- Batteripleje: Recharge the mirror when the light dims or stops working. Avoid completely draining the battery frequently to prolong its lifespan. If storing for an extended period, charge the battery every 3-6 months.
- Generel pleje: Avoid strong impacts or dropping the mirror. Do not attempt to disassemble the mirror or its internal components.
Fejlfinding
| Problem | Mulig årsag | Løsning |
|---|---|---|
| Lyset tændes ikke. | Batteriet er lavt eller afladet. | Charge the mirror fully using the provided Type-C cable. |
| Lyset er svagt eller flimrer. | Lavt batteri. | Recharge the mirror. |
| Kan ikke ændre lysfarve eller lysstyrke. | Forkert berøringsbetjening. | Ensure you are using a single short tap for color change and a long press for brightness adjustment. Ensure your finger is dry and clean. |
| 10X magnification image is blurry or inverted. | Too far from the mirror. | Move your face closer to the 10X side, maintaining a distance of approximately 4 inches (10 cm). |
| Spejlet føles løst på væggen. | Monteringsskruerne er løse. | Carefully tighten the mounting screws. If necessary, re-install with appropriate wall anchors. |
Specifikationer
| Mærke | Rocollos |
| Modelnummer | RM0002 |
| Produktdimensioner | 13 cm L x 10 cm B (samlet) |
| Spejldiameter | 8 tommer |
| Forstørrelse | 1X / 10X Double Sided |
| Belysning | LED, 3 Color Lights (White, Natural, Warm), Dimmable |
| Batteri | Indbygget 2000 mAh genopladeligt litiumbatteri |
| Opladningsport | Type-C |
| Monteringstype | Vægmontering |
| Rammemateriale | Metal |
| Finish Type | Polished (Brushed Nickel) |
| Særlige funktioner | Foldable, 360° Swivel, Extendable Arm, Touch Screen Control |
| Varens vægt | 2.49 pund |

Figur 7: Produktmål
Garanti og support
Rocollos provides a 12 måneders garanti for dette produkt fra købsdatoen.
For any questions, concerns, or warranty claims, please contact Rocollos customer service. Rocollos offers 7/7/24 customer services.
You can visit the official Rocollos Store on Amazon for more information and support: Rocollos Store
Ask a question about this manual
Ask about setup, troubleshooting, compatibility, parts, safety, or missing instructions. Manuals+ will review the question and use this page’s manual context to help answer it.