1. Introduktion
This manual provides essential information for the safe and efficient installation, operation, and maintenance of your new SparkPod High Pressure Rain Shower Head. Please read these instructions thoroughly before beginning installation and retain this manual for future reference.
2. Sikkerhedsoplysninger
Always ensure the main water supply is turned off before attempting any installation or maintenance. Use appropriate tools and avoid over-tightening connections to prevent damage. If you are unsure about any step, consult a qualified plumber.
3. Pakkens indhold
Kontroller, at alle komponenter er til stede, før installationen påbegyndes:
- 1x 6" Rainfall Shower Head
- 1x 1.8 GPM Flow Restrictor (Pre-installed)
- 1x 2.5 GPM Flow Restrictor (Bonus)
- 1x Screened Washer
- 1x Plumber's Tape
- 1x Product Guide
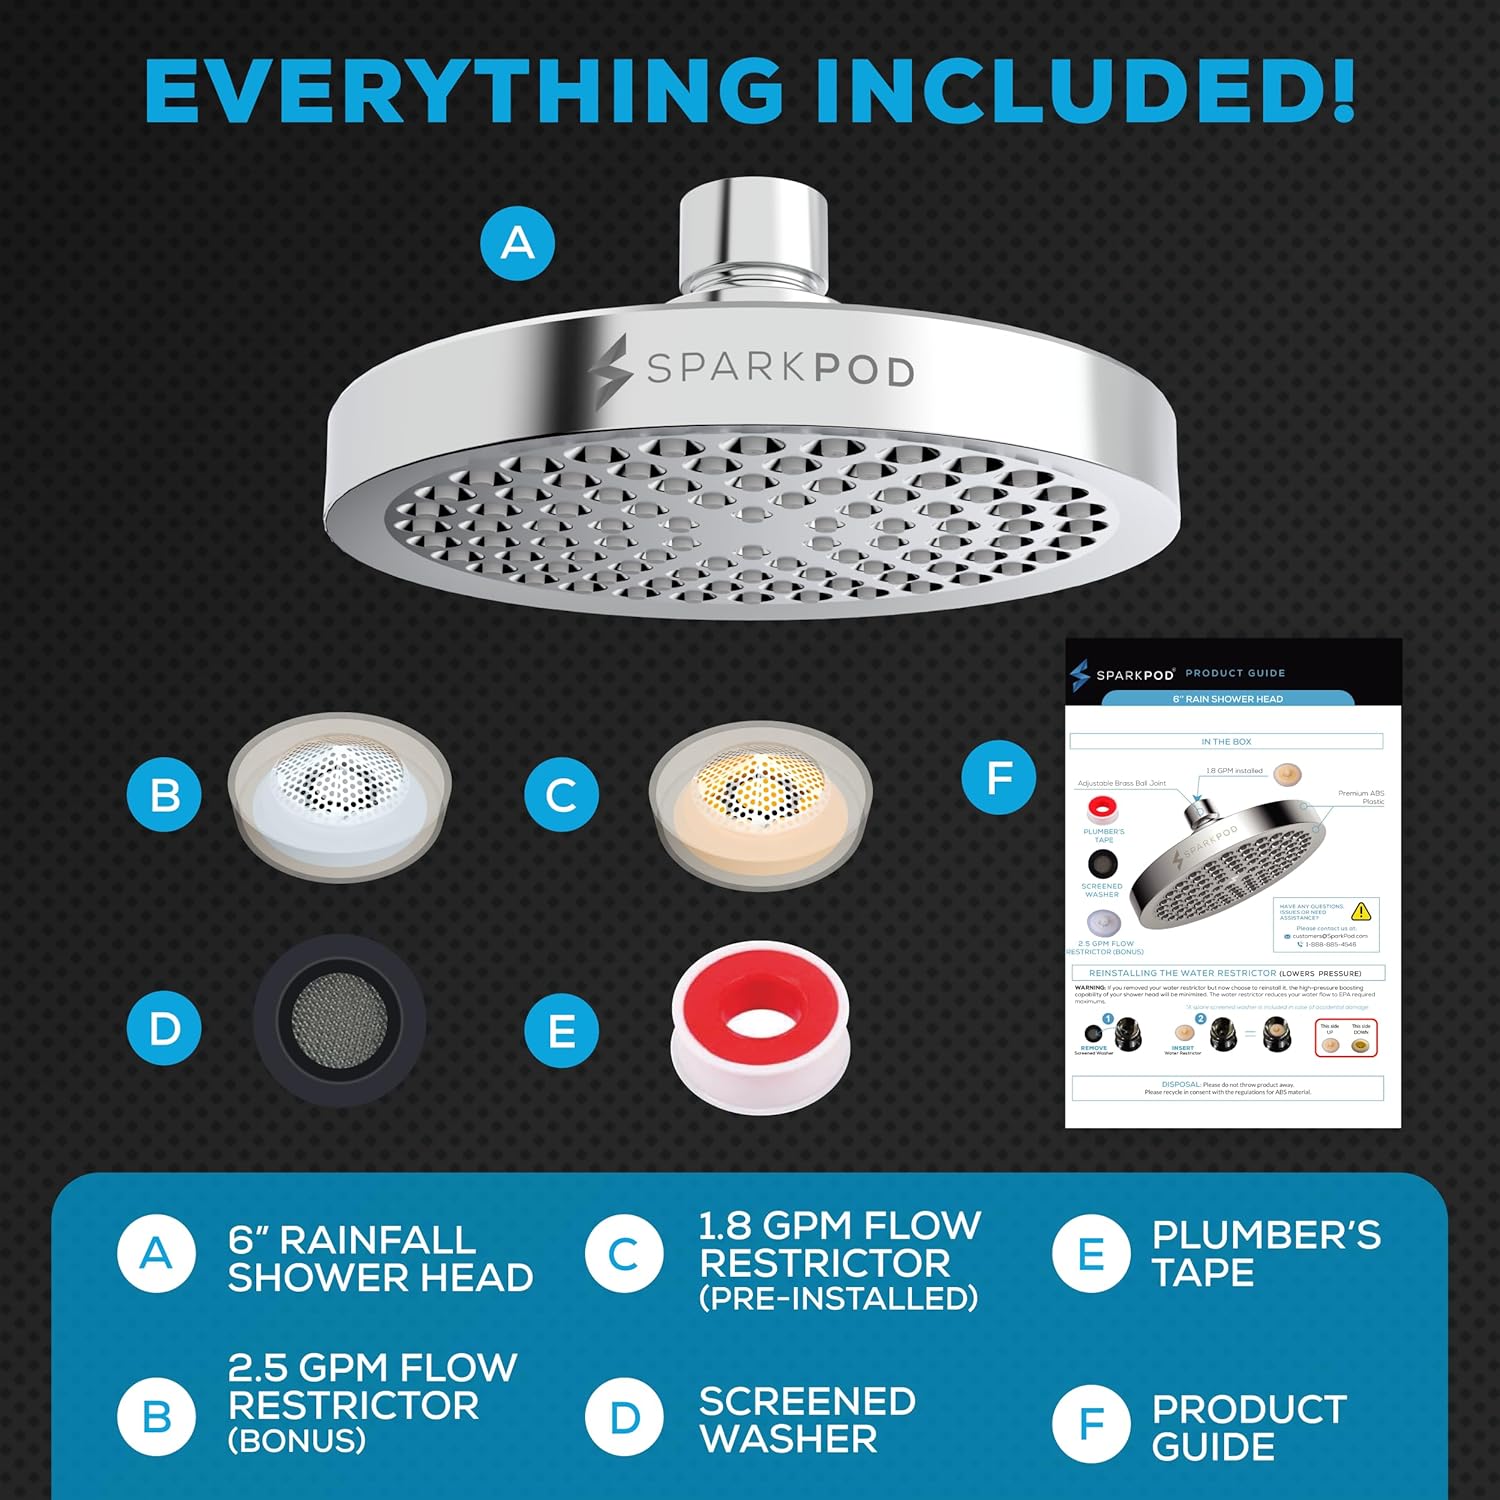
Figure 1: All included components for your SparkPod Shower Head.
4. Opsætning og installation
The SparkPod Shower Head is designed for quick, no-tool installation on any standard shower arm (1/2" IPS).
- Klargør brusearmen: Ensure the water supply is off. Unscrew and remove your old shower head from the shower arm. Clean any residue from the shower arm threads.
- Påfør VVS-tape: Wrap the included plumber's tape clockwise around the threads of your shower arm 3-4 times to ensure a watertight seal.
- Fastgør brusehovedet: Hand-tighten the SparkPod Shower Head onto the taped shower arm threads. Ensure it is snug but do not overtighten.
- Test for lækager: Turn on the water supply and check for any leaks. If leaks occur, tighten slightly or reapply plumber's tape.

Figure 2: Step-by-step installation guide for the SparkPod Shower Head.
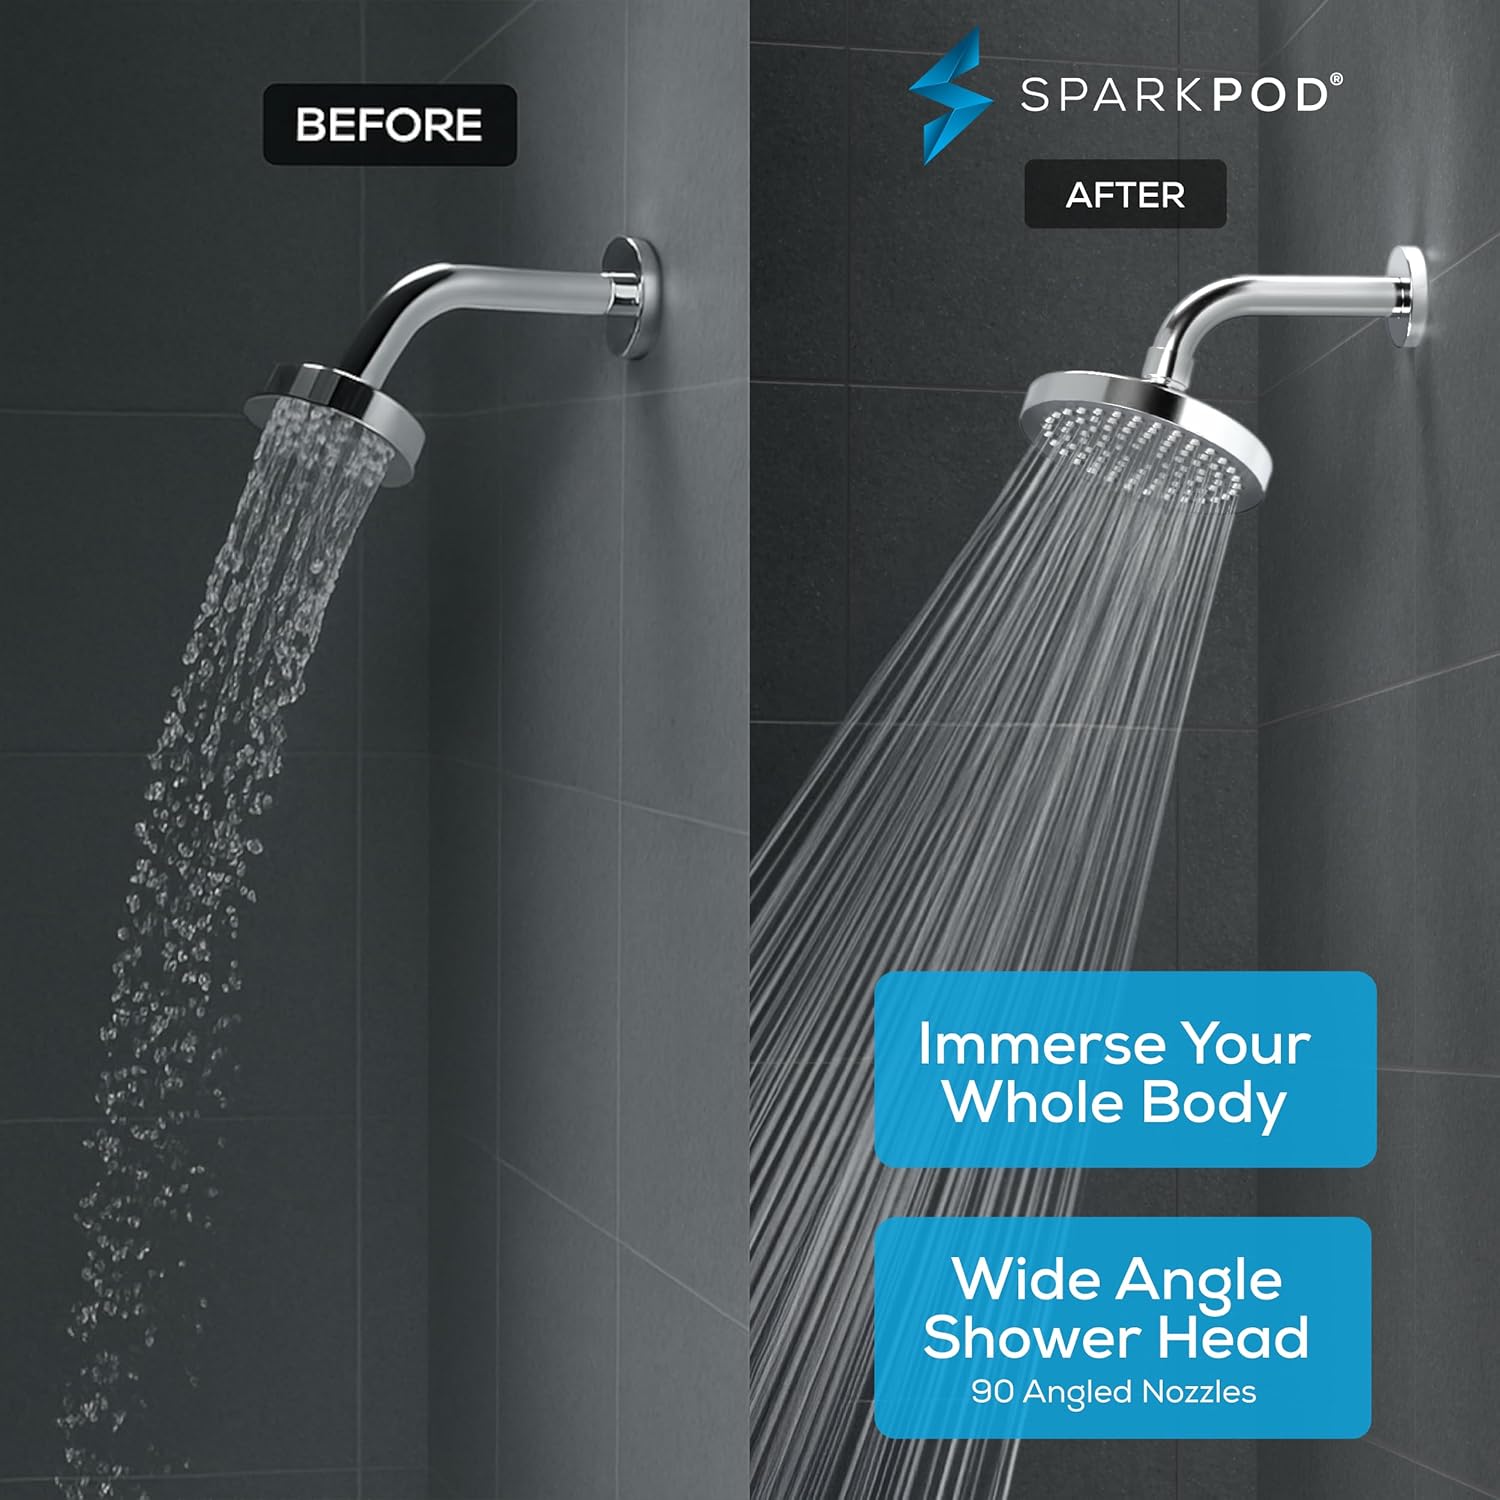
Figure 3: Visual comparison of water pressure before and after installing the SparkPod Shower Head.
5. Betjeningsvejledning
Your SparkPod Shower Head delivers a high-pressure rainfall experience. The swivel ball joint allows you to easily adjust the angle of the shower head to your preference.
- Vandflow: The shower head is designed with a maximum outflow of 1.8 gallons per minute (GPM) for energy and water savings.
- Justering af vinkel: Gently tilt the shower head to direct the water flow as desired. The brass swivel ball joint ensures smooth and durable adjustment.

Figure 4: Experience the high-pressure rainfall of your SparkPod Shower Head.
6. Vedligeholdelse
To ensure optimal performance and longevity, regular cleaning of your shower head is recommended.
- Letrengørbare dyser: The rustproof ABS plastic shower head features 90 Powered Easy-to-Clean Rubber Jets. To remove hard water deposits (like limescale), simply rub the rubber nozzles with your finger or a soft brush.
- Generel rengøring: Use a soft cloth and mild soap or a non-abrasive bathroom cleaner to wipe down the exterior of the shower head. Avoid harsh chemicals or abrasive scrubbers that could damage the finish.
Figure 5: Detail of the easy-to-clean rubber nozzles.
7. Fejlfinding
Lavt vandtryk
If you experience lower than desired water pressure, it may be due to a pre-installed water restrictor. Your SparkPod Shower Head includes a removable water restrictor to comply with water conservation regulations. If your home's water pressure is naturally low, or if you desire higher pressure, you may remove this component.
- Locate the Restrictor: The water restrictor is typically located inside the shower head's connection point to the shower arm.
- Remove the Restrictor: Carefully use a small screwdriver or pliers to gently pry out the water restrictor. Be careful not to damage the washer or the shower head itself.
- Reinstall and Test: Reattach the shower head to the shower arm and test the water pressure.
8. Specifikationer
| Feature | Detalje |
|---|---|
| Mærke | SparkPod |
| Stil | 6 Inch Round |
| Form | Rund |
| Materiale | Acrylonitril-butadienstyren |
| Finish Type | Poleret |
| Installationstype | Vægmonteret |
| Flowhastighed | 1.8 GPM |
| Farve | Luxury Polished Chrome |
| Produktdimensioner | 3.27 cm L x 6.3 cm B |
| Antal indstillinger | 1 |
| Antal dyser | 90 |
| Varens vægt | 8.6 ounce |
| Modelnummer | X001PI9585 |
9. Garanti og support
At SparkPod, customer satisfaction is our priority. We are committed to transforming your shower experience. Our dedicated Customer Happiness team is available every day of the week to answer any questions you may have regarding your product.
For support, please visit the official SparkPod store or contact our customer service directly.