1. Introduktion
This manual provides essential instructions for the proper setup, operation, and maintenance of your SentrySafe Executive Security Safe, Model PLX510487. This safe is designed to protect your valuables with an electronic lock and pry-resistant steel construction. Please read this manual thoroughly before using your safe to ensure optimal performance and security.
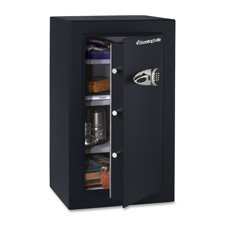
Figure 1: SentrySafe Executive Security Safe (Model PLX510487)
2. Sikkerhedsoplysninger
- Do not store safe keys inside the safe. Always keep override keys in a secure location away from the safe.
- Sørg for, at pengeskabet er sikkert monteret for at forhindre uautoriseret fjernelse.
- Keep the electronic keypad dry and clean.
- This safe is not water resistant. Do not expose it to water or high humidity.
- Keep children away from the safe and do not allow them to operate the electronic lock.
3. Pakkens indhold
Bekræft at alle komponenter er til stede i pakken:
- SentrySafe Executive Security Safe (PLX510487)
- Tilsidesæt nøgler (2)
- Mounting Bolts (for wall mounting)
- Brugervejledning (dette dokument)
4. Opsætning
4.1 Udpakning
- Tag forsigtigt pengeskabet ud af emballagen.
- Inspect the safe for any signs of damage. If damaged, contact customer support.
- Gem emballagematerialerne til senere transport, hvis det er nødvendigt.
4.2 Batteriinstallation
The electronic lock requires four (4) AA alkaline batteries (not included).
- Find batterirummet på indersiden af døren til pengeskabet.
- Åbn batterirummets dæksel.
- Isæt fire nye AA alkaline-batterier, og sørg for at polariteten (+/-) vender korrekt.
- Luk batterirummets dæksel forsvarligt.
4.3 Montering af pengeskabet
For enhanced security, it is recommended to wall mount the safe.
- Choose a suitable location for mounting, ensuring it is a solid surface capable of supporting the safe's weight.
- Open the safe door and locate the pre-drilled mounting holes on the back panel.
- Position the safe against the wall and mark the drilling points through the mounting holes.
- Drill pilot holes into the wall at the marked locations.
- Align the safe with the drilled holes and secure it using the provided mounting bolts. Tighten all bolts firmly.
4.4 Indledende kodeopsætning
Upon first use, you will need to set your personal electronic access code.
- Når pengeskabslågen er åben, skal du trykke på den røde nulstillingsknap, der er placeret på indersiden af døren, nær hængslet. Den gule indikatorlampe på tastaturet lyser.
- Indtast din ønskede 3-8-cifrede kode på tastaturet inden for 5 sekunder.
- Press the 'A' or 'B' button to confirm your new code. The yellow light will turn off, and a beep will confirm the code is set.
- Test den nye kode med døren åben, før du lukker den.
5. Betjening af pengeskabet
5.1 Opening the Safe with Electronic Code
- Indtast din personlige 3-8-cifrede kode på tastaturet.
- Press the 'A' or 'B' button. The green indicator light will illuminate, and you will hear a beep.
- Drej håndtaget med uret inden for 5 sekunder for at åbne pengeskabslågen.
5.2 Opening the Safe with Override Key
In case of forgotten code or battery failure, use the override key.
- Find nøglehulsdækslet på tastaturpanelet.
- Fjern dækslet.
- Insert the override key and turn it counter-clockwise.
- While holding the key turned, turn the handle clockwise to open the safe door.
- Remove the key and replace the keyhole cover after use.
5.3 Lukning og låsning af pengeskabet
- Luk pengeskabslågen godt.
- Turn the handle counter-clockwise until it is fully engaged and the door is secured.
- The safe will automatically lock.
5.4 Ændring af brugerkoden
- Open the safe door using your current code or override key.
- Press the red reset button on the inside of the door. The yellow indicator light will illuminate.
- Indtast din nye 3-8-cifrede kode inden for 5 sekunder.
- Press the 'A' or 'B' button to confirm. The yellow light will turn off, and a beep will confirm the new code.
- Test the new code with the door open before closing.
6. Vedligeholdelse
6.1 Udskiftning af batteri
When the batteries are low, the red indicator light will flash when you enter your code. Replace batteries promptly to avoid lock-out.
- Åbn pengeskabsdøren.
- Replace all four AA alkaline batteries as described in Section 4.2.
- Your electronic code will be retained during battery replacement.
6.2 Rengøring
Rengør ydersiden af pengeskabet med en blød, damp klud. Brug ikke slibende rengøringsmidler eller opløsningsmidler, da disse kan beskadige overfladen eller de elektroniske komponenter.
7. Fejlfinding
- Pengeskabet åbner ikke med kode:
- Ensure batteries are fresh and installed correctly. Replace if necessary.
- Re-enter the code carefully. Ensure no buttons are stuck.
- Try using the override key to open the safe. - Keypad does not respond:
- Kontroller batteriinstallationen og udskift batterierne.
- Sørg for, at der ikke er snavs i knapperne. - Forgotten code:
- Use the override key to open the safe.
- Once open, follow the steps in Section 5.4 to set a new user code. - Door does not close/lock properly:
- Ensure no items are obstructing the door or locking bolts.
- Check that the handle is fully turned counter-clockwise to engage the locking mechanism.
8. Specifikationer
| Mærke | SentrySafe |
| Modelnummer | PLX510487 |
| Låsetype | Elektronisk, nøgle |
| Kapacitet | 6 Kubikfod |
| Materiale | Legeret stål |
| Monteringstype | Vægmontering |
| Inkluderede komponenter | Bolte, nøgler |
| Varens vægt | 241 pund |
| Vandmodstandsniveau | Ikke vandafvisende |
| Produktdimensioner | 23.8 x 21.5 x 38.3 tommer |
| UPC | 635665104871 |
9. Garanti og support
SentrySafe products are manufactured to high-quality standards. For specific warranty information, please refer to the warranty card included with your purchase or visit the official SentrySafe website. For technical support, replacement parts, or further assistance, please contact SentrySafe customer service directly.
SentrySafe Official Webwebsted: www.sentrysafe.com