FineMolds Girls & Panzer Type 97 Chi-Ha Medium Tank Model Kit
Model: 41111 - 1/35 Scale, New Turret, Early Production Chassis
Indledning
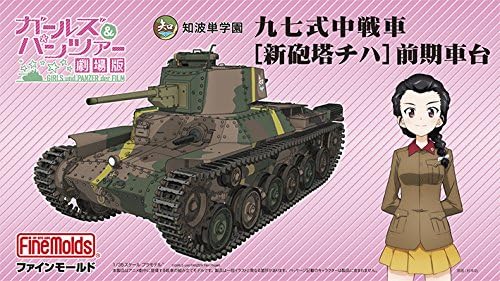
This instruction manual provides detailed guidance for assembling the FineMolds Girls & Panzer Type 97 Chi-Ha Medium Tank model kit. This 1/35 scale plastic model features the new turret with a 47mm gun, representing the early production chassis version as depicted in the 'Girls & Panzer' film. The kit includes partially assembled plastic tracks and an etched muffler guard for enhanced detail. Careful attention to these instructions will ensure a successful and enjoyable assembly experience.

Image: The complete FineMolds Girls & Panzer Type 97 Chi-Ha Medium Tank model kit, showcasing the new turret and early production chassis design.
Opsætning og montering
Nødvendigt værktøj og materialer:
- Plastic model cement (adhesive)
- Hobbykniv eller sprue-skærere
- Pincet (til små dele)
- Sandpapir eller slibepinde (forskellige kornstørrelser)
- Model paints (acrylic or enamel, as desired)
- Paintbrushes or airbrush
- Masking tape (for painting)
- Løsning til fastgørelse af klistermærker (valgfrit)
Trin for generalforsamling:
- Forberedelse: Carefully remove all parts from the sprues using sprue cutters or a hobby knife. Clean any excess plastic (flash) or mold lines with a hobby knife and sandpaper.
- Undersamlinger: Begin by assembling smaller components such as the turret, main gun, and road wheels. Ensure parts fit correctly before applying cement.
- Chassismontering: Construct the main hull and chassis. Pay attention to alignment to ensure the tank sits level.
- Sporsamling: The kit includes partially assembled plastic tracks. Follow the instructions to connect the track sections around the road wheels and drive sprockets. Ensure proper tension and alignment.
Billede: Detaljeret view of the partially assembled plastic track sections included in the kit, ready for installation onto the tank chassis.
- Muffler Guard: Attach the newly designed etched muffler guard according to the instructions. Handle etched parts with care to avoid bending or damage.
- Afsluttende samling: Combine the main sub-assemblies (chassis, turret, tracks).
- Maleri: Apply primer, then paint the model according to your desired scheme. Refer to historical references or the 'Girls & Panzer' film for accurate colors.
- decals: Apply the anime original markings and character decals as provided. Use decal setting solution for a seamless finish.
Note: Always refer to the detailed diagrams and step-by-step instructions provided within the physical kit packaging for precise part placement and assembly order.
Betjening (display og håndtering)
This product is a static display model. It is not designed for active play or rough handling. Once assembled and painted, the model should be handled with care to prevent damage to delicate parts, paint, or decals.
- Vise: Place the model on a stable, flat surface away from direct sunlight, excessive heat, or humidity to preserve its finish and structural integrity.
- Håndtering: When moving the model, grasp it by the main hull or chassis, avoiding pressure on antennas, machine guns, or other small, protruding components.
Opretholdelse
Proper maintenance ensures the longevity and appearance of your model.
- Rensning: Dust the model regularly with a soft, dry brush or a can of compressed air. Avoid using wet cloths or harsh cleaning agents, as these can damage paint and decals.
- Opbevaring: If storing the model, place it in a dust-free container or display case. Ensure it is not exposed to extreme temperatures or humidity fluctuations.
- Reparationer: In case of minor damage, use appropriate plastic cement or super glue for repairs. Touch up paint as needed.
Fejlfinding
Common issues encountered during model kit assembly and their solutions:
- Dele, der ikke passer: If parts do not fit snugly, check for excess plastic (flash) on the edges or inside connection points. Carefully trim or sand these areas until a proper fit is achieved. Dry-fit parts before applying cement.
- Forsølvning af mærkater: If decals show a 'silvering' effect (air trapped under the clear film), apply a decal setting solution to help them conform to the surface and eliminate air bubbles. Ensure the surface is glossy before decal application.
- Paint Adhesion Issues: Ensure parts are clean and free of oils or mold release agents before priming and painting. Wash parts with mild soap and water, then allow them to dry completely.
- Track Alignment: If the tracks appear misaligned or too loose/tight, re-check the connection points and ensure all road wheels and sprockets are correctly positioned. Adjust track sections as necessary.
Specifikationer
- Mærke: FineMolds
- Modelnummer: 41111
- Skala: 1/35
- Produkttype: Unpainted Plastic Assembly Kit
- Hovedmateriale: Plast
- Completed Size (Approximate): Længde 156mm × Bredde 67mm × Højde 71mm
- Batteriforbrug: Ingen
- Batteri inkluderet: Ingen
- Særlige funktioner: Partially assembled plastic tracks, newly designed etched muffler guard, anime original markings and character decals included.
Garanti og support
Information regarding product warranty and customer support is not provided in the available product data. Please refer to the manufacturer's official website or contact your retailer for details on warranty policies and support services for FineMolds products.