
1. Úvod
The KCEVE HDMI KVM Switch allows two computers to share a single monitor, keyboard, mouse, and up to three additional USB 3.0 devices. This device supports high-resolution video up to 8K@60Hz and 4K@120Hz, making it suitable for demanding visual applications. It is designed for efficiency, reducing cable clutter and simplifying workstation management.
2. Obsah balení
Ověřte, zda jsou v balení přítomny všechny položky:
- 1 x KCEVE 8K HDMI KVM Switch
- 2 x USB 3.0 Cables (1.5m each)
- 1 x Wired Remote Control Cable (1.5m)
- 1 x Uživatelská příručka
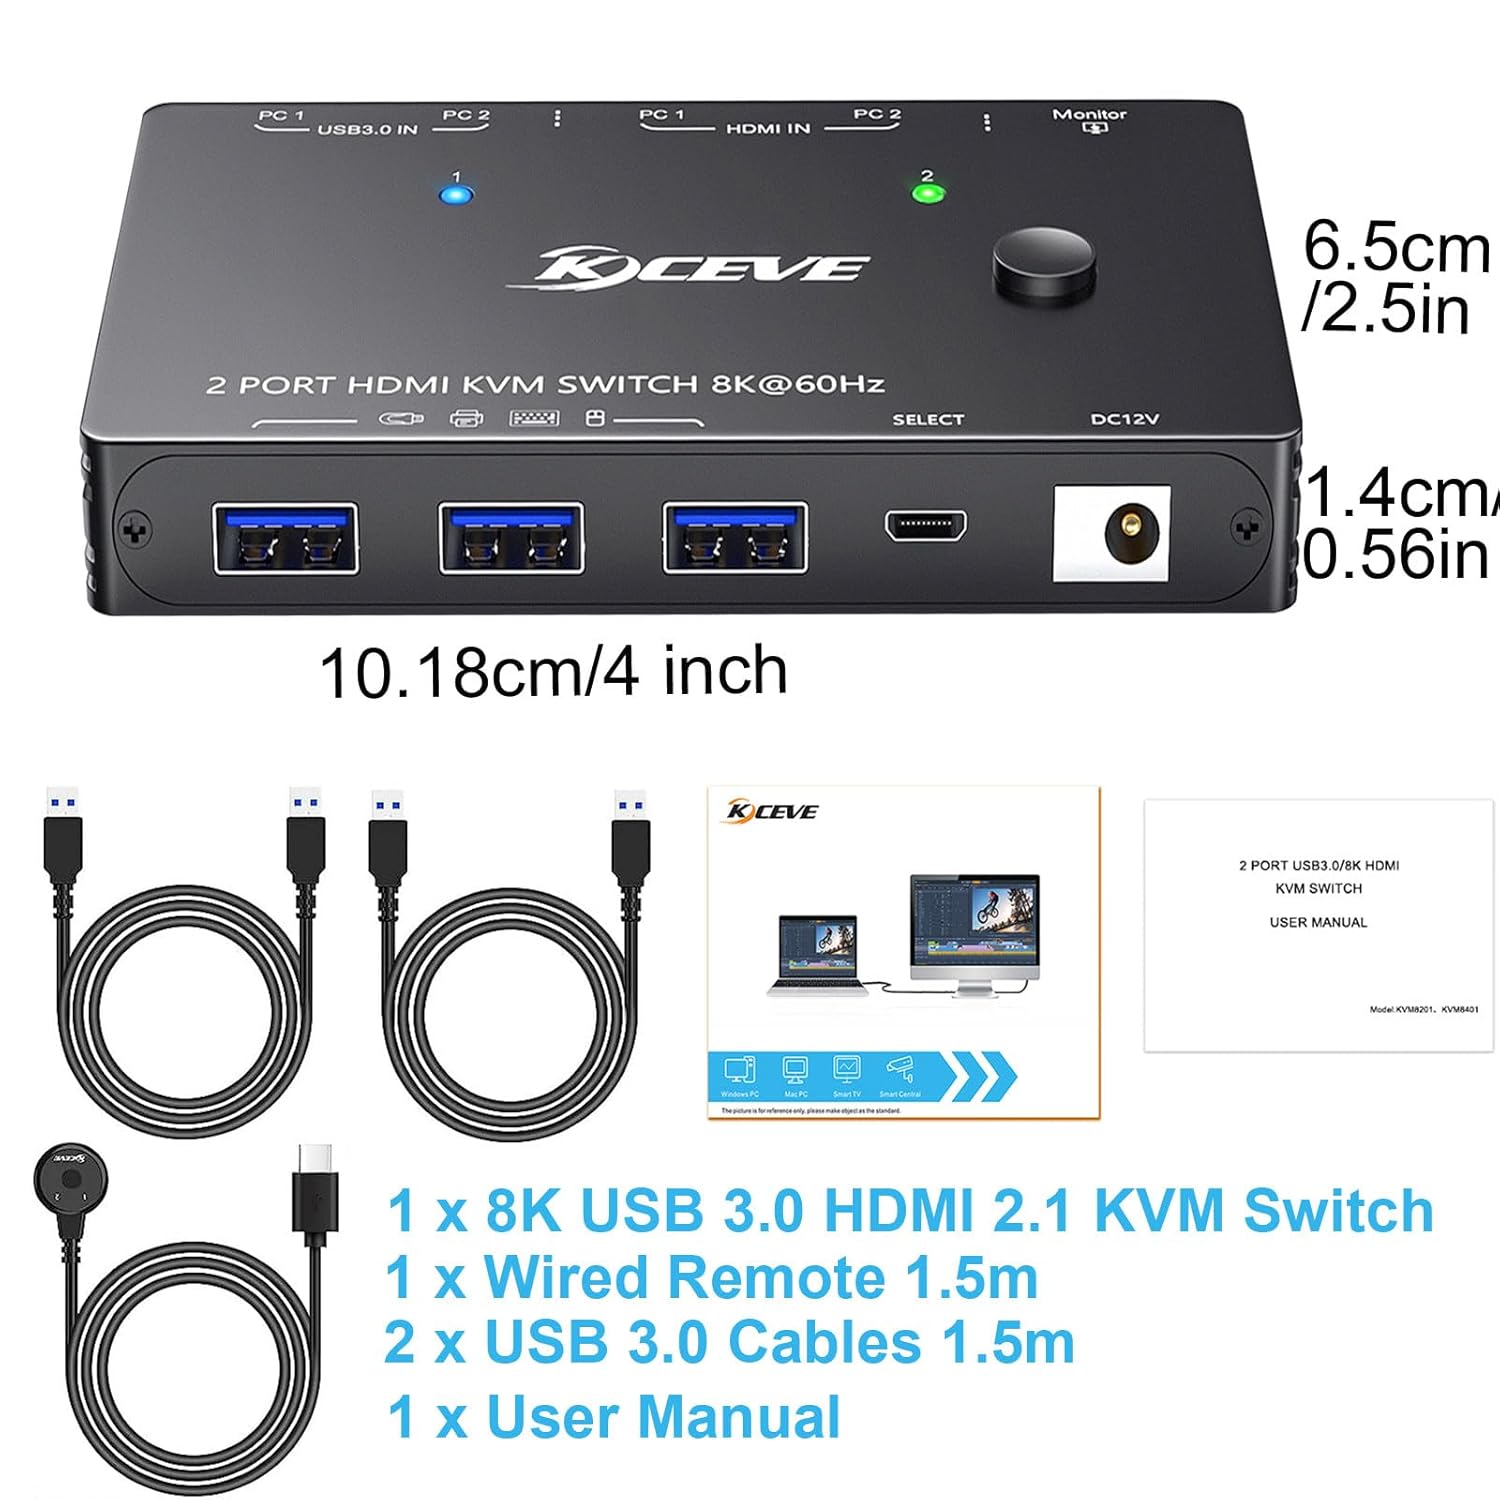
Image: The KVM switch unit, two USB 3.0 cables, a wired remote, and the user manual are shown, along with the dimensions of the KVM switch.
3. Konec produktuview
3.1 Klíčové vlastnosti
- Podpora vysokého rozlišení: Supports resolutions up to 8K@60Hz, 4K@120Hz, 4K@60Hz, 8K@30Hz, and 1080P@120/60Hz.
- Připojení USB 3.0: Features three USB 3.0 ports for sharing peripherals like keyboards, mice, printers, scanners, and flash drives with data transfer rates up to 5Gbps.
- Kompatibilita s HDMI 2.1: Compatible with HDMI 2.1, HDCP 2.3, and backward compatible with HDMI 2.0 and HDMI 1.4.
- Dual Switching Methods: Switch between connected computers using the button on the device or the included 1.5m wired remote.
- Široká kompatibilita: Works with Windows 11/10/8/7/XP/Vista, Chrome, Linux, Unix, Ubuntu, Fedora, Mac OS, and most HDMI input devices.
- Plug and Play: No additional driver software required for operation.
3.2 Rozložení zařízení a porty

Image: A diagram illustrating the KVM switch's input and output ports. The top view shows the output HDMI port, three USB 3.0 ports, and the DC 12V power input. The bottom view shows two HDMI input ports (PC1, PC2) and two USB 3.0 input ports (PC1, PC2).
The KVM switch features the following ports:
- Input Ports (for Computers):
- 2 x HDMI Input (PC1, PC2)
- 2 x USB 3.0 Input (PC1, PC2)
- Output Ports (for Monitor & Peripherals):
- 1 x HDMI Output (to Monitor)
- 3 x USB 3.0 Output (for Keyboard, Mouse, USB devices)
- Příkon: 1 x DC 12V (Power adapter not included, typically powered via USB)
- Port dálkového ovládání: 1 x USB-C (for wired remote)
4. Pokyny k nastavení
Follow these steps to set up your KCEVE KVM Switch:
- Připojení monitoru: Connect your monitor to the HDMI Output port on the KVM switch using an HDMI cable.
- Připojení periferií: Connect your keyboard, mouse, and other USB 3.0 devices (e.g., printer, scanner, flash drive) to the USB 3.0 Output ports on the KVM switch.
- Připojení počítačů: For each computer (PC1 and PC2):
- Connect an HDMI cable from your computer's HDMI output to the corresponding HDMI Input port (PC1 or PC2) on the KVM switch.
- Connect a USB 3.0 cable (provided) from your computer's USB 3.0 port to the corresponding USB 3.0 Input port (PC1 or PC2) on the KVM switch.
Note: Each computer requires both an HDMI cable and a USB 3.0 cable connection to the KVM switch for full functionality.
- Připojení kabelového dálkového ovladače (volitelné): Plug the wired remote control cable into the USB-C port on the KVM switch.
- Zapnutí: The KVM switch is typically powered via the USB 3.0 connections from your computers. For stable operation, especially with 8K or 4K@60Hz and higher resolutions, or with high-power USB devices, it is recommended to connect an external DC 12V power adapter (not included) to the DC 12V input port.

Image: The KVM switch connected to two desktop computers, a single monitor, a keyboard, and a mouse, demonstrating a typical setup.
5. Návod k obsluze
The KVM switch offers two methods for switching between connected computers:
5.1 Tlačítkový spínač
- Locate the "SELECT" button on the top of the KVM switch.
- Press the button to toggle between PC1 and PC2.
- LED indicators on the KVM switch will illuminate to show which computer is currently active.
5.2 Wired Remote Control
- If you have connected the wired remote control, you can use it to switch computers.
- Press the button on the wired remote to toggle between PC1 and PC2.
- The LED on the remote and the KVM switch will indicate the active computer.
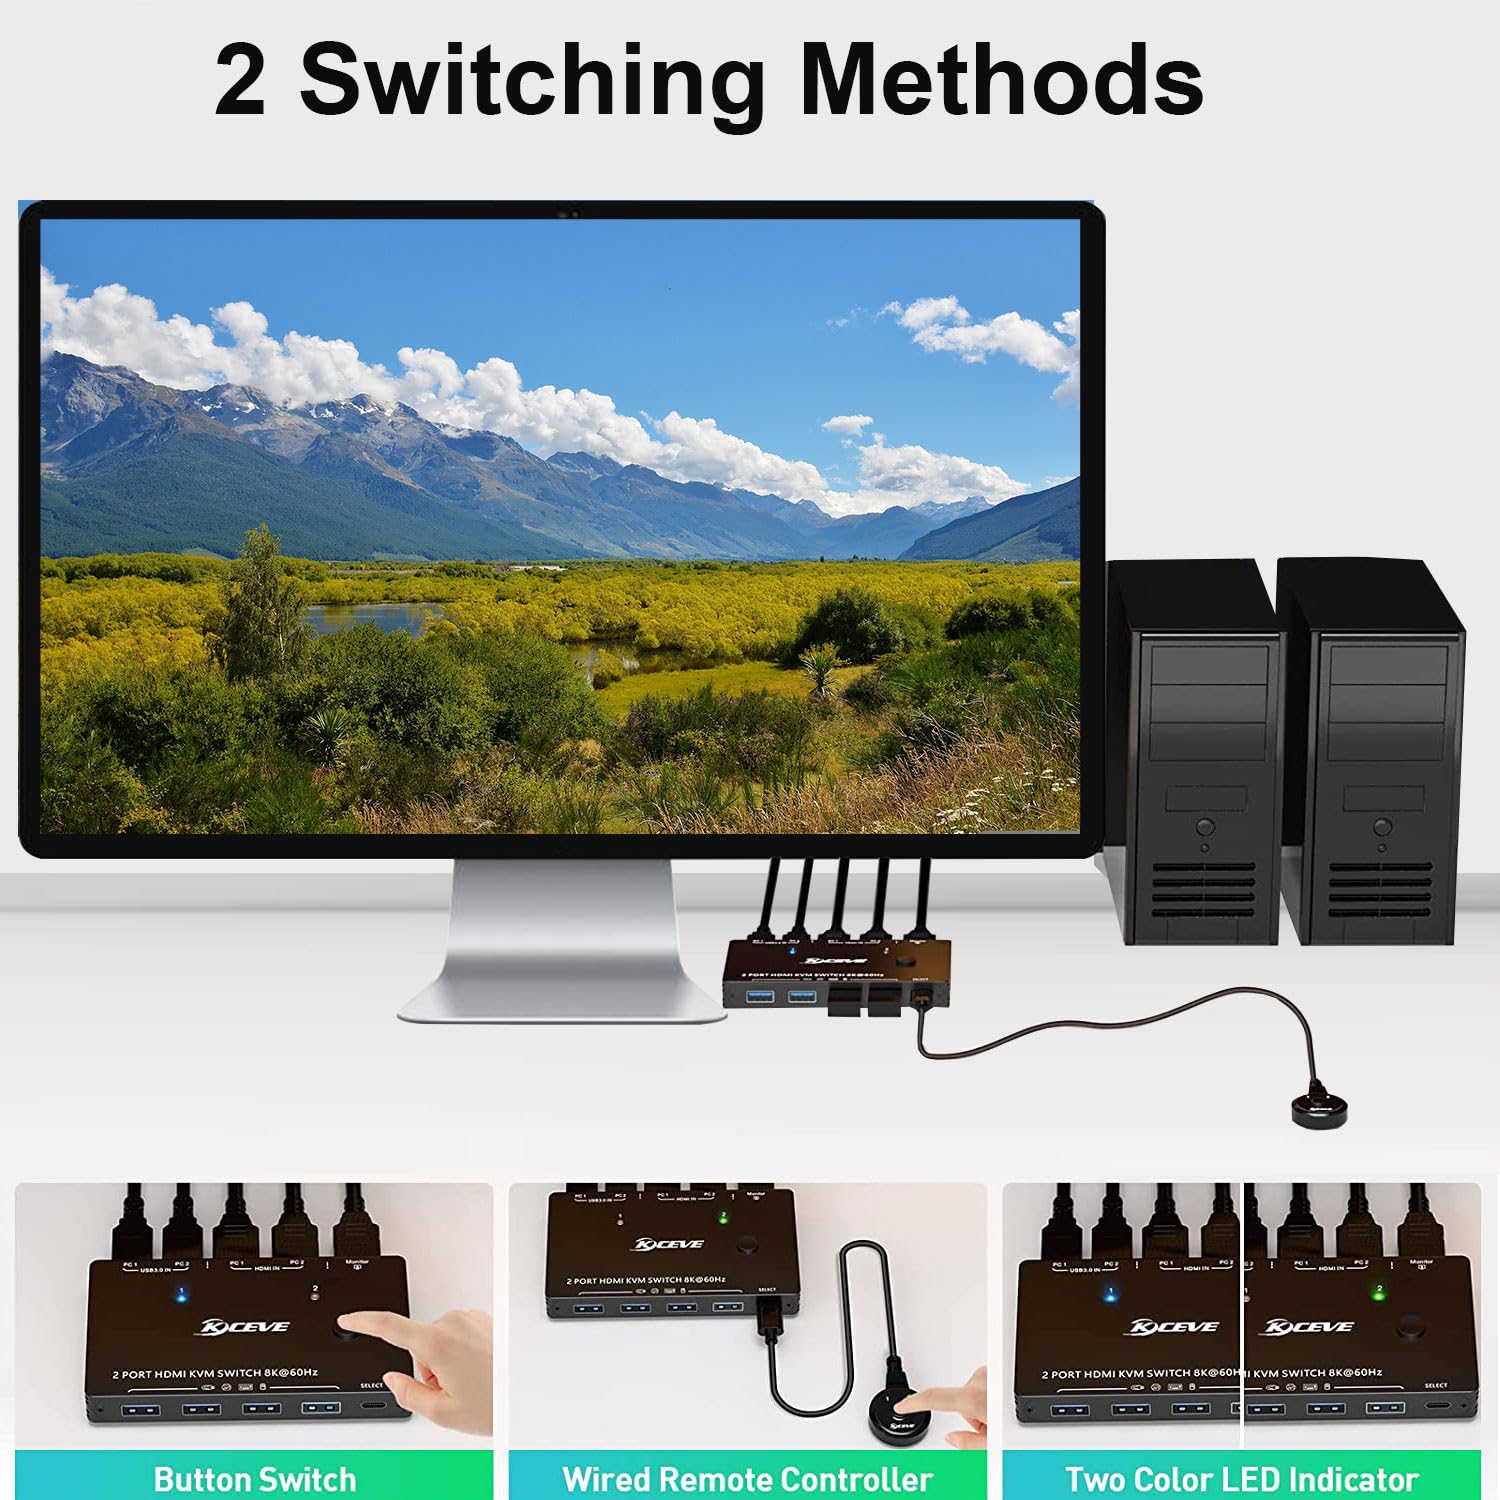
Image: Demonstrates the two methods of switching between computers: a direct button press on the KVM unit and using the external wired remote control. LED indicators show the active computer.
6. Údržba
- Čištění: Use a soft, dry cloth to clean the surface of the KVM switch. Avoid using liquid or aerosol cleaners.
- Skladování: Přístroj skladujte na chladném a suchém místě mimo dosah přímého slunečního záření a extrémních teplot.
- Zacházení: Avoid dropping or subjecting the device to strong impacts. Ensure cables are not excessively bent or strained.
7. Řešení problémů
Pokud narazíte na problémy, podívejte se na následující běžná řešení:
- No Display or Flickering Screen:
- Ujistěte se, že jsou všechny kabely HDMI bezpečně připojeny.
- Verify that your monitor and graphics card support the selected resolution and refresh rate.
- Use high-quality, certified HDMI 2.1 cables, especially for 8K or 4K@120Hz resolutions. Lower quality cables can cause flickering or black screens.
- Connect an external DC 12V power adapter to the KVM switch if you are using high resolutions or multiple power-hungry USB devices.
- Klávesnice/myš nereaguje:
- Ensure the USB 3.0 cables from both computers are correctly connected to the KVM switch.
- Check that your keyboard and mouse are plugged into the USB 3.0 Output ports on the KVM switch.
- Try reconnecting the USB cables.
- Some older peripherals may require a power cycle (unplug and replug) after switching.
- USB Devices Not Detected or Slow:
- Ensure the USB 3.0 cables are properly connected.
- Verify that the USB device is compatible with USB 3.0.
- If using high-power USB devices, ensure the KVM switch is powered by an external DC 12V adapter.
- Problémy s přepínáním:
- Ensure the KVM switch has adequate power.
- Verify the wired remote control cable is securely connected.
8. Specifikace
| Model | KVM8201-A |
| Vstupní porty | 2 x HDMI 2.1, 2 x USB 3.0 |
| Výstupní porty | 1 x HDMI 2.1, 3 x USB 3.0 |
| Rozlišení videa | Up to 8K@60Hz, 4K@120Hz, 4K@60Hz, 8K@30Hz, 1080P@120/60Hz |
| Rychlost přenosu dat přes USB | Až 5 Gbps (USB 3.0) |
| Podpora HDCP | HDCP 2.3 (zpětně kompatibilní) |
| Metody přepínání | Button on device, Wired Remote Control |
| Napájení | USB powered (optional DC 12V external power for high demand) |
| Materiál | Kov |
| Rozměry (D x Š x V) | 10.18 x 6.5 x 1.4 cm (4 x 2.56 x 0.55 palce) |
| Hmotnost | 12.32 unce |
| Kompatibilní OS | Windows, Chrome, Linux, Unix, Ubuntu, Fedora, Mac OS |
9. Záruka a podpora
KCEVE provides comprehensive after-sales support for this product, including product replacement and technical assistance. For any inquiries or support needs, please contact KCEVE customer service through the retailer's platform or the official KCEVE webmísto.