
1. Úvod
The KCEVE USB 3.0 KVM Switch allows you to control up to four computers using a single HDMI monitor, keyboard, and mouse. This device is designed to streamline your workspace by eliminating the need for multiple peripherals for each computer. It supports high-resolution video output up to 8K@60Hz and 4K@144Hz, and provides high-speed USB 3.0 data transfer for connected peripherals. This KVM switch is suitable for various environments including offices, monitoring stations, classrooms, and home theater setups.
2. Obsah balení
Zkontrolujte prosím obsah balení, abyste se ujistili, že jsou přítomny všechny položky:
- 1 x KCEVE 8K KVM Switch HDMI Unit
- 1 x 1.5m Wired Remote Control
- 1 x DC 12V napájecí adaptér
- 4 x USB 3.0 kabel
- 1 x Uživatelská příručka
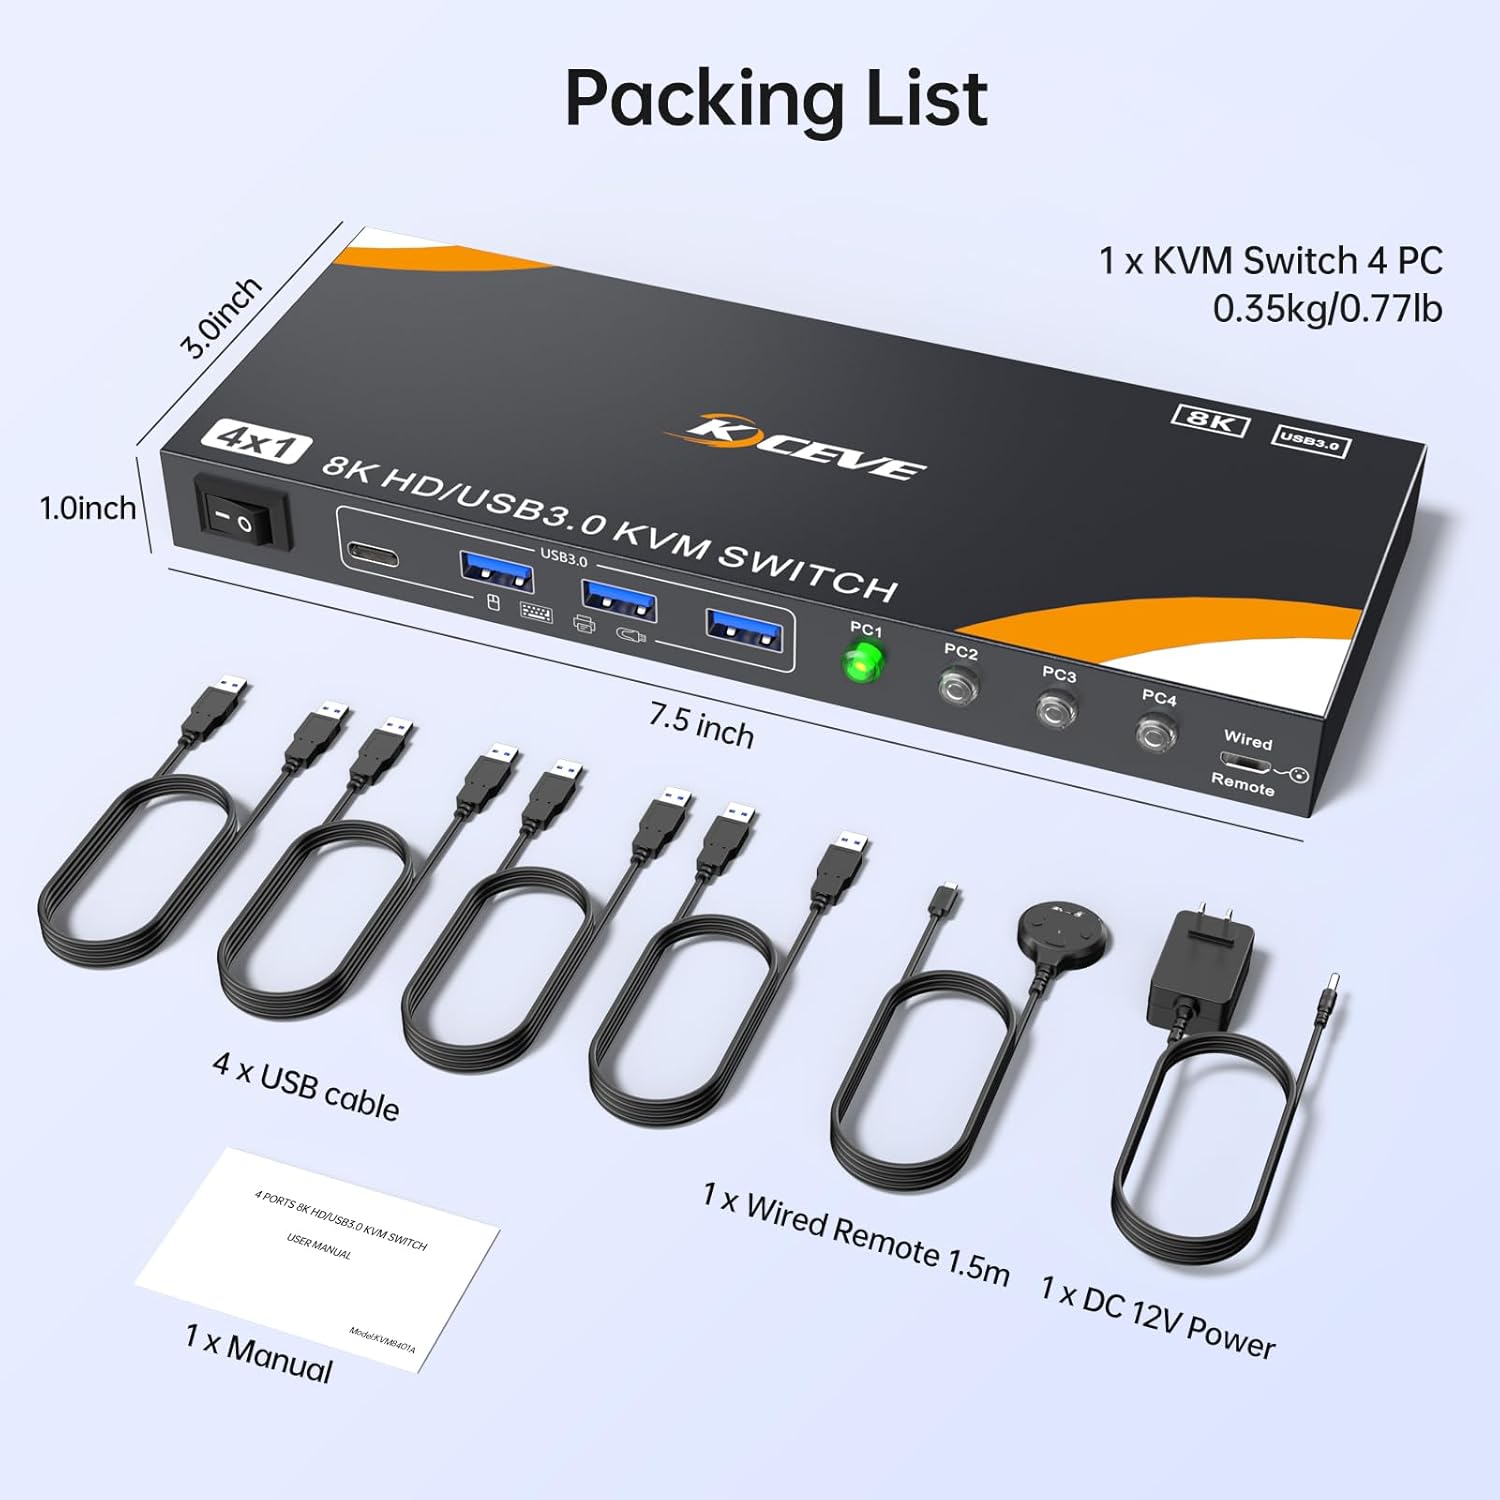
Obrázek 2.1: Obsah balení
3. Konec produktuview
The KVM switch features multiple ports for connecting your computers, monitor, and USB peripherals. Familiarize yourself with the layout:

Figure 3.1: KVM Switch Port Layout
Přední panel:
- Vypínač: Pro zapnutí/vypnutí zařízení.
- Porty USB 3.0 (x4): For connecting USB peripherals such as keyboard, mouse, printer, U-disk, hard drive, scanner, or camera.
- PC Selection Buttons (PC1-PC4): Press to switch between connected computers.
- Wired Remote Port: For connecting the included wired remote control.
Zadní panel:
- Vstup DC 12V: Zde připojte dodaný napájecí adaptér.
- HDMI Output (Monitor): Connect your HDMI monitor here.
- HDMI Inputs (HD1-HD4): Connect HDMI cables from your computers (PC1-PC4) here.
- USB 3.0 Inputs (USB3.0-1 to USB3.0-4): Connect USB 3.0 cables from your computers (PC1-PC4) here.
4. Pokyny k nastavení
Follow these steps to set up your KCEVE KVM Switch:
- Vypínací zařízení: Ensure all computers and the monitor are powered off before beginning the connection process.
- Připojení monitoru: Connect your HDMI monitor to the "Monitor Output" HDMI port on the KVM switch.
- Připojení periferií: Connect your keyboard, mouse, and any other USB peripherals (printer, U-disk, etc.) to the USB 3.0 ports on the front panel of the KVM switch.
- Connect Computers (PC1-PC4): For each computer you wish to connect (up to four):
- Connect an HDMI cable from your computer's HDMI output to one of the "HD" input ports (HD1-HD4) on the KVM switch.
- Connect a USB 3.0 cable from your computer's USB 3.0 port to the corresponding "USB3.0" input port (USB3.0-1 to USB3.0-4) on the KVM switch. Each computer requires both an HDMI and a USB 3.0 cable connection to the KVM switch for full functionality.
- Připojení kabelového dálkového ovladače (volitelné): If desired, connect the 1.5-meter wired remote control to the "Wired Remote" port on the front panel.
- Připojte napájecí adaptér: Connect the provided DC 12V power adapter to the "DC 12V" input port on the rear panel of the KVM switch, then plug it into a power outlet.
- Zapnutí: Power on the KVM switch, then power on your monitor and connected computers.
Důležité: For optimal video quality, especially for 8K@60Hz or 4K@144Hz, use certified HDMI 2.1 cables. For optimal USB data transfer speeds, use USB 3.0 cables.
5. Návod k obsluze
The KVM switch offers two methods for switching between connected computers:
Metoda 1: Tlačítko na předním panelu
- Press the "SELECT" button (PC1, PC2, PC3, or PC4) on the front panel of the KVM switch corresponding to the computer you wish to control.
- An LED indicator will illuminate next to the selected PC button, showing which computer is currently active.
Method 2: Wired Remote Control
- Press the button on the wired remote control to cycle through the connected computers.
- The LED indicators on the KVM switch will show the currently active computer.

Figure 5.1: Switching Methods
Poznámka: There may be an approximate 8-second delay when switching between sources as the KVM re-establishes the video and USB connections.
6. Specifikace
| Funkce | Detail |
|---|---|
| Model | KC-8401A-A |
| Verze HDMI | HDMI 2.1 |
| Podpora rozlišení videa | 8K@60Hz, 4K@144Hz, 4K@120Hz, 4K@60Hz (YUV 4:4:4) |
| Verze USB | USB 3.0 (zpětně kompatibilní s USB 2.0/1.1) |
| Rychlost přenosu dat | Až 5 Gbps (USB 3.0) |
| Kontrolní metoda | Push Button, Wired Remote |
| Provozní svtage | 12 voltů |
| Wattage | 12 wattů |
| Materiál | Kov |
| Rozměry (D x Š x V) | 7 x 3 x 1 palce |
| Hmotnost položky | 0.78 libry |
| Hodnocení mezinárodní ochrany | IP67 |
| Certifikace | CE |

Figure 6.1: Supported Video Resolutions

Figure 6.2: USB 3.0 Data Transfer Speed
7. Kompatibilita
The KCEVE KVM Switch offers broad compatibility without requiring additional drivers:
Podporované operační systémy:
- Windows
- Průhled
- macOS
- Chrome OS
- Linux
- Unix
- Ubuntu
Compatible HDMI Devices:
- Stolní počítače
- Notebooky
- Monitory
- HDTV
- Projektory
- Apple TV
- PS5
- Xbox
- Videokamery
- Set-top boxy

Obrázek 7.1: Kompatibilita operačních systémů
8. Řešení problémů
If you encounter issues, please refer to the following common troubleshooting steps:
- Žádný displej na monitoru:
- Ensure the KVM switch is powered on using the provided DC 12V adapter.
- Verify that all HDMI cables are securely connected between the computers, KVM switch, and monitor.
- Confirm that the correct input source is selected on your monitor.
- Try using certified HDMI 2.1 cables, especially for high resolutions (8K/4K@144Hz).
- Restart the KVM switch and the connected computers.
- Klávesnice/myš nereaguje:
- Ensure the USB 3.0 cables are securely connected from each computer to the corresponding USB 3.0 input on the KVM switch.
- Verify that your keyboard and mouse are connected to the USB 3.0 peripheral ports on the front of the KVM switch.
- Zkuste připojit klávesnici a myš přímo k počítači, abyste se ujistili, že jsou funkční.
- Some specialized gaming keyboards/mice with advanced features may require direct connection or specific drivers not supported by KVM switches.
- Zpoždění spínání:
- An approximate 8-second delay during switching is normal as the KVM re-establishes connections. This is not a malfunction.
- No EDID Information:
- This KVM Switch does not feature EDID emulation. This means the monitor's EDID information is passed directly to the active computer. When switching, the inactive computers may detect a temporary loss of display, which is normal behavior for KVMs without EDID emulation.
9. Údržba
To ensure the longevity and optimal performance of your KCEVE KVM Switch, follow these maintenance guidelines:
- Čištění: K čištění vnější strany zařízení používejte měkký, suchý hadřík. Nepoužívejte tekuté čisticí prostředky ani aerosoly.
- Větrání: Ujistěte se, že je KVM přepínač umístěn v dobře větraném prostoru, aby nedošlo k jeho přehřátí. Neblokujte žádné větrací otvory.
- Moc: Always use the provided DC 12V power adapter. Using an incorrect power adapter may damage the device.
- Skladování: Pokud zařízení delší dobu nepoužíváte, skladujte jej na chladném a suchém místě mimo dosah přímého slunečního záření a extrémních teplot.
10. Záruka a podpora
Your KCEVE HDMI KVM switch is backed by a 12měsíční záruka výrobce od data nákupu.
Should you encounter any issues or require assistance with your product, please contact KCEVE customer support. Provide your model number (KC-8401A-A) and a detailed description of the problem for prompt service.
Contact information for support can typically be found on the KCEVE official webwebu nebo prostřednictvím vaší nákupní platformy.