1. Úvod
This manual provides essential information for the safe and efficient operation, maintenance, and troubleshooting of your Timbertech MNFS01 Wall Chaser. Please read these instructions carefully before using the tool and keep them for future reference. The Timbertech MNFS01 is a high-quality wall chaser designed for precise groove cutting in various masonry materials. It features a powerful 1700W motor, an integrated laser guide for accuracy, and adjustable settings for cutting depth and width.
2. Bezpečnostní pokyny
Always follow basic safety precautions to reduce the risk of fire, electric shock, and personal injury. Failure to follow these instructions may result in serious injury or property damage.
- Přečtěte si všechny pokyny: Familiarize yourself with the tool's controls and proper operation.
- Používejte osobní ochranné prostředky (OOP): Always wear safety glasses, hearing protection, a dust mask, and heavy-duty gloves when operating the wall chaser.
- Zajištění obrobku: Ensure the material being cut is stable and securely clamped, aby se zabránilo pohybu během provozu.
- Udržujte čistou pracovní plochu: Nepořádek v pracovních prostorech nutí k nehodám. Udržujte své pracovní místo dobře osvětlené a bez nečistot.
- Vyhněte se nebezpečnému prostředí: Nepoužívejte elektrické nářadí v damp nebo vlhkých místech ani je nevystavujte dešti. Pracovní prostor dobře větrejte.
- Prevent Accidental Starting: Před zapojením nástroje se ujistěte, že je vypínač v poloze VYPNUTO.
- Použijte správný nástroj: Do not force the tool; use the correct tool for your application.
- Odpojit napájení: Před prováděním jakýchkoli úprav, výměnou příslušenství nebo uložením nářadí jej vždy odpojte od zdroje napájení.
- Zkontrolujte, zda nejsou poškozené díly: Before use, inspect the tool for any damaged parts. Ensure all guards and safety features are in working order.
- Odsávání prachu: Always connect the dust extraction adapter to a suitable vacuum cleaner to minimize dust exposure.
3. Obsah balení
Your Timbertech MNFS01 Wall Chaser package includes the following items:
- 1 x Wall Chaser with Laser
- 1 x Přepravní pouzdro
- 2 x Diamond Cutting Discs (Ø 150mm)
- 1 x Groove Chisel
- 1 x klíč na klíč
- 1 x Dust Extractor Adapter
- 1 x Návod k použití

Figure 1: The Timbertech MNFS01 Wall Chaser shown with its main components and included accessories, such as diamond discs, wrenches, and the dust extraction adapter, all neatly arranged.
4. Technické specifikace
| Funkce | Specifikace |
|---|---|
| svtage | 230 V - 240 V ~50 Hz |
| Spotřeba energie | 1700 W |
| Třída ochrany | II |
| Rychlost | 4000 min-1 (ot./min.) |
| Průměr řezného kotouče | 150 mm |
| Bore Capacity | 22.2 mm |
| Groove Depth | Cca. 10 – 40 mm |
| Šířka drážky | Approx. 14, 19, and 26 mm |
| Vlnová délka laseru | 650 nm |
| Výstupní výkon laseru | 1 mW |
| Laser Divergence Angle | 1.5 mrad |
| Hmotnost | 7.91 kg |
| Rozměry (balení) | 39.1 x 37.79 x 23.4 cm |
5. Nastavení a montáž
5.1 Installing Diamond Discs
To install the diamond cutting discs:
- Ujistěte se, že je nástroj odpojen od zdroje napájení.
- Otevřete ochranný kryt.
- Place the first diamond disc onto the spindle, ensuring the rotation arrow on the disc matches the arrow on the tool.
- Add the appropriate spacers to achieve the desired cutting width (14mm, 19mm, or 26mm).
- Place the second diamond disc, again matching the rotation arrow.
- Secure the discs and spacers with the flange and nut, tightening with the provided spanner wrench.
- Bezpečně zavřete ochranný kryt.
Video 1: Detailed instructions on how to correctly install the diamond cutting discs and spacers into the wall chaser for various groove widths.

Obrázek 2: Detail view of the diamond cutting discs and the various spacers used to adjust the groove width, illustrating the different size options available.
5.2 Attaching Dust Extraction Adapter
For a cleaner work environment and to reduce dust exposure, attach the dust extraction adapter to a suitable vacuum cleaner.
- Locate the dust extraction port on the wall chaser.
- Securely attach the provided dust extractor adapter to this port.
- Connect a vacuum cleaner hose to the adapter.

Figure 3: The dust extraction adapter is shown connected to the wall chaser, ready to be attached to a vacuum cleaner for effective dust management during operation.
6. Návod k obsluze
6.1 Nastavení hloubky a šířky řezu
The wall chaser allows for precise adjustment of both cutting depth and width:
- Nastavení hloubky: Use the depth adjustment screw to set the desired cutting depth between 10mm and 40mm. Refer to the markings on the tool for accurate setting.
- Nastavení šířky: Adjust the groove width by adding or removing spacers between the diamond discs during installation. Available widths are 14mm, 19mm, and 26mm.

Obrázek 4: Podrobný view of the wall chaser highlighting the depth adjustment mechanism, showing the screw and scale for precise control over cutting depth.
6.2 Používání laserového naváděcího přístroje
The integrated laser guide assists in achieving straight and accurate cuts:
- Locate the laser ON/OFF button on the tool.
- Press the button to activate the laser line, which will project onto your workpiece.
- Align the laser line with your marked cutting path for precise guidance.
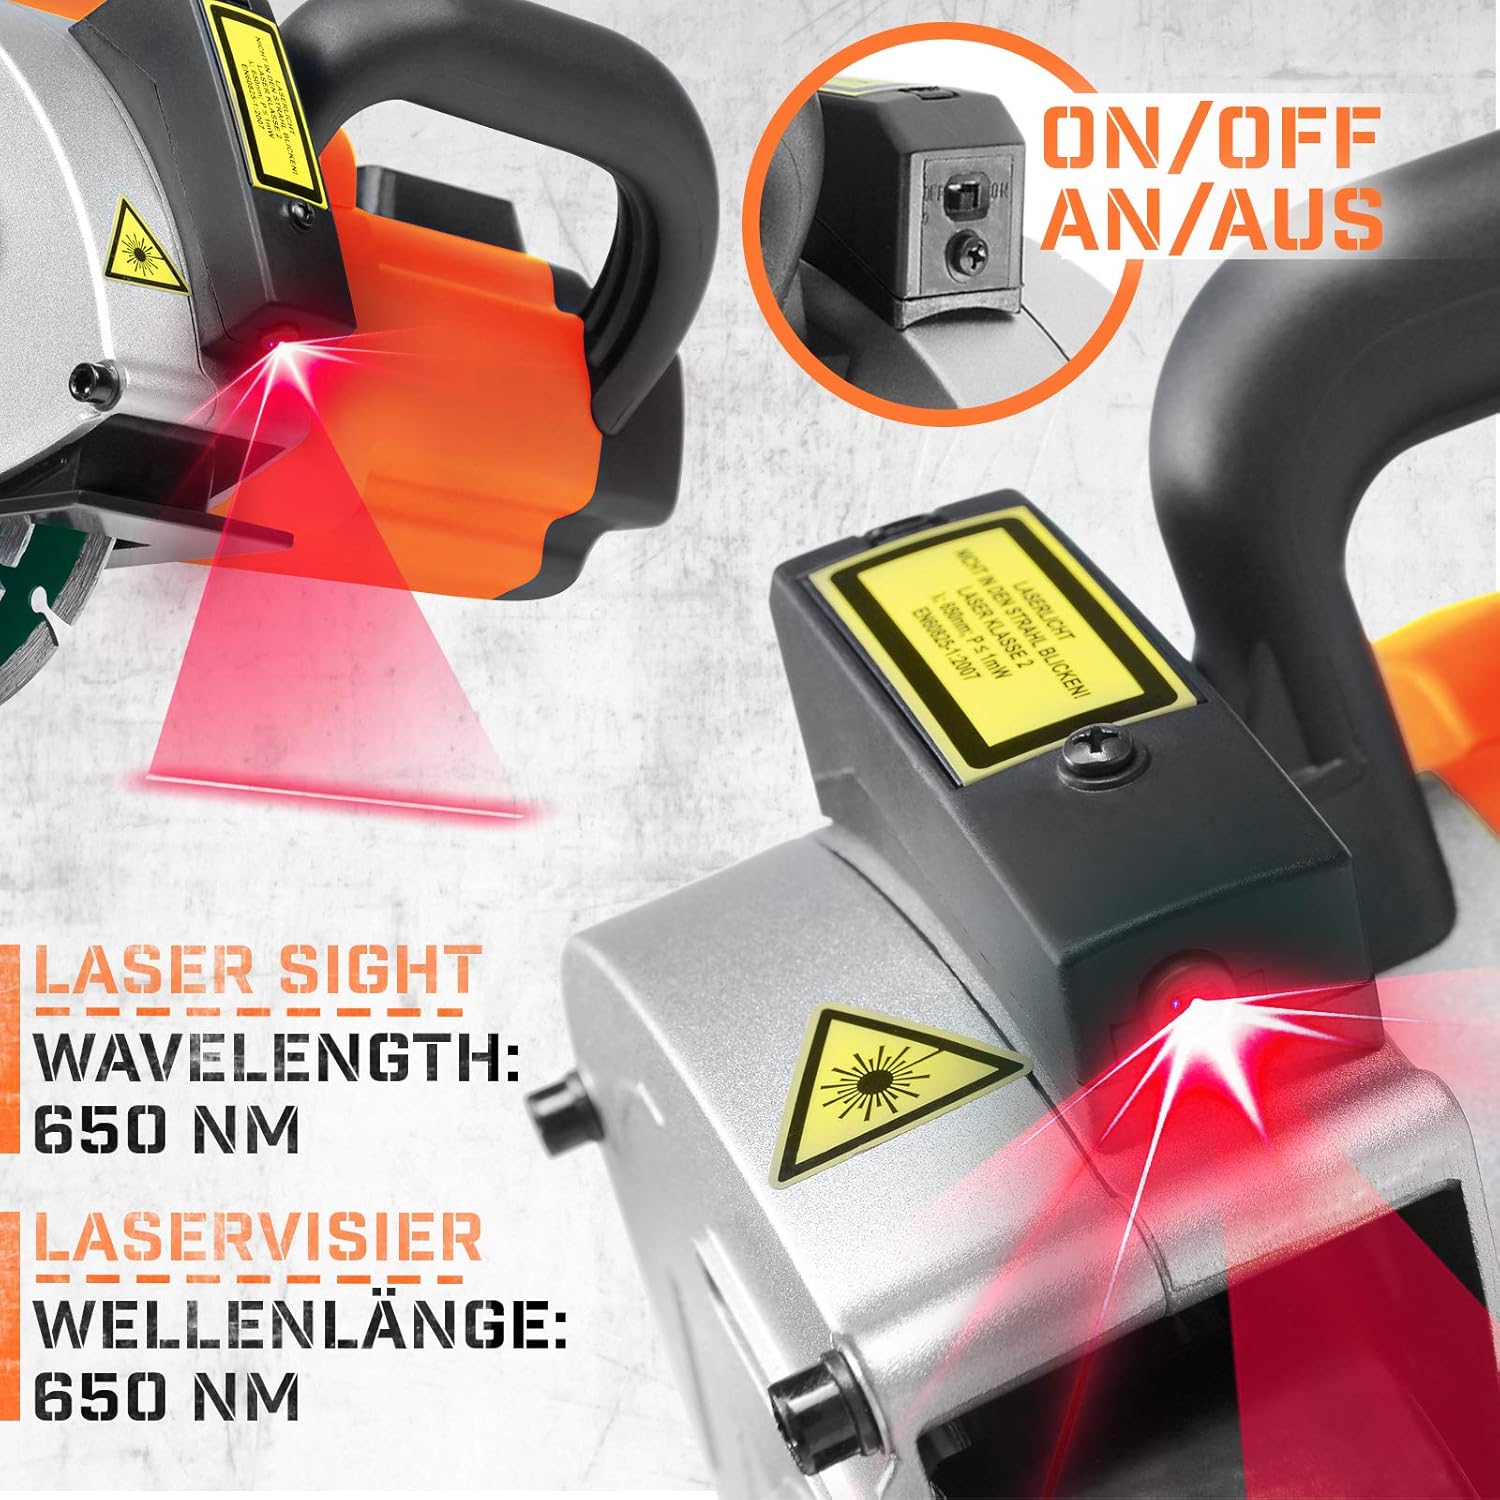
Figure 5: A close-up image of the wall chaser's laser sight, showing the laser beam projecting a guide line for accurate cutting.
6.3 Obecné tipy pro provoz
- Funkce pomalého startu: The tool is equipped with a soft start function to prevent sudden jolts upon startup, ensuring smoother operation and extending motor life.
- Ochrana proti přetížení: An integrated overload protection system will automatically shut down the tool if it detects excessive load, preventing damage to the motor. Allow the tool to cool down before resuming operation.
- Pracovní směr: Always pull the wall chaser towards you or push it downwards along the marked line for optimal control and safety.
Video 2: Demonstration of the FERM WSM1008 Wall Slotter (similar to MNFS01) in operation, showing how to make precise cuts in a wall.
Video 3: An operational video showcasing the wall chaser in action, demonstrating its effectiveness in creating grooves for various applications.
7. Údržba a péče
Regular maintenance ensures the longevity and optimal performance of your wall chaser.
- Čištění: After each use, clean the tool thoroughly. Remove any dust and debris from the ventilation slots and the protective cover. Use a soft brush or compressed air.
- Kontrola čepele: Regularly inspect the diamond cutting discs for wear or damage. Replace worn or chipped discs immediately to maintain cutting efficiency and safety.
- Kontrola kabelů: Check the power cable for any signs of damage, cuts, or fraying. Do not use the tool if the cable is damaged.
- Skladování: Store the wall chaser in its carrying case in a dry, secure place, out of reach of children.
8. Odstraňování běžných problémů
If you encounter problems with your wall chaser, refer to the following troubleshooting guide:
- Nástroj se nespustí:
- Zkontrolujte, zda je napájecí kabel bezpečně zapojený do funkční zásuvky.
- Verify that the ON/OFF switch is fully engaged.
- Zkontrolujte, zda nejsou vypnuté jističe nebo spálené pojistky.
- Snížený řezný výkon:
- Inspect diamond discs for wear or damage. Replace if necessary.
- Ensure the cutting depth and width settings are appropriate for the material.
- Nadměrné množství prachu:
- Ensure the dust extraction adapter is properly connected to a functional vacuum cleaner.
- Check if the vacuum cleaner bag is full or the filter is clogged.
- Tool Shuts Off During Operation:
- This may indicate the overload protection has activated. Reduce pressure on the tool and allow it to cool down.
- Check for blockages around the cutting discs.
9. Záruka a zákaznická podpora
For warranty information, service, or technical support, please refer to the contact details provided in your product packaging or visit the official Timbertech webUschovejte si účtenku jako doklad o koupi pro případné reklamace.