1. Important Safety Instructions
Read and understand all safety warnings and instructions before operating this drain cleaner machine. Failure to follow these instructions may result in electric shock, fire, and/or serious injury.
General Safety
- Electrical Safety: Ensure the machine is connected to a properly grounded outlet. Do not operate in wet conditions or near standing water. Keep all electrical connections dry.
- Personal Protective Equipment (PPE): Always wear heavy-duty gloves, eye protection, and appropriate work clothing. Loose clothing or jewelry can become entangled in rotating parts.
- Work Area: Keep the work area clean and well-lit. Cluttered or dark areas invite accidents. Keep bystanders, especially children, away while operating the machine.
- Cable Handling: Never grasp the rotating cable with bare hands. Always use the provided gloves. Be aware of the cable's movement and potential for kinking or whipping.
- Machine Stability: Ensure the machine is placed on a stable, level surface before operation to prevent tipping.
- Power Disconnection: Disconnect the power plug from the electrical outlet before making any adjustments, changing accessories, or storing the machine.
2. Product Overview
The VEVOR 120FT x 7/8 Inch Drain Cleaner Machine is designed for clearing blockages in various pipes. It features a powerful motor, durable steel cables, and interchangeable cutters for efficient operation.
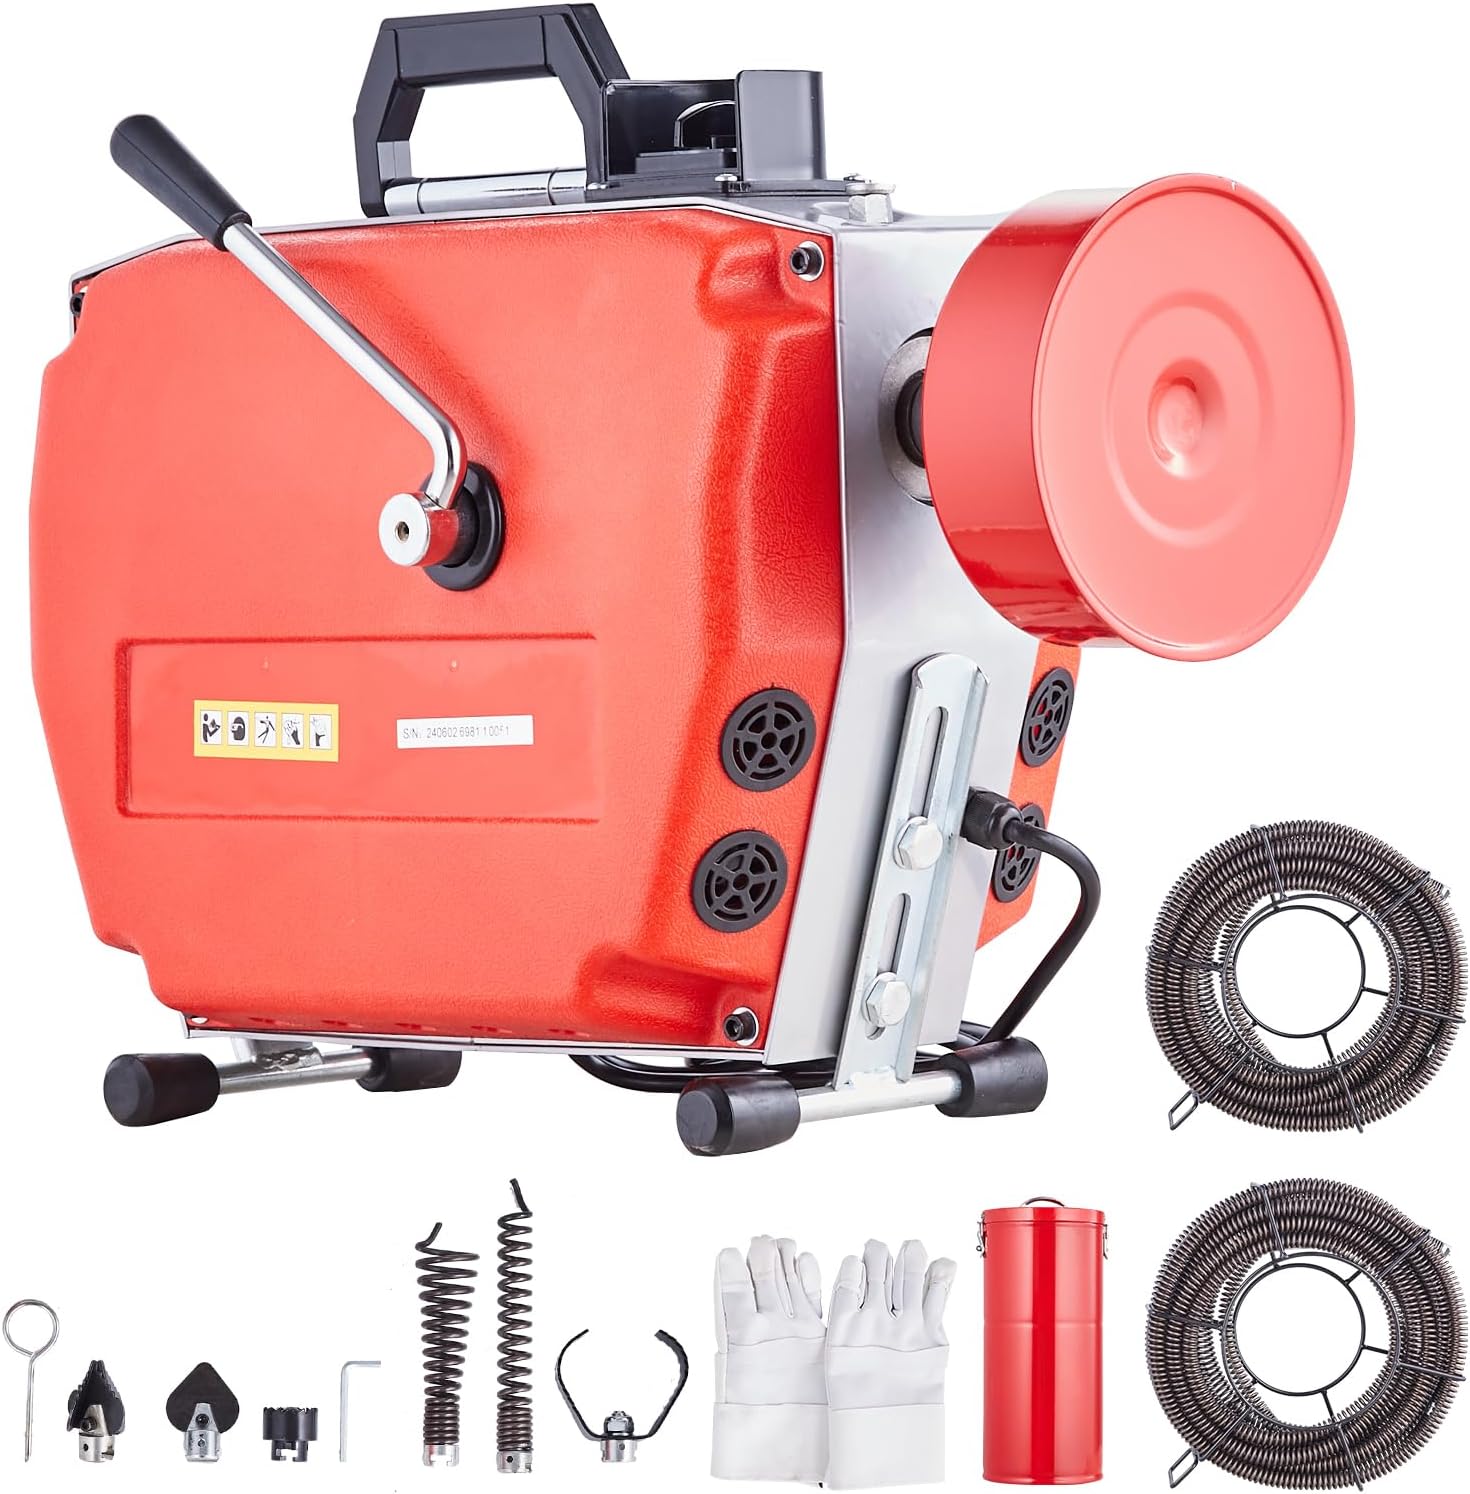
Figure 2.1: VEVOR 120FT x 7/8 Inch Drain Cleaner Machine
2.1 Key Features
- High-Quality Steel Cables: Includes 120 FT x 7/8" and 18 FT x 3/8" 65Mn steel cables, treated for resistance against breakage, twisting, and corrosion. Suitable for 1.9 to 6-inch pipes.
- Manual Feeding Control: Allows precise control over cable feed speed and force.
- CW/CCW Control: Forward and reverse rotation for effective clog removal and cable retraction.
- Versatile Cutters: Six quick-change cutters are included for various types of blockages.
- Powerful 420W Motor: Copper wire motor provides high efficiency and conductivity for tackling tough clogs.
- Durable Construction: Built with high-strength industrial plastic for long-term reliability.
2.2 Components Included
- 1 x Drain Cleaner Machine Unit
- 1 x 120 FT x 7/8 Inch Steel Cable
- 1 x 18 FT x 3/8 Inch Steel Cable
- 6 x Interchangeable Cutters (various shapes)
- 1 x Hex Wrench
- 1 x Installation Tool
- 1 x Pair of Gloves

Figure 2.2: Included Cutters for various blockages

Figure 2.3: High-Quality Steel Cables
3. Setup and Assembly
3.1 Unpacking
- Carefully remove all components from the packaging.
- Inspect the machine and all accessories for any damage that may have occurred during shipping. Contact customer support if any damage is found.
- Ensure all listed components are present.
3.2 Attaching Cutters
- Select the appropriate cutter for the type of blockage and pipe size.
- Using the installation tool, securely attach the chosen cutter to the end of the drain cable. Ensure it is firmly locked in place to prevent detachment during operation.
4. Operating Instructions
4.1 Preparing the Work Area
- Clear the area around the drain opening.
- Place the drain cleaner machine on a stable, flat surface near the drain.
- Wear appropriate personal protective equipment, including heavy-duty gloves and eye protection.
4.2 Cable Insertion and Feeding
- Insert the cable with the attached cutter into the drain opening.
- Engage the manual feeding control system. This allows you to control the speed and force with which the cable enters the pipe.
- Use the CW (Clockwise) setting on the control switch for forward rotation to advance the cable into the blockage.
- Apply gentle pressure to feed the cable. Do not force the cable, as this can cause kinking or damage.
- Once the blockage is cleared, switch to the CCW (Counter-Clockwise) setting to retract the cable from the pipe.
- Always maintain a firm grip on the cable with gloved hands during feeding and retraction.

Figure 4.1: Operating the Drain Cleaner Machine
4.3 Official Product Video
Video 4.1: Demonstration of the VEVOR Drain Cleaner Machine in operation, showcasing cable feeding and control.
5. Maintenance
5.1 Cleaning
- After each use, disconnect the machine from power.
- Clean the cable and cutters thoroughly to remove any debris, grease, or residue. Use a stiff brush and water, then dry completely to prevent rust.
- Wipe down the machine housing with a damp cloth. Do not use harsh chemicals or abrasive cleaners.
5.2 Storage
- Store the machine and cables in a dry, cool place, away from direct sunlight and moisture.
- Ensure cables are properly coiled and secured to prevent tangling.
5.3 Cable Care
- Regularly inspect cables for signs of wear, kinks, or damage. Replace damaged cables immediately.
- Lubricate cables periodically with a rust-inhibiting oil to extend their lifespan.
6. Troubleshooting
This section provides solutions to common issues encountered during operation. For problems not listed here, contact VEVOR customer support.
| Problem | Possible Cause | Solution |
|---|---|---|
| Machine does not start | No power supply; Faulty power switch; Motor issue | Check power connection and outlet; Ensure switch is in correct position; Contact customer support. |
| Cable gets stuck in pipe | Severe blockage; Cable kinked; Incorrect cutter used | Switch to CCW to retract slightly, then try CW again with gentle pressure; Use appropriate cutter; Do not force. |
| Cable kinks or twists | Excessive force; Cable not properly guided; Cable too long for pipe diameter | Reduce force; Guide cable carefully; Ensure correct cable size for pipe. |
| Cutter detaches from cable | Cutter not securely attached | Ensure cutter is firmly locked using the installation tool before operation. |
7. Specifications
| Attribute | Detail |
|---|---|
| Manufacturer | VEVOR |
| Part Number | 120FT x 7/8 Inch Drain Cleaner Machine |
| Item Weight | 113.5 pounds |
| Product Dimensions | 16.5 x 10.4 x 15 inches |
| Item Model Number | 120FT x 7/8 Inch Drain Cleaner Machine |
| Color | Red |
| Style | 120FT x 7/8Inch |
| Item Package Quantity | 1 |
| Included Components | 1 x Hex Wrench, 1 x Installation Tool, 1 x Pair of Gloves, 6 x Cutter |
| Batteries Required? | No |
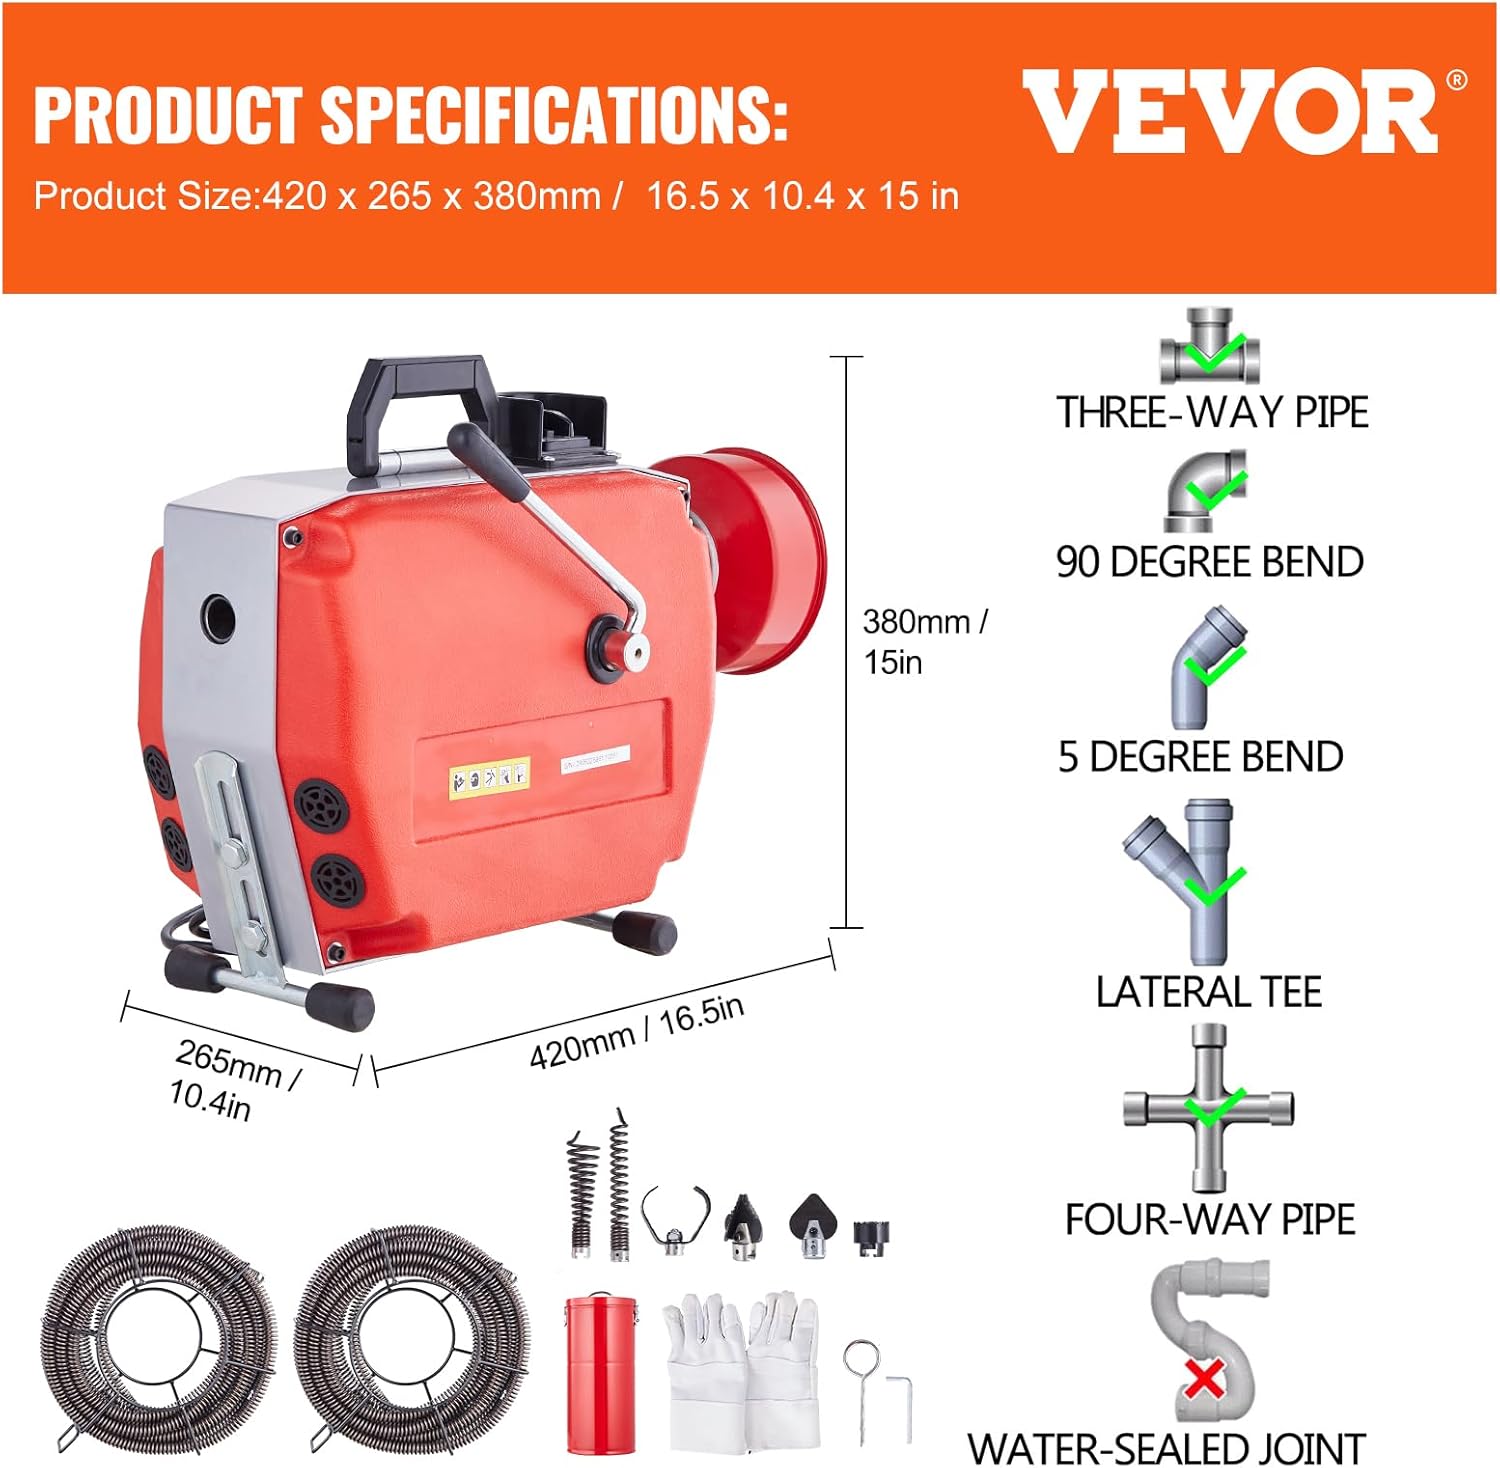
Figure 7.1: Product Dimensions and Pipe Compatibility
8. Warranty and Support
For warranty information, technical support, or service inquiries, please refer to the official VEVOR website or contact VEVOR customer service directly. Keep your purchase receipt for warranty claims.


