1. Introducció
The PIXEL TW-283/E3 is a multi-functional wireless shutter release and timer remote control designed for compatible Canon cameras. This device allows photographers to trigger their camera's shutter wirelessly, set various timer functions, and avoid camera shake, making it ideal for long exposures, macro photography, and self-portraits. This manual provides detailed instructions for its setup, operation, and maintenance.
2. Producte acabatview
The TW-283/E3 system consists of two main components: a transmitter and a receiver. Both units feature an LCD screen for easy setting adjustments and channel synchronization.
2.1 Transmitter (TW-283)
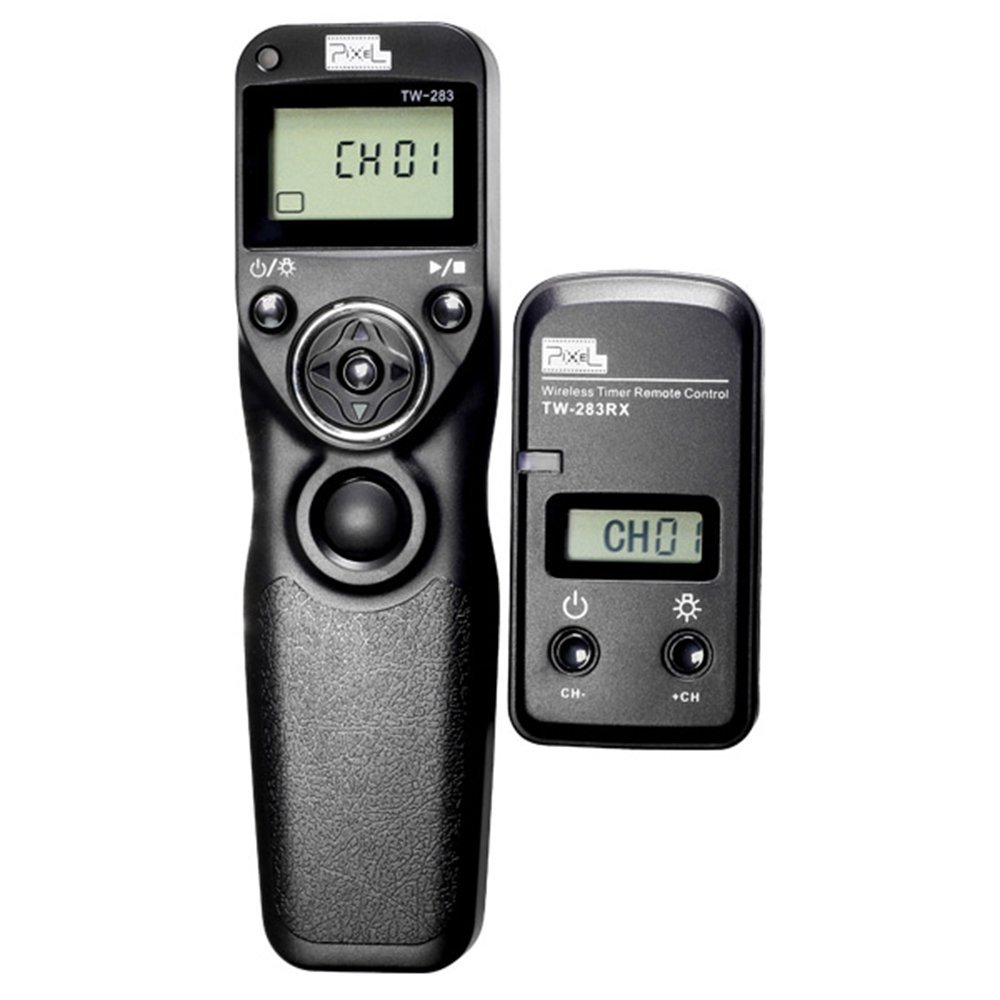
The transmitter is the handheld unit used to control the camera. It features an LCD display, a multi-function button for focus and shutter release, and buttons for navigating menus and setting timer functions.
2.2 Receiver (TW-283RX)

The receiver connects directly to your camera's remote control port. It receives signals from the transmitter and triggers the camera's shutter. It also features an LCD display for channel synchronization.
2.3 Compatibilitat

The TW-283/E3 is compatible with various Canon cameras, including but not limited to:
- Canon Rebel: Digital Rebel, XT, XSi, T1i, T2i, T3, T3i, T4i, T5, T5i, T6i, T6s, SL1
- Canon EOS: 60D, 60Da, 70D
- Canon PowerShot: G10, G11, G12, G15, G16, G1X, G1X Mark II, SX50 HS, SX60 HS
- Also compatible with select Pentax, Samsung, Contax, Sigma, and Hasselblad models.
3. Configuració
3.1 Instal·lació de la bateria
Both the transmitter and receiver require batteries for operation. Please use four new AAA batteries in total (two for the transmitter, two for the receiver).
- Locate the battery compartment on the back of both the transmitter and receiver.
- Obriu la coberta del compartiment.
- Insert two AAA batteries into each unit, ensuring correct polarity (+ and - terminals) as indicated inside the compartment.
- Tanqueu bé la tapa del compartiment de la bateria.
3.2 Connecting the Receiver to Your Camera

The receiver connects to your camera via the provided E3 connection cable.
- Locate the remote control socket on your Canon camera. This is typically a small port on the side of the camera body.
- Connect one end of the E3 cable to the receiver's port.
- Connect the other end of the E3 cable to your camera's remote control socket. Ensure the cable is inserted completely and securely for proper contact.

The receiver can be mounted on the camera's hot shoe or attached to a strap for convenience.
3.3 Setting the Channel
For the transmitter and receiver to communicate, they must be set to the same channel. The default channel is CH01.
- Enceneu tant l'emissor com el receptor.
- On each unit, use the channel selection buttons (e.g., 'CH-' and 'CH+') to select the desired channel.
- Verify that the channel displayed on both the transmitter and receiver LCD screens matches.
4. Instruccions de funcionament
The PIXEL TW-283/E3 offers various modes of operation, including single shot, continuous shooting, bulb mode, and timer functions.
4.1 Basic Shutter Release
- Ensure both units are powered on and set to the same channel.
- Gently press the main shutter button on the transmitter halfway down to activate your camera's autofocus.
- Press the button fully down to trigger the camera's shutter.
4.2 Funcions del temporitzador
The TW-283/E3 features an LCD timer remote control, allowing for precise control over your shots. Refer to the on-screen menu of the transmitter to set:
- Temporitzador de retard: Set a delay before the first shot.
- Long Exposure Timer: Control the duration of bulb exposures.
- Interval Timer: Set the time between consecutive shots for time-lapse photography.
- Nombre de trets: Specify how many photos to take.
Use the directional buttons around the main shutter button on the transmitter to navigate the menu and adjust values. Confirm settings by pressing the appropriate button as indicated on the screen.
5. Manteniment
- Neteja: Feu servir un drap suau i sec per netejar l'exterior del transmissor i el receptor. Eviteu utilitzar netejadors líquids o dissolvents.
- Substitució de la bateria: Replace batteries when the low battery indicator appears on the LCD screen or if the units fail to power on. Remove batteries if the device will not be used for an extended period to prevent leakage.
- Emmagatzematge: Guardeu el dispositiu en un lloc fresc i sec, allunyat de la llum solar directa i de temperatures extremes.
6. Solució De Problemes
- El dispositiu no s'encén: Check battery installation and ensure batteries are new and correctly inserted.
- Camera not firing:
- Ensure the receiver's connection cable is fully inserted into the correct remote socket on the camera.
- Verify that both the transmitter and receiver are set to the same channel.
- Check camera settings to ensure it is ready to receive remote commands.
- Connexió intermitent: Ensure there are no significant obstructions between the transmitter and receiver. Check battery levels in both units.
7. Especificacions
| Característica | Detall |
|---|---|
| Número de model | TW-283/E3 (Internal: QW015) |
| Marca | PIXEL |
| Dimensions del producte | 6.6 x 4.3 x 1.2 polzades |
| Pes de l'article | 4 unces |
| Piles necessàries | 4 AAA batteries (2 for transmitter, 2 for receiver) |
| Dispositius compatibles | Canon Cameras (E3 type connector) and other listed models |
| Característica especial | Ergonomic design, LCD Timer Remote Control |
8. Garantia i Suport
For warranty information or technical support, please refer to the documentation included with your purchase or contact PIXEL customer service directly. Keep your proof of purchase for any warranty claims.