
1. Uvod
The LAUNCH X431 CRP919EBT is a professional automotive diagnostic scanner designed for comprehensive vehicle system analysis. This device features bi-directional control, advanced ECU coding capabilities, and over 35 special service functions. It supports a wide range of vehicle makes and models, offering both wireless Bluetooth and wired USB connectivity for the VCI (Vehicle Communication Interface) adapter.
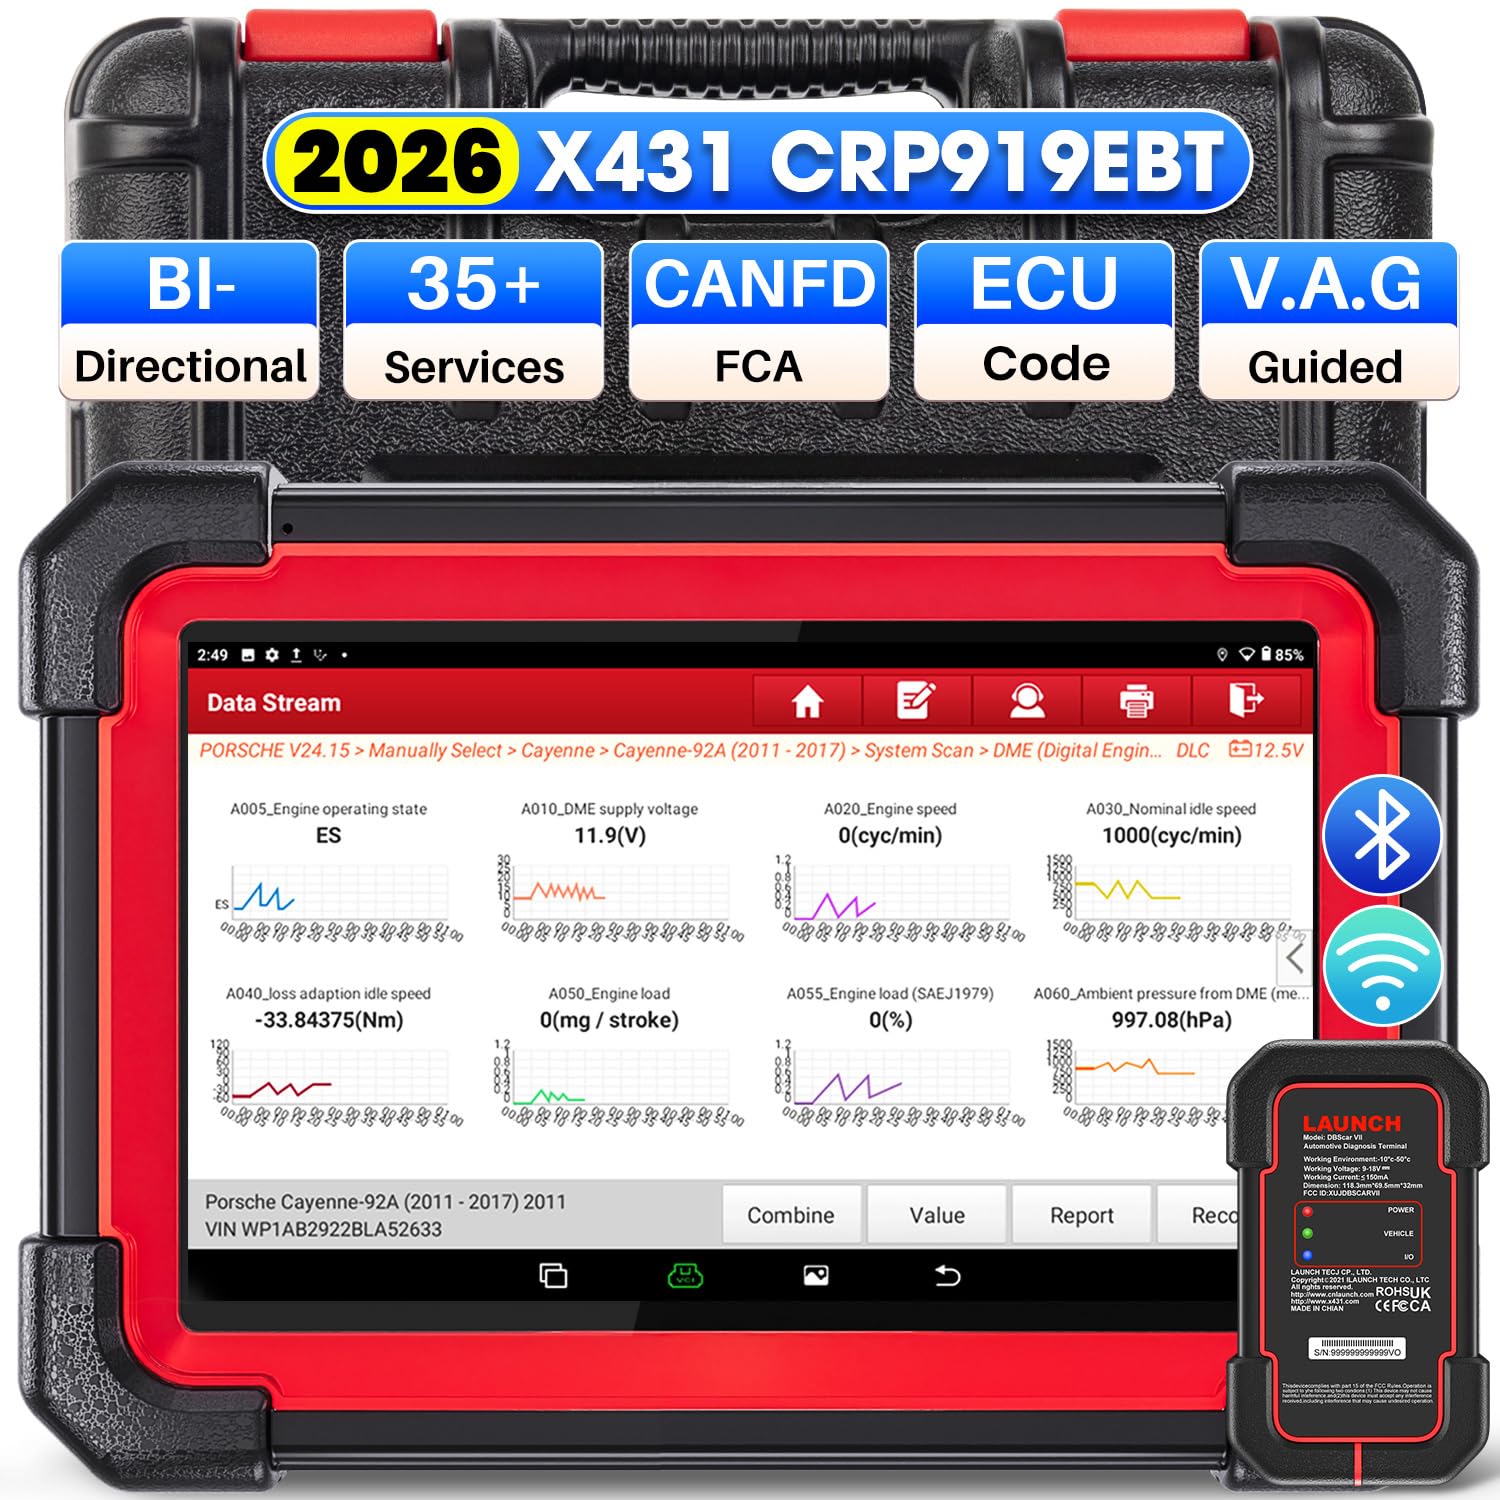
Image 1.1: LAUNCH X431 CRP919EBT Diagnostic Scanner main unit and VCI adapter.
2. Šta se nalazi u kutiji
Pažljivo raspakujte sadržaj i provjerite da li su svi predmeti prisutni:
- LAUNCH X431 CRP919EBT Main Unit (Tablet)
- DBSCAR VII VCI Connector
- Diagnostic Cable (OBD-II)
- Adapter za napajanje
- USB kabel tipa A na tip C
- Korisnički priručnik / Vodič za brzi početak
- Torbica za pohranu

Slika 2.1: Gotovoview of the LAUNCH X431 CRP919EBT package contents, including the main unit, VCI, cables, and power adapter.
3. Podešavanje
3.1 Početno punjenje
Before first use, fully charge the CRP919EBT main unit using the provided power adapter. Connect the adapter to the device's charging port and plug it into a power outlet. The charging indicator will show the charging status.
3.2 VCI Connection to Vehicle
- Locate the vehicle's OBD-II diagnostic port, typically under the dashboard on the driver's side.
- Plug the DBSCAR VII VCI connector into the vehicle's OBD-II port. Ensure a secure connection.
- Once connected, the VCI's POWER indicator will illuminate solid red. The VOZILO indicator will illuminate green and flash when communicating with the vehicle.
3.3 VCI Connection to Main Unit
The DBSCAR VII VCI adapter supports both wireless (Bluetooth) and wired (USB) connections to the CRP919EBT main unit.
- Bluetooth veza: The VCI will automatically attempt to pair with the main unit via Bluetooth. The I/O indicator on the VCI will illuminate blue when wirelessly communicating with the tablet. This allows for a diagnostic range of 33-67 feet (10-20 meters).
- USB veza: For a wired connection, use the provided Type-A to Type-C USB cable to connect the VCI to the main unit. The I/O indicator on the VCI will illuminate red when connected via USB cable.
Image 3.1: DBSCAR VII VCI Connector showing power, vehicle, and I/O indicators, along with USB and Bluetooth connectivity options.
4. Uputstvo za upotrebu
4.1 Vehicle Selection and AutoVIN
- Turn on the CRP919EBT main unit.
- U glavnom meniju odaberite 'Dijagnosticiraj'.
- Choose 'AutoVIN' to automatically identify the vehicle's make, model, and year. Alternatively, select 'Manual Choose Model & Year' if AutoVIN is not successful.
4.2 Potpuna dijagnostika sistema
This function allows for a comprehensive scan of all available electronic control modules (ECMs) in the vehicle, including Engine, ABS, SRS, Transmission, TPMS, and more.
- After vehicle identification, select 'Full System Scan'.
- Alat će skenirati sve sisteme i prikazati sve otkrivene dijagnostičke kodove grešaka (DTC).
- You can then select a specific system to view detailed information, read/clear fault codes, and access live data streams.
- The device supports 8-in-1 live data streams, allowing for simultaneous monitoring of multiple parameters.

Image 4.1: Display illustrating the full system diagnostic process and bi-directional control capabilities.
4.3 Dvosmjerna kontrola (aktivni testovi)
Bi-directional control allows the diagnostic tool to send commands to vehicle ECUs to perform specific tests and functions, verifying component functionality without using the vehicle's controls. This includes activating components like fuel pumps, cycling ABS solenoids, or performing injector tests.
- From the diagnostic menu for a specific system, select 'Active Test' or 'Bi-directional Control'.
- Choose the component or system you wish to test.
- Follow the on-screen prompts to execute the test and observe the component's response.
4.4 Special Functions (Service Resets)
The CRP919EBT offers over 35 special service functions for various maintenance and reset procedures. These functions are typically found under 'Special Functions' within a specific vehicle system.
- Resetiranje ulja
- Reset kočnice
- Kalibracija SAS-a (senzora ugla upravljanja)
- ABS krvarenje
- Resetiranje baterije
- Kodiranje injektora
- Prilagodba gasa
- TPMS Reset
- DPF regeneracija
- Usklađivanje mjenjača
Note: The availability and specific procedures for these functions vary by vehicle make, model, and year. Always confirm compatibility before performing any service.

Image 4.2: Visual representation of various special service functions available on the diagnostic tool.
4.5 ECU Coding Functions
The device supports advanced ECU coding capabilities, allowing for customization and maintenance of electronic control units.
- Online kodiranje: Supported for VW, Audi, Skoda, and Seat vehicles.
- Online Calibration: Za precizna podešavanja.
- Online Account Service Login: For accessing manufacturer-specific functions.
- ECU Replacement/Recode/Matching: For adapting new or replacement ECUs.
- PMI funkcija: Allows transferring data from an original module to a new unit for module replacement (specific to Ford, Lincoln, Mazda).
- Otključajte skrivene funkcije: Access and activate dormant features in certain vehicles.

Image 4.3: Illustration of various ECU coding and component matching functions.
4.6 Advanced Protocols and Features
- CANFD & DOIP: Compatible with newer vehicle communication protocols, including GM (2019+), Volvo (2018+), BMW (2017+), Land Rover (2017+), and Jaguar (2017+).
- FCA automatska autorizacija: Supports secure access to FCA (Fiat Chrysler Automobiles) vehicles from 2018-2026 (Fiat, Chrysler, Alfa Romeo, Dodge, Jeep, etc.) via registered AutoAuth.
- VAG vođena funkcija: Provides step-by-step instructions for performing complex functions on VW, Audi, Seat, and Skoda vehicles.

Slika 4.4: Gotovoview of advanced protocol support and guided functions for various car brands.
5. Održavanje
5.1 Ažuriranja softvera
The CRP919EBT includes 2 years of free software updates. Regular updates ensure access to the latest vehicle coverage, bug fixes, and new features. Connect the device to a Wi-Fi network and navigate to the 'Software Update' section in the main menu to check for and install updates.
5.2 Čišćenje i skladištenje
- Clean the device screen and body with a soft, damp krpom. Izbjegavajte abrazivna sredstva za čišćenje ili rastvarače.
- Keep the VCI connector clean and free of debris.
- Store the device and its accessories in the provided storage case in a cool, dry place when not in use.
5.3 Njega baterija
To prolong battery life, avoid fully discharging the device frequently. Charge the device regularly, especially if it will be stored for an extended period.
6. Otkrivanje problema
If you encounter issues with your CRP919EBT, refer to the following common troubleshooting tips:
- Uređaj se ne uključuje: Ensure the device is fully charged. Connect it to the power adapter and try again.
- VCI se ne povezuje sa vozilom: Verify the VCI is securely plugged into the OBD-II port. Check the vehicle's ignition status (usually needs to be ON).
- VCI not connecting to main unit (Bluetooth): Ensure Bluetooth is enabled on the main unit. Try re-pairing the VCI in the device settings. Ensure the VCI is within the 33-67 feet range.
- Nema komunikacije s vozilom: Check all connections. Ensure the vehicle's battery is adequately charged. Verify the vehicle's make, model, and year selection is correct.
- Problemi sa softverom: Perform a software update to ensure you have the latest version.
For persistent issues or advanced technical support, please contact LAUNCH customer service.
7. Specifikacije
The following table outlines the key specifications of the LAUNCH X431 CRP919EBT diagnostic scanner:

Image 7.1: Comparison chart highlighting the specifications of the CRP919EBT model.
| Feature | Specifikacija |
|---|---|
| Brand | LAUNCH |
| Model | CRP919EBT |
| Operativni sistem | Android 10.0 |
| Procesor | 4-Core High-efficiency Processor |
| RAM/ROM | 4GB RAM / 64GB ROM |
| Veličina ekrana | 7 inča |
| Kapacitet baterije | 6300mAh |
| Povezivanje | Bluetooth (DBSCAR VII VCI), USB |
| Wi-Fi | Dvostruki WiFi od 5G i 2.4 GHz |
| Kamera | 8MP stražnja kamera |
| Pokrivenost vozila | 150+ Brands (1996-2026) |
| Posebne funkcije | 35+ Service Resets |
| Period ažuriranja | 2 godine besplatnog ažuriranja |
| Podržani protokoli | CANFD, DOIP, OBDII/EOBD |
| Jezici | 23+ Languages |
8. Garancija i podrška
8.1 Ažuriranja softvera
The LAUNCH X431 CRP919EBT includes 2 years of free software updates from the date of activation. After this period, updates may be available for purchase.
8.2 Optional Extension Modules
The CRP919EBT supports integration with various optional extension modules to expand its functionality:
- VSP600 Endoscope
- BST360 Battery Tester
- iTPMS/TSGUN TPMS Tool
- X-PROG3 Tool
8.3 Tehnička podrška
For technical assistance, product inquiries, or warranty claims, please refer to the contact information provided in your product packaging or visit the official LAUNCH webstranica za resurse podrške.