1. Proizvod je gotovview
The VEVOR Vacuum Stand HLFGSJLG-01 is designed to provide a stable and organized storage solution for various cordless upright vacuum cleaners and their accessories. This stand helps to keep your vacuum and tools neatly arranged and easily accessible without the need for wall drilling.

Image 1.1: The VEVOR Vacuum Stand HLFGSJLG-01 providing organized storage for a cordless vacuum and its attachments.

Image 1.2: The vacuum stand shown both as individual components and fully assembled, alongside a compatible vacuum cleaner.
2. Kompatibilnost
This vacuum stand is compatible with a wide range of cordless upright vacuum cleaner models.
- V-Series: V6, V7, V8, V10, V11, V15
- DC-Series: DC30, DC31, DC34, DC35, DC58, DC59, DC62, DC74
Note: The vacuum stand only. Charger dock and vacuum accessories are not included.

Image 2.1: Visual representation of compatible vacuum models, including V6, V7, V8, V10, V11, and V15 series.
3. Sadržaj paketa
Prije početka montaže provjerite da li su sve komponente prisutne.
- 1 x baza
- 1 x Bottom Bracket
- 1 x Middle Bracket
- 1 x Top Bracket
- 4 x konektora
- 1 x Krstasti odvijač
- 1 x 8 mm Open Wrench
- 1 x L-shaped Hex Wrench
- 16 x Round Head Screws (M4 x 8)
- 2 x Countersunk Screws (M5 x 20)
- 4 x Vijci (M6 x 25)
- 1 x Uputstvo za upotrebu

Slika 3.1: Detaljno view of all components and tools included in the package, along with product specifications.
4. Upute za sastavljanje
Follow these steps for quick and easy assembly. No drilling is required.
- Korak 1: Instalirajte bazu
Attach the main support pole to the weighted base using the provided screws and tools. Ensure the base is stable. - Step 2: Attach the Hooks
Secure the accessory hooks to the main support pole at desired heights. The stand includes 6 hooks for various attachments. - Step 3: Install the Top Panel
Connect the top bracket to the upper section of the main support pole. - Step 4: Mount the Charger
If desired, mount your vacuum's charger dock onto the top panel using the appropriate screws.

Image 4.1: Step-by-step assembly guide for the VEVOR Vacuum Stand, illustrating base installation, hook attachment, top panel installation, and charger mounting.
5. Rad i upotreba
The VEVOR Vacuum Stand provides convenient storage and easy access to your vacuum cleaner and its accessories.
- Vacuum Placement: Place your cordless upright vacuum cleaner onto the designated holder at the top of the stand.
- Skladištenje dodatne opreme: Utilize the 6 hooks to store various vacuum attachments such as flexible crevice tools, soft dusting brushes, stubborn dirt tools, and soft roller cleaner heads. Each hook supports up to 11.02 lbs (5 kg).
- Stabilnost: The stand features a 3.96 lbs (1.8 kg) weighted base and anti-slip pads to ensure stability and prevent tipping or sliding.
- Dizajn koji štedi prostor: The compact base (11.41 x 11 inches) allows the stand to fit into corners or narrow areas, optimizing vertical space.

Image 5.1: Illustration of how to organize vacuum and accessories on the stand, labeling storage points for charger, vacuum, and various tools.
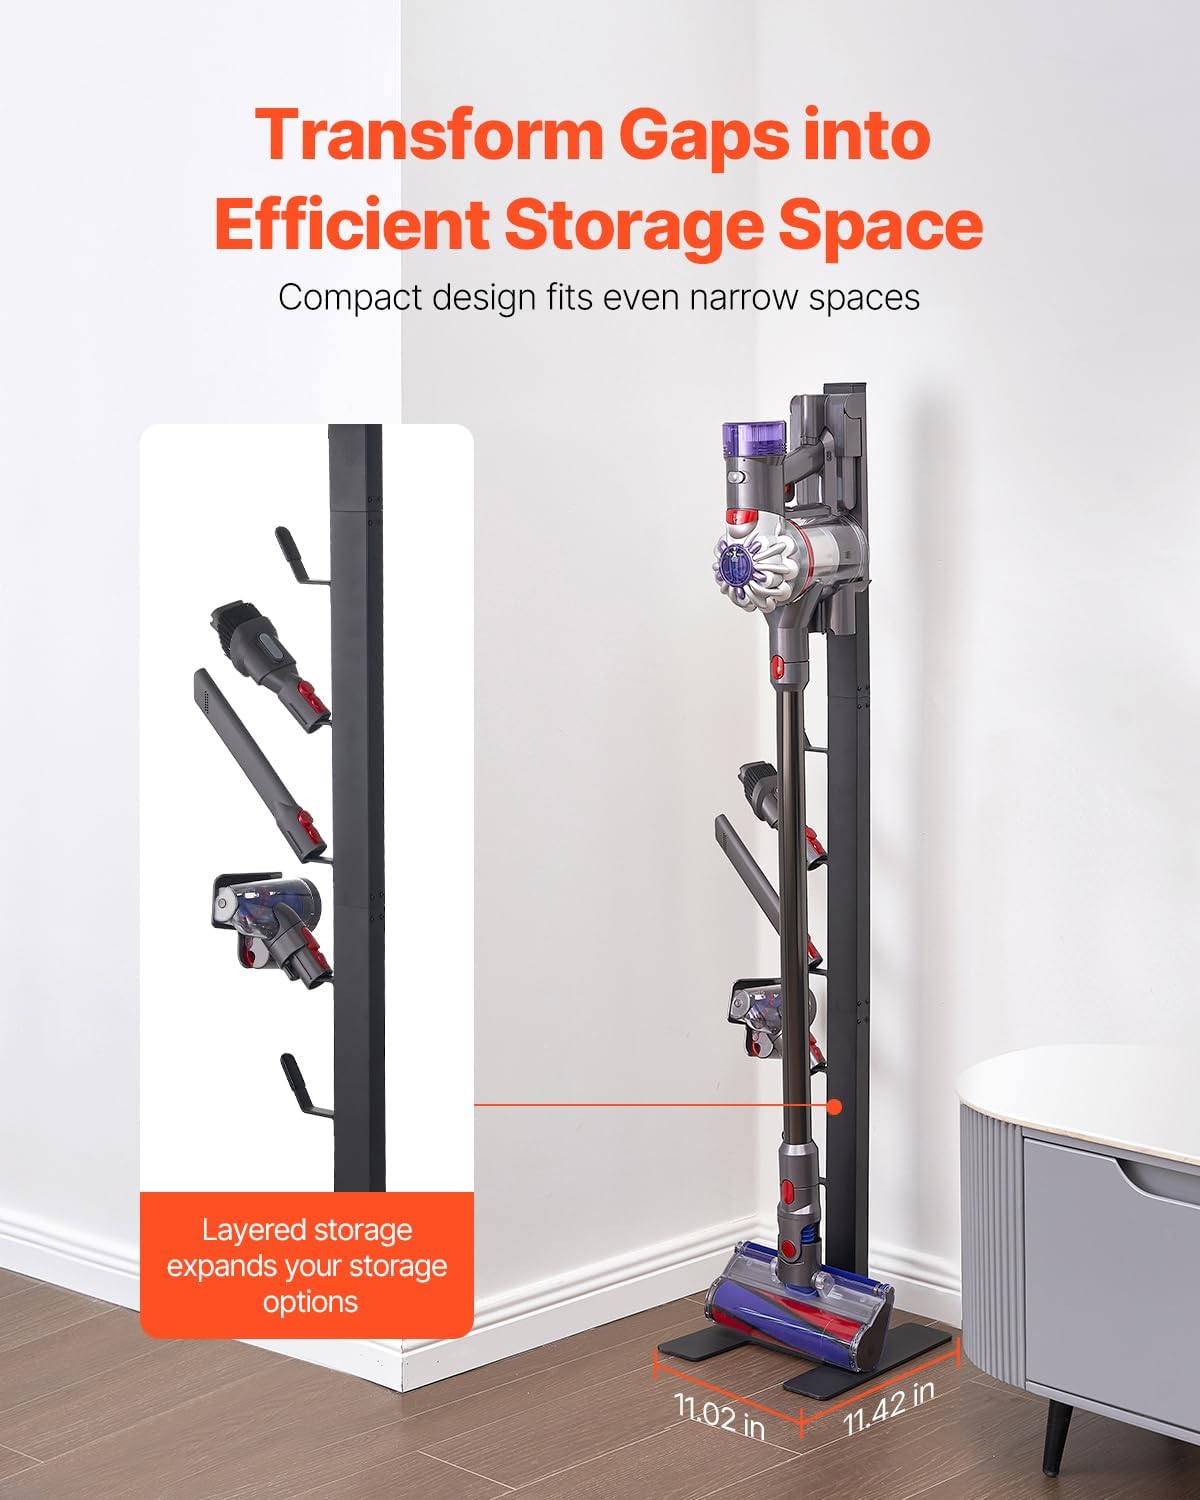
Image 5.2: The stand positioned in a room corner, highlighting its compact footprint and efficient layered storage for accessories.
6. Održavanje
To ensure the longevity and appearance of your VEVOR Vacuum Stand, follow these simple maintenance guidelines:
- čišćenje: Redovno brišite postolje mekom,amp krpom da biste uklonili prašinu i prljavštinu. Izbjegavajte abrazivna sredstva za čišćenje ili rastvarače koji bi mogli oštetiti završnu obradu.
- inspekcija: Povremeno provjeravajte sve vijke i spojeve kako biste bili sigurni da su čvrsto zategnuti. Po potrebi ih ponovo zategnite kako biste održali stabilnost.
- plasman: Place the stand on a flat, level surface to prevent instability.
7. Otkrivanje problema
If you encounter any issues with your vacuum stand, refer to the following common solutions:
| Problem | Mogući uzrok | Rješenje |
|---|---|---|
| Stalak je klimav ili nestabilan. | Screws are loose; uneven surface. | Ensure all screws are tightened securely. Move the stand to a flat, level surface. |
| Accessories do not fit on hooks. | Incorrect accessory type; hooks not positioned correctly. | Verify that your accessories are compatible. Adjust hook positions if necessary. |
| Nedostajući dijelovi tokom montaže. | Greška u pakovanju. | Refer to the "Package Contents" section and contact VEVOR customer support if parts are missing. |
8. Specifikacije
Detailed specifications for the VEVOR Vacuum Stand HLFGSJLG-01:
- Naziv modela: Vacuum Stand
- Broj modela stavke: HLFGSJLG-01
- Brand: VEVOR
- Boja: Crna
- Glavni materijal: Cold-rolled SPCC Steel
- Dimenzije proizvoda (D x Š x V): 11.42" x 11.02" x 50" (290 x 280 x 1270 mm)
- Težina proizvoda: 8.59 lbs (3.9 kg)
- Hook Capacity: Up to 11.02 lbs (5 kg) per hook
- Posebna karakteristika: Space-Saving
- Potrebna montaža: Da
- Unutarnja/vanjska upotreba: Indoor
- Compatible Vacuum Brands and Models: V6, V7, V8, V10, V11, V15, DC30, DC31, DC34, DC35, DC58, DC59, DC62, DC74 Series Upright Vacuums
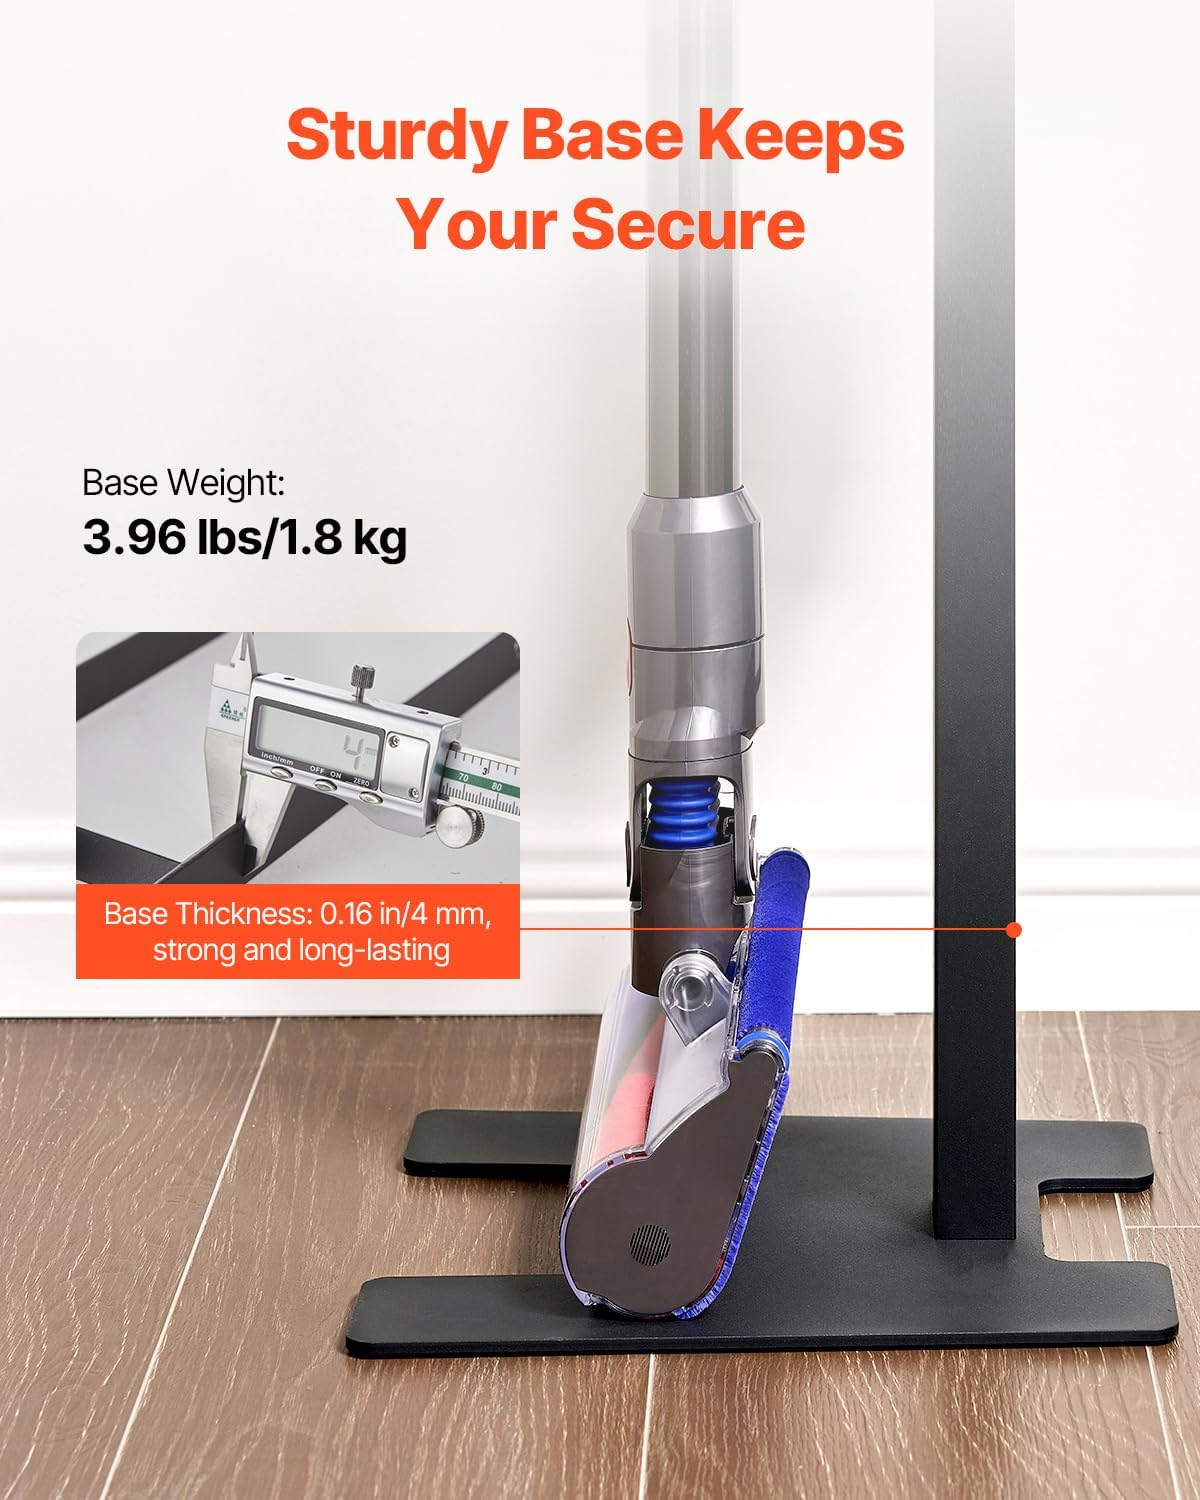
Image 8.1: Detail of the stand's sturdy base, indicating its weight (3.96 lbs / 1.8 kg) and thickness (0.16 in / 4 mm).
9. Garancija i podrška
Za informacije o garanciji ili tehničku podršku, molimo vas da se obratite službenom VEVOR-u. webweb-mjesto ili direktno kontaktirajte njihovu korisničku službu.
Zvanični VEVOR Webstranica: www.vevor.com