Bambu Lab SC001 Cutting Module
Safety information
Before using the cutting module, ensure you read the instructions carefully to ensure safe and proper operation.
General information:
- Keep your workspace clean and organized, ensuring that tables, shelves, and any structures holding the device are stable and secure.
- Inspect the device thoroughly for any signs of damage before use. If damage is detected, stop using the device immediately.
- Do not disassemble or alter the device’s structure and operating methods unless directed by Bambu Lab support.
- Operate the cutting module within a temperature range of 0 °C to 30 °C and store it between -10 °C and 40 °C. To prevent damage, avoid operating or storing the cutting module outside these specified temperatures or in a strong magnetic field.
Safe cutting:
- Do not operate the cutting module unless it is correctly installed with all safety locking and detection mechanisms active.
- Do not hold materials by hand during cutting.
- If the cutting module becomes jammed or obstructed, immediately cut off the printer’s power. Wait for all moving parts to stop before disconnecting the cutting module connector. Only then can you handle the module and material.
- Before removing the blade from the holder, securely cover it with the provided rubber protective cover to prevent injuries while handling. Please visit our Wiki and get detailed guidance.
- After removing the blade, ensure the rubber protective cover is securely in place, and store the blade out of reach of children to prevent accidents.
- Before starting the cutting process, ensure the material is securely fastened to prevent it from becoming loose, which could damage the device or cause injury.
- When taking off materials, please pay attention to the blade to prevent injury.
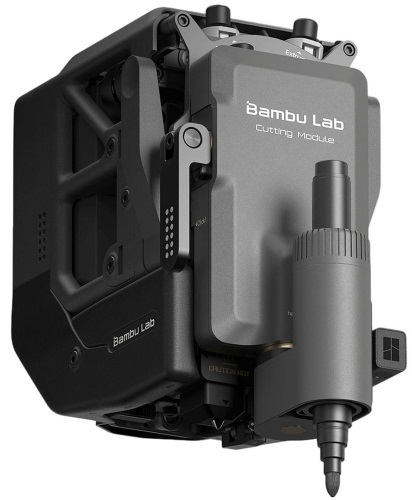
Cutting module component introduction

Printer component introduction

* The privacy cover is in the accessory box. You can install it magnetically on the live view camera.
Included accessories

Print tools in advance

Before using the cutting function, please visit makerworld.com/en/@BambuLab, and then download and print the 3 tools shown above:
- Weeding tool: Removes waste after cutting.
- Scraper blade: Takes off the material from the cutting platform.
- Roller: Used to flatten the material to ensure cutting accuracy.
Lower the heatbed

Lower the heatbed using the on-screen buttons to leave enough space to prevent the blade from damaging the cutting platform.
Install the cutting platform

Remove the build plate on the heatbed. Then, place the cutting platform on the heatbed, and make sure to align the two corners of the cutting platform and the stoppers of the heatbed. Do not discard the protective films on both the cutting mats. When not using the cutting function, reapply the protective film to the cutting mat to prevent debris from sticking to it and to maintain its adhesive property.
- Press the two top corners of the front cover and remove it.

- As shown in the picture, unlock the quick-release lever. Then, align the slots of the cutting module and the toolhead, and slide the module all the way down.

- As shown in the picture, make sure the “Click” mark on the module is aligned with the dented lot on the toolhead. Then, push the quick-release lever down to lock it.

- Open the dust-proof cover, and insert the connector into the toolhead interface.

- Remove the protective cover on the blade holder.
- Caution! Sharp blade! Please carefully operate to avoid injury. Keep the protective cover safe to re-attach it when the blade is not in use.
Use the drawing function
If you want to use the drawing function, you only need to replace the blade holder with the pen module.
Install the pen module
- Remove the height calibrator from the pen holder, and install it on the bottom.

- Rotate the pen fixture counterclockwise to loosen it. Insert a pen to the bottom, and then rotate the fixture clockwise to tighten it.

- Pull the blade holder downward by the round edges to remove it.
- The blade is sharp. Please operate carefully to avoid injury!

- The blade is sharp. Please operate carefully to avoid injury!
- Remove the height calibrator. Then, insert the pen module all the way into the cutting module.

First calibration and use
After you install the cutting module for the first time, you must complete the calibration process before using it. Please follow the instructions on the screen to complete the process. For more details on calibration and use of the function, please see the Wiki page below.

Regular maintenance
- Regular maintenance is essential to ensure the cutting module’s longer lifespan and optimal performance.
Cutting module base:
- Regularly inspect the base to ensure it is properly installed on the toolhead. After locking the quick-release lever, verify that the module is stable and does not wobble. If any wobbling is detected, tighten the screws on the quick-release lever.
Blade holder:
- Regularly check for debris near the blade. If there is any, unscrew the end cap to remove the debris to prevent buildup that can obstruct the blade’s rotation.
Consumables:
- Regularly check the adhesion of the cutting mat and replace it when necessary to ensure the material can be securely held in place.
- Over time, the blade will wear down, resulting in cutting quality decline. Replace the blade regularly to maintain optimal performance.
- The lifespan of the blade can vary depending on the materials being cut. For more details, please refer to our wiki.
- bambulab.com/support/maintenance

Please refer to the “Regular Maintenance Recommendations” section on our wiki for more information.
Specifications
- Cutting Area
- 300*285 mm?
- Drawing Area
- 300*255 mm?
- Supported Pen Diameter
- 10.5 mm-12.5 mm
- Cutting Mat Type
- LightGrip and StrongGrip Cutting Mats
- Blade Type
- 45° *0.35 mm
- Blade Pressure Range
- 50 gf-600 gf
- Max Cutting Thickness
- 0.5 mm
- Blade and Pen Recognition
- Supported
- Cutting Mat Type Detection
- Supported
- Supported Image Type
- Bitmap and Vector Images
- Supported Material Type
- Paper, PVC, vinyl, leather, and more
Technical Support
If you need technical support, please follow either of the following methods:
- Method 1: Get in touch by using the Contact Us button in our Support Center. bambulab.com/support

- Method 2: Create a support ticket on Bambu Handy, from the Support Center section.

- You can also visit the Bambu Lab Wiki for more tutorials and maintenance guidance. wiki.bambulab.com/home

MORE INFORMATION
Unboxing Guide
- Scan the QR code to access our online guides for detailed on how to unbox, assemble, set up, and start your first task. bambulab.com/support/unboxing

Download Bambu Suite
- Visit the link below to download Bambu Suite. You can remotely control your printer and monitor your tasks in real time on your computer. bambulab.com/download

Download free and cool models
- Scan the QR code to visit MakerWorld, our models community, where you can download a variety of free and cool models, and engage with creators to exchange ideas and tips on model creation. makerworld.com

Get help
- Scan the QR code to visit our support center, contact technical support, and access more useful tutorials. bambulab.com/support

Documents / Resources
 | Bambu Lab SC001 Cutting Module [pdf] User Guide 1-11 H2D, O2C, SC001 Cutting Module, SC001, Cutting Module, Module |
 | Bambu Lab SC001 Cutting Module [pdf] User Guide SC001 Cutting Module, SC001, Cutting Module, Module |