
1. artıqview
The HyperX Cloud II is a high-performance gaming headset designed for comfort and superior audio quality across multiple platforms. It features virtual 7.1 surround sound, large 53mm drivers, and a durable aluminum frame. The headset is equipped with comfortable memory foam ear cushions and a detachable noise-cancelling microphone for clear communication.

Image 1: The HyperX Cloud II Gaming Headset in Gun Metal, showcasing its design and detachable microphone.
Video 1: An official product video highlighting the key features and design of the HyperX Cloud II Gaming Headset.
2. Qutuda nə var
- HyperX Cloud II Oyun qulaqlığı
- Çıxarılan səs-küyün qarşısını alan mikrofon
- USB Sound Card Audio Control Box
- PC uzatma kabeli
- Tez Başlanğıc Bələdçisi
- Additional Velour Ear Cushions (pre-installed are leatherette)
3. Quraşdırma
3.1 Qulaqlığın qoşulması
- Connect the detachable microphone to the headset's microphone port on the left ear cup.
- For PC and Mac, connect the headset's 3.5mm jack to the USB Sound Card Audio Control Box. Then, plug the USB connector of the control box into an available USB port on your computer.
- For PS4, Xbox One, Nintendo Switch, and mobile devices, connect the headset's 3.5mm jack directly to the controller or device's audio port. The USB Sound Card Audio Control Box is not typically used for these connections for optimal stereo sound.

Image 2: A diagram illustrating the multi-platform compatibility of the HyperX Cloud II, showing USB connection for PC/Playstation/Nintendo Switch and 3.5mm connection for Xbox Controller/Mobile/VR.
3.2 Configuring 7.1 Virtual Surround Sound (PC/Mac)
The HyperX Cloud II features a USB sound card audio control box that enables virtual 7.1 surround sound on PC and Mac. Follow these steps to ensure proper configuration:
Windows üçün:
- Open the Control Panel and navigate to 'Hardware and Sound', then select 'Sound'.
- In the 'Playback' tab, locate 'HyperX 7.1 Audio' (or 'USB Audio'). If it's not the default device, right-click and select 'Set as Default Device'. A green checkmark will appear.
- Repeat the same steps for the microphone under the 'Recording' tab, selecting 'HyperX 7.1 Audio' (or 'USB Audio') as the default input device.
Mac üçün:
- Click the Apple menu and select 'System Preferences'.
- Click on the 'Sound' icon.
- In the 'Input' tab, select 'HyperX 7.1 Audio' (or 'USB Audio') for default sound input.
- In the 'Output' tab, select 'HyperX 7.1 Audio' (or 'USB Audio') for default sound output.
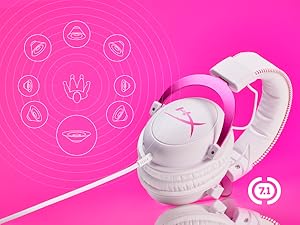
Image 3: The HyperX Cloud II headset with an overlay indicating its 7.1 virtual surround sound capability.
4. Qulaqlıqdan istifadə
4.1 Audio Control Box Functions
The USB Sound Card Audio Control Box provides convenient access to audio settings:
- Qulaqlıq səs səviyyəsinə nəzarət: Use the '+' and '-' buttons on the left side to adjust headphone volume.
- Mikrofonun səs səviyyəsinə nəzarət: Use the '+' and '-' buttons on the right side to adjust microphone volume.
- 7.1 Surround Sound Toggle: Press the '7.1' button in the center to activate or deactivate virtual 7.1 surround sound.
- Mikrofon Səssiz: Use the switch on the side of the control box to quickly mute or unmute the microphone.
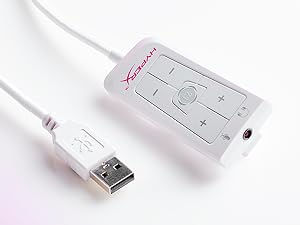
Image 4: The Advanced USB Sound Card Audio Control Box for the HyperX Cloud II headset, showing volume controls and 7.1 surround sound toggle.
4.2 Çıxarıla bilən Mikrofon
The noise-cancelling microphone can be detached when not needed, allowing the headset to be used for music listening or other audio without the microphone boom in the way.

Şəkil 5: Yaxın plan view of the HyperX Cloud II's detachable, noise-cancelling microphone.
5. Baxım
5.1 Ear Cushion Replacement
The HyperX Cloud II comes with both leatherette and velour ear cushions. These are replaceable, allowing you to maintain comfort and hygiene over time. To replace, gently pull off the existing ear cushions and press the new ones onto the ear cups until securely attached.
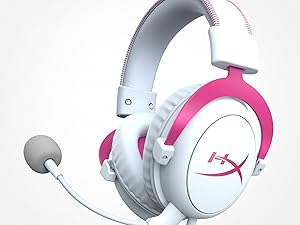
Image 6: The HyperX Cloud II headset highlighting its comfortable memory foam ear cushions.
Video 2: A video demonstrating the memory foam ear cushions of the HyperX Cloud II headset, emphasizing their comfort and flexibility.
5.2 Ümumi qulluq
- Store the headset in a clean, dry place when not in use.
- Qulaqlığı həddindən artıq temperatura və ya rütubətə məruz qoymaqdan çəkinin.
- Clean the ear cushions and headband with a soft, damp parça. Güclü kimyəvi maddələrdən istifadə etməyin.
6. Giderme
6.1 No Audio or Microphone Function
- Bağlantıları yoxlayın: Ensure all cables (3.5mm jack, USB) are securely connected to the headset, control box, and device.
- Default Audio Device: Verify that 'HyperX 7.1 Audio' (or 'USB Audio') is set as the default playback and recording device in your operating system's sound settings (refer to Section 3.2 for detailed steps).
- Səs Səviyyələri: Check both the headset's volume controls on the audio control box and your device's system volume. Ensure the microphone is not muted.
- Microphone Detached: Confirm the detachable microphone is fully inserted into its port.
7. Spesifikasiyalar
| Xüsusiyyət | Spesifikasiya |
|---|---|
| Brend | HyperX |
| Model nömrəsi | KHX-HSCP-GM |
| Rəng | Silah Metal |
| Qulaqların Yerləşdirilməsi | Qulaq üstü |
| Empedans | 60 Ohm |
| Tezliyə cavab | 15-25kKhz |
| Audio sürücü ölçüsü | 53 Millimetr |
| Səs-küyə Nəzarət | Passiv səs-küy ləğvi |
| Bağlantı texnologiyası | Wired (3.5 mm Jack, USB) |
| Uyğun Cihazlar | PC, Mac, PS4, PS5, Xbox Series X|S, Xbox One, Nintendo Switch, Mobile, VR |
| Material | Aluminum, Faux Leather |
| Maddə Çəkisi | 11.29 unsiya |
8. Zəmanət və Dəstək
For detailed warranty information and technical support, please refer to the official HyperX websaytına və ya məhsulunuzla birlikdə verilən zəmanət kartına baxın. Həmçinin ziyarət edə bilərsiniz Amazonda HyperX Mağazası əlavə mənbələr üçün.