
1. Introduction
Thank you for choosing the MILBIS Cordless Weed Wacker HT-904. This manual provides essential information for the safe and efficient operation, maintenance, and troubleshooting of your new tool. Please read this manual thoroughly before first use and keep it for future reference.
2. Safety Instructions
Always follow basic safety precautions to reduce the risk of fire, electric shock, and personal injury when operating this tool.
- Read All Instructions: Familiarize yourself with the controls and proper use of the tool.
- Wear Eye Protection: Always wear safety glasses or goggles to protect your eyes from flying debris.
- Wear Protective Clothing: Wear long pants, long sleeves, and sturdy footwear. Avoid loose clothing or jewelry that could get caught in moving parts.
- Keep Area Clear: Ensure the work area is free of bystanders, children, and pets.
- Inspect Before Use: Check for damaged parts, loose fasteners, or any other condition that may affect safe operation.
- Remove Battery When Not In Use: Disconnect the battery pack when not in use, before cleaning, or when changing accessories.
- Dual-Switch Safety: The tool features a dual-switch safety button. Both buttons must be pressed simultaneously to activate the tool, preventing accidental starts.
3. Package Contents
Verify that all items are present and in good condition upon unpacking.
- 1x MILBIS Cordless Weed Wacker
- 2x 21V Li-Ion Batteries (3.0Ah)
- 1x Fast Charger
- 1x Wheel Attachment
- 2x Circular Saw Blades
- 2x Metal Blades
- 10x Grass Ropes
- 10x Nylon Blades
- 1x Pair of Non-Slip Gloves
- 1x Safety Glasses
- 1x User Manual

Image: Complete package contents including the weed wacker, batteries, charger, and various cutting blades.
4. Setup and Assembly
Follow these steps to assemble your MILBIS Cordless Weed Wacker.
4.1 Attaching the Safety Guard and Blades
- Align the safety guard with the mounting points on the trimmer head.
- Secure the safety guard using the provided fasteners.
- Select the appropriate blade for your task (circular saw, metal, or nylon).
- Attach the chosen blade to the trimmer head according to the instructions for each blade type. Ensure it is securely fastened.
Video: Demonstrates the installation process of the MILBIS Cordless Weed Wacker, including attaching components.
4.2 Attaching the Wheel Attachment
For wheeled operation, attach the wheel assembly to the safety guard.
- Position the wheel attachment onto the designated slots on the safety guard.
- Secure the wheels by holding the nut with one hand and tightening the wheel into place.

Image: A user demonstrating how to attach the wheel to the weed wacker's safety guard, holding the nut while tightening.
4.3 Adjusting Handle and Telescopic Pole
The handle and telescopic pole can be adjusted for user comfort and reach.
- Telescopic Pole: Adjust the pole length from 35 to 47 inches by releasing the locking mechanism, extending or retracting the pole, and then securing the lock.
- Auxiliary Handle: The auxiliary handle can be rotated 180 degrees for optimal grip and control. Loosen the handle clamp, adjust to the desired angle, and tighten.


Image: Left shows the 90-degree adjustable cutting head. Right shows the 180-degree adjustable auxiliary handle for user comfort.

Image: Illustration demonstrating the adjustable height feature of the weed wacker, ranging from 35 to 47 inches.
5. Operating Instructions
5.1 Charging the Battery
Before first use, fully charge the battery. The charger indicates charging status (red for charging, green for charged).
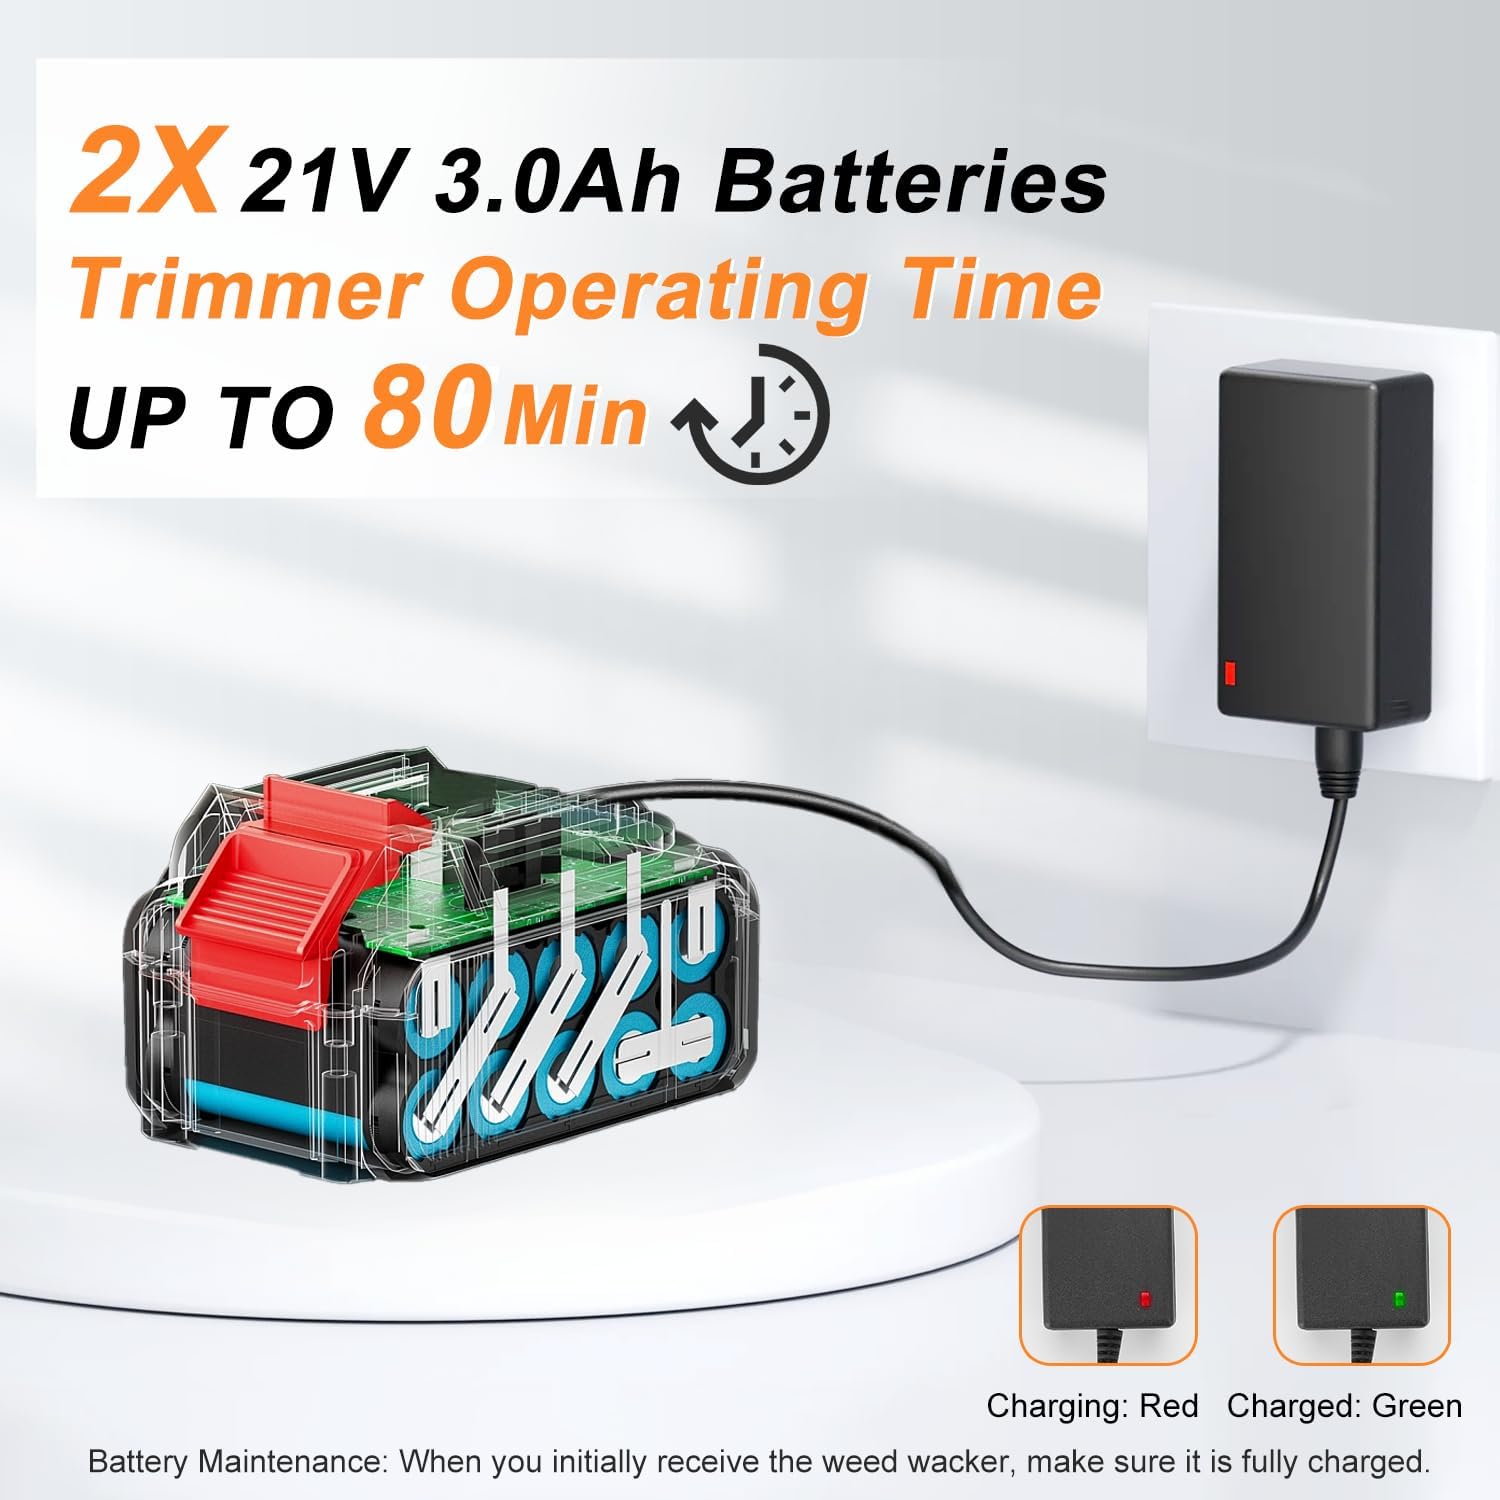
Image: Diagram showing the 21V 3.0Ah battery being charged, with indicators for charging (red) and charged (green) states.
5.2 Selecting the Correct Blade
The MILBIS weed wacker supports five types of cutting blades, each suited for different tasks:
- Circular Saw Blades: Ideal for small branches up to 1 inch thick, dense weeds, and shrubs.
- Metal Blades: Suitable for dense weeds and shrubs.
- S-Blade: Designed for cutting plants and small brushes.
- Nylon Blades: Best for trimming soft grass and light weeds.
- Grass Rope: Used for trimming tall and sturdy grass.
Tip: Always choose the correct blade for the task to prevent damage to the blade and ensure efficient cutting.

Image: Visual guide illustrating the five different types of cutting blades and their recommended applications for various lawn care needs.
5.3 Starting and Stopping the Tool
- To Start: Press both the lock-off button and the on/off trigger simultaneously.
- To Stop: Release the on/off trigger.

Image: Labeled diagram highlighting the lock-off button, on/off trigger, dual safety control switch, and other key components of the weed wacker.
5.4 Operating Modes
The MILBIS Cordless Weed Wacker offers two primary operating modes:
- Push Wheeled Mode: For general grass trimming and edging, the wheel attachment provides stability and ease of movement.
- Weed Trimmer Mode: For detailed trimming, reaching tight spaces, or shaping hedges, the tool can be used without the wheel attachment. The cutting head can be rotated 0-90 degrees for flexible trimming.

Image: Demonstrates the 2-in-1 cutting modes: Push Wheeled for ground trimming and Weed Trimmer for vertical or angled cutting.
Video: A comprehensive guide on how to effectively use the cordless weed wacker for various gardening tasks.
6. Maintenance
Regular maintenance ensures optimal performance and extends the life of your tool.
- Cleaning: After each use, remove debris from the cutting head, safety guard, and motor vents. Use a dry cloth; do not use water or solvents.
- Blade Inspection: Regularly inspect blades for wear, damage, or dullness. Replace worn or damaged blades immediately.
- Battery Care: Store batteries in a cool, dry place. Do not expose them to extreme temperatures. Fully charge batteries before long-term storage.
- Storage: Store the weed wacker in a dry, secure location, out of reach of children.
7. Troubleshooting
| Problem | Possible Cause | Solution |
|---|---|---|
| Tool does not start | Battery not charged or improperly inserted; Safety switch not engaged. | Ensure battery is fully charged and correctly inserted. Press both safety button and trigger simultaneously. |
| Reduced cutting performance | Dull or damaged blade; Incorrect blade for material; Overgrown vegetation. | Replace blade. Select appropriate blade type. Cut in smaller passes. |
| Excessive vibration | Loose blade; Damaged blade; Debris caught in cutting head. | Tighten blade. Replace damaged blade. Clean cutting head. |
| Short battery life | Battery not fully charged; Old battery; Heavy load. | Ensure battery is fully charged. Consider replacing old batteries. Avoid continuous heavy cutting. |
8. Specifications
- Brand: MILBIS
- Model Number: HT-904
- Power Source: Battery Powered
- Battery Type: 21V Li-Ion (2x 3.0Ah included)
- No-Load Speed: Up to 18,000 RPM
- Output Power: 880W
- Item Weight: 3.9 pounds (without battery) / 6.9 pounds (with battery)
- Cutting Width: 6 inches
- Adjustable Length: 35-47 inches
- Cutting Head Rotation: 0-90 degrees
- Noise Level: 65 dB (Low Noise)

Image: Overview of the MILBIS 21V Cordless Weed Wacker, emphasizing its copper motor, battery power, 18,000 RPM speed, lightweight design (3.9 lbs), and low noise operation.
9. Warranty and Support
MILBIS provides a 12-month after-sales service guarantee for this product, ensuring its durability and reliability. For any questions or assistance, our friendly customer service team is available 7 days a week, 24 hours a day.
Please refer to your purchase documentation for specific contact information.