
TOPPLAN Smart Toilet T008-PRO User Manual
Model: T008-PRO
1. Introduction
This manual provides detailed instructions for the installation, operation, and maintenance of your TOPPLAN Smart Toilet T008-PRO. Please read this manual thoroughly before installation and use to ensure proper function and safety. Keep this manual for future reference.

Image: Overview of the TOPPLAN Smart Toilet highlighting its diverse functions including side button, clean seat, remote control, smart sensor, warm air drying, effective cleaning, water pressure restriction, and multi-dimensional flushing.
2. Important Safety Information
Please observe the following safety precautions to prevent injury or damage to the product:
- Ensure the toilet is installed by a qualified professional according to local plumbing and electrical codes.
- Connect the toilet to a grounded electrical outlet. Do not use extension cords.
- Do not immerse the product in water or spray water directly onto electrical components.
- Keep children and pets away from the toilet's moving parts and heated elements.
- Do not attempt to repair or modify the toilet yourself. Contact customer support for service.
- Turn off the water supply and unplug the toilet before performing any maintenance or cleaning.
3. Package Contents
Verify that all components are present before beginning installation:
- TOPPLAN Smart Toilet Unit
- Remote Control
- Installation Instructions Manual
- Certificate
- 1/2 Angle Valve
- Wax Ring
- 7/8 to 3/4 Adapter
- Battery (for remote and emergency flush module)
- Mounting Screws and Hardware

Image: All components included with the TOPPLAN Smart Toilet, including the toilet unit, remote control, angle valve, wax ring, adapter, battery, and mounting screws.
4. Product Specifications
| Feature | Detail |
|---|---|
| Model Number | T008-PRO |
| Color | Clean White |
| Product Dimensions (D x W x H) | 26.7" x 16.1" x 18.1" |
| Material | Ceramic |
| Item Weight | 98 pounds |
| Flush Volume | 1.26 GPF (Gallons Per Flush) |
| Installation Method | Floor Mounted |
| Rough-in | 12 inches (approximate, verify with diagram) |
| Heated Seat | 4 levels adjustable temperature |
| Water Temperature | 4 levels adjustable temperature |
| Air Dryer | 4-speed adjustable temperature |
| Bidet Modes | Rear, Feminine, Massage |
| Bidet Nozzle | Self-cleaning, 5 levels adjustable position and pressure |
| Control Methods | Remote Control, Side Knob, Foot Sensor |
| Additional Features | Auto Open/Close Lid, Auto Flush, Night Light, Pre-Wetting, Deodorization, Emergency Flush |
Image: Diagram showing the dimensions of the smart toilet (26.7 inches deep, 16.1 inches wide, 18.1 inches high) and the 12-inch rough-in requirement, along with included accessories.
5. Installation Guide
Professional installation is recommended. Ensure all local plumbing and electrical codes are followed.
5.1 Pre-Installation Checks
- Rough-in Measurement: Verify your bathroom's rough-in distance is approximately 12 inches from the wall to the center of the drain pipe.
- Water Supply: Ensure a cold water supply line is available.
- Electrical Outlet: A grounded 120V AC electrical outlet is required within reach of the toilet's power cord. Consult a qualified electrician if an outlet is not present.
- Clearance: Ensure adequate space around the toilet for comfortable use and maintenance.
5.2 Installation Steps
- Turn off the main water supply to your bathroom.
- Remove your old toilet (if applicable) and clean the flange area.
- Install the new wax ring onto the toilet's drain opening or directly onto the floor flange.
- Carefully position the TOPPLAN Smart Toilet over the flange, aligning the bolts. Press down firmly to create a seal with the wax ring.
- Secure the toilet to the floor using the provided mounting screws and hardware. Do not overtighten.
- Connect the water supply line to the toilet's inlet valve using the provided 1/2 angle valve and 7/8 to 3/4 adapter if necessary.
- Connect the power cord to a grounded electrical outlet.
- Turn on the main water supply and check for leaks.
- Insert batteries into the remote control and the emergency flush module.
- Perform an initial flush and test all functions.
6. Operating Instructions
Your TOPPLAN Smart Toilet offers various features for enhanced comfort and hygiene. Familiarize yourself with the control methods:
6.1 Automatic Functions
- Auto Open & Close Lid: The lid automatically opens when you approach and closes when you leave.
- Auto Flush: The toilet automatically flushes after you leave the seat.
- Pre-Wetting: The bowl is pre-wetted before use to maintain cleanliness.
- Gentle Night Light: A soft light illuminates the bowl for nighttime use without disturbing sleep.
- Aromatherapy Deodorization: Integrated system to keep the air fresh.

Image: Diagram illustrating the automatic functions of the smart toilet, including auto open/close, auto flush, heated seat, hot air drying, self-cleaning nozzle, foot sensor, and aromatherapy deodorization.
6.2 Remote Control
The remote control provides full access to all smart toilet functions. Ensure batteries are installed correctly.

Image: Detailed view of the remote control, showing buttons for various functions such as flushing, bidet modes, temperature adjustments, and nozzle position. Also shown is the side rotational knob and an icon for power outage flushing.
- Flush Button: Initiates a full flush.
- Bidet Modes: Select Rear Wash, Feminine Wash, or Massage Wash.
- Position Adjustment: Adjusts the bidet nozzle position (5 levels).
- Pressure Adjustment: Adjusts water pressure (5 levels).
- Water Temperature: Adjusts bidet water temperature (4 levels).
- Seat Temperature: Adjusts heated seat temperature (4 levels).
- Dryer Temperature: Adjusts warm air dryer temperature (4 speeds).
- Stop Button: Stops all bidet and drying functions.
6.3 Side Rotational Knob
The side knob offers quick access to essential functions.

Image: Close-up of the side rotational knob, indicating its functions for easy operation, one-time press, and hip cleaning.
- Rotate: Adjusts water pressure or temperature depending on the current mode.
- Press Once: Initiates a flush or activates a specific wash mode.
- Press and Hold: May activate specific functions like hip cleaning or stop current operations.
6.4 Foot Sensor
The foot sensor allows for touch-free operation of the lid and flushing.

Image: Illustration showing the soft-close seat mechanism and the foot sensor's role in automatically opening the lid upon approach, and closing/flushing upon leaving.
- Lid Control: Gently tap your foot near the sensor to lift or close the toilet lid.
- Flush Activation: A foot tap can also initiate a flush, reducing contact.
6.5 Flushing System
The toilet features a strong vortex flushing system for efficient cleaning.
- Vortex Flush: Provides powerful and water-efficient flushing (1.26 GPF).
- Off-Seat Auto Flush: Automatically flushes when you stand up and move away.
- Emergency Flush: A dedicated module ensures flushing capability even during power outages.

Image: Transparent view of the smart toilet's internal flushing mechanism, highlighting the powerful vortex action for effective waste removal.
6.6 Bidet Functions
The integrated bidet offers personalized cleaning options.
Image: Close-up of the bidet nozzle extending from the toilet bowl, with a digital display showing water temperature settings and different wash modes.
- Rear Wash: Standard posterior cleaning.
- Feminine Wash: Gentle front cleaning for women.
- Massage Wash: Pulsating water stream for a soothing effect.
- Adjustable Nozzle: Position and pressure can be adjusted via remote control.
- Warm Water: Water temperature is adjustable to 4 levels for comfort.
- Self-Cleaning Nozzle: The nozzle cleans itself before and after each use.
6.7 Heated Seat & Warm Air Dryer
Enjoy comfort with the heated seat and efficient drying.

Image: Split view showing the heated toilet seat with temperature settings and the warm air dryer mechanism with adjustable air temperature.
- Heated Seat: Adjustable to 4 temperature levels for constant warmth.
- Warm Air Dryer: 4-speed adjustable air temperature for effective drying after bidet use.
7. Care and Maintenance
Regular cleaning and maintenance will ensure the longevity and optimal performance of your smart toilet.
7.1 Daily Cleaning
- Wipe the exterior surfaces with a soft, damp cloth and a mild, non-abrasive cleaner.
- The ceramic surface is glazed for easy cleaning. Avoid harsh chemicals that could damage the finish.
- The bidet nozzle performs a self-cleaning cycle automatically. For additional cleaning, refer to the remote control for manual nozzle cleaning options.
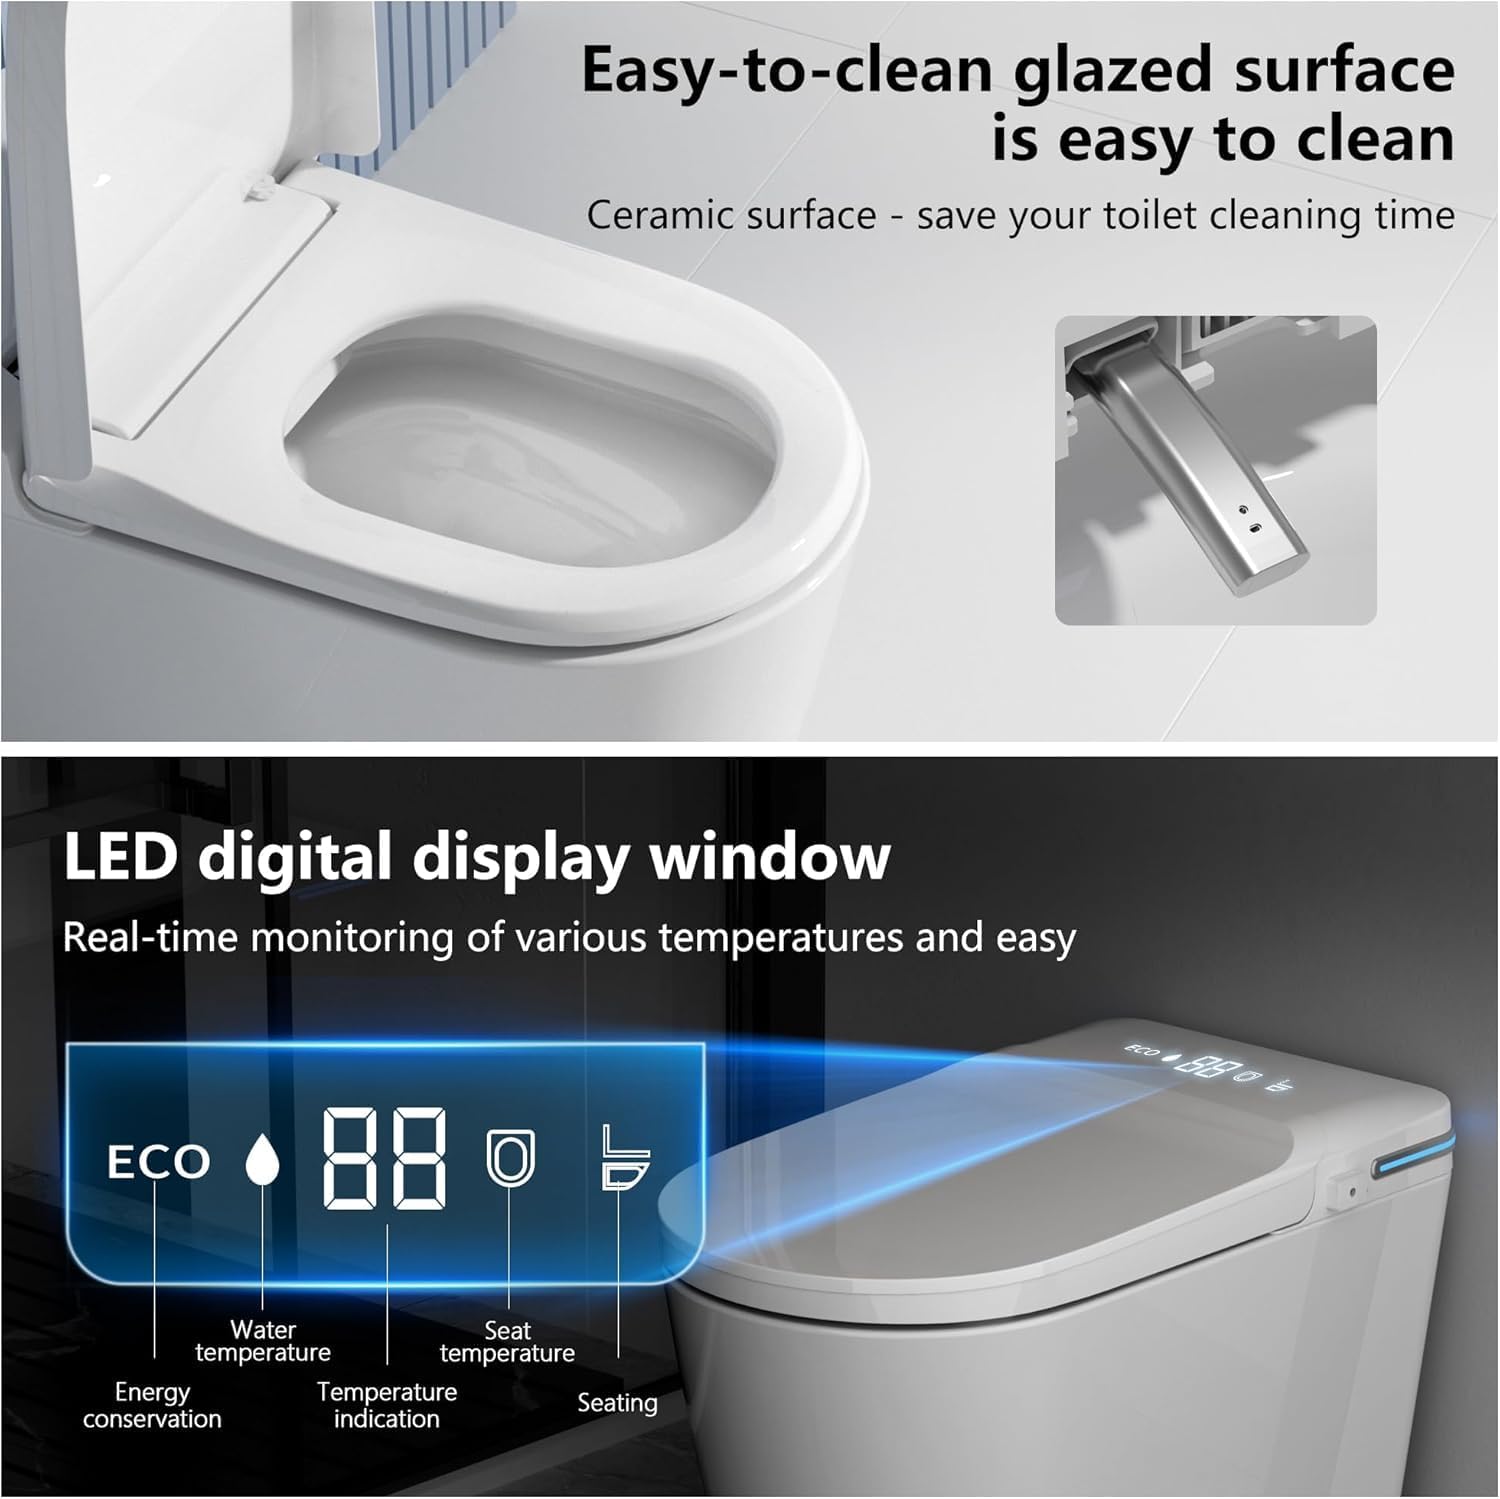
Image: View of the toilet bowl's glazed ceramic surface, emphasizing its easy-to-clean properties, alongside the LED digital display window showing operational status.
7.2 Hard Water Buildup
If you have hard water, mineral deposits may accumulate on the bidet nozzle. To clean:
- Turn off the water supply and unplug the toilet.
- Gently extend the bidet nozzle (if a manual extension option is available, otherwise use the self-clean function).
- Wipe the nozzle with a soft cloth dampened with white vinegar or a descaling solution.
- Rinse thoroughly before restoring power and water.
8. Troubleshooting Guide
Refer to this section for common issues and their solutions. If the problem persists, contact customer support.
| Problem | Possible Cause | Solution |
|---|---|---|
| No power to the toilet. | Power cord unplugged, circuit breaker tripped, power outage. | Ensure power cord is securely plugged in. Check circuit breaker. For power outages, use the emergency flush. |
| Bidet functions not working. | Water supply off, nozzle clogged, remote control batteries low. | Check water supply valve. Clean nozzle. Replace remote control batteries. |
| Toilet not flushing automatically. | Sensor obstructed, auto-flush feature disabled, power issue. | Ensure sensors are clean and unobstructed. Check remote settings. Verify power supply. |
| Heated seat or dryer not working. | Temperature setting too low, power issue. | Adjust temperature settings via remote. Check power supply. |
| Lid not opening/closing automatically. | Foot sensor obstructed or disabled. | Ensure foot sensor area is clear. Check remote settings for auto open/close. |
9. Warranty and Customer Support
TOPPLAN provides a limited warranty for this product. Please refer to the warranty card included in your package for specific terms and conditions.
For technical assistance, troubleshooting beyond this guide, or warranty claims, please contact TOPPLAN customer support:
- Website: www.topplan.com
- Email: support@topplan.com
- Phone: 1-800-XXX-XXXX
Please have your model number (T008-PRO) and purchase date available when contacting support.