
1. Introduction
Thank you for choosing the SereneLife 9000 BTU Portable Air Conditioner. This 3-in-1 unit provides cooling, dehumidification, and fan functions to enhance your indoor comfort. Designed for convenience, it features a compact form factor, integrated casters for easy mobility, and smart control options including a remote and a WiFi-enabled application. Please read this manual thoroughly before operation to ensure proper use, maintenance, and safety.
2. Safety Instructions
To reduce the risk of fire, electric shock, or injury, always follow these basic precautions:
- Read all instructions before using the appliance.
- Connect to a properly grounded outlet only.
- Do not operate the unit with a damaged cord or plug.
- Do not block air outlets or inlets. Maintain at least 20 cm (8 inches) clearance around the unit.
- Do not insert fingers or foreign objects into the air inlets or outlets.
- Always turn off and unplug the unit before cleaning or servicing.
- Do not use the unit near flammable gases or combustible materials.
- Ensure the unit is placed on a flat, stable surface to prevent tipping.
- This appliance is not intended for use by persons (including children) with reduced physical, sensory or mental capabilities, or lack of experience and knowledge, unless they have been given supervision or instruction concerning use of the appliance by a person responsible for their safety.
3. Package Contents
Verify that all components are present in the package:
- SereneLife Portable Air Conditioner Unit
- Exhaust Hose (1.49 m)
- Window Sealing Kit
- Drain Hose (1 m)
- Remote Control
- Air Filter (pre-installed)
- User Manual
4. Product Overview
Familiarize yourself with the main parts and controls of your portable air conditioner.
Unit Components
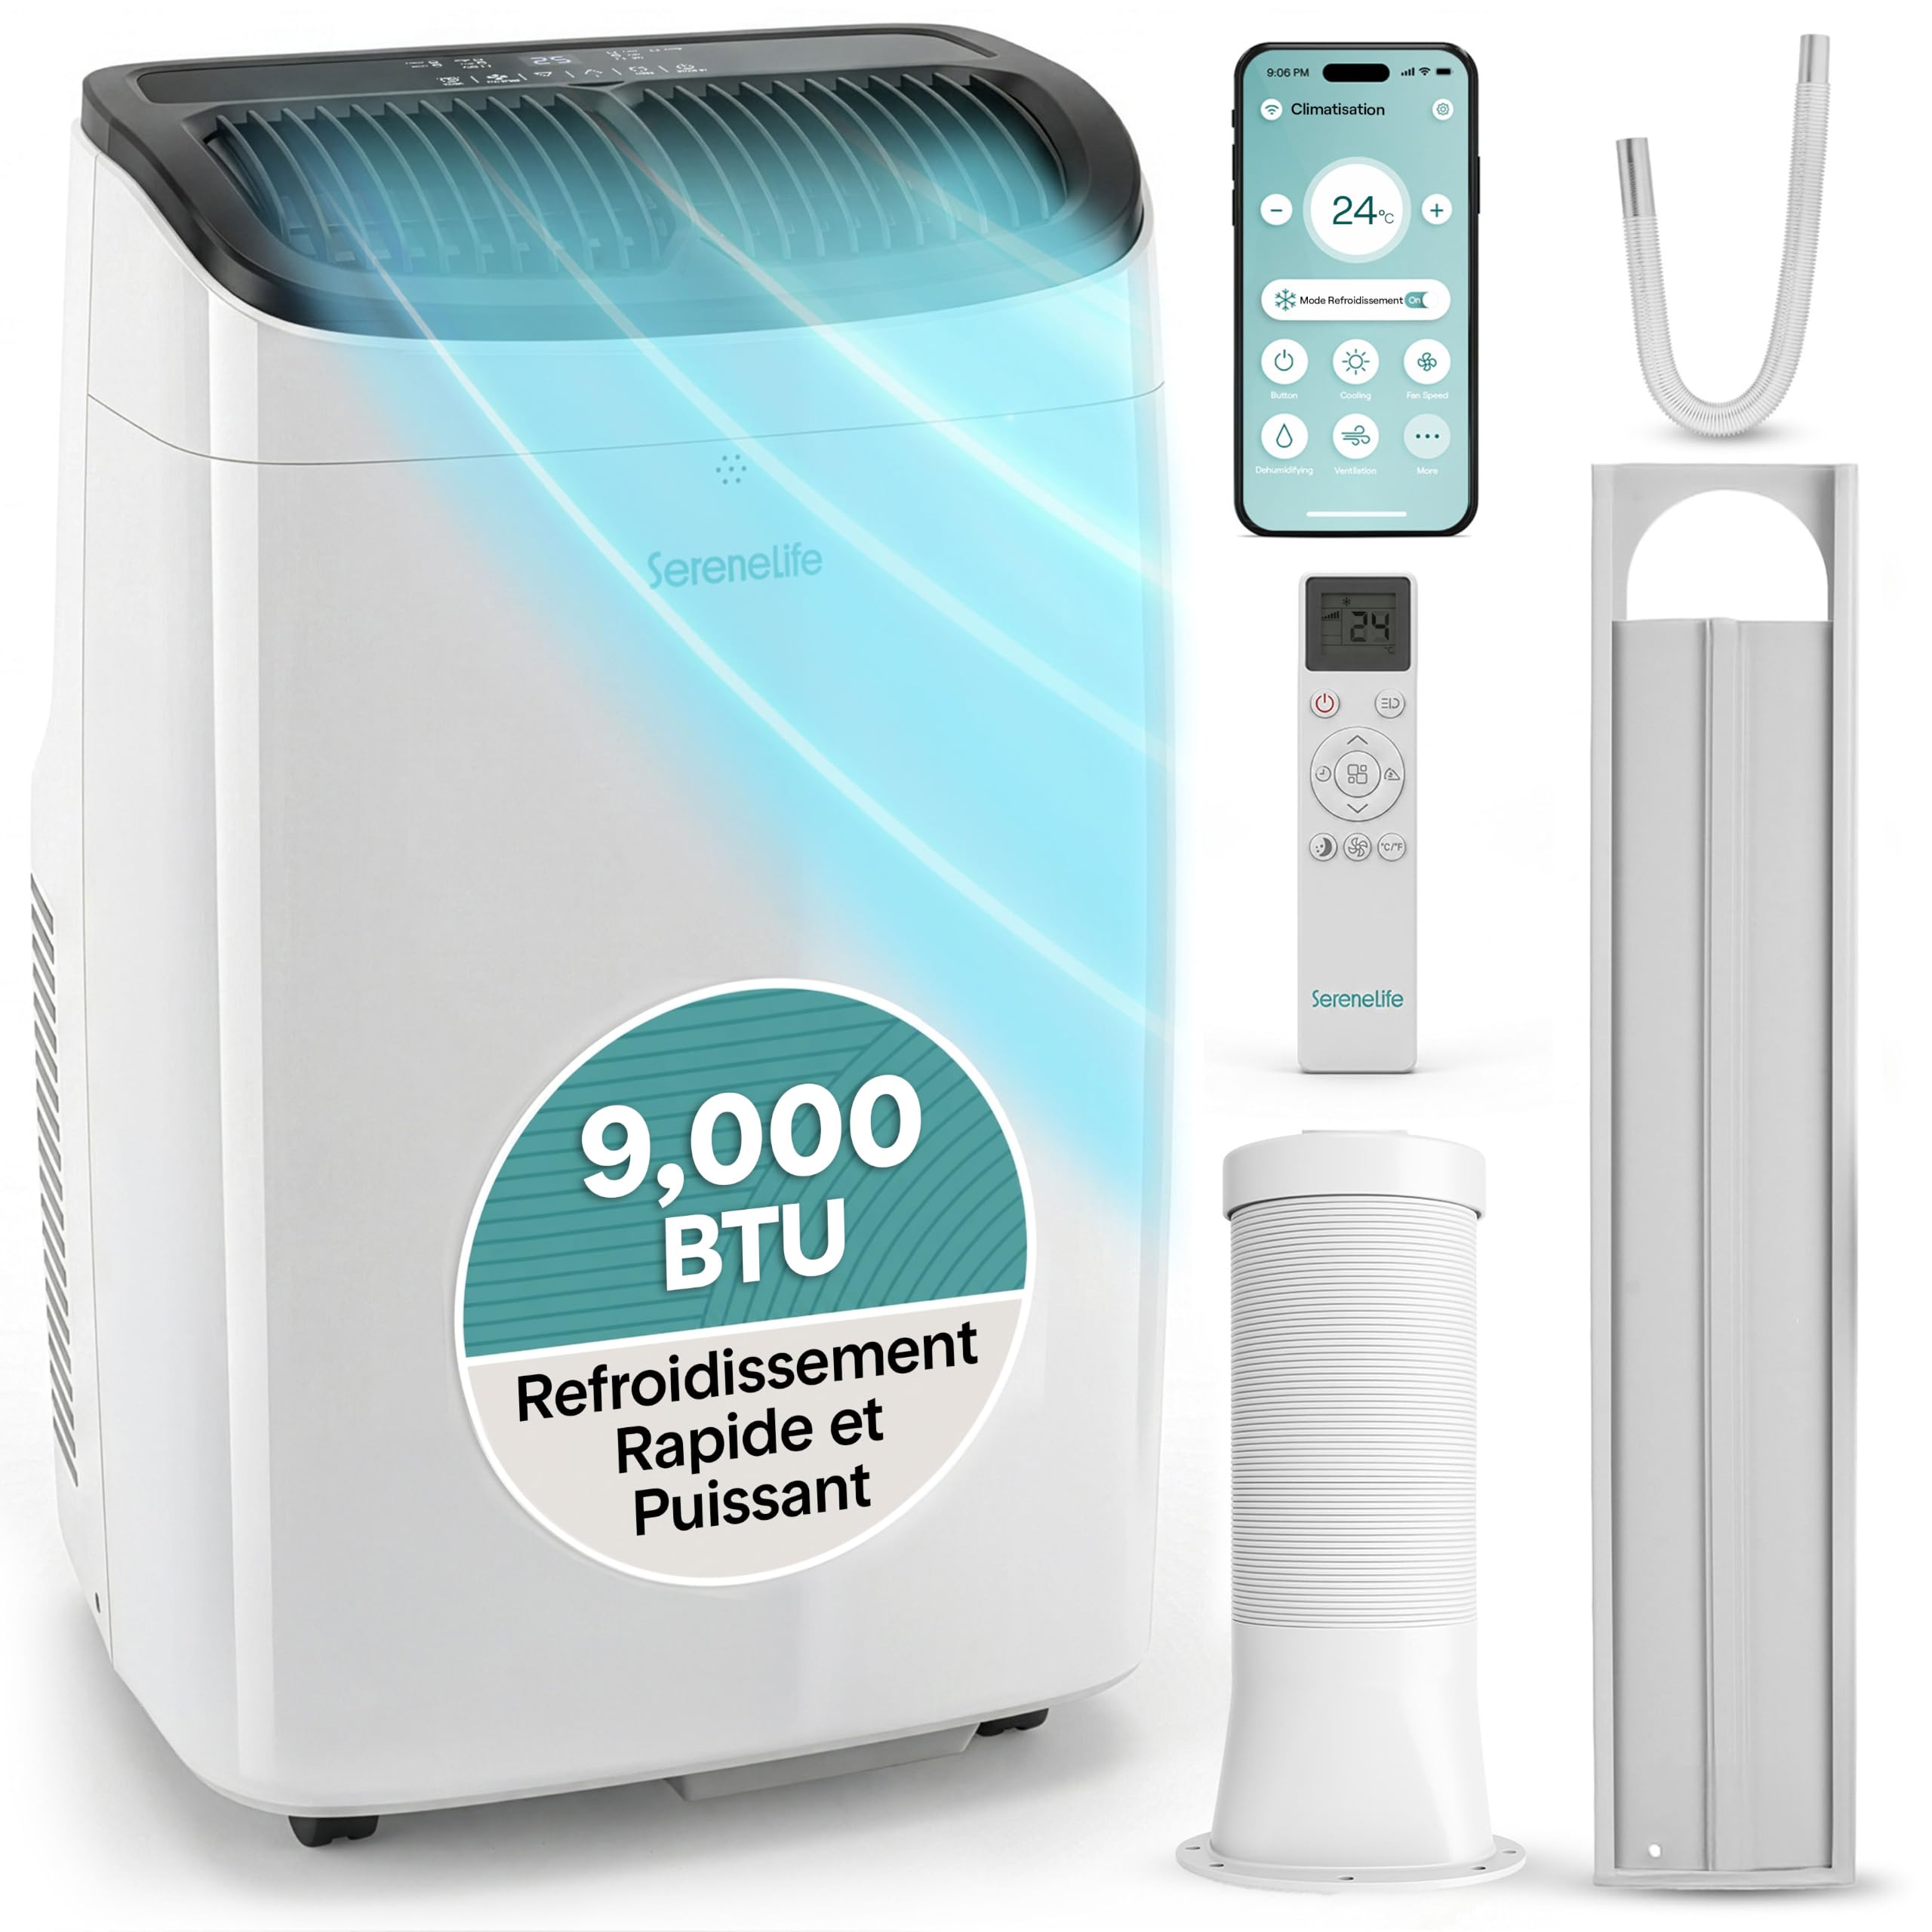
Image: SereneLife Portable Air Conditioner showing its compact design and dimensions (36P x 39l x 63H cm).
- Control Panel: Located on the top of the unit for manual operation.
- Air Outlet: Adjustable louvers for directing airflow.
- Air Inlet: Located on the rear, with a removable filter.
- Casters: Four wheels at the base for easy movement.
- Exhaust Port: Connection point for the exhaust hose.
- Drain Port: For continuous or manual water drainage.
Control Panel and Remote

Image: Close-up of the digital LED screen and touch controls on the unit's top panel.
- Power Button: Turns the unit On/Off.
- Mode Button: Cycles through Cool, Fan, and Dry (Dehumidify) modes.
- Temperature Up/Down Buttons: Adjusts the desired temperature.
- Fan Speed Button: Selects fan speed (High, Low, Auto).
- Timer Button: Sets the auto On/Off timer.
- Sleep Button: Activates sleep mode for quieter operation and gradual temperature adjustment.
- Display: Shows current temperature, timer settings, and mode indicators.
5. Setup and Installation
Proper installation is crucial for efficient operation. Follow these steps to set up your portable air conditioner.
Placement
- Place the unit on a firm, level surface in the desired room.
- Ensure there is at least 20 cm (8 inches) of space around the unit for proper airflow.
- Position the unit near a window or opening for exhaust hose installation.
Window Kit Installation
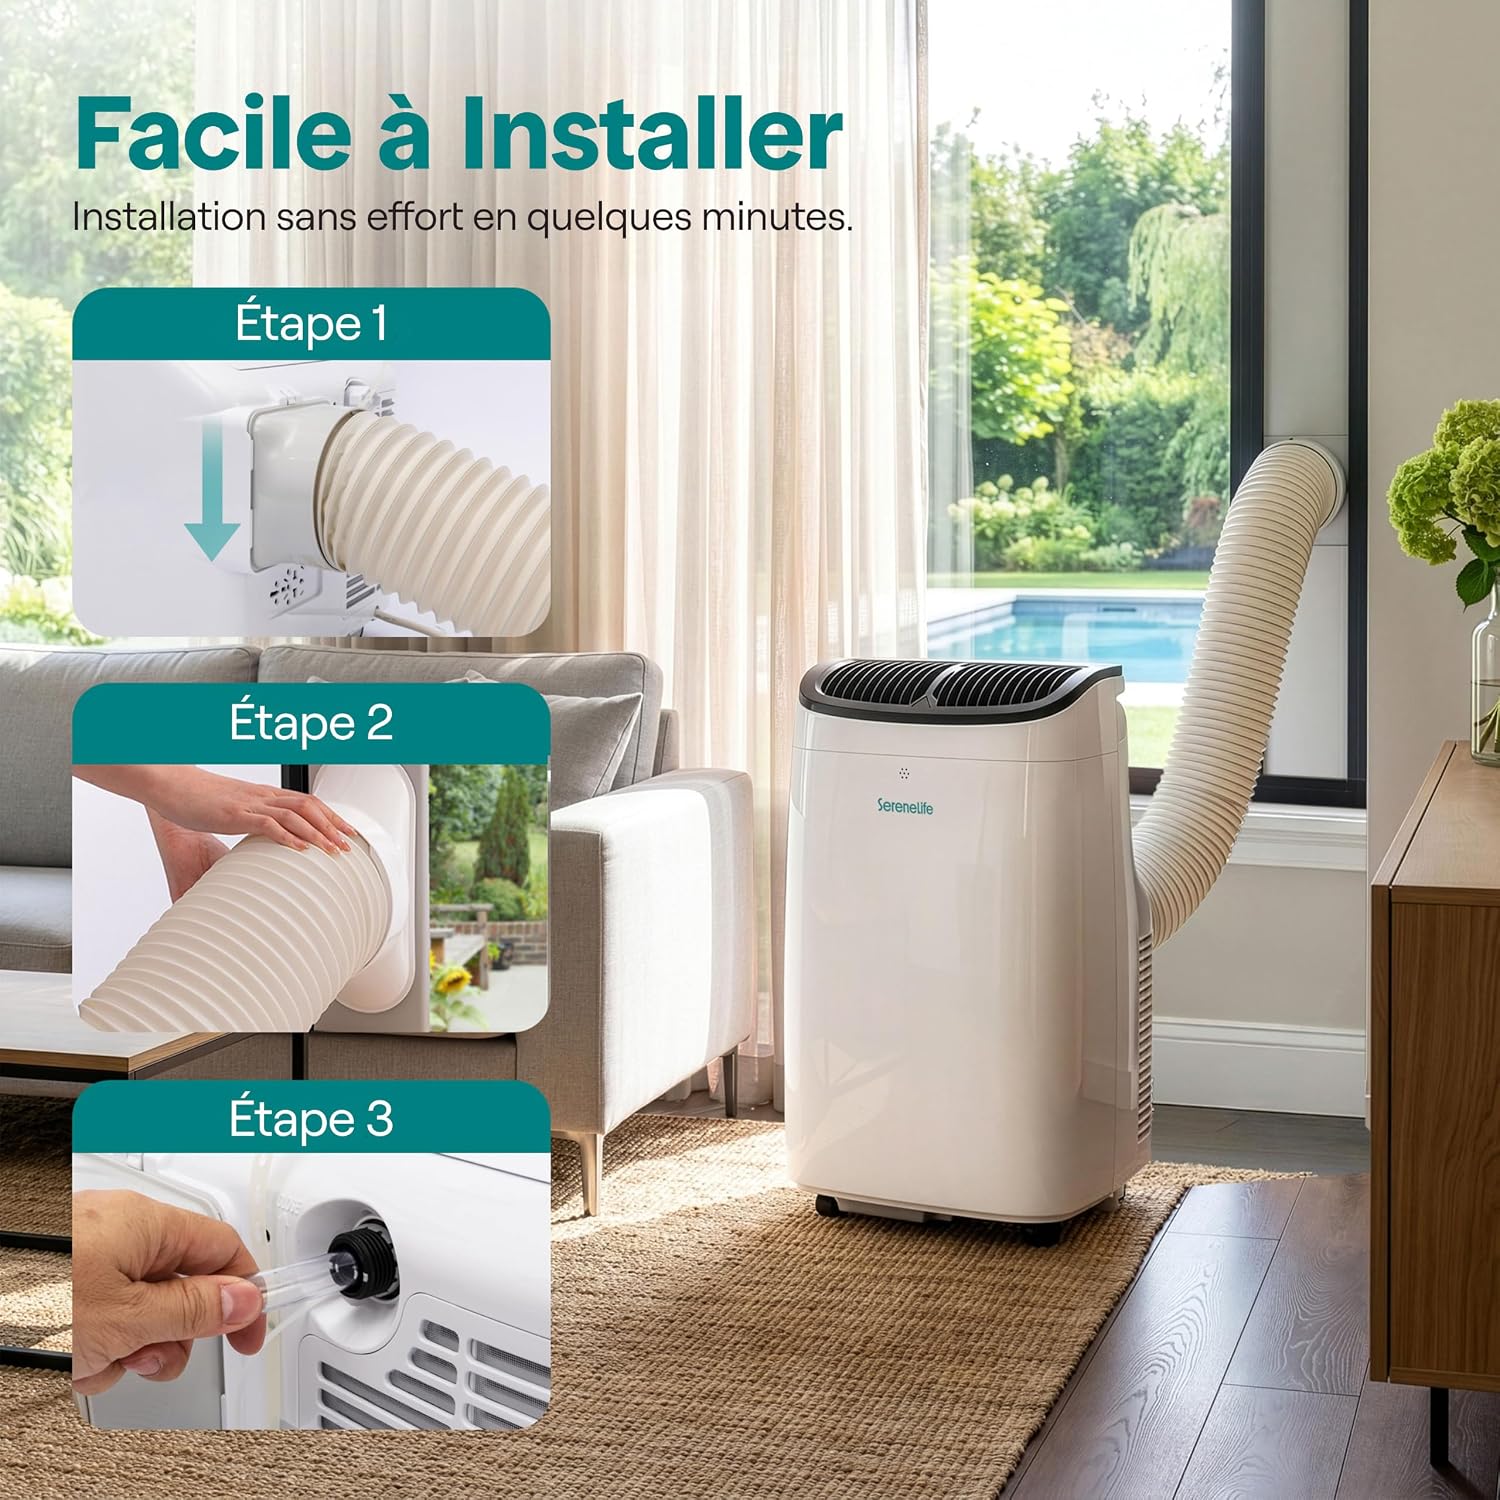
Image: Visual guide showing three steps for installing the exhaust hose and window kit.
- Attach Exhaust Hose to Unit: Screw the exhaust hose connector onto the exhaust port at the back of the air conditioner.
- Install Window Kit: Adjust the window sealing plate to fit your window opening. Secure it in place.
- Connect Hose to Window Kit: Insert the other end of the exhaust hose into the opening of the window sealing plate. Ensure a tight seal to prevent hot air from re-entering the room.
- Drain Hose (Optional): For continuous dehumidification, connect the drain hose to the continuous drain port and direct it to a suitable drain or container.
6. Operating Instructions
Operate your SereneLife portable air conditioner using the control panel, remote control, or the WiFi app.
Basic Operation
- Power On/Off: Press the Power button to turn the unit on or off.
- Select Mode: Press the Mode button repeatedly to cycle through Cool, Fan, and Dry (Dehumidify) modes.
- Adjust Temperature: In Cool mode, use the Up/Down arrows to set your desired temperature (16°C - 30°C / 61°F - 86°F).
- Set Fan Speed: Press the Fan Speed button to choose between High, Low, or Auto fan speeds.
- Timer Function: Press the Timer button to set an auto-on or auto-off time (1-24 hours).
- Sleep Mode: Press the Sleep button for quieter operation and gradual temperature increase in Cool mode, ideal for nighttime use.

Image: Depicts the three operating modes: Cooling, Fan, and Dehumidification, illustrating their respective functions.
WiFi App Control

Image: Shows a smartphone screen with the SereneLife app interface controlling the air conditioner remotely.
The unit can be controlled remotely via the SereneLife WiFi app. Download the app from your smartphone's app store. Follow the in-app instructions to connect your air conditioner to your home WiFi network. Once connected, you can adjust settings such as mode, temperature, fan speed, and timer from anywhere.
7. Maintenance
Regular maintenance ensures optimal performance and extends the lifespan of your air conditioner.
Cleaning the Air Filter
The air filter should be cleaned every two weeks or more frequently depending on usage and air quality.
- Turn off the unit and unplug it from the power outlet.
- Locate the air filter panel on the rear of the unit.
- Remove the filter by gently pulling it out.
- Wash the filter with lukewarm water and a mild detergent. Rinse thoroughly.
- Allow the filter to air dry completely before reinserting it. Do not expose to direct sunlight.
- Once dry, slide the filter back into its slot.
Water Drainage
This unit features an auto-evaporation system, which typically expels condensed water through the exhaust hose. However, in high humidity conditions, the internal water tank may fill up. If the tank is full, the unit will stop operating and display an error code (e.g., 'FL').
- Turn off the unit and unplug it.
- Place a shallow pan or container under the drain port at the bottom rear of the unit.
- Remove the drain plug to allow water to flow out.
- Once drained, replace the drain plug securely.
8. Troubleshooting
Refer to this section for common issues and their solutions.
| Problem | Possible Cause | Solution |
|---|---|---|
| Unit does not turn on | No power supply Power cord damaged Full water tank (FL error) | Check power outlet and plug Contact customer support Drain water tank |
| Unit not cooling effectively | Air filter clogged Exhaust hose not properly installed Room too large Doors/windows open | Clean air filter Ensure exhaust hose is sealed Use in recommended room size Close all doors and windows |
| Unusual noise | Unit not on a level surface Foreign object in fan | Place on a flat, stable surface Turn off and inspect for obstructions |
| Water leakage | Drain plug loose Unit tilted | Secure drain plug Ensure unit is level |
| WiFi app not connecting | Incorrect WiFi password Router too far App/firmware issue | Verify WiFi credentials Move unit closer to router Consult app instructions or customer support |
9. Specifications
| Feature | Specification |
|---|---|
| Model Number | FR-SLPAC9BWEU |
| Cooling Capacity | 9000 BTU (British Thermal Units) |
| Air Flow Rate | 400 m³/h |
| Dehumidification Capacity | 1.2 L/h |
| Power Consumption | 902 Watts |
| Voltage | 220 Volts |
| Noise Level | 50-53 dB |
| Dimensions (D x W x H) | 36P x 39l x 63H cm |
| Weight | 21.3 Kilograms |
| Control Methods | Application, Touch, Remote Control |
| Operating Modes | Cooling, Ventilation, Dehumidification |
| Energy Efficiency | A+++ |
10. Warranty and Support
For warranty information or technical assistance, please refer to the warranty card included with your product or contact SereneLife customer support. Keep your purchase receipt as proof of purchase.