
1. Introduction
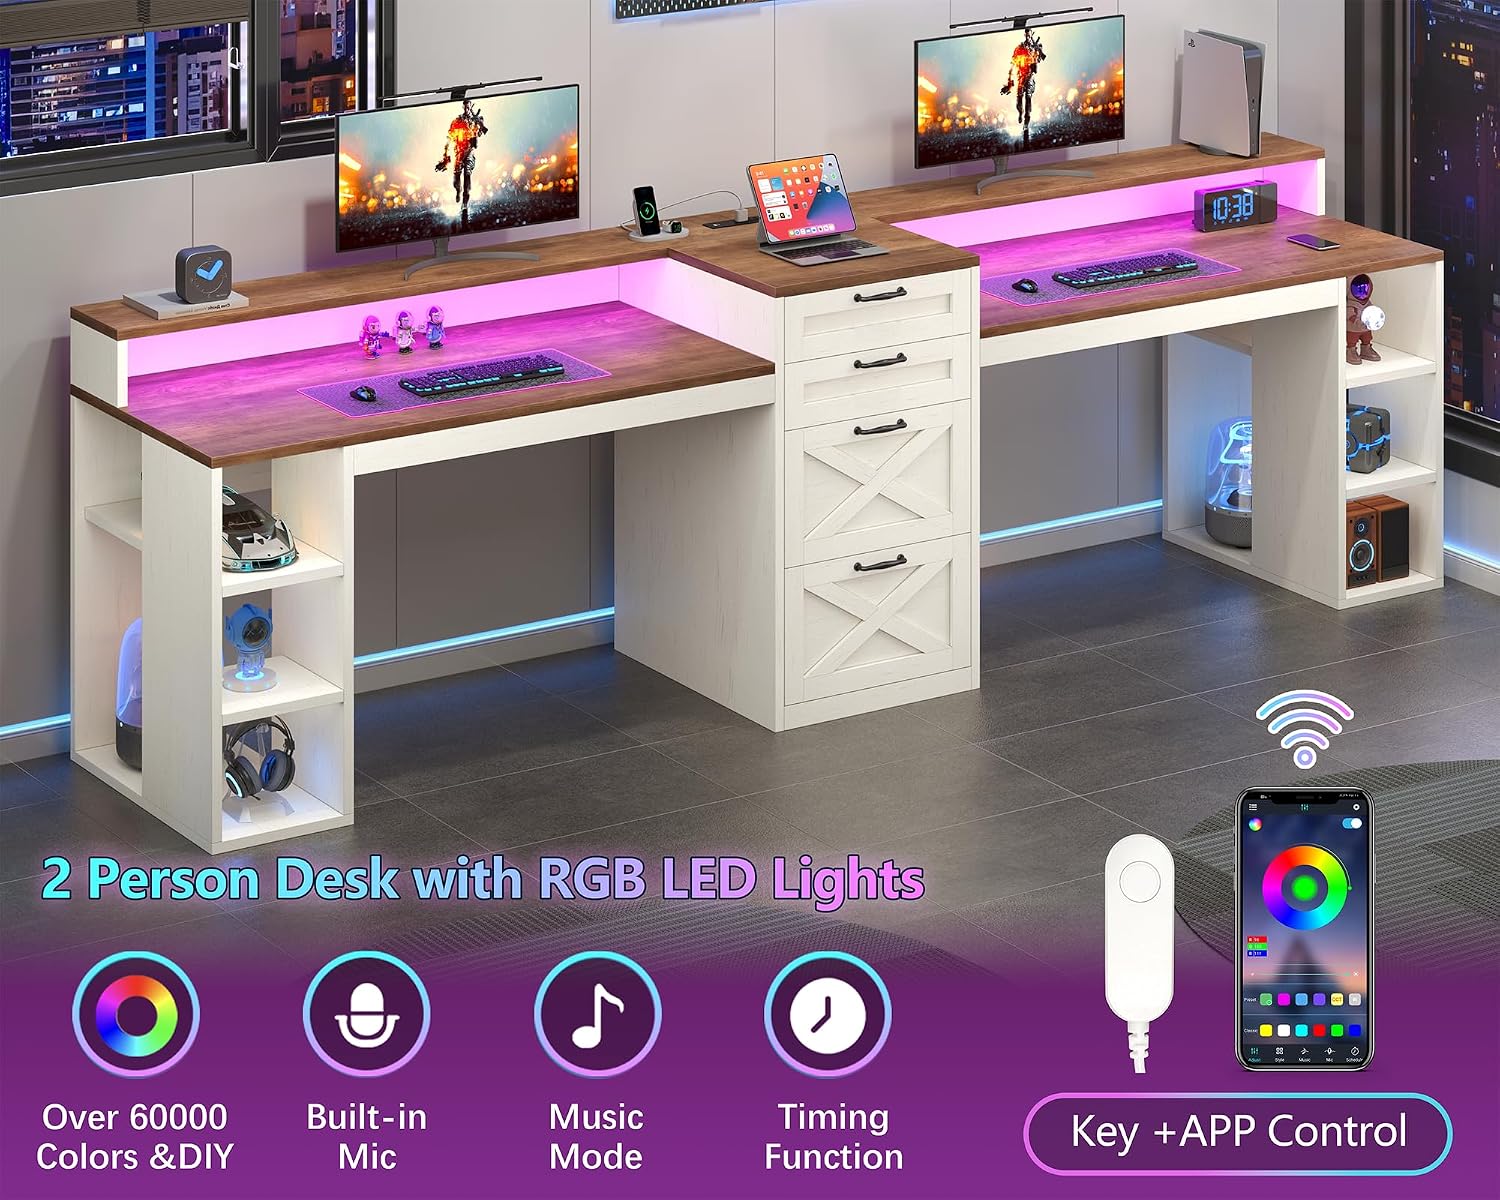
Thank you for choosing the YOMILUVE 94" 2 Person Desk. This desk is designed to provide a functional and spacious workspace for two individuals, featuring integrated storage, a printer shelf, built-in power outlets, and customizable RGB LED lighting. This manual provides essential information for assembly, operation, maintenance, and troubleshooting to ensure optimal use of your new desk.
2. Safety Information
- Read all instructions carefully before assembly and use.
- Keep all packaging materials away from children to prevent choking hazards.
- Ensure all screws and fasteners are securely tightened before use. Periodically check and re-tighten as necessary.
- Do not overload the desk or shelves. Refer to the specifications for weight limits.
- Place the desk on a flat, stable surface to prevent tipping.
- Keep liquids away from electrical components, including the power outlets and LED light strips.
- Use only the provided power cord and ensure it is properly connected to a grounded outlet.
- Do not attempt to modify the electrical components or wiring. Contact qualified personnel for any electrical issues.
3. Package Contents
Before beginning assembly, verify that all components are present and undamaged. Refer to the included parts list in your assembly guide for detailed identification.
Key Components:
- Desk Panels (Desktop surfaces, side panels, back panels)
- Drawer Units (Drawer fronts, sides, bottoms, slides)
- Shelf Panels (Adjustable shelves, fixed shelves)
- Monitor Stands
- Built-in Power Strip (with AC outlets, USB, Type-C ports)
- RGB LED Light Strips
- Hardware Pack (Screws, dowels, cam locks, handles, etc.)
- Assembly Tools (e.g., Allen wrench, screwdriver)
4. Setup and Assembly
Assembly of the YOMILUVE 94" 2 Person Desk requires careful attention to detail. All parts are clearly marked to facilitate the process. It is recommended to have two people for assembly to ensure stability and ease of handling larger components.
Assembly Steps:
- Unpack and Organize: Lay out all components on a clean, soft surface to prevent scratches. Group similar hardware items.
- Assemble Base Structures: Follow the step-by-step instructions in the provided assembly guide to construct the main desk frames and central storage unit. Pay close attention to the orientation of each piece.
- Install Drawers: Assemble the drawers according to the instructions, ensuring the drawer slides are correctly aligned for smooth operation.
- Attach Monitor Stands: Secure the monitor stands to the desktop surfaces.
- Integrate Power Strip: Install the built-in power strip into its designated recess. Connect the power cable.
- Apply LED Light Strips: Adhere the RGB LED light strips to the designated areas, typically under the monitor stands. Connect them to the power source.
- Final Tightening: Once fully assembled, re-check all connections and tighten any loose screws.


5. Operating Instructions
5.1. Built-in Power Outlets
The desk features a built-in power strip located on the monitor stand, providing convenient access to power for your devices.
- Components: 3 AC outlets (125V/12A), 1 USB port (5V/2A), 1 Type-C port (5V/2A), and 1 power switch.
- Usage: Plug your devices into the appropriate ports. Use the power switch to turn the entire strip on or off, conserving energy when not in use.

5.2. RGB LED Light Strips
Enhance your workspace ambiance with the integrated RGB LED light strips.
- Control: The LED lights can be controlled via a dedicated mobile application (APP) or a remote control (if included).
- Features: Explore over 60,000 colors, DIY lighting modes, music synchronization, and timing functions.
- APP Connection: Download the recommended APP (refer to the LED light manual for specific app name) and follow the in-app instructions to connect your lights.
5.3. Storage Drawers and Shelves
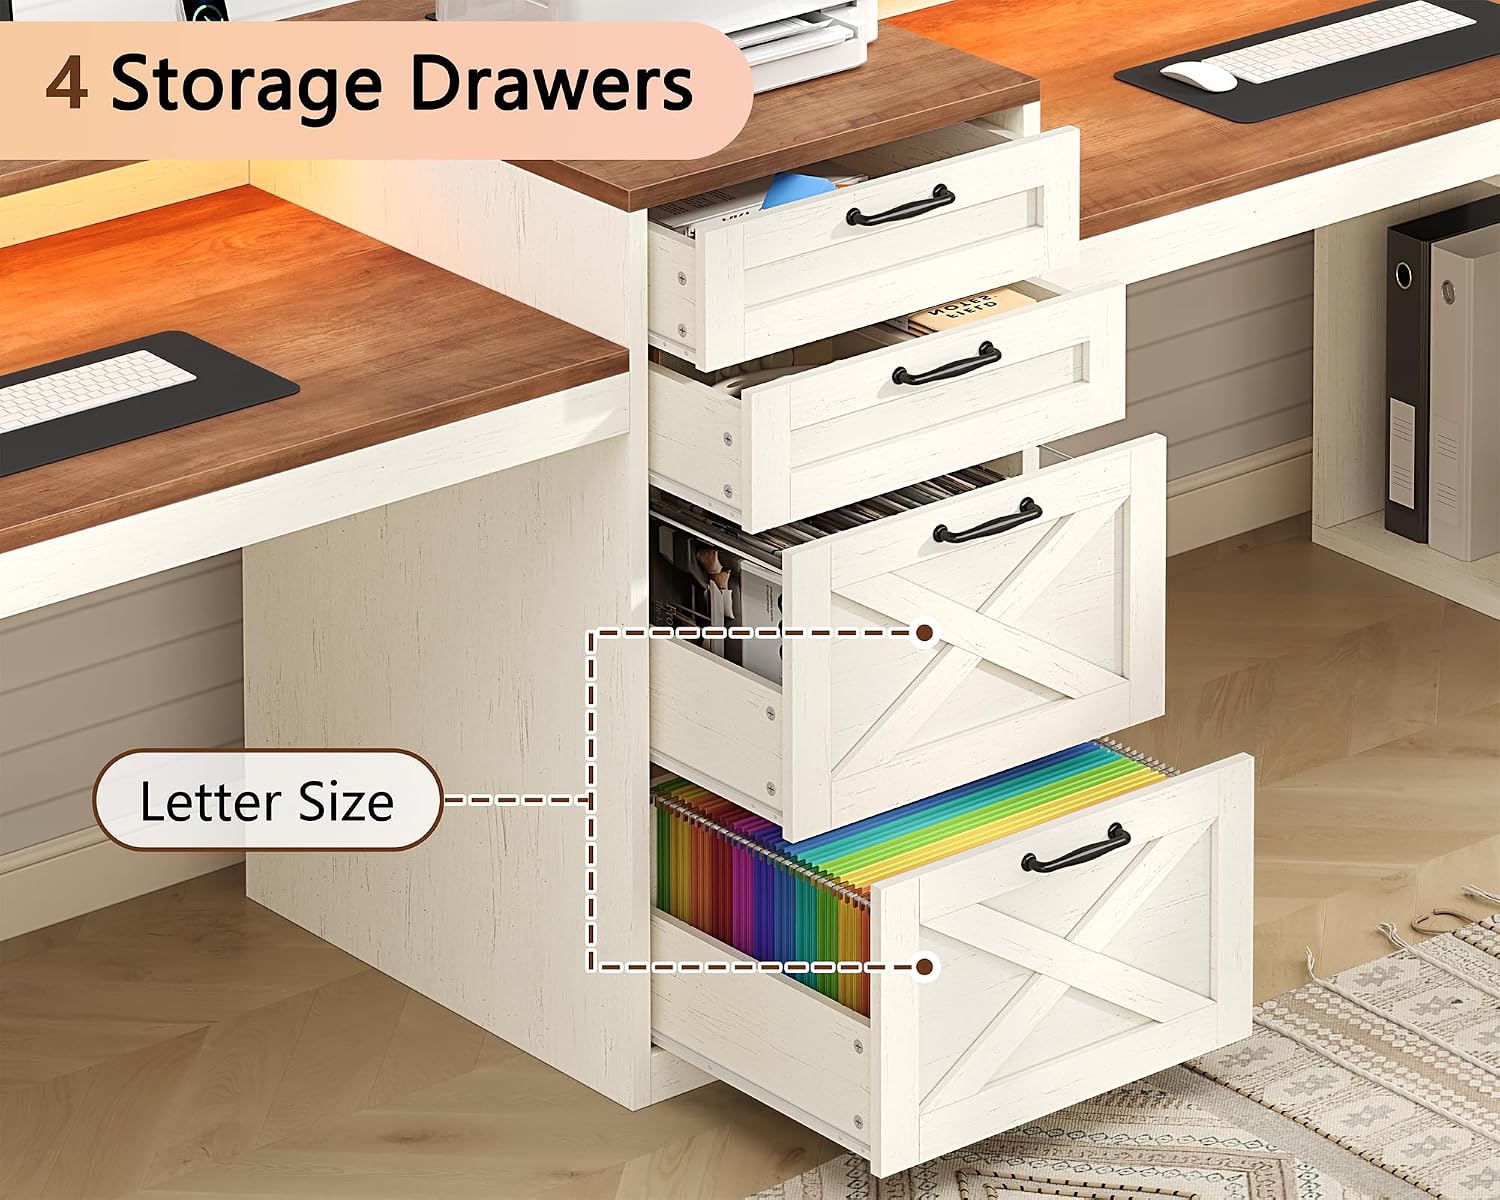
The desk offers ample storage with four central drawers and eight open shelves.
- Drawers: The bottom two drawers are designed to accommodate Letter-sized documents, functioning as file drawers. The top two drawers are suitable for general office supplies.
- Adjustable Shelves: The open shelves on the side units are adjustable, allowing you to customize the storage space for various items like books, decorative objects, or small electronics.

5.4. Monitor Stand
The full-size monitor stand elevates your screens to an ergonomic height.
- Ergonomics: Positioning your monitor at eye level helps reduce neck and back strain, promoting a more comfortable working posture.
- Space Optimization: The space beneath the monitor stand can be used for storing keyboards, mice, or other small accessories when not in use, helping to keep your desk tidy.

6. Maintenance and Care
- Cleaning: Wipe the desk surfaces with a soft, damp cloth. Avoid harsh chemicals or abrasive cleaners, which can damage the finish.
- Spills: Clean up spills immediately to prevent staining or damage to the engineered wood.
- Hardware: Periodically check all screws and fasteners to ensure they remain tight. Re-tighten as needed to maintain stability.
- LED Lights: If the LED strips become dusty, gently wipe them with a dry, soft cloth. Do not use liquids directly on the lights.
- Avoid Direct Sunlight: Prolonged exposure to direct sunlight can cause fading or discoloration of the desk finish.
7. Troubleshooting
7.1. LED Lights Not Functioning
- Check Power: Ensure the LED light strip is properly connected to its power source and that the power outlet is active.
- Remote/APP: Verify that the remote control has working batteries or that the mobile application is correctly paired and functioning.
- Connections: Inspect all cable connections for the LED strip to ensure they are secure.
7.2. Power Outlets Not Working
- Main Power: Ensure the desk's main power cord is securely plugged into a functional wall outlet.
- Power Switch: Confirm that the power switch on the built-in power strip is in the 'ON' position.
- Device Check: Test the power strip with a different device to rule out an issue with your original device.
- Circuit Breaker: Check your home's circuit breaker if multiple outlets are not working.
7.3. Drawers Sticking or Not Closing Smoothly
- Alignment: Ensure the drawer slides are correctly aligned and free of obstructions.
- Overload: Do not overload drawers, as excessive weight can cause them to stick or sag.
- Assembly Check: Review the assembly steps for the drawers and slides to ensure all components were installed correctly.
- Obstructions: Check for any items inside the drawer or along the slides that might be causing an obstruction.
8. Product Specifications
| Feature | Detail |
|---|---|
| Brand | YOMILUVE |
| Model Number | B0H5NYLC6D |
| Product Dimensions (D x W x H) | 18.5"D x 94.5"W x 34.6"H |
| Color | Brown and White |
| Style | Farmhouse |
| Material | Engineered Wood |
| Number of Drawers | 4 (2 file drawers for Letter-sized documents) |
| Number of Shelves | 8 (open, adjustable) |
| Special Features | Built-In USB Outlet (3 AC, 1 USB, 1 Type-C), Monitor Stand, RGB LED Light Strip, Printer Shelf |
| Mounting Type | Freestanding |
| Recommended Use | Office, Gaming, Home Office |
9. Warranty and Support
YOMILUVE is committed to providing quality products and customer satisfaction. If you encounter any issues with your desk or have questions regarding assembly, operation, or parts, please do not hesitate to contact our customer support team.
Please refer to your purchase documentation or the YOMILUVE official website for specific warranty details and contact information. When contacting support, please have your model number (B0H5NYLC6D) and purchase date available.