1. Introduction
Thank you for choosing the MZK 13-inch 13-Amp 2-in-1 Electric Dethatcher and Scarifier. This tool is designed to efficiently remove thatch and aerate your lawn, promoting healthier grass growth. Please read this manual carefully before operation to ensure safe and effective use of the product.
This electric dethatcher features a powerful 13 Amp motor, a 13-inch working width, and a 4-position depth adjustment. It includes interchangeable blades for both dethatching and scarifying functions, along with a 30L collection bag for debris.
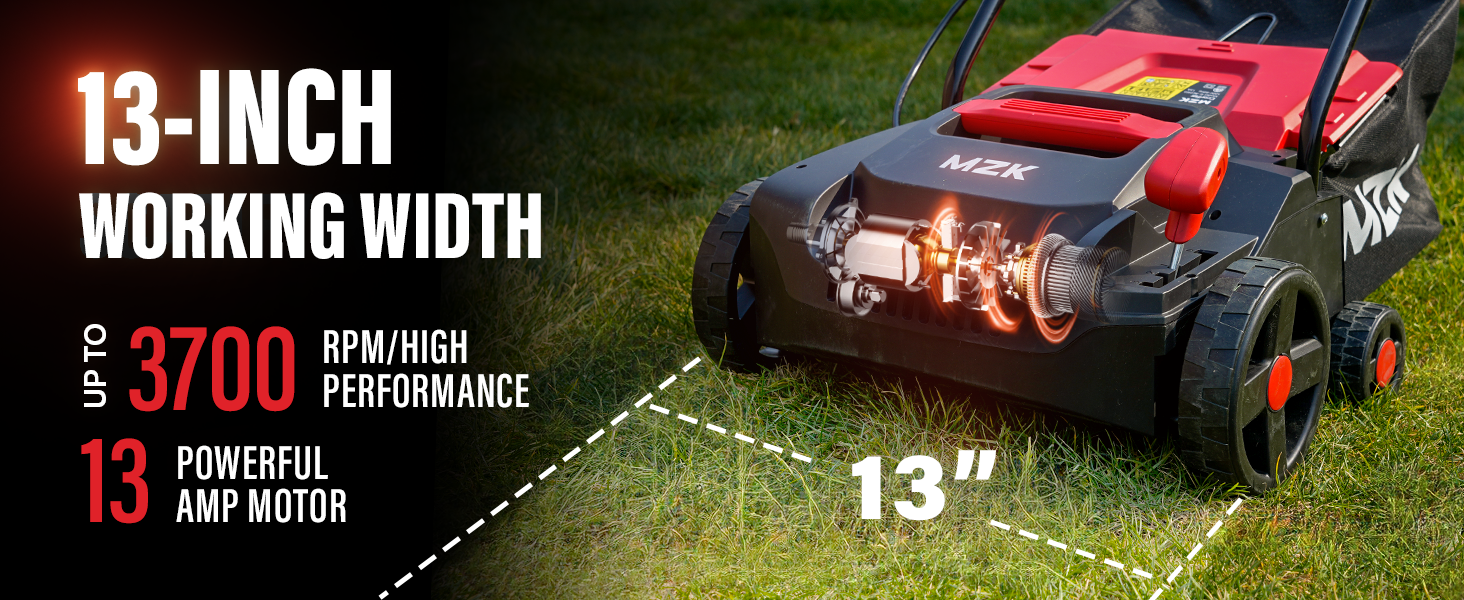
Image: The MZK 13-inch Dethatcher highlighting its 13-inch working width and 13 Amp motor for high performance.
2. Safety Information
Always observe basic safety precautions to reduce the risk of fire, electric shock, and personal injury. Keep this manual for future reference.
General Safety Warnings:
- Read all instructions: Familiarize yourself with the controls and proper use of the equipment.
- Personal Protective Equipment: Always wear safety glasses, sturdy footwear, and hearing protection during operation.
- Electrical Safety: Ensure the power cord is in good condition and properly secured. Use an outdoor-rated extension cord suitable for the tool's power requirements. Do not operate in wet conditions.
- Clear Work Area: Before starting, clear the work area of stones, sticks, wires, and other debris that could be thrown by the blades.
- Keep Bystanders Away: Do not allow children or pets near the operating area.
- Maintenance: Disconnect the power supply before cleaning, adjusting, or performing any maintenance.

Image: Close-up of the power cord secured to the handle, emphasizing waterproof protection and maintaining a secure plug connection.
3. Assembly and Setup
The MZK Dethatcher and Scarifier requires minimal assembly. Follow these steps to prepare your unit for use.
Handle Assembly:
- Attach the lower handle sections to the main unit using the provided knobs and bolts.
- Connect the upper handle section to the lower sections, ensuring all cables are routed correctly and not pinched.
- Tighten all fasteners securely. The handles are foldable for convenient storage.
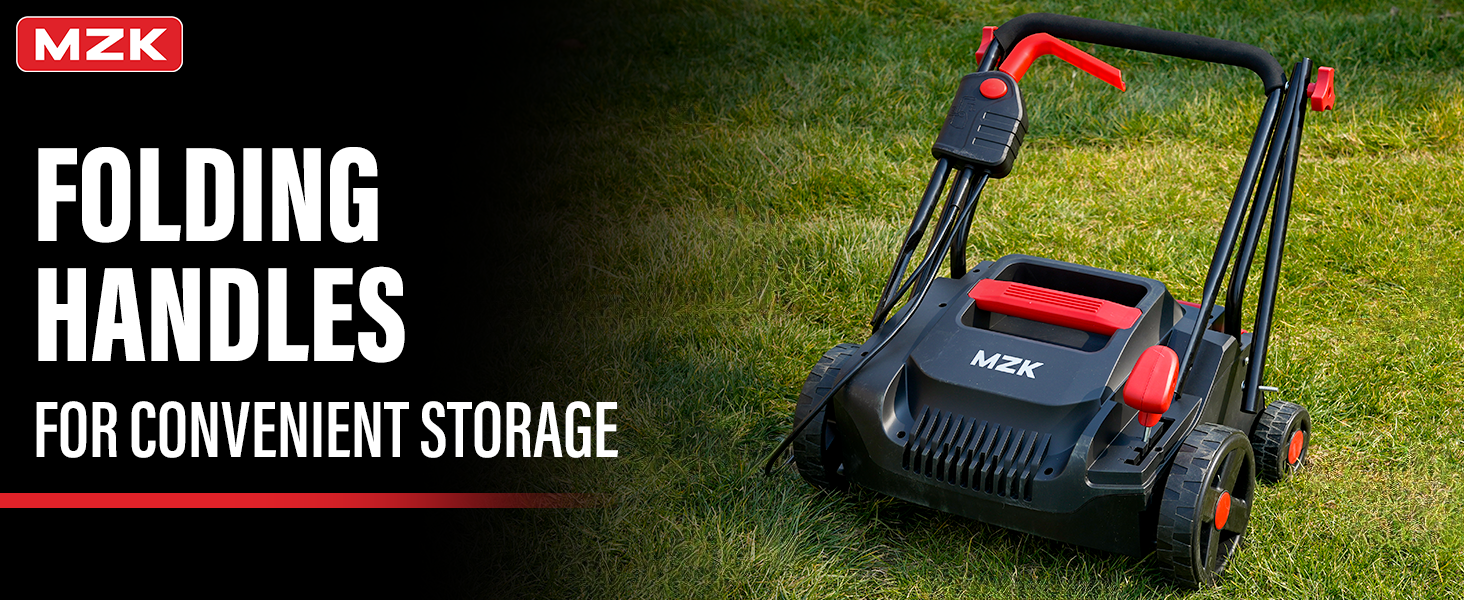
Image: The dethatcher with its handles folded, illustrating the convenient storage feature.
Blade Installation/Change:
The unit comes with two interchangeable blade types: a dethatcher (spring tines) and a scarifier (fixed blades). Always ensure the unit is unplugged before changing blades.
- Turn the unit on its side to access the blade assembly.
- Locate the quick-release mechanism for the blade shaft.
- Carefully remove the installed blade shaft.
- Insert the desired blade shaft (dethatcher or scarifier) and secure it using the quick-release mechanism. Ensure it is firmly locked in place.
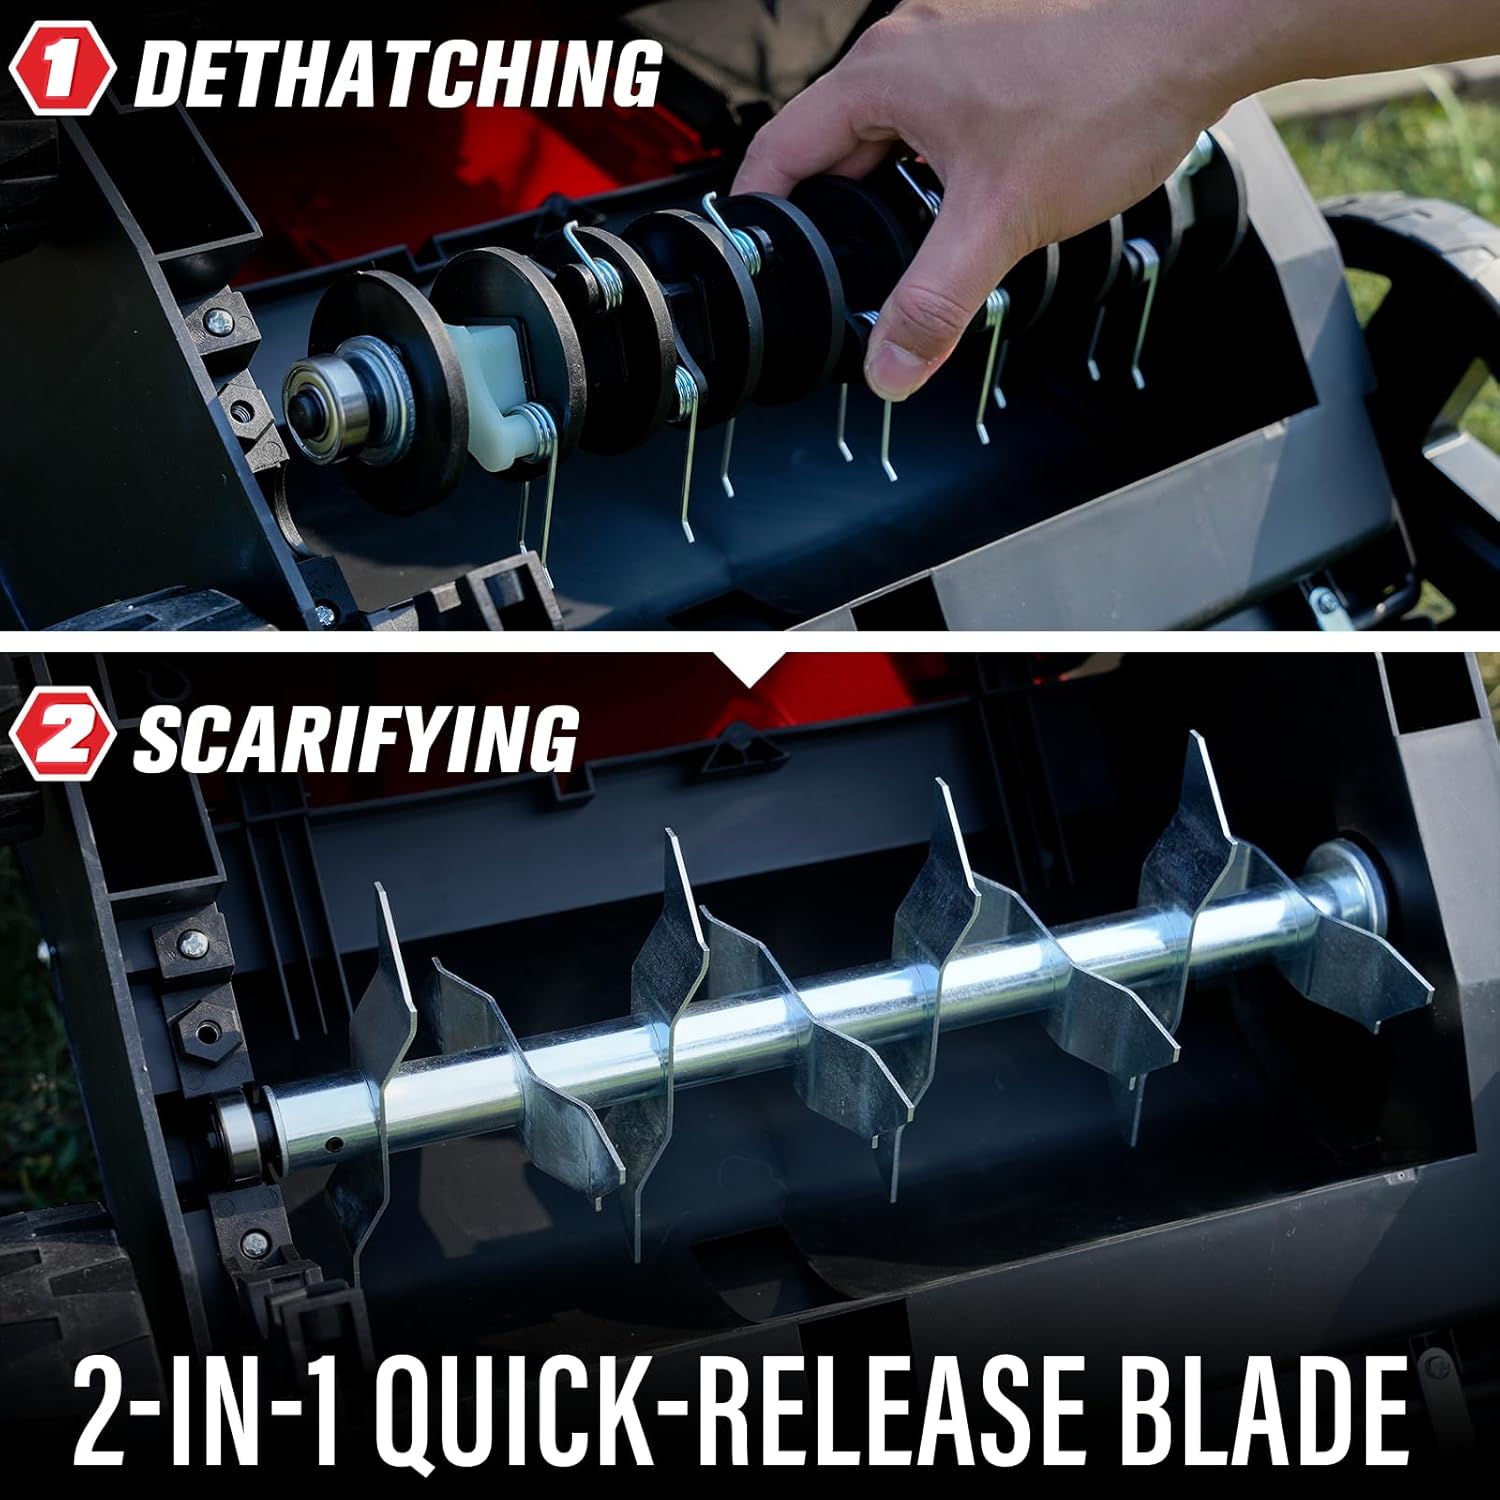
Image: A user demonstrating the quick-release blade system, showing both the dethatching and scarifying blade types.
Collection Bag Attachment:
Attach the 30L collection bag to the rear discharge chute of the unit. Ensure it is securely fastened to prevent debris from escaping.
4. Operating Instructions
Follow these steps for safe and effective operation of your MZK Dethatcher and Scarifier.
Starting the Unit:
- Connect the power cord to a suitable outdoor-rated extension cord, then plug into a grounded outlet.
- Press and hold the safety lock-off button.
- Squeeze the bail switch lever towards the handle. The motor will start.
- Release the safety lock-off button while continuing to hold the bail switch lever to maintain power.
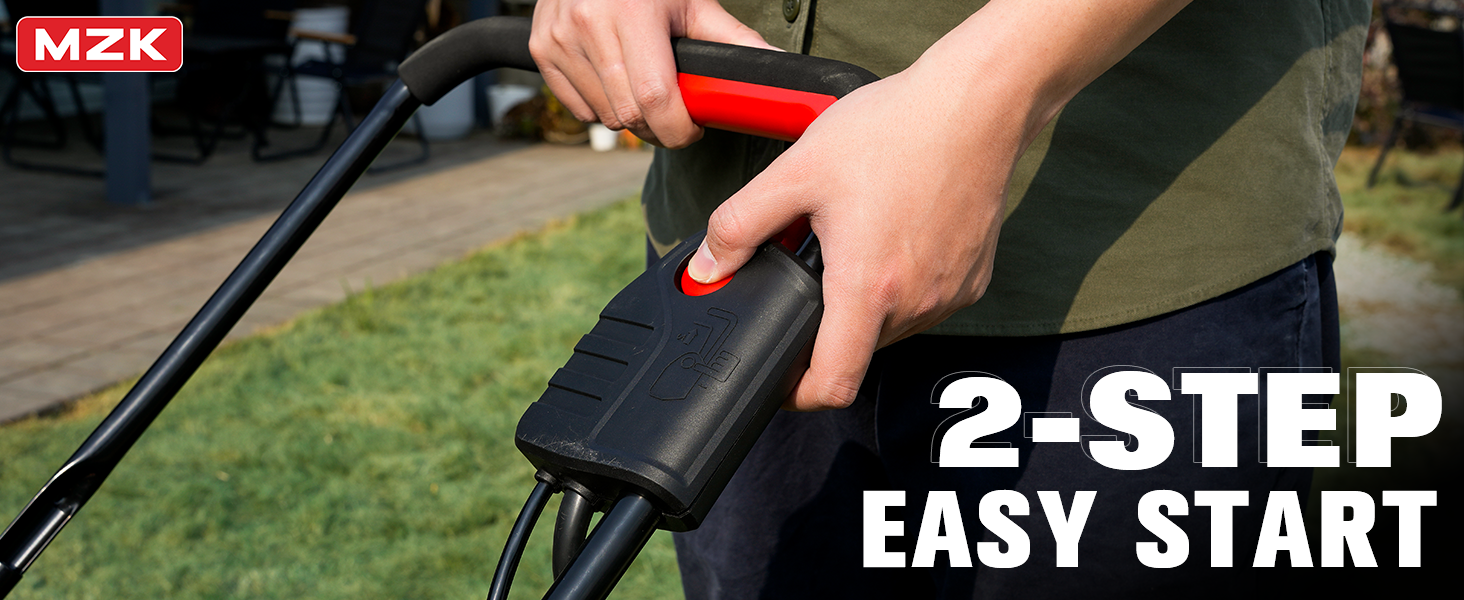
Image: A user's hands on the handle, illustrating the 2-step easy start mechanism for the dethatcher.
Adjusting Depth:
The unit features a 4-position height adjustment lever. Adjust the depth according to your lawn's condition and the task (dethatching or scarifying).
- Position 0: Shallowest setting, typically for light dethatching or initial passes.
- Position 1-3: Progressively deeper settings for more aggressive dethatching or scarifying.

Image: A diagram illustrating the 4-position height adjustment, showing how different settings affect dethatching and scarifying depth.
Dethatching and Scarifying:
- Dethatching: Use the spring tines to gently rake out dead grass and debris from the lawn surface. This improves air and water penetration.
- Scarifying: Use the fixed blades to cut into the soil, promoting deeper root growth and better nutrient absorption. This is a more aggressive process.
Work in overlapping passes, similar to mowing a lawn. For best results, make perpendicular passes on the second application. Empty the collection bag frequently to maintain efficiency.

Image: The MZK Dethatcher operating on a lawn, demonstrating its 13-inch working width for efficient yard cleaning.

Image: The dethatcher with its large 30L collection bag, designed to efficiently gather grass, leaves, and debris.
Official Product Video:
Video: An introductory video showcasing the MZK 13-inch 2-in-1 Electric Dethatcher and Scarifier, demonstrating its key features and operation.
5. Maintenance
Regular maintenance ensures optimal performance and extends the life of your unit. Always disconnect power before performing maintenance.
- Cleaning: After each use, clean the unit thoroughly. Remove any grass, thatch, or debris from the housing, blades, and wheels. Use a brush or cloth; do not use water directly on electrical components.
- Blade Inspection: Regularly inspect the dethatching tines and scarifying blades for wear or damage. Replace worn or bent tines/blades to maintain effectiveness.
- Storage: Store the unit in a dry, secure location. The folding handles allow for compact storage.
6. Troubleshooting
If you encounter issues with your MZK Dethatcher and Scarifier, refer to the following common problems and solutions.
Unit Does Not Start:
- Check Power Connection: Ensure the power cord and extension cord are securely plugged into a working outlet.
- Safety Switch: Verify that the safety lock-off button is pressed before engaging the bail switch lever.
- Circuit Breaker: Check if a circuit breaker has tripped.
Poor Dethatching/Scarifying Performance:
- Depth Adjustment: Adjust the working depth to a lower setting.
- Worn Blades: Inspect blades for wear. Replace if dull or damaged.
- Overlapping Passes: Ensure you are making overlapping passes to cover the entire area effectively.
Excessive Vibration:
- Blade Damage: Check blades for damage or imbalance. Replace if necessary.
- Debris Buildup: Clear any debris that may be caught in the blade assembly.
7. Specifications
| Feature | Specification |
|---|---|
| Brand | MZK |
| Model Number | G-AC2403 |
| Power Source | AC Electric |
| Motor | 13 Amp |
| Cutting Width | 13 Inches |
| Depth Adjustment | 4 Positions (-0.47" to 0.16") |
| Collection Bag Capacity | 30 Liters (approx. 8 Gallons) |
| Weight | 19.5 lbs |
| Assembly Required | Yes |
8. Warranty and Support
MZK products are manufactured to high-quality standards. For warranty information, technical support, or replacement parts, please refer to the contact information provided with your purchase documentation or visit the official MZK website. Keep your proof of purchase for warranty claims.