Giantex GX-11389-UH
Giantex Twin Over Twin Bunk Bed with Slide & Ladder
Instruction Manual
Model: GX-11389-UH
1. Important Safety Information
Please read and understand all instructions before assembling and using this bunk bed. Keep this manual for future reference.
- Mattress Safety: The surface of the mattress for the upper bunk must be at least 5 inches (12.7 cm) below the upper edge of the guardrails.
- Weight Limits: Do not exceed the maximum weight capacity for each component:
- Upper Bunk: 250 lbs (113 kg)
- Slide: 250 lbs (113 kg)
- Ladder: 250 lbs (113 kg)
- Assembly Required: This bunk bed requires adult assembly. Ensure all parts are correctly installed and fasteners are tightened securely before use.
- Fall Hazard: Children under 6 years of age should not use the upper bunk.
- Guardrails: Always use guardrails on both sides of the upper bunk.
- Openings: Do not allow children to play on or under the bed without supervision. Ensure there are no openings between the bed and the wall or other furniture that could trap a child.
- Modifications: Do not substitute parts. Use only manufacturer-recommended parts. Any modification to the bed structure may compromise safety and void the warranty.
- Ventilation: Ensure adequate ventilation around the bed.
2. Product Overview
The Giantex Twin Over Twin Bunk Bed with Slide & Ladder is designed as a space-saving sleeping solution for children's rooms. It features a house-shaped metal frame, providing a playful aesthetic, and includes both a ladder and a slide for interactive use. The design is reversible, allowing for flexible room layouts.
Key Features:
- Twin-Over-Twin Design: Accommodates two twin-sized mattresses, ideal for siblings or sleepovers.
- House-Shaped Frame: Offers a unique and customizable design element.
- Sturdy Metal Construction: Built with a robust metal frame and 20 heavy-duty metal slats for durability and support.
- Safety Guardrails: Features 11.5-inch high guardrails and protective rounded corners on the upper bunk for enhanced safety.
- Reversible Slide & Ladder: The slide and ladder can be positioned on either side of the bed to suit various room configurations.
- No Box Spring Needed: Designed for use with mattresses directly on the slats.
3. Components List
Before assembly, verify that all components listed below are present and undamaged. If any parts are missing or damaged, do not proceed with assembly. Contact customer support for assistance.
- Upper Bunk Bed Frame Sections
- Lower Bunk Bed Frame Sections
- House-Shaped Roof Frame Sections
- Metal Slats (20 pieces)
- Ladder
- Slide
- Guardrails
- Hardware Kit (bolts, nuts, washers, Allen wrench)
- User Guide (this document)
4. Specifications
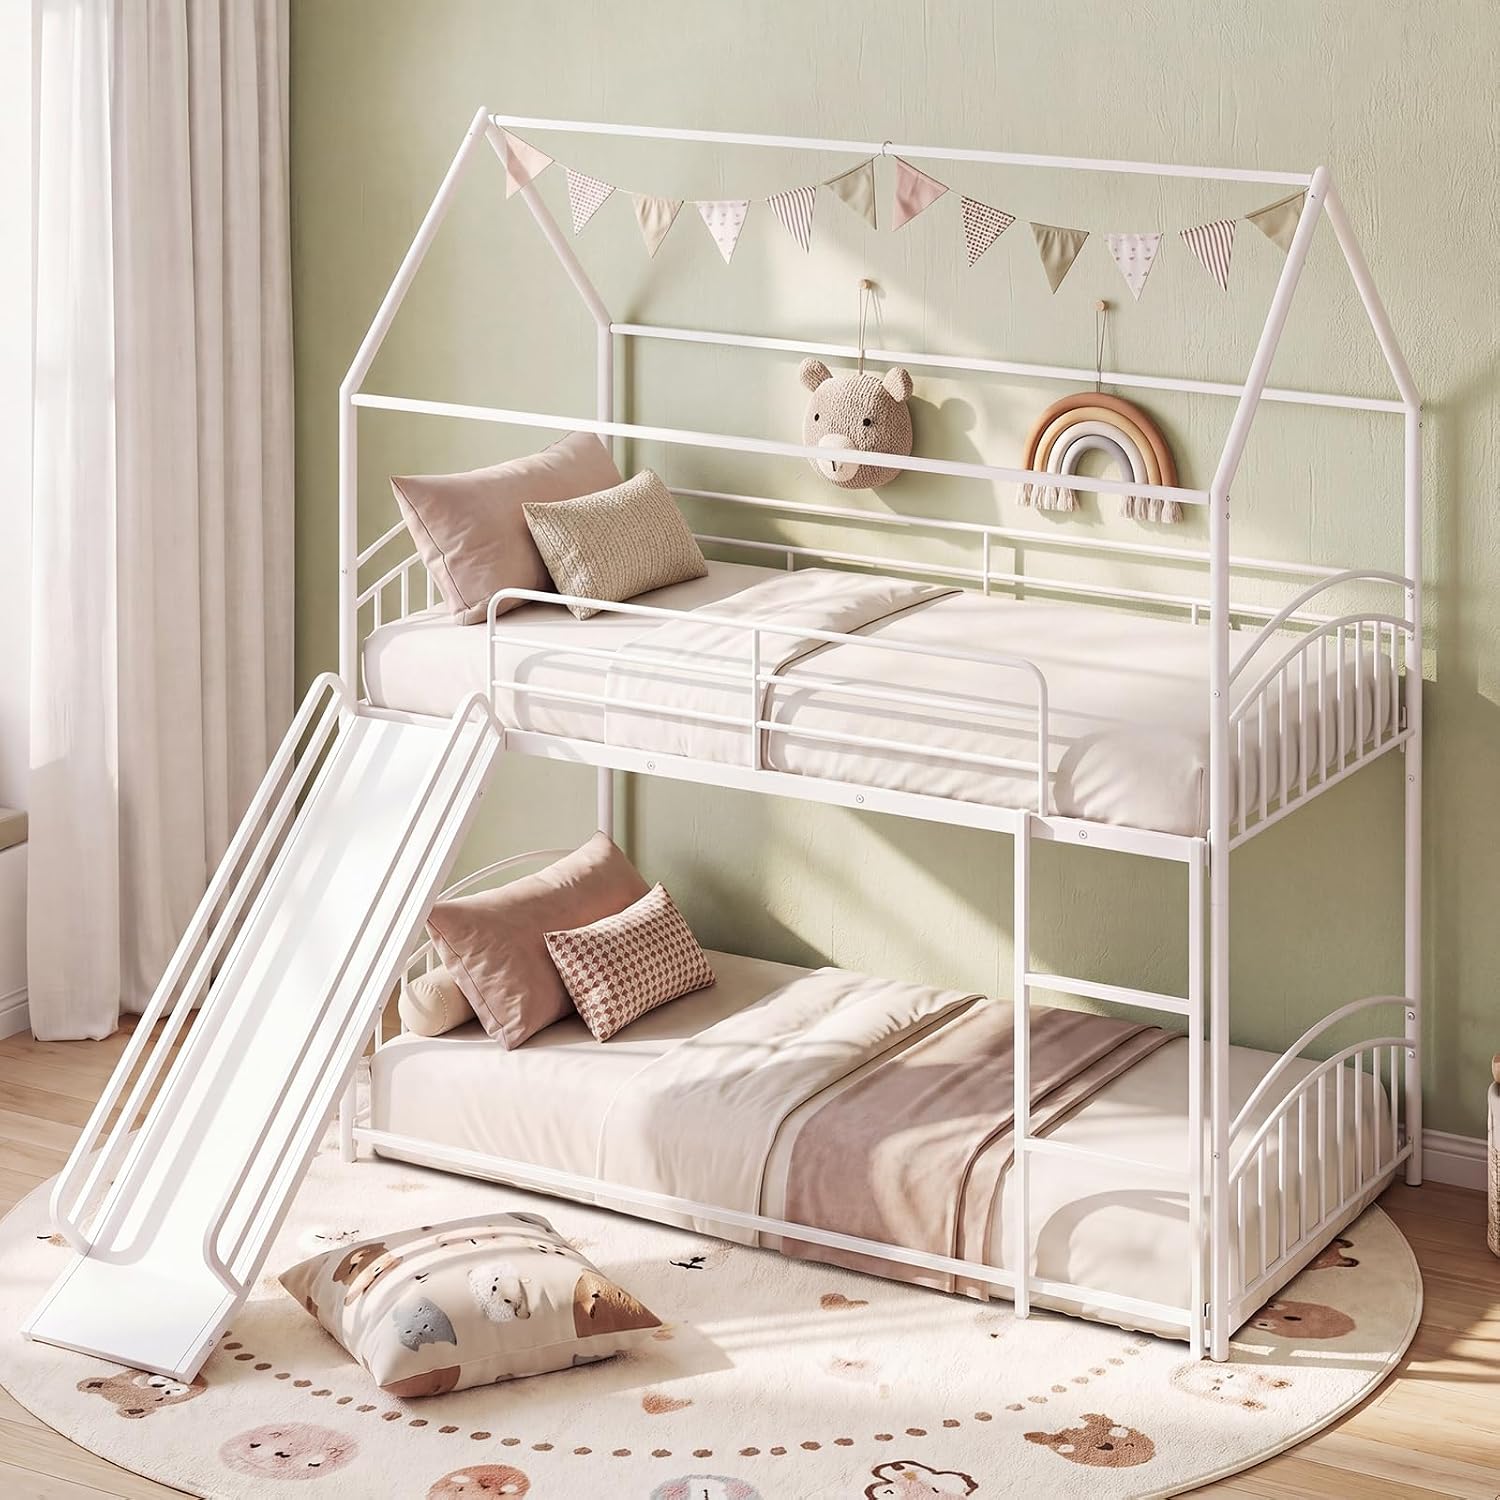
Figure 4.1: Product Dimensions and Load Capacities
| Feature | Measurement/Value |
|---|---|
| Overall Dimensions (L x W x H) | 80" x 77" x 83" (203 cm x 196 cm x 211 cm) |
| Upper Bunk Size (L x W) | 75" x 38" (190.5 cm x 96.5 cm) |
| Lower Bunk Size (L x W) | 75" x 38" (190.5 cm x 96.5 cm) |
| Height of Upper Bunk | 32.5" (82.5 cm) |
| Height of Guardrail | 11.5" (29.2 cm) |
| Slide Dimensions (L x W) | 54" x 14.5" (137 cm x 37 cm) |
| Ladder Dimensions (L x W) | 34" x 14.5" (86 cm x 37 cm) |
| Width of Entrance | 13" (33 cm) |
| Mattress Thickness for Upper Bunk | Max 6" (15 cm) |
| Mattress Thickness for Lower Bunk | Max 10" (25 cm) |
| Suitable Mattress Size | Twin (38" x 75" / 96.5 cm x 190.5 cm) |
| Load Capacity (Upper Bunk) | 250 lbs (113 kg) |
| Load Capacity (Slide) | 250 lbs (113 kg) |
| Load Capacity (Ladder) | 250 lbs (113 kg) |
| Net Weight | 79.5 lbs (36 kg) |
| Material | Metal |
| Color | White |
5. Setup and Assembly Instructions
Follow these steps carefully for proper assembly. It is recommended to have two adults for assembly.
5.1 Preparation
- Unpack all components and lay them out on a clean, soft surface (e.g., a carpet or blanket) to prevent scratches.
- Identify all parts using the provided components list and diagrams.
- Ensure all necessary hardware is present.
5.2 Assembling the Lower Bunk
- Connect the side rails to the headboard and footboard of the lower bunk using the specified bolts and washers. Do not fully tighten yet.
- Insert the metal slats into the designated slots on the lower bunk frame.
- Once all slats are in place, fully tighten all bolts for the lower bunk frame.
5.3 Assembling the Upper Bunk
- Assemble the upper bunk frame similarly to the lower bunk, connecting side rails to the headboard and footboard.
- Attach the guardrails to the upper bunk frame using the provided hardware. Ensure they are securely fastened.
- Insert the metal slats into the designated slots on the upper bunk frame.
- Fully tighten all bolts for the upper bunk frame and guardrails.

Figure 5.1: Sturdy and Secure Bunk Bed Features
5.4 Connecting Bunks and Attaching Roof Frame
- Carefully lift the assembled upper bunk and place it onto the lower bunk, aligning the connecting points. Secure with the appropriate hardware.
- Assemble the house-shaped roof frame sections and attach them to the top of the upper bunk frame.
5.5 Attaching the Ladder and Slide
- Determine the desired position for the ladder and slide. The design is reversible, allowing placement on either side.
- Attach the ladder to the upper bunk frame using the provided hardware. Ensure it is firmly secured and stable.
- Attach the slide to the upper bunk frame. Verify that all connection points are tight and the slide is stable.

Figure 5.2: Reversible Slide and Ladder Design Options
5.6 Final Checks
- Double-check all bolts and fasteners to ensure they are fully tightened.
- Verify the stability of the entire bunk bed structure, including the ladder and slide.
- Place twin mattresses on both bunks. Ensure the upper bunk mattress does not exceed 6 inches (15 cm) in thickness and is at least 5 inches (12.7 cm) below the top of the guardrails.

Figure 5.3: Mattress Thickness Guidelines
6. Operating Instructions
6.1 Using the Bunk Bed
- Mattress Placement: Always use twin-sized mattresses (38" x 75") on both bunks. Ensure the upper bunk mattress is no thicker than 6 inches (15 cm) and positioned correctly within the guardrails.
- Weight Distribution: Distribute weight evenly on both bunks. Do not exceed the stated weight capacities.
6.2 Using the Ladder
- Always use the ladder for ascending and descending the upper bunk.
- Ensure hands and feet are dry to prevent slipping.
- Face the ladder when climbing up or down.
6.3 Using the Slide
- Use the slide one person at a time.
- Slide feet first, in a sitting position.
- Ensure the area at the bottom of the slide is clear before use.
- Supervise children during slide use.

Figure 6.1: Proper Use of Slide and Ladder
7. Maintenance
Regular maintenance will help ensure the longevity and safety of your bunk bed.
- Cleaning: Wipe the metal frame with a soft, damp cloth. Avoid using harsh chemicals or abrasive cleaners, as they may damage the finish.
- Hardware Check: Periodically check all bolts, screws, and fasteners to ensure they remain tight. Re-tighten if necessary to maintain structural integrity.
- Inspection: Regularly inspect the bed for any signs of wear, damage, or loose parts. Address any issues immediately.
- Moving the Bed: If you need to move the bed, lift it rather than dragging it to prevent damage to the frame or floor.
8. Troubleshooting
If you encounter any issues with your bunk bed, refer to the following common solutions:
- Bed Wobbles: Ensure all bolts and fasteners are securely tightened. Check that the bed is placed on a level surface.
- Squeaking Noises: Re-tighten all hardware. Applying a small amount of lubricant (e.g., silicone spray) to metal-on-metal contact points may help.
- Missing Parts: If you discover missing components during unpacking, do not proceed with assembly. Contact Giantex customer support immediately for replacement parts.
- Difficulty Assembling: Review the assembly instructions carefully. Ensure you are using the correct hardware for each step. Sometimes, loosening previously tightened bolts slightly can help align parts before re-tightening.
9. Warranty and Support
For warranty information, replacement parts, or any other inquiries, please contact Giantex customer support. Keep your purchase receipt and model number (GX-11389-UH) handy for faster service.
Customer Support: Refer to the contact information provided with your purchase or visit the official Giantex website.
Related Documents - GX-11389-UH
 |
Giantex Wood Twin Bed Assembly Instructions Detailed assembly instructions for the Giantex Wood Twin Bed with 2 Storage Drawers, including a parts list, hardware list, and step-by-step diagrams with textual descriptions. |
 |
Giantex Twin Loft Bed Assembly Instructions - Model HW66935 Comprehensive assembly guide for the Giantex Twin Loft Bed, including parts list, hardware details, and step-by-step instructions. Ensure safe and correct assembly by following this manual. |
 |
Giantex Twin Over Full Metal Bunk Bed Assembly Instructions Comprehensive assembly guide for the Giantex Twin Over Full Metal Bunk Bed, including hardware lists, component identification, and step-by-step instructions for safe and secure setup. Features noise-free design and steel frame support. |
 |
Helmer Scientific i.Series & Horizon Series Freezers: Instructions for Use Comprehensive instructions for operating and maintaining Helmer Scientific i.Series and Horizon Series laboratory and plasma storage freezers. Covers installation, operation, safety, specifications, and compliance. |
 |
How to Install Apple CarPlay Android Auto Upgrade Kit for 2014-2021 Lexus GX | Hamilton Motor Company Step-by-step installation guide for the Hamilton Motor Company Apple CarPlay and Android Auto upgrade kit for the 2014-2021 Lexus GX. Includes detailed instructions and tips for a successful installation. |
 |
GX-L/GF-L Series High-Capacity Precision Balances Instruction Manual Detailed instruction manual for A&D's GX-L and GF-L series high-capacity precision balances, covering features, installation, operation, calibration, troubleshooting, and specifications. |
Ask a question about this manual
Ask about setup, troubleshooting, compatibility, parts, safety, or missing instructions. Manuals+ will review the question and use this page’s manual context to help answer it.