1. Introduction
This manual provides detailed instructions for the assembly, operation, and maintenance of your MFSTUDIO 8x12ft Portable Storage Shed Garage. This heavy-duty canopy is designed to offer a versatile and protective shelter solution for various items, including small vehicles, motorcycles, bicycles, lawnmowers, firewood, gardening tools, and patio furniture. Please read all instructions carefully before beginning assembly and retain this manual for future reference.
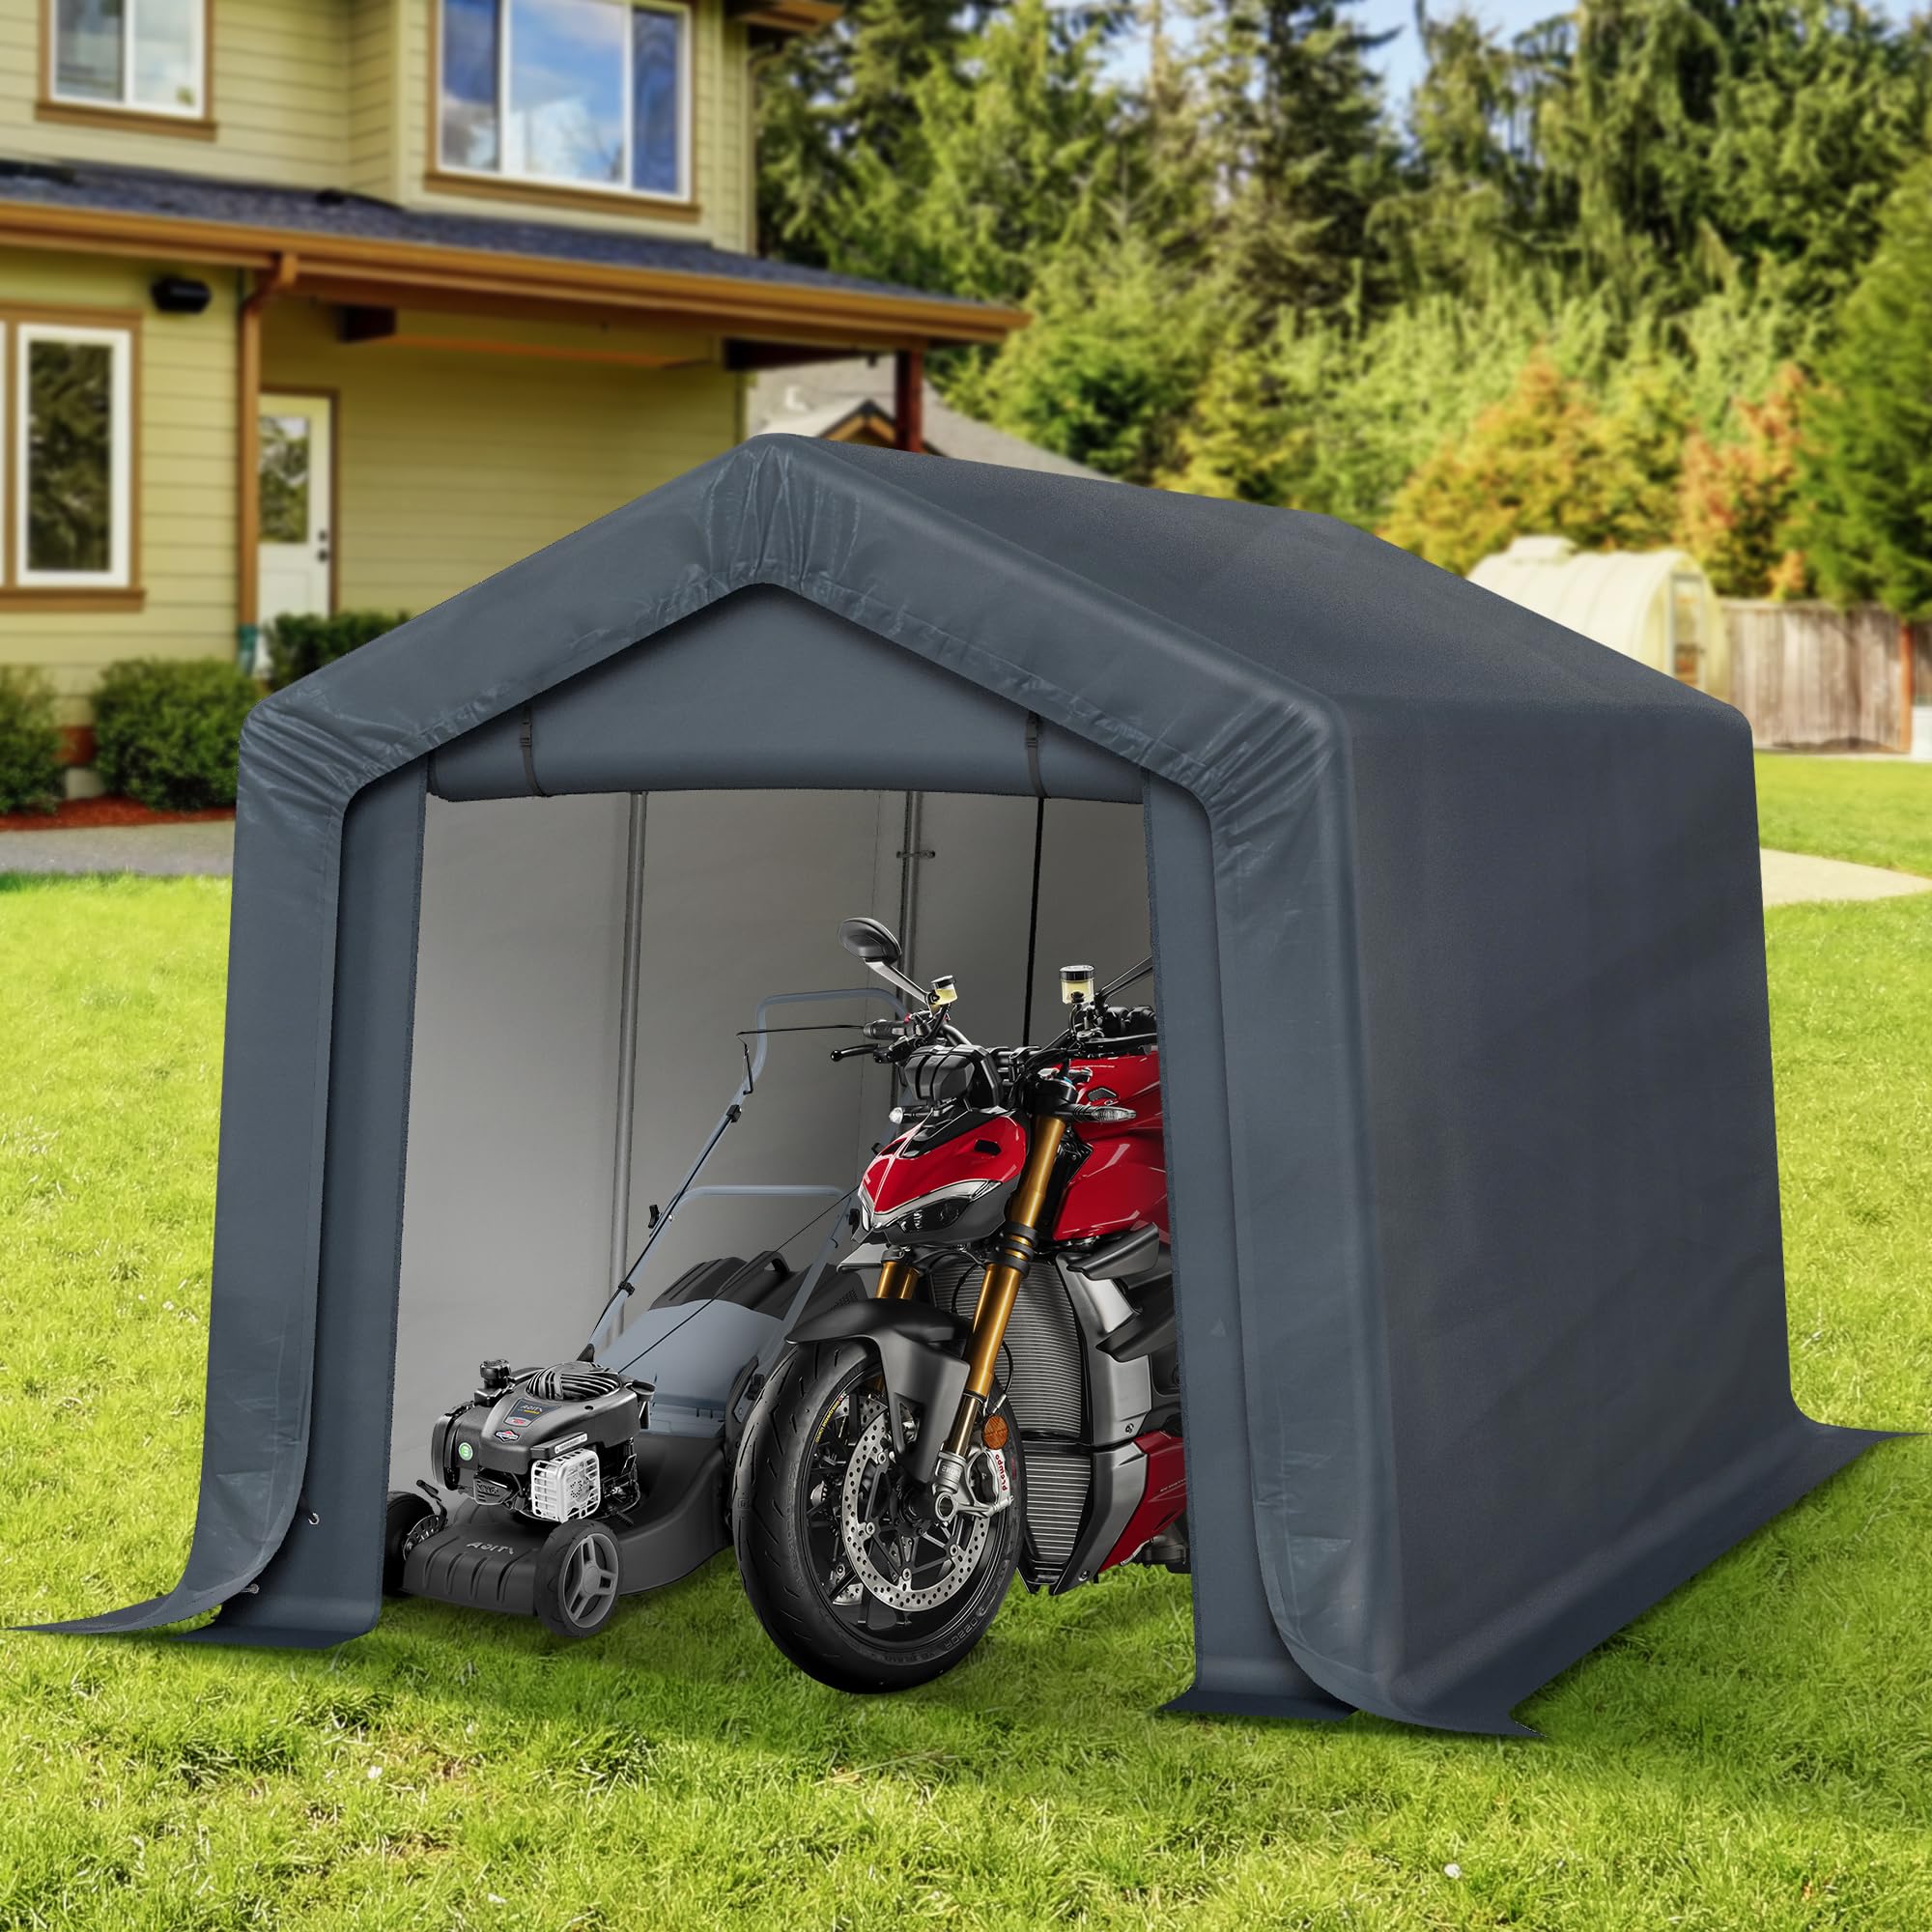
Image: MFSTUDIO 8x12ft Portable Storage Shed Garage, providing shelter for various items.
Video: An overview of the MFSTUDIO Storage Sheds, showcasing their design and potential uses.
2. Safety Information
- Read all instructions: Ensure you understand all assembly steps and safety warnings before installation.
- Two-person assembly: Assembly is recommended with at least two people for safety and ease.
- Clear area: Assemble the shed in a clear, level area, free from obstructions and overhead power lines.
- Secure anchoring: Always anchor the shed securely to the ground using the provided hardware to prevent wind damage.
- Weather conditions: Do not attempt to assemble the shed during strong winds, heavy rain, or lightning.
- Regular inspection: Periodically check all connections and anchors to ensure they remain tight and secure.
- Fire hazard: Keep all heat sources and open flames away from the shed fabric.
3. Package Contents
Before beginning assembly, verify that all components listed below are present and undamaged. If any parts are missing or damaged, please contact customer support.
- Galvanized Steel Frame Pipes (various lengths and shapes)
- Galvanized Tee Pipes / Connectors
- Polyethylene (PE) Fabric Cover
- Front and Rear End Panels with Zipper Doors and Mesh Window Panels
- Roof Fasteners (4 pieces)
- S Hooks (4 pieces)
- Elastic Balls / Bungees
- Ground Nails / Screws (for securing to cement or grass)
- Assembly Tools (basic tools may be required, not always included)
- Instruction Manual
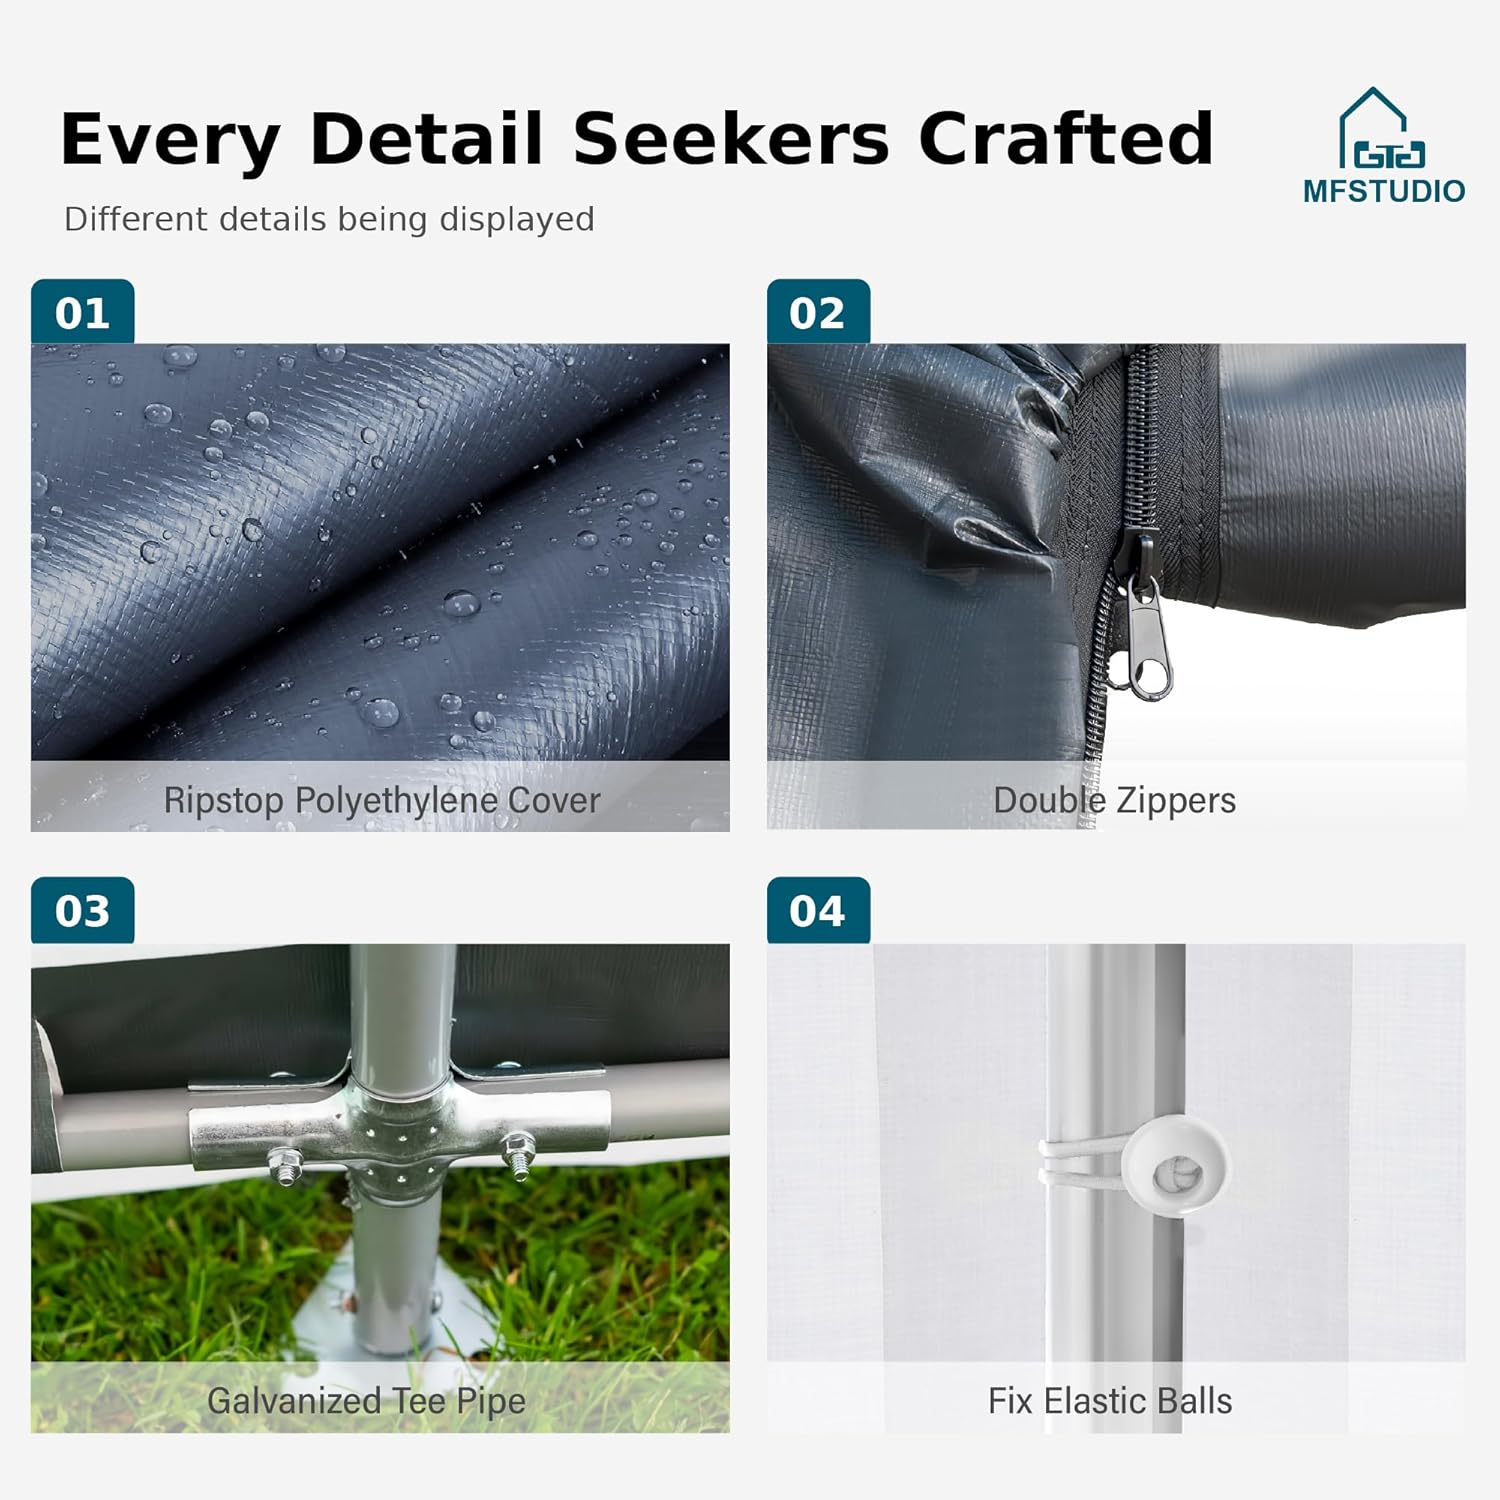
Image: Detailed view of key components including the ripstop cover, double zippers, galvanized tee pipe, and elastic balls for securing.
4. Setup Instructions
Follow these steps carefully for proper assembly. It is highly recommended to have at least two people for this process.
Video: A visual guide demonstrating the setup process for the storage shed.
Step 1: Prepare the Site
- Choose a level, clear area for assembly. Ensure adequate space around the shed for installation and future access.
- Clear any debris, rocks, or sharp objects that could damage the fabric cover.
Step 2: Assemble the Frame
- Unpack all galvanized steel pipes and connectors. Refer to the included diagram for part identification.
- Begin by assembling the base frame, connecting the horizontal and vertical pipes using the galvanized tee pipes. Ensure all connections are secure.
- Continue building the frame upwards, following the numerical sequence in the assembly diagram. The joint adopts a spray molding process that prevents chipping, peeling, rust, and corrosion.
- Ensure all pipes are fully inserted into their connectors and secured if necessary (e.g., with pins or bolts).


Image: Illustrations of the galvanized tee pipe for easy connection and the hidden fastening device for stability.
Step 3: Attach the Cover
- Carefully drape the polyethylene fabric cover over the assembled frame. Ensure the cover is centered and evenly distributed.
- Secure the cover to the frame using the provided roof fasteners and S hooks. These ensure the storage cover fits the frame tightly, enhancing wind resistance.
- Attach the front and rear end panels. Use the elastic balls/bungees to secure the panels to the frame. Note: Some users have reported that the front and rear panels can be challenging to fit correctly; ensure careful alignment.
Step 4: Secure the Shed
- Once the frame and cover are in place, anchor the shed to the ground using the provided ground nails (for grass) or screws (for cement floors).
- Ensure all anchoring points are firmly secured to prevent the shed from shifting or being lifted by strong winds.

Image: Demonstrates the windproof and stable construction with S hooks and fastening devices.
5. Operating Instructions
Using the Roll-Up Zipper Doors
- The shed features roll-up doors with zippers for easy access. To open, unzip the door completely and roll it upwards. Secure the rolled-up door using the attached straps or ties.
- To close, unroll the door and zip it down securely. Ensure both zippers are fully closed to protect contents from weather and dust.
Ventilation
- The shed includes visible mesh window panels to provide good airflow and indoor light. These can be opened or closed as needed to manage ventilation and light inside the shed.

Image: Illustrates the breathable roller blinds and visible window for ventilation and light.
6. Maintenance
- Cleaning: Clean the polyethylene cover periodically with mild soap and water. Avoid harsh chemicals or abrasive cleaners that could damage the fabric. Rinse thoroughly and allow to air dry.
- Frame Inspection: Regularly inspect the galvanized steel frame for any signs of rust, corrosion, or damage. While the frame is treated for rust resistance, extreme conditions may require attention.
- Fastener Check: Periodically check all fasteners, including roof fasteners, S hooks, elastic balls, and ground anchors, to ensure they are tight and secure. Re-tighten as necessary.
- Weather Preparedness: In anticipation of severe weather conditions (e.g., heavy snow, strong winds), consider temporarily reinforcing the shed or removing the cover to prevent damage. The extra-thick waterproof and anti-UV fabric is designed to withstand various elements, but extreme weather can exceed its limits.
- Snow Removal: Do not allow heavy snow to accumulate on the roof, as this can cause structural damage. Gently remove snow using a soft brush or broom from the outside.
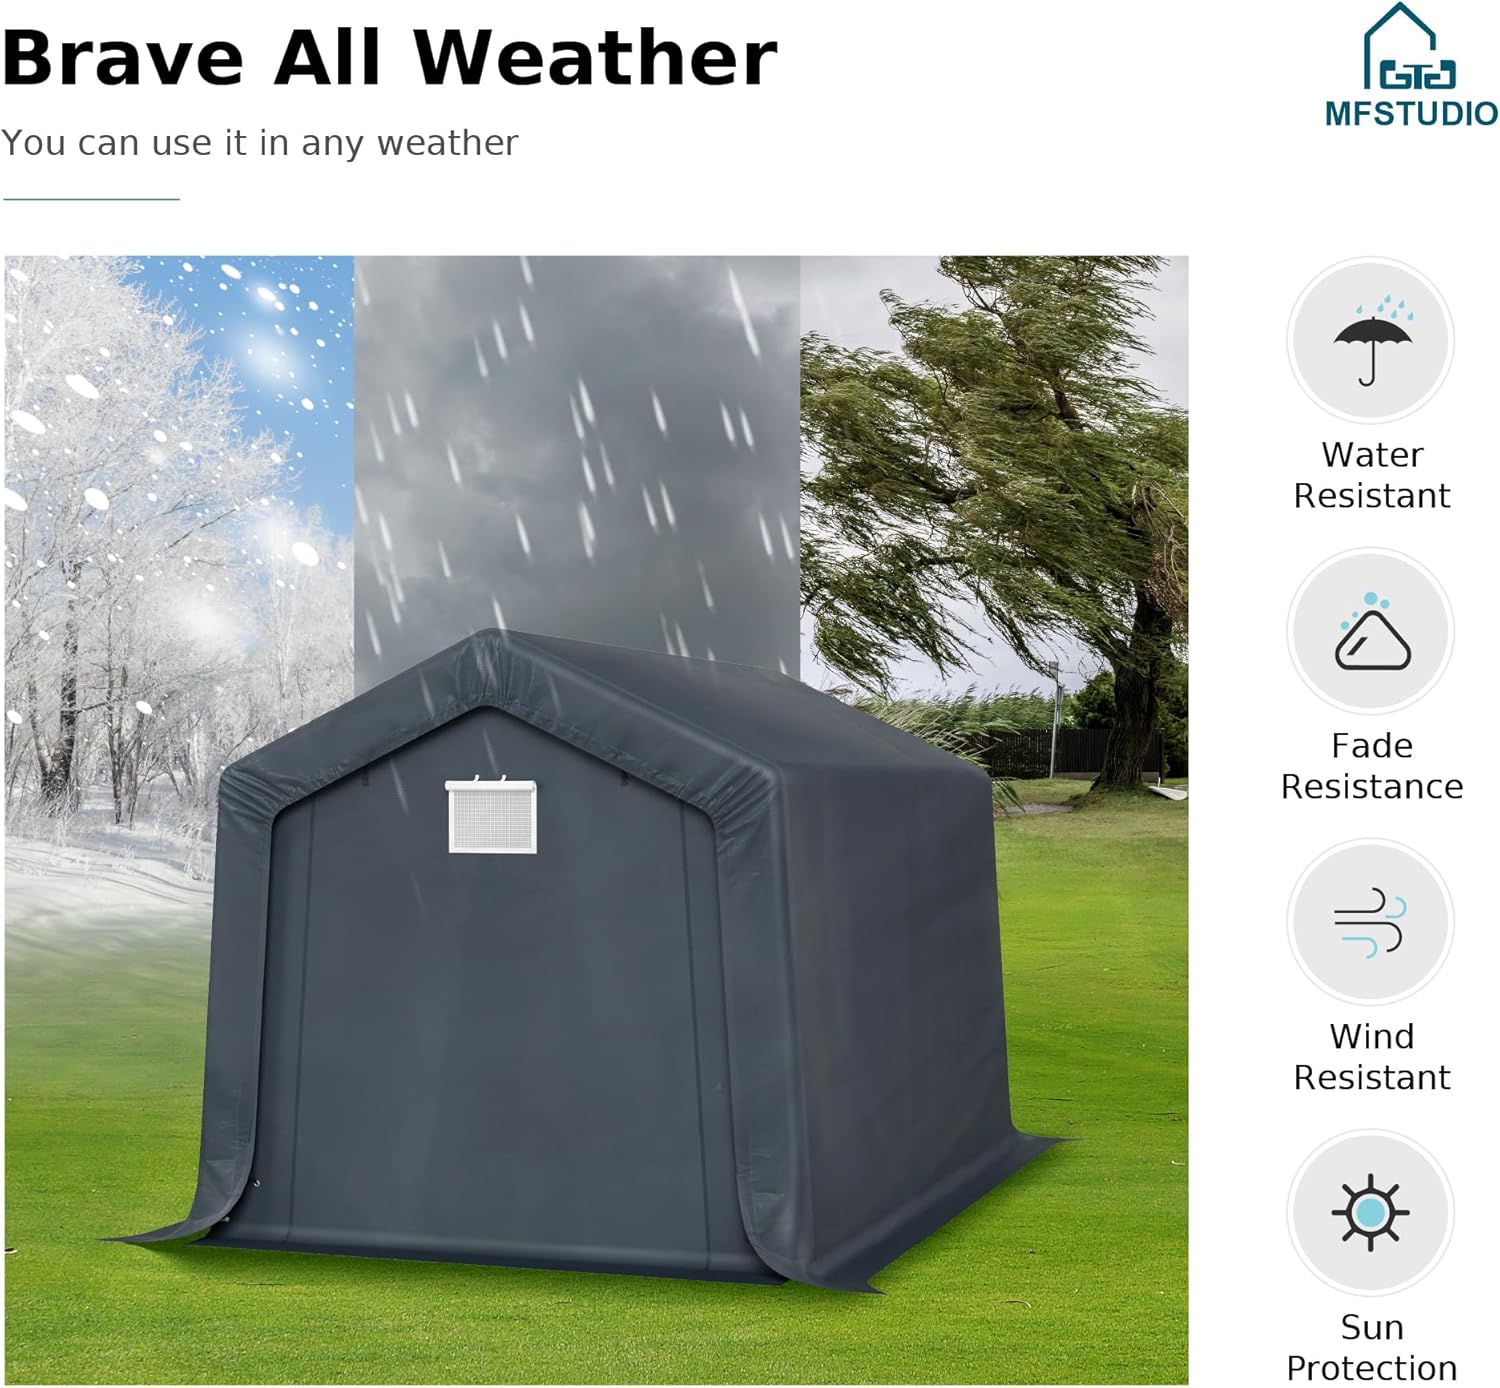
Image: The shed is designed to brave all weather, including snow, rain, and wind.
7. Troubleshooting
- Shed is unstable: Ensure all frame connections are fully engaged and tightened. Verify that the shed is properly anchored to the ground at all designated points. Check for level ground.
- Cover does not fit tightly: Double-check that the frame is assembled correctly according to the instructions. Ensure all roof fasteners and S hooks are properly attached and tensioned. The elastic balls should be used to pull the cover taut.
- Front/Rear panels difficult to attach: This can sometimes occur. Ensure the main cover is correctly positioned and centered before attempting to attach the end panels. Slight adjustments to the frame or cover tension may be needed for a better fit.
- Water pooling on roof: Ensure the frame is assembled correctly and the cover is taut to allow water runoff. Remove any debris that might obstruct drainage.
- Zippers sticking: Apply a silicone-based lubricant to the zipper teeth to improve smooth operation. Keep zippers clean from dirt and debris.
8. Specifications
| Feature | Detail |
|---|---|
| Brand | MFSTUDIO |
| Model Number | Shed116 |
| Product Dimensions (L x W x H) | 144"L x 96"W x 87"H (8x12ft) |
| Material (Cover) | Polyethylene (PE) |
| Material (Frame) | Galvanized Steel |
| Color | Gray |
| Water Resistance Level | Waterproof |
| UV Protection | Yes |
| Assembly Required | Yes |

Image: Visual representation of the shed's dimensions and anchoring options (screws for cement, 7-shaped ground nails for grass).
9. Warranty Information
MFSTUDIO products are manufactured to high-quality standards. This product comes with a limited warranty against defects in materials and workmanship under normal use. Please refer to the product packaging or contact customer support for specific warranty terms and conditions. Keep your proof of purchase for warranty claims.
10. Customer Support
If you have any questions, require assistance with assembly, or need to report missing/damaged parts, please contact MFSTUDIO customer support. You can typically find contact information on the product packaging or the official MFSTUDIO website.
We are committed to providing excellent service and support for your MFSTUDIO product.