
1. Introduction
Thank you for purchasing the Einhomn 64" Farmhouse Sideboard Cabinet. This manual provides detailed instructions for the safe assembly, operation, and maintenance of your new furniture. Please read all instructions carefully before beginning assembly and retain this manual for future reference.
2. Safety Information
- Always assemble the cabinet on a soft, clean surface to prevent scratches.
- Ensure all parts are securely fastened before use. Do not overtighten screws.
- Warning: To prevent tipping, this cabinet must be securely attached to the wall using the provided anti-tip device. Failure to do so can result in serious injury.
- Do not allow children to climb on or play with the cabinet.
- Distribute weight evenly across shelves and drawers. Do not exceed the maximum weight capacity for the top surface (220 lbs) or shelves/drawers (44 lbs each).
- Keep small parts and packaging materials away from children.
3. Package Contents
Before assembly, verify that all components and hardware are present. Refer to the included parts list in your packaging. If any parts are missing or damaged, please contact customer support.
4. Setup and Assembly
Assembly typically requires two adults. Tools required: Phillips head screwdriver (not included).
4.1. Unpacking and Preparation
- Carefully unpack all components from the box.
- Lay out all parts on a clean, soft surface to identify them and prevent damage.
- Separate hardware into individual groups as per the parts list.
4.2. Step-by-Step Assembly
Follow the numbered diagrams in your assembly guide. General steps include:
- Assemble the main frame of the cabinet.
- Install the back panels, ensuring they are securely fastened for durability.
- Assemble and install the drawers, ensuring smooth operation of the slides.
- Attach the doors, including the curved glass doors, and adjust hinges for proper alignment.
- Insert the adjustable shelves into the desired positions.
- Attach the handles to the drawers and doors.
- Install the anti-tip safety system to a wall stud for stability.
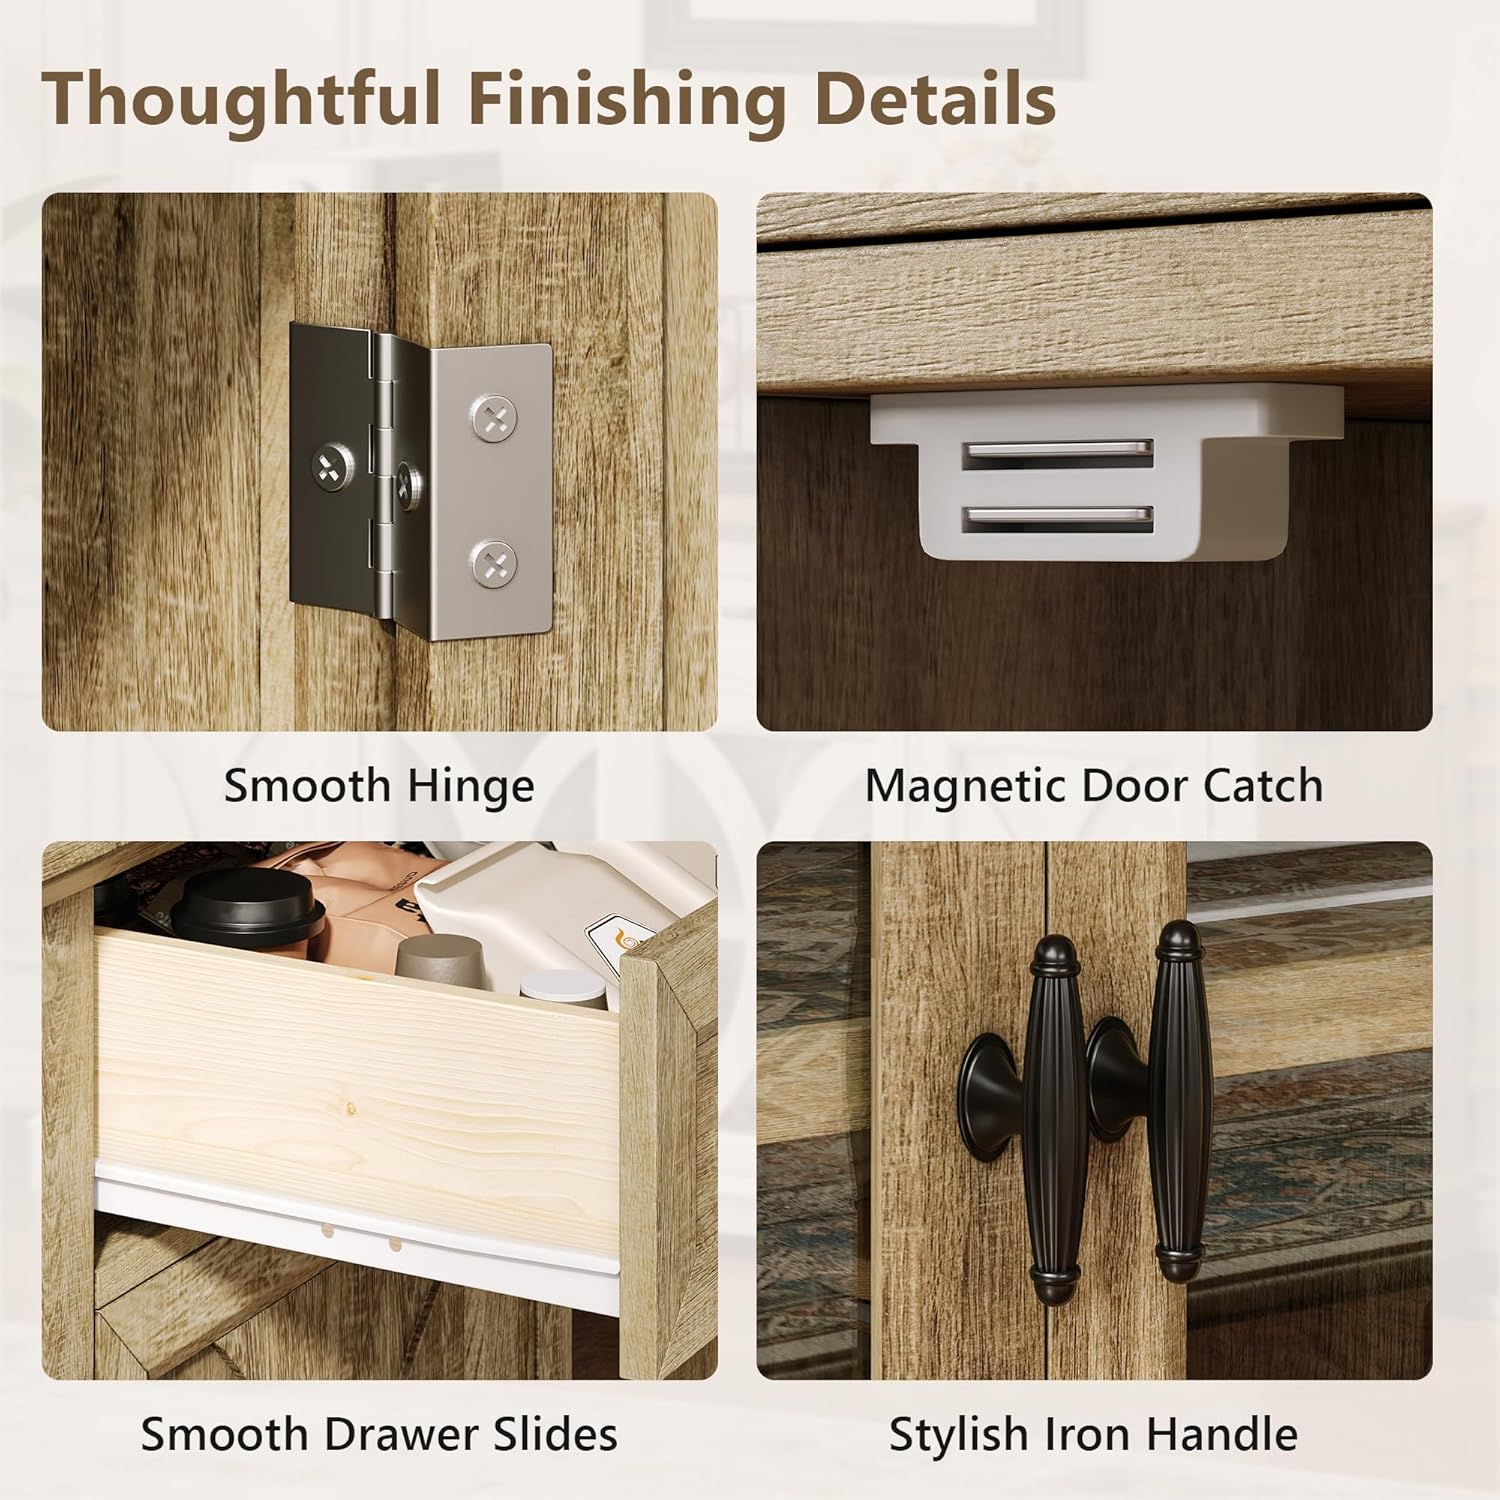
Figure 4.2.1: Thoughtful Finishing Details. This image displays the smooth hinges, magnetic door catches, smooth drawer slides, and stylish iron handles, highlighting the quality components used in the cabinet's construction.

Figure 4.2.2: Adjustable Shelves. This image illustrates the interior of the cabinet with adjustable shelves, demonstrating how they can be repositioned to accommodate items of various heights.
4.3. Anti-Tip Device Installation
The anti-tip device is crucial for safety. Locate a wall stud behind the cabinet. Securely attach the bracket to the wall stud and the cabinet using the provided hardware. Ensure the strap is taut.

Figure 4.3.1: Safety Features. This composite image shows the stable base support, metal fasteners for back panel durability, and the anti-tip safety system with wall-mount hardware.
5. Operating Instructions
5.1. Using Drawers and Doors
- The three drawers feature smooth-glide slides for easy opening and closing. Avoid forcing drawers if they feel stiff.
- The four doors, including the curved glass doors, open smoothly on their hinges. Magnetic catches ensure they remain closed when not in use.

Figure 5.1.1: Drawer Storage. This image shows the cabinet with its drawers open, illustrating the ample storage space available for various items.
5.2. Adjusting Shelves
The interior shelves are adjustable to accommodate items of different heights. To adjust a shelf:
- Empty the shelf of all contents.
- Carefully lift the shelf and remove the shelf pins from their current holes.
- Reinsert the shelf pins into the desired new holes, ensuring they are level.
- Place the shelf back onto the pins.
6. Maintenance
6.1. Cleaning
- Wipe surfaces with a soft, damp cloth.
- Avoid using harsh chemicals, abrasive cleaners, or polishes that may damage the finish.
- For glass doors, use a standard glass cleaner and a lint-free cloth.
6.2. General Care
- Periodically check all fasteners and tighten if necessary.
- Avoid placing hot items directly on the top surface; use coasters or protective pads.
- Keep the cabinet away from direct sunlight and excessive moisture to prevent warping or fading.
7. Troubleshooting
| Problem | Possible Cause | Solution |
|---|---|---|
| Cabinet is wobbly or unstable. | Loose fasteners; uneven floor; anti-tip device not installed. | Tighten all screws. Place shims under legs if floor is uneven. Ensure anti-tip device is securely installed to a wall stud. |
| Drawers do not slide smoothly. | Drawer slides misaligned; debris in slides; drawer overloaded. | Check alignment of drawer slides and re-adjust if necessary. Clean slides. Reduce weight in drawer. |
| Doors do not close properly or are misaligned. | Hinges loose or misaligned; magnetic catch not engaging. | Adjust hinge screws to align doors. Check magnetic catch for proper installation and function. |
| Missing hardware or damaged parts. | Manufacturing error or shipping damage. | Contact Einhomn customer support for replacement parts. |
8. Specifications
| Feature | Detail |
|---|---|
| Model Number | SB-64-CG-3D4D-N |
| Dimensions (D x W x H) | 15.7"D x 63.8"W x 32.3"H |
| Material | Engineered Wood, Glass |
| Color | Natural |
| Number of Drawers | 3 |
| Number of Doors | 4 (2 with curved glass) |
| Number of Shelves | 3 (Adjustable) |
| Item Weight | 135 Pounds |
| Max. Top Surface Weight Capacity | 220 lbs |
| Max. Shelf/Drawer Weight Capacity | 44 lbs each |
| Assembly Required | Yes |

Figure 8.1.1: Product Dimensions. This diagram provides detailed measurements for the overall cabinet, drawers, and internal compartments, including weight capacities.
9. Warranty and Customer Support
Einhomn stands behind the quality of its products. For warranty information, replacement parts, or any questions regarding your cabinet, please contact Einhomn customer support through the retailer where you purchased the product. Please have your model number (SB-64-CG-3D4D-N) and purchase date available when contacting support.